Signs of Mortar Failure: What Ontario Homeowners Need to Know
Learn to spot failing mortar before it becomes expensive brick damage. From the dime test to efflorescence—know when to call a professional.
On this page
You're walking around your house and something catches your eye. The mortar between the bricks looks different than it used to. Maybe it's crumbling. Maybe there's a gap where there wasn't one before. Maybe you're not even sure what you're looking at.
Here's the thing: mortar fails before brick does. That's by design. But it also means the warning signs show up years before the expensive damage starts. Catch them early and you're looking at a straightforward repair. Miss them and you're replacing brick.
This guide covers what to look for, why Ontario homes face these problems faster than most, and when it's time to call someone.
The Three Warning Signs
Most mortar problems come down to one thing: water getting where it shouldn't. Here's what that looks like from the outside.
Efflorescence (Those White Stains)
See chalky white deposits on your brick surface? That's efflorescence—salt left behind when water evaporates through the masonry. The stains themselves are cosmetic. The problem is what they tell you: water is moving through your wall.
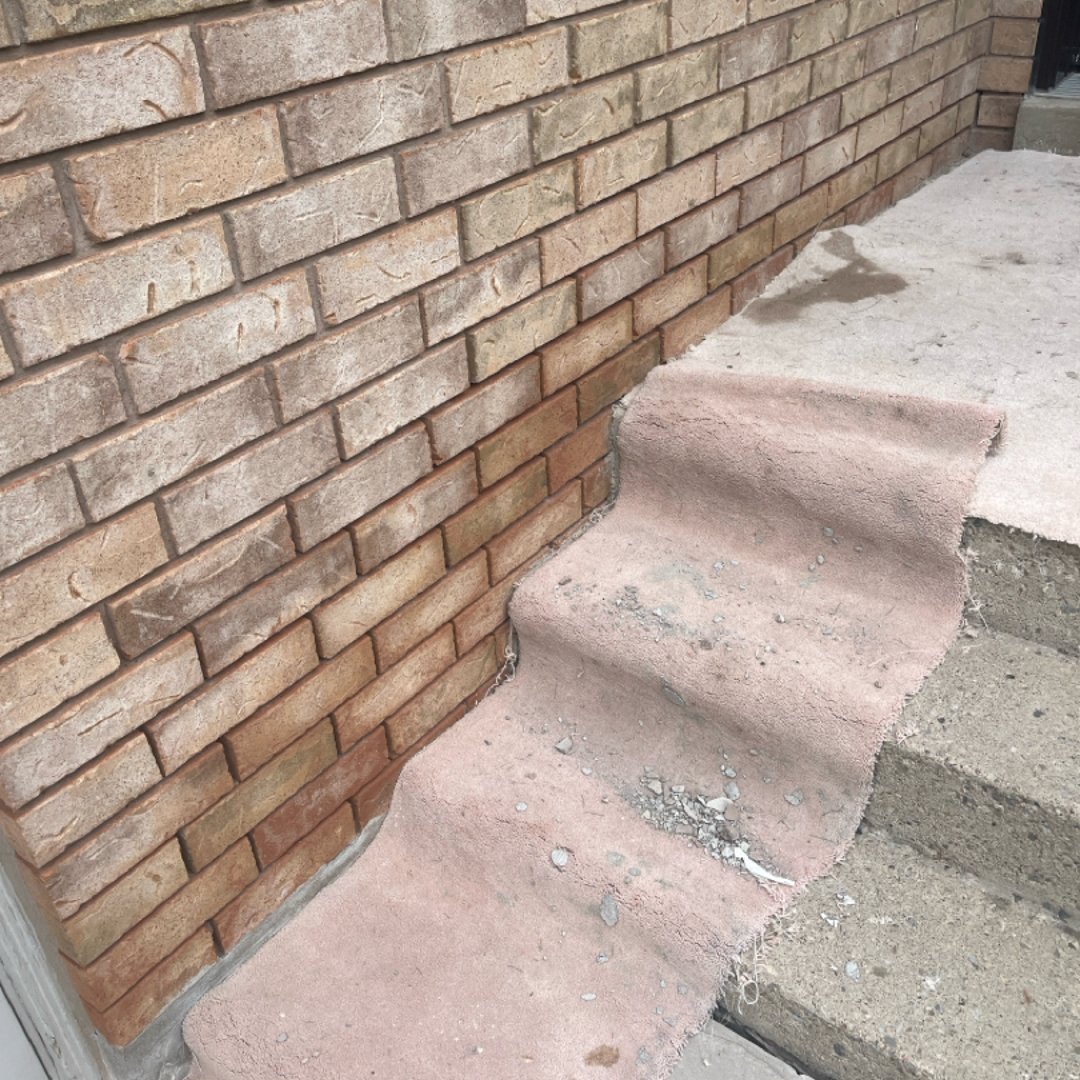
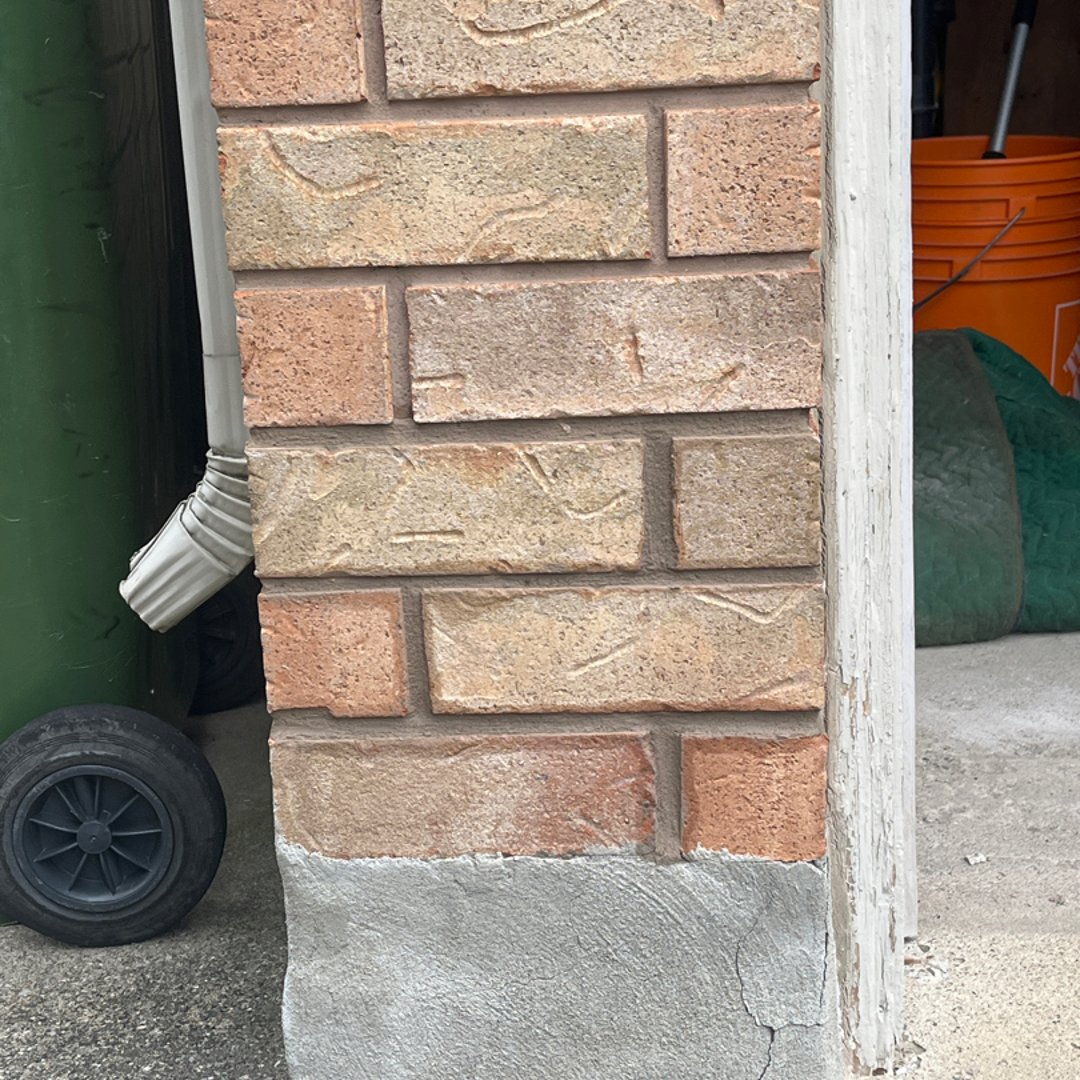
We recently worked on a home where the garage pillar bricks had been absorbing salt and moisture from the driveway for years. As one customer, Sid R., described it: "Fix My Brick removed 4 courses of clay brick on each pillar that were cracked and crumbling due to the absorption of salt and moisture."
That's what happens when efflorescence gets ignored. The moisture path that causes those white stains eventually breaks down the mortar—and then the brick.
If you're seeing white stains after rain, the mortar is already letting water through. Worth checking sooner rather than later.
Spalling (Brick That's Flaking Apart)
When brick starts flaking, chipping, or crumbling, that's spalling. It happens when moisture gets inside the brick, freezes, expands, and breaks the surface apart from the inside out.
The Canada Masonry Design Centre notes that freeze-thaw damage only occurs when masonry reaches a critical level of water saturation. Translation: if your brick is spalling, water has been getting in for a while.
Spalling can also result from previous repairs done with the wrong mortar type—a too-hard mortar can trap moisture in softer historic brick, causing the brick to fail instead of the mortar.
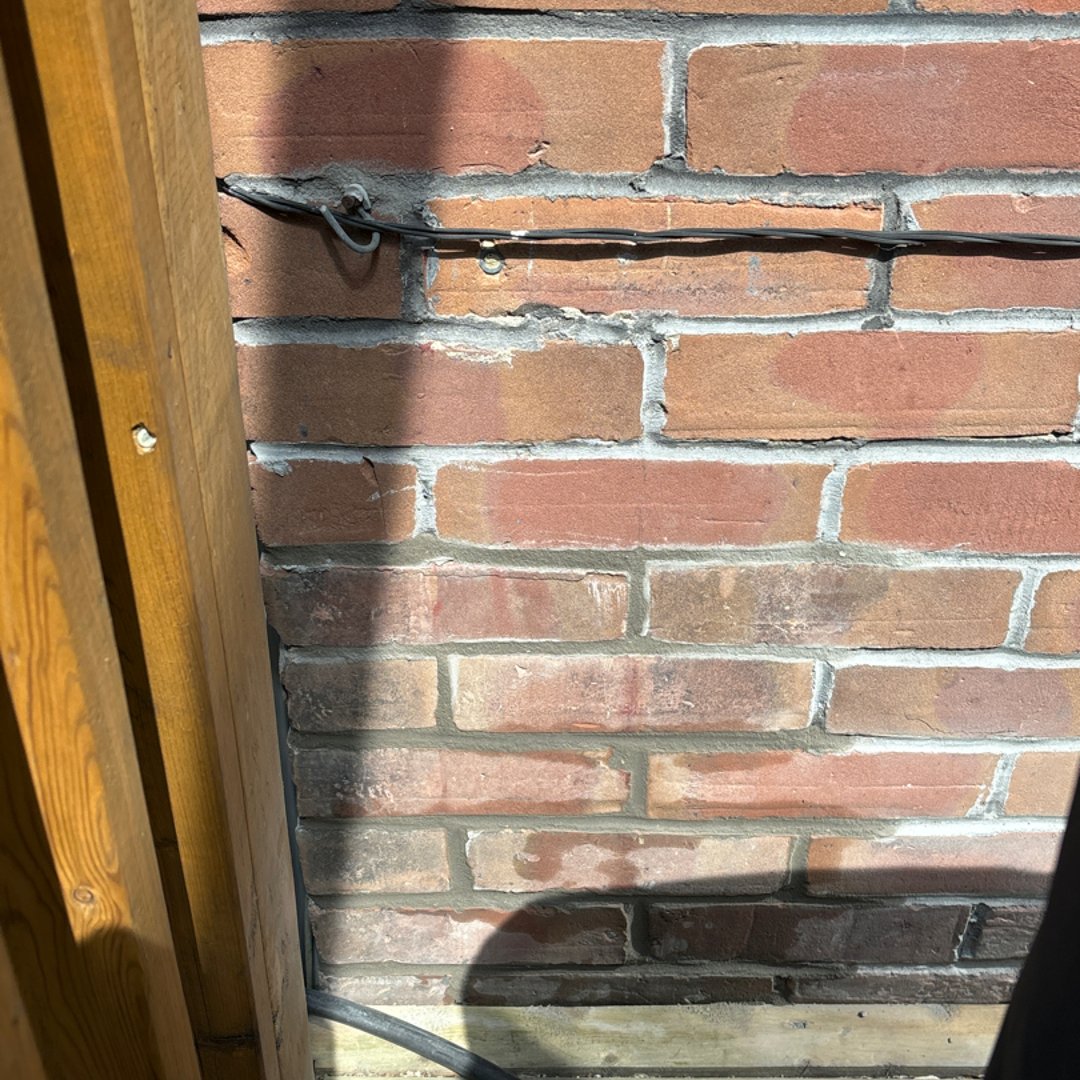
Frost Damage (The Cracks and Gaps)
Ontario's freeze-thaw cycles are brutal on masonry. Water seeps into mortar joints and small cracks. Temperature drops. Water expands. Cracks get wider. Repeat forty times a winter.
The signs are obvious once you know what to look for:
- Mortar that's cracked horizontally or vertically
- Gaps between mortar and brick that weren't there before
- Mortar that feels soft or sandy when you scratch it
- Joints that are recessed deeper than the brick face
One customer, Donna O., called us about her 70-year-old brick: "Had to harvest some bricks from the carport to do the repairs on 70 year old cracked bricks and no longer useful mortar." Even well-maintained homes hit this point eventually.
How to Check Your Mortar
You don't need tools for a basic check. Here's what to do.
The Dime Test
Take a dime. Try to slide it sideways into the mortar joints between your bricks. If it fits, the gap is wide enough for water entry—and wide enough for a professional to look at.
This test works best at eye level on accessible walls. Don't climb ladders for this. If you're worried about chimney mortar or upper-storey walls, that's exactly when to call a mason.
Visual Inspection Checklist
Walk around your home on a dry day. Look for:
- White staining on brick faces (efflorescence)
- Mortar that's recessed behind the brick surface
- Gaps or missing mortar sections
- Cracks running through multiple mortar joints
- Bricks that seem loose or shifted
If you check two or three of these boxes, it's time for a professional assessment.
What You Can Check vs. What Needs a Pro
Safe to inspect yourself:
- Eye-level walls you can reach from the ground
- Foundation walls at grade level
- Front steps and porch masonry
- Low garden walls
Needs professional access:
- Chimney masonry (never climb on your roof for this)
- Upper-storey walls
- Anything requiring a ladder over 6 feet
- Structural walls with visible movement
Why Ontario Homes Fail Faster
Ontario's climate is particularly hard on masonry. The problem isn't just cold—it's the constant cycling between freezing and thawing.
A typical Toronto winter might see 40+ freeze-thaw cycles. Each one drives the damage a little further. We see it constantly on jobs—mortar that would last 50 years in a stable climate barely makes it 25-30 years here.
Timeline Expectations by Home Age
| Home Age | What to Expect |
|---|---|
| Under 25 years | Original mortar should be fine. Check every 5 years. |
| 25-50 years | Some repointing likely needed. Check every 3 years. |
| 50-75 years | Significant repointing common. Annual visual check recommended. |
| 75+ years | Original mortar often needs full replacement. May need heritage-appropriate lime mortar. |
South-facing walls and chimneys see the most extreme temperature swings—warm sun followed by cold nights—and typically fail first.
Getting a Professional Assessment
There's a difference between a homeowner inspection and a professional assessment. You're looking for obvious signs. A mason is looking for patterns, causes, and the scope of work needed.
During a professional inspection, expect them to:
- Check mortar hardness with a pointed tool
- Look for moisture patterns across the wall
- Assess whether damage is cosmetic or structural
- Check drainage and water management around the building
- Recommend whether repointing or tuckpointing is the right approach
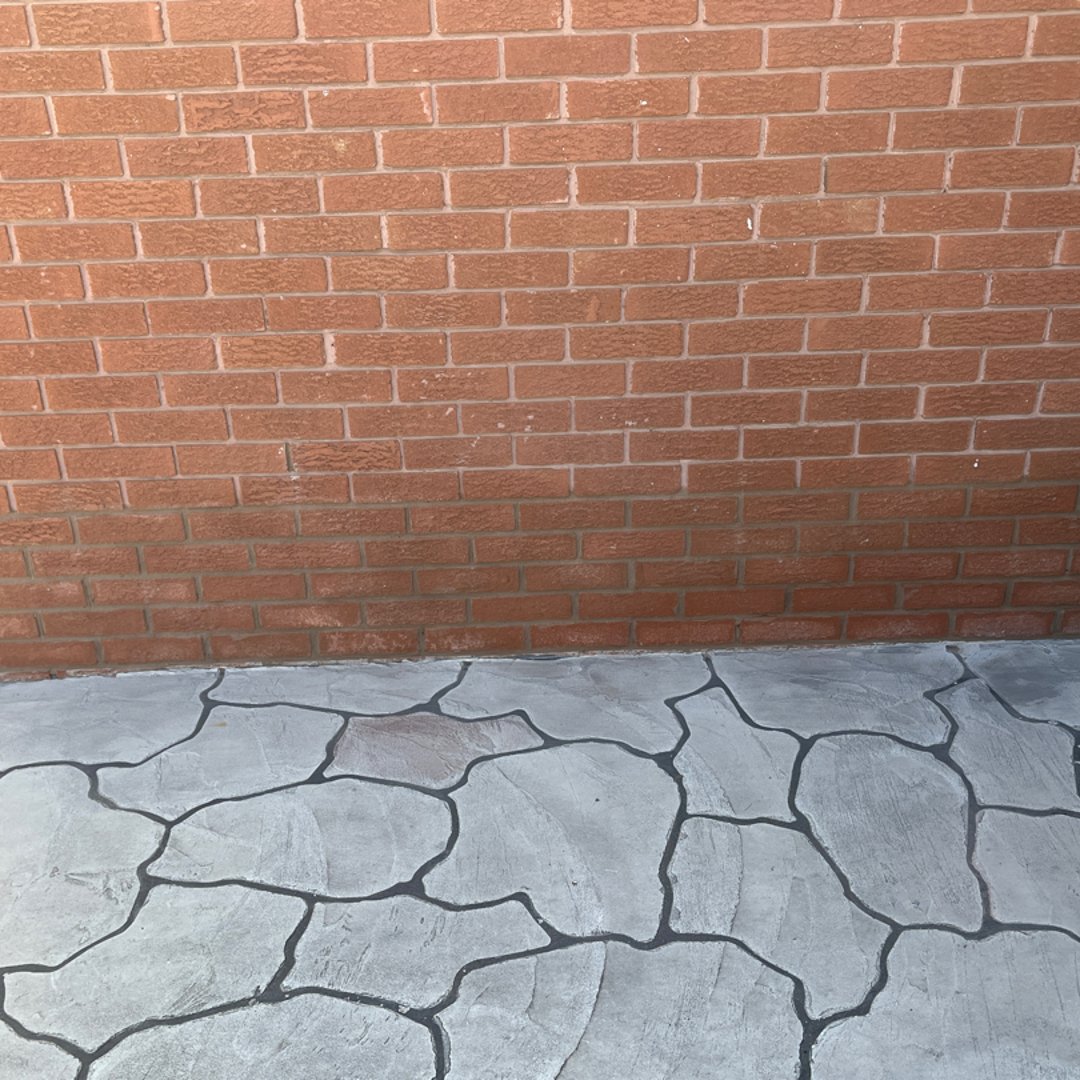
The good news is that quality repairs blend in completely. As Connie C. told us after we repaired her chimney and front spalling: "All the cracks and repair work blended in seamlessly."
That's what you should expect from any professional tuckpointing job—you shouldn't be able to tell where the old mortar ends and the new begins.
Your Maintenance Checklist
Catching problems early is mostly about looking. Here's a simple annual routine:
Spring Check (After Winter)
This is the most important inspection of the year. Walk your property after the last frost and look for:
- New cracks that appeared over winter
- Mortar that's pushed out or fallen
- Efflorescence staining (shows moisture pathways)
- Any brick that's shifted position
Fall Prep (Before Winter)
Make sure water drains away from masonry:
- Clean gutters and downspouts
- Check that grading slopes away from foundation
- Clear any soil or mulch piled against brick
- Note any concerns before the ground freezes
Every 5-7 Years
Consider having a professional apply a breathable, water-resistant masonry sealant. This helps repel water while still letting the brick release moisture—important for preventing freeze-thaw damage.
DIY vs. Professional Work
Some masonry maintenance is homeowner-friendly. Most repairs aren't.
What You Can Do
Annual cleaning: A gentle scrub with a soft-bristled brush and mild detergent (half cup dish soap per gallon of warm water), rinsed with a low-pressure hose. Never use a pressure washer—it drives water into the mortar and can cause the exact damage you're trying to prevent.
What Needs a Pro
Any actual repair work. Here's why: using the wrong mortar type, applying it incorrectly, or failing to remove enough old mortar will create new problems. Wrong mortar can trap moisture in brick, causing spalling. Poor technique leaves weak spots that fail faster than the original.
Professional brick repair or mortar matching ensures the new work will last as long as the original—and look like it belongs there.
What Happens If You Wait
Mortar problems don't fix themselves. We've worked on enough "I should have called two years ago" jobs to know the pattern. Left alone, here's the typical progression:
- Year 1-2: Small cracks and minor recession. Easy repointing job.
- Year 3-5: Cracks widen, water entry increases. More extensive repointing needed.
- Year 5-10: Water damage to brick begins. Some brick replacement likely.
- Year 10+: Structural concerns possible. Wall sections may need rebuilding.
The cost difference between stage 1 and stage 4 can be 10x or more. An afternoon of repointing versus weeks of reconstruction.
Taking Action
If you've read this far, you're probably wondering whether your mortar needs attention. Here's a simple decision tree:
No action needed right now if:
- Mortar looks solid at eye level
- Dime test fails (gaps too narrow)
- No efflorescence after rain
- Home under 25 years old with no visible issues
Schedule an assessment if:
- Dime fits in mortar gaps
- White staining visible after rain
- Mortar crumbles when scratched
- Any bricks feel loose
Call today if:
- Visible gaps where mortar is missing entirely
- Multiple bricks have shifted position
- Stair-step cracks across the wall
- Water entering the building through masonry
As Carrie put it after her first repointing project: "First time ever needing brick repointing, and I chose the right company to work with! Easy to work with, offering competitive pricing, flexible timelines, knowledgeable and experienced craftsmen."
Most mortar problems are straightforward once you catch them. The hard part is knowing what to look for—and now you do.
Ready for a professional assessment? Schedule an appointment and we'll take a look. We serve the GTA and surrounding areas, and we'll give you an honest assessment of what needs attention now versus what can wait.
Need Professional Masonry Services?
Our expert team is ready to help with all your masonry repair and restoration needs across Ontario.