You Said Tuckpointing. You Meant Repointing. Here's Why It Matters.
Most Ontario contractors use 'tuckpointing' to mean repointing. Understand the difference and determine which service your brick home actually needs.
On this page
You searched "tuckpointing." What you probably need is repointing.
Nine out of ten homeowners who contact me use the wrong term—not their fault, since most Ontario contractors use these words interchangeably. But they mean different things, and the distinction determines whether you're paying for structural repair or decorative work you might not need.
I'm Rodrigo, Fix My Brick's GTA lead mason. After 13 years in the trade and 800+ completed projects, I've stopped correcting homeowners on terminology during initial calls—I just show up and assess what they actually need. The answer is almost always repointing: removing failing mortar and replacing it with properly matched material before Ontario's freeze-thaw cycles turn a $3,000 repair into $12,000 of brick replacement.
Key Takeaways
- ✅ Repointing is structural repair: removing and replacing failing mortar to prevent water damage
- ✅ Tuckpointing is decorative enhancement: adding contrasting colour lines to structurally sound mortar
- ✅ Most Ontario contractors use "tuckpointing" when they mean repointing
- ✅ If your mortar is crumbling or receding, you need repointing—not optional decorative work
The Essential Distinction
The rule is simple: failing mortar joints require repointing. Tuckpointing applies only when mortar remains structurally sound and you want decorative enhancement.
| Feature | Repointing | Traditional Tuckpointing |
|---|---|---|
| Purpose | Structural repair | Decorative enhancement |
| When needed | Mortar crumbling, failing, or missing | Mortar sound but appearance needs refinement |
| Process | Remove deteriorated mortar, replace with new | Apply thin contrasting line over existing sound mortar |
| Frequency in Ontario | Required on most older homes | Often combined with repointing for finished look |
| Urgency | Required to prevent water damage | Optional aesthetic upgrade |
| Combined work | Often followed by tuckpointing for finished look | Applied after repointing is complete |
What Repointing Actually Involves
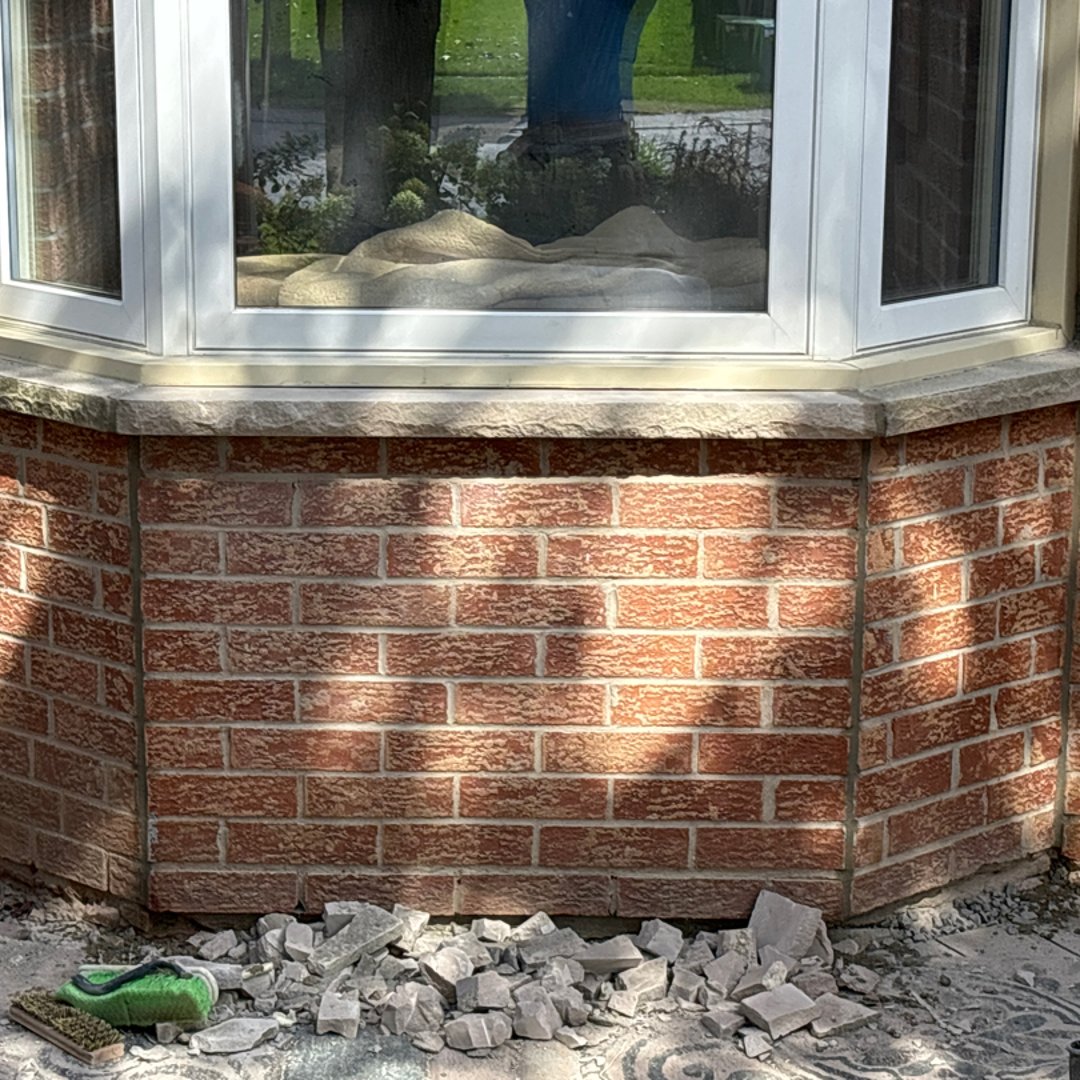
Repointing removes deteriorated mortar from the joints between bricks and replaces it with fresh material. It addresses failing joints before they cause serious problems—water infiltration, brick deterioration, foundation damage.
Think of mortar like grout in a shower. When it starts crumbling, water penetrates behind it. In a bathroom, that produces mould and rot. On an Ontario brick exterior, it produces freeze-thaw damage that can crack bricks and cost ten times more to repair than timely repointing would have. Understanding what is brick restoration helps homeowners recognize when mortar work is part of a larger repair scope.
Mortar typically deteriorates every 25-40 years depending on exposure and original quality. When it weakens—becoming crumbly, receding from brick faces, losing its grip—repointing becomes necessary.
The Five-Step Process
Proper mortar replacement requires precision at every stage. Here's what separates professional work from the DIY attempts I'm regularly called to repair:
1. Removing mortar to adequate depth
Most amateur efforts go too shallow—3-4mm when the work requires 15-20mm minimum, sometimes deeper on heritage brick. Shallow removal means new mortar lacks sufficient bonding surface. It pops out after one freeze-thaw cycle, and the homeowner is back where they started.
2. Cleaning joints thoroughly
This step determines whether repairs last. Any dust or loose material left behind prevents proper bonding. We use compressed air and wire brushes, then dampen joints so the brick doesn't draw moisture out of fresh mortar too quickly.
3. Matching mortar composition
Pre-1950s Ontario brick requires lime-based mortar that's softer than the brick itself. Use modern Portland cement and the brick spalls while the mortar remains intact—exactly backward from what you want. I analyze existing mortar under magnification before mixing: sand grain size, lime content, aggregate type. This is why our repairs blend invisibly with original work. For a deeper dive, see our guide on brick mortar repair.
I've seen too many homeowners buy big-box store mortar to save money. It's invariably too hard for older brick. The short-term savings become long-term brick replacement costs.
4. Applying mortar in layers
Not one thick application. We pack 6-8mm layers, allowing each to set slightly before adding the next. This prevents shrinkage cracks that undermine the entire repair.
5. Finishing to match existing profiles
Concave, flush, weathered struck—every house has a distinct original joint profile. Matching it precisely means repairs become invisible. Mismatched profiles announce themselves from the street.
What Tuckpointing Actually Means
Tuckpointing is a decorative technique far less common than most homeowners assume. It involves applying a thin line of contrasting mortar—typically white or cream—on top of existing joints to create a visual "false joint" effect.
The technique emerged from Victorian-era masonry decoration, popular when builders wanted uniform-looking walls from variable-coloured bricks. It created decorative patterns and made joints appear finer than they actually were.
The critical distinction: tuckpointing doesn't replace underlying mortar. It sits atop existing joints as a cosmetic layer. This means:
- Original mortar underneath must be structurally sound
- The technique provides no structural benefit whatsoever
- Precise colour matching is essential for visual success
- It applies only when mortar joints are already in good condition
In practice, we often do both. Repointing addresses the structural issue first—removing failed mortar and replacing it with compatible material. Then tuckpointing finishes the work, applying that fine decorative line for a clean, uniform appearance. The techniques complement each other. Understanding the distinction helps you know what you're paying for and why each step matters.

Common Mistakes I Fix Regularly
After 800+ projects, certain patterns repeat. These are the mistakes that turn simple repointing into expensive repairs:
Using caulk instead of mortar. Never use caulk on brick joints. Mortar breathes and allows moisture to escape. Caulk traps water inside, accelerating spalling, deterioration, and freeze-thaw damage. I've seen entire walls destroyed by well-intentioned caulking.
Buying big-box store mortar. Pre-mixed mortar from hardware stores is almost always too hard for older brick. Pre-1950s Ontario homes need lime-based mortar softer than the brick itself. Portland cement that's too hard causes the brick to spall while the mortar remains intact—exactly backward from what you want.
Going too shallow on removal. Most DIY attempts remove 3-4mm of mortar when the work requires 15-20mm minimum. Shallow removal means new mortar lacks bonding surface. It pops out after one freeze-thaw cycle, and you're back where you started—except now the joints are damaged further.
Waiting until spring. If mortar is failing in October, waiting until April doesn't save money—it costs more. Water penetrates through winter, freezes dozens of times, and by spring you're often replacing brick, not just mortar. The homeowners who spend least overall are those who address problems before winter.
Skipping the screwdriver test. Many homeowners call about "one crack" when a full-house inspection reveals failing mortar in multiple areas. A screwdriver pressed into joints quickly reveals whether you're looking at cosmetic touch-up or structural intervention. We test every accessible wall during assessments.
For heritage properties, the stakes are higher. Using wrong materials on a heritage home can cause irreversible damage and may violate Ontario Heritage Trust standards.
What Homeowners Actually Describe
Here's the actual language from recent inquiries, illustrating the confusion these terms create:
- "2 stories semidetached house. 90 years old. Need to restore brick mortar." — Mississauga homeowner (needed repointing)
- "I believe we need tuckpointing for the brick, the bricks appear to be in good repair but there are some gaps and plants growing." — Toronto homeowner (definitely needed repointing)
- "The stone mortar is gone at the joint. I would like to get a quote for fixing it." — Oakville homeowner (needed repointing)
The pattern is consistent. Homeowners say "tuckpointing" or "restore mortar" while describing structural failure requiring repointing. The terminology confusion runs deep enough that I've stopped correcting it in initial conversations—we clarify once I've assessed the actual condition.
Determining What Your Home Needs
Indicators requiring repointing:
- Mortar crumbles when you press a screwdriver into it
- Visible gaps or recession between bricks exceeding 6mm
- Water stains appearing on interior walls
- Masonry over 30 years old without previous repointing
- White powdery deposits (efflorescence) on brick surfaces
- Observable signs of impending mortar failure
Situations where tuckpointing applies:
- As a finishing step after structural repointing (common on heritage and high-end work)
- When mortar is structurally sound but appearance needs refinement
- You want crisp, uniform joint lines across the wall
- Heritage restoration requiring period-accurate appearance
Most homes in Toronto, Hamilton, and across the GTA need structural repointing at minimum. Many projects—especially on older or heritage homes—combine both: repointing for structure, tuckpointing for finish.
Age-Based Assessment Guide
From 800+ projects across Southern Ontario, here's what building age typically indicates:
| Era | Expected Condition | Typical Need |
|---|---|---|
| Pre-1950s | Original mortar is 70+ years old | Very likely needs repointing |
| 1950-1980 | 40-70 year old mortar if original | Likely needs repointing if never addressed |
| 1980-2000 | 25-40 year old mortar | May need partial repointing; inspect north walls and chimneys first |
| Post-2000 | Under 25 years old | Unlikely to need immediate repointing unless you observe cracks |
From our 2024 project data: The most common issues we see are cracks (63 projects), water leaks (41 projects), and spalling brick (19 projects). Tuckpointing specifically accounts for about 75 of our annual inquiries—but when we assess, most actually need structural repointing first.
The top issue tags from 886 recent leads: porch/step damage (116), foundation concerns (62), visible cracks (63), and brick replacement needs (62). These align with what I see on-site: mortar failure rarely happens in isolation. By the time homeowners notice, multiple areas often need attention.
If your mortar crumbles under screwdriver pressure, don't wait for spring. Water penetrates those cracks, freezes, expands, and transforms a $3,000 repointing project into $12,000 of brick replacement by March. I've watched this progression unfold dozens of times.
What Drives Project Costs
Several factors determine pricing for mortar repair work. Understanding them helps you evaluate quotes accurately:
Deterioration extent
A typical Hamilton or Toronto 2-storey semi presents roughly 2,000-3,000 square feet of exposed brick. Spot repairs—one wall, window surrounds—versus full-house repointing can represent a 5-10x cost difference. A thorough assessment identifies what needs immediate attention versus what can safely wait.
Access requirements and building height
Ground-floor garage walls are straightforward. Third-floor gable ends or chimneys above rooflines require scaffolding or lift equipment, additional labour time, and comprehensive safety measures. Access difficulty can add 30-40% to project costs.
Mortar matching complexity
Heritage properties or homes with original custom-coloured mortar require specialized materials and testing. Matching mortar for a 1920s Hamilton home with original lime mortar involves more analysis than matching a 1990s build with standard Type N.
Wall condition and combination work
Severely deteriorated brick or structural movement may require additional repairs beyond mortar replacement. Many projects combine structural repointing with decorative tuckpointing—we address the failing mortar first, then apply the fine finishing lines for a clean, period-appropriate appearance. This is standard on heritage restorations and high-end residential work. For an overview of different brick restoration techniques, we cover when each approach applies.
Every project presents unique characteristics. We provide free on-site assessments throughout Mississauga and Southern Ontario with accurate quotes based on your home's specific condition.
What a Professional Assessment Reveals
When you schedule an assessment, here's what the process involves:
Physical inspection and testing:
- Screwdriver test to evaluate mortar hardness and structural integrity
- Identification of water infiltration points and moisture patterns
- Assessment of brick condition, spalling, and structural movement
- Examination of high-risk areas: chimneys, parapets, below-grade walls, north-facing elevations
Material analysis:
- Mortar type identification (lime-based, cement-based, or blended)
- Colour matching recommendations for invisible repairs
- Strength testing to ensure compatible mortar selection
Documentation:
- Clear scope identifying which areas need attention and which can wait
- Explanation of applicable technique (repointing vs tuckpointing)
- Timeline estimates and seasonal considerations (we don't repoint below 5°C)
- Access requirements and equipment specifications
I can typically assess mortar condition in 15 minutes. The screwdriver test reveals most of what I need to know about structural soundness. The remaining work involves identifying patterns: where is deterioration appearing first, what's causing it, and what timeline are you working with.
The Cost of Waiting
Unaddressed mortar deterioration accelerates predictably in Ontario's climate:
6-12 months:
- Mortar continues crumbling
- Water penetration increases with each rain
- Winter freeze-thaw cycles begin expanding cracks
1-2 years:
- Freeze-thaw damage accelerates deterioration significantly
- Brick spalling begins (surface faces flaking off)
- Interior water stains appear
- Structural concerns emerge
3-5 years:
- Extensive brick replacement becomes necessary
- Potential foundation issues if water penetrates below grade
- Costs escalate 3-5x compared to early intervention
The homeowners who spend the least overall are those who call at first signs of crumbling—not when water stains appear inside.
What Actually Matters to Homeowners
After 800+ projects, I've noticed what homeowners mention in reviews. It's rarely the technical process—it's the outcomes they live with daily.
Matching matters most. When repairs blend invisibly with original work, homeowners notice:
"Ryan and Paolo matched our brick perfectly—you can't tell where old ends and new starts." — Bridget C., Toronto
"Very professional. Great job matching bricks. Clean work." — Tony R.
The worksite stays clean. This comes up constantly:
"They replaced crumbling and cracked bricks, parged the sills, and left everything clean. The results look great." — Daniel R., Mississauga
"Fixmybrick came to do some mortar repair and replace a few bricks. They were very courteous and professional. Lawrence, Arthur and Jacob did a great job and even did some parging repair I hadn't asked for." — Rick B.
Communication throughout. Responsive service from quote to completion:
"Good price, good job and friendly crew. Rodrigo and his office are very responsive whenever I have any questions." — Tom C.
"Very professional from my initial email and onwards. We are very happy with the job and the service from start to finish." — Anabel B.
Get Expert Assessment
If you're uncertain whether your brick home needs repointing or tuckpointing, we offer free on-site assessments throughout Southern Ontario. I'll evaluate your masonry condition, explain exactly what you need, and provide honest recommendations based on your home's specific situation.
After 800+ projects, I can assess your mortar in 15 minutes and tell you exactly what timeline you're working with. We'll identify what needs attention now, what can wait, and what to monitor going forward. If you're comparing contractors, our guide on hiring a brick repair contractor covers what to look for and what questions to ask.
What happens when you call:
- Brief phone conversation about what you're seeing
- On-site inspection (15-30 minutes, free throughout Southern Ontario)
- Written scope with clear pricing—no hidden fees, no pressure
- Scheduling that works for your timeline
Request a Free Assessment or call us at (905) 807-0404.
For more information about our tuckpointing and repointing services, visit our tuckpointing service page.
Need Professional Masonry Services?
Our expert team is ready to help with all your masonry repair and restoration needs across Ontario.