Signs Your Brick Needs Repair: A Homeowner's Checklist (Ontario)
Learn the most common brick damage signs, what they usually mean, and when to call a professional for an on-site assessment.
On this page
Signs Your Brick Needs Repair: A Homeowner's Checklist (Ontario Guide)
After 20+ years fixing brick across Southern Ontario, we hear the same question every spring: "Is this crack something I should worry about?"
The answer depends on what you're seeing—and when you caught it.
Brick is tough, but it isn't invincible. Most problems we see start the same way: water gets in through failing mortar, then Ontario's freeze-thaw cycles do the rest. Catch it early and you can usually prevent bigger repairs. Wait too long, and a simple repoint becomes a brick replacement.
This checklist helps you spot common brick damage signs, figure out what's urgent, and decide what to do next. It's not a diagnosis—you don't need to climb anything to use it, and many issues are visible from the ground.
If something looks loose or unstable, keep people back and book an assessment. The goal is simple: stop water at the source and deal with failing mortar before the brick starts to fail too.
Quick Triage — Is This Urgent?
We get thousands of calls each year. Here's how we prioritize them:
Level 1: Urgent (book assessment ASAP / safety risk)
- A wall or chimney is bulging, bowing, or leaning
- Loose bricks above doors, walkways, porches, or exits (fall risk)
- A crack that's getting wider or longer
- Separation at corners or around windows/doors (a visible gap)
Level 2: Soon (repair before it spreads)
- Spalling brick is spreading (more faces flaking off)
- Mortar is failing in multiple areas
- Interior water stains or dampness near an exterior brick wall/chimney
Level 3: Monitor
- Small, isolated hairline mortar cracks
- Light efflorescence on brick (white powder) that disappears and doesn't return
Take dated photos. Changes matter—if you can show us "here's what it looked like 6 months ago," it helps us understand how fast the damage is moving.
The 9 Most Common Signs (And What They Usually Mean)
1) Mortar joints are crumbling or recessed
- What it looks like: The "lines" between bricks look sandy, cracked, or washed back.
- What usually causes it: Moisture + age + freeze‑thaw wear. We see this on almost every home over 30 years old in Hamilton, Toronto, and across the GTA.
- Why it matters: Open joints let more water in, which speeds up damage to everything around them.
- What to do next: Ask about mortar joint repair (often called repointing). See /services/tuckpointing and /services/brick-repair.
"Fix My Brick came to do some mortar repair and replace a few bricks. They did a great job and even did some parging repair that I hadn't asked for." — Rick B., Hamilton
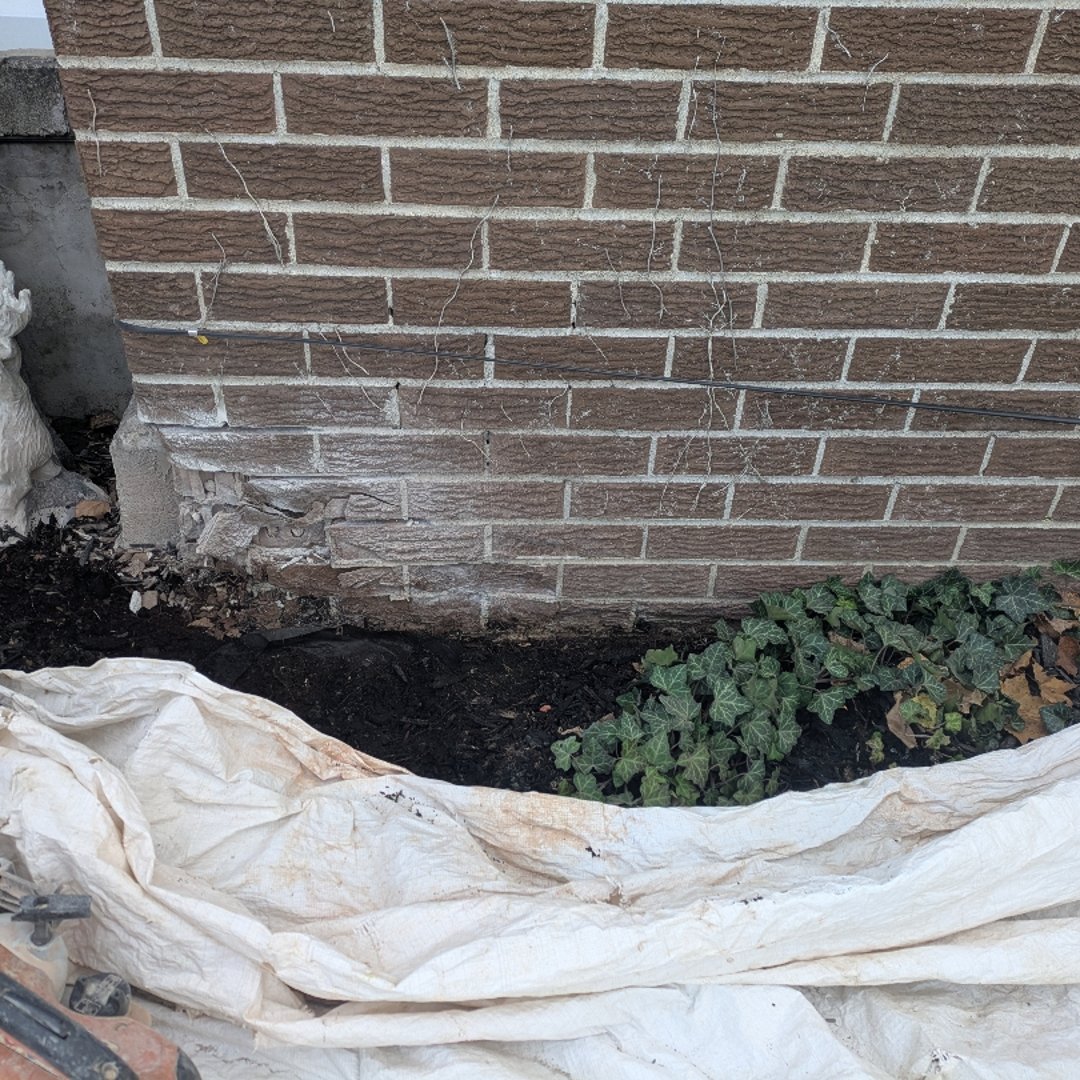
2) Spalling brick (faces flaking, popping, or "blowing")
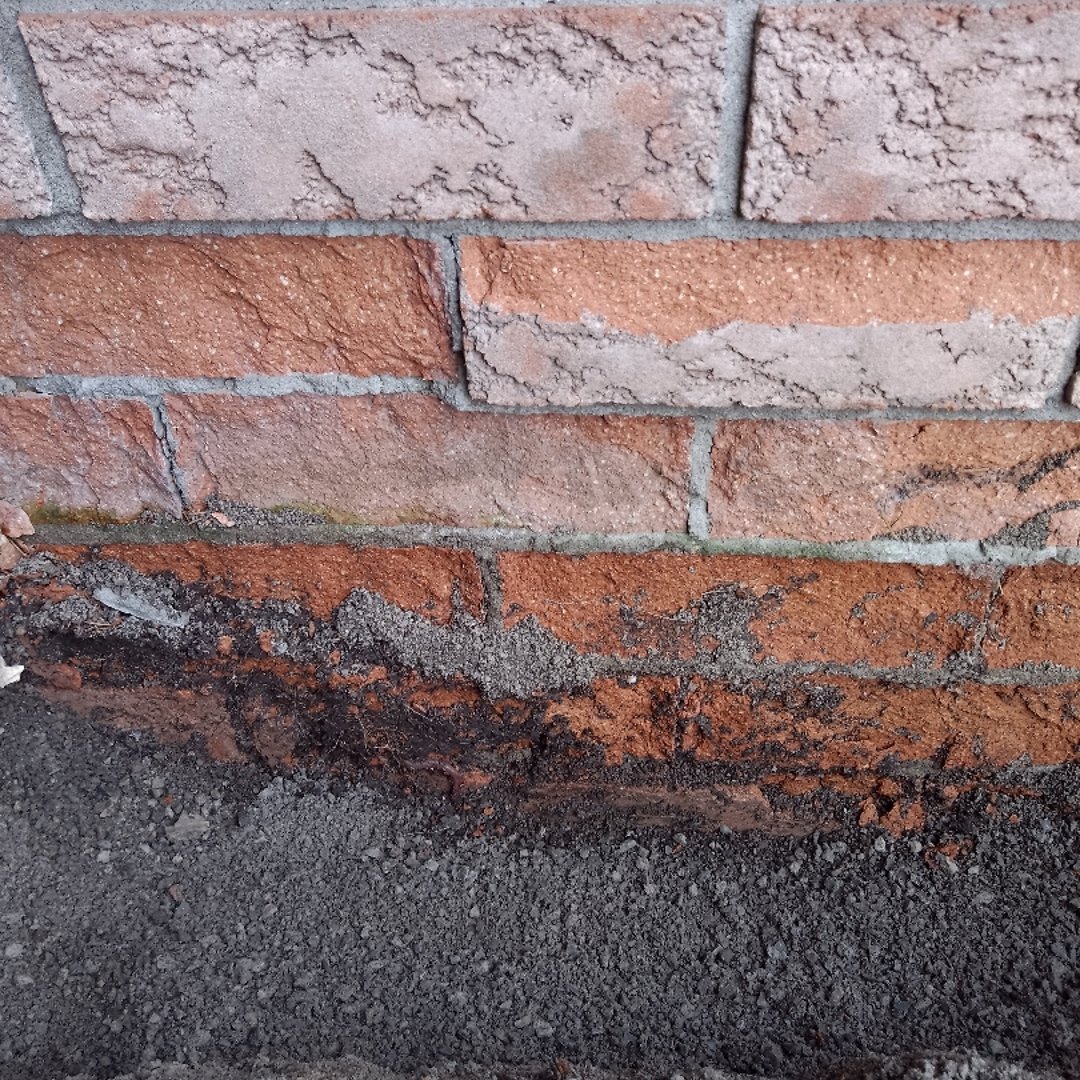
- What it looks like: The brick face chips or peels off in layers—sometimes just surface flaking, sometimes deep chunks popping off.
- What usually causes it: Water + freeze-thaw pressure, or salts forcing the surface apart. We see the worst spalling within 2 feet of driveways—salt splash from winter de-icing accelerates the damage significantly.
- Why it matters: Once the face is gone, the brick absorbs even more water and keeps deteriorating.
- What to do next: Treat expanding spalling as "soon." We'll advise whether you need brick repair vs replacement and handle brick matching. Read /blog/brick-repair-vs-replacement.
Case Snapshot: Salt Damage on Garage Pillars — Mississauga
A homeowner noticed cracking and crumbling on the brick pillars at their garage entrance. When we assessed it, the damage was classic salt exposure—4 courses of clay brick on each pillar had absorbed moisture and de-icing salt splash from the driveway over several winters.
The fix: Removed the damaged brick, replaced with concrete block bases, and parged for a clean, durable finish that won't absorb salt the same way.
"The result is a nice, clean look that will not crack or crumble. The price was fair as well." — Sid R., Mississauga
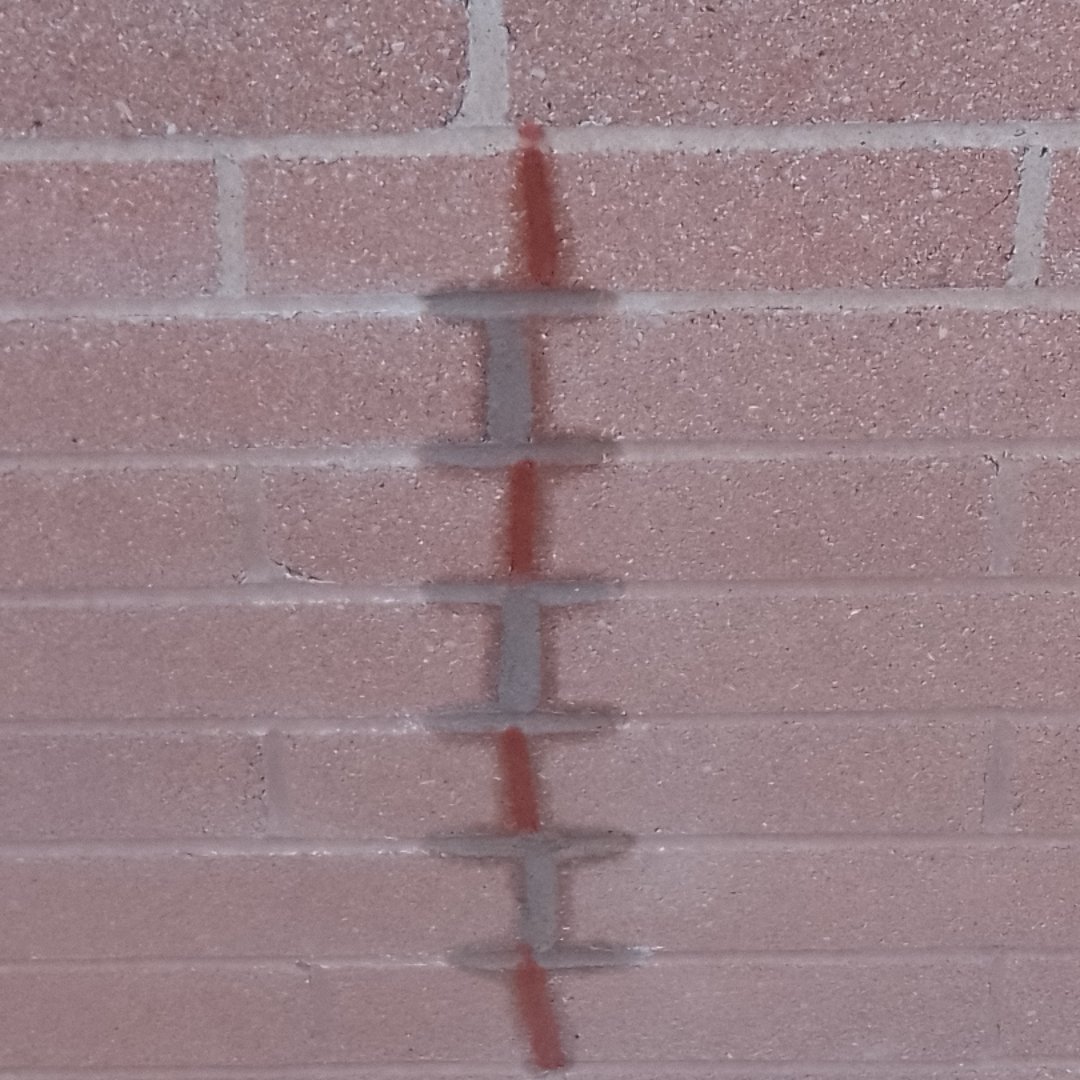
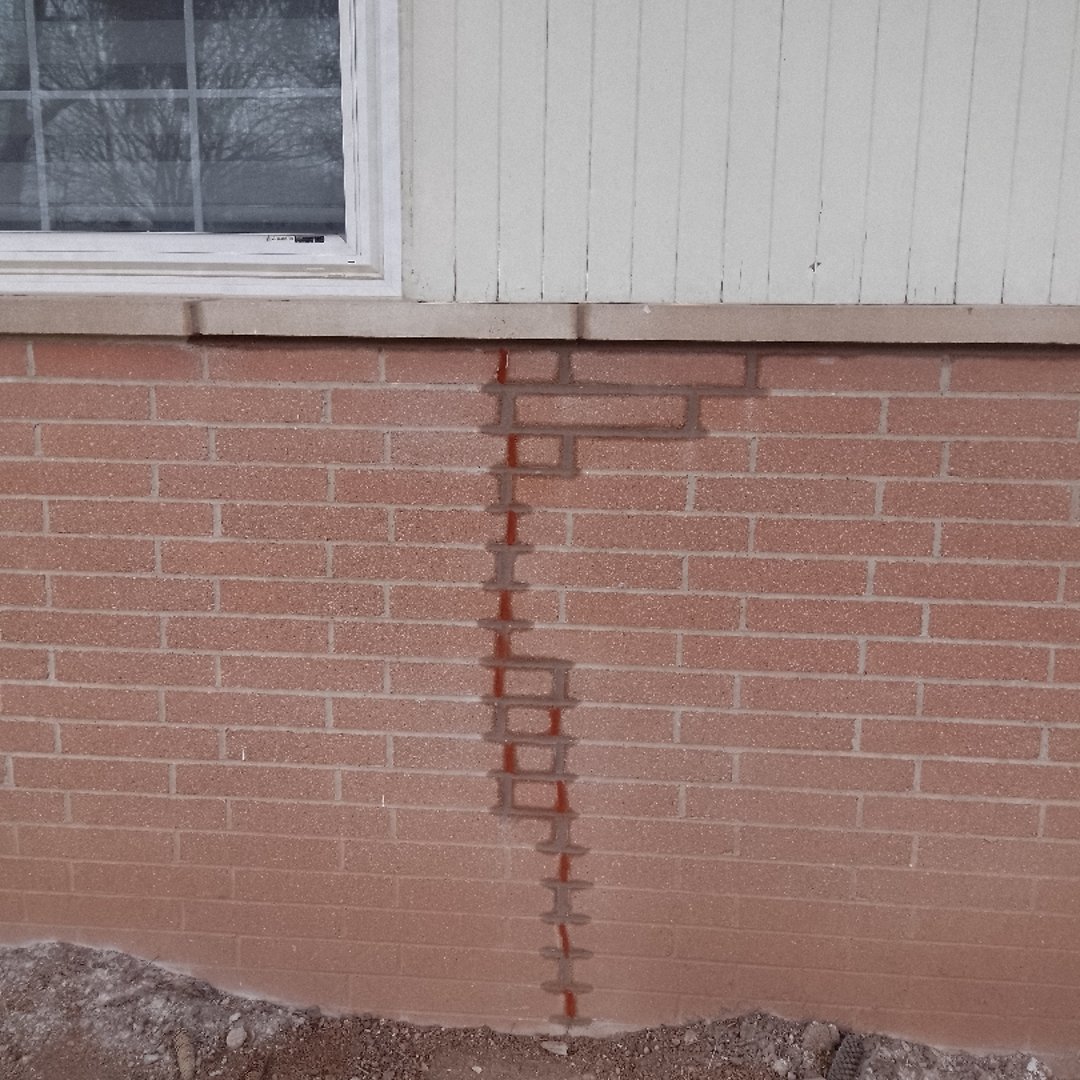
3) Stair-step cracks
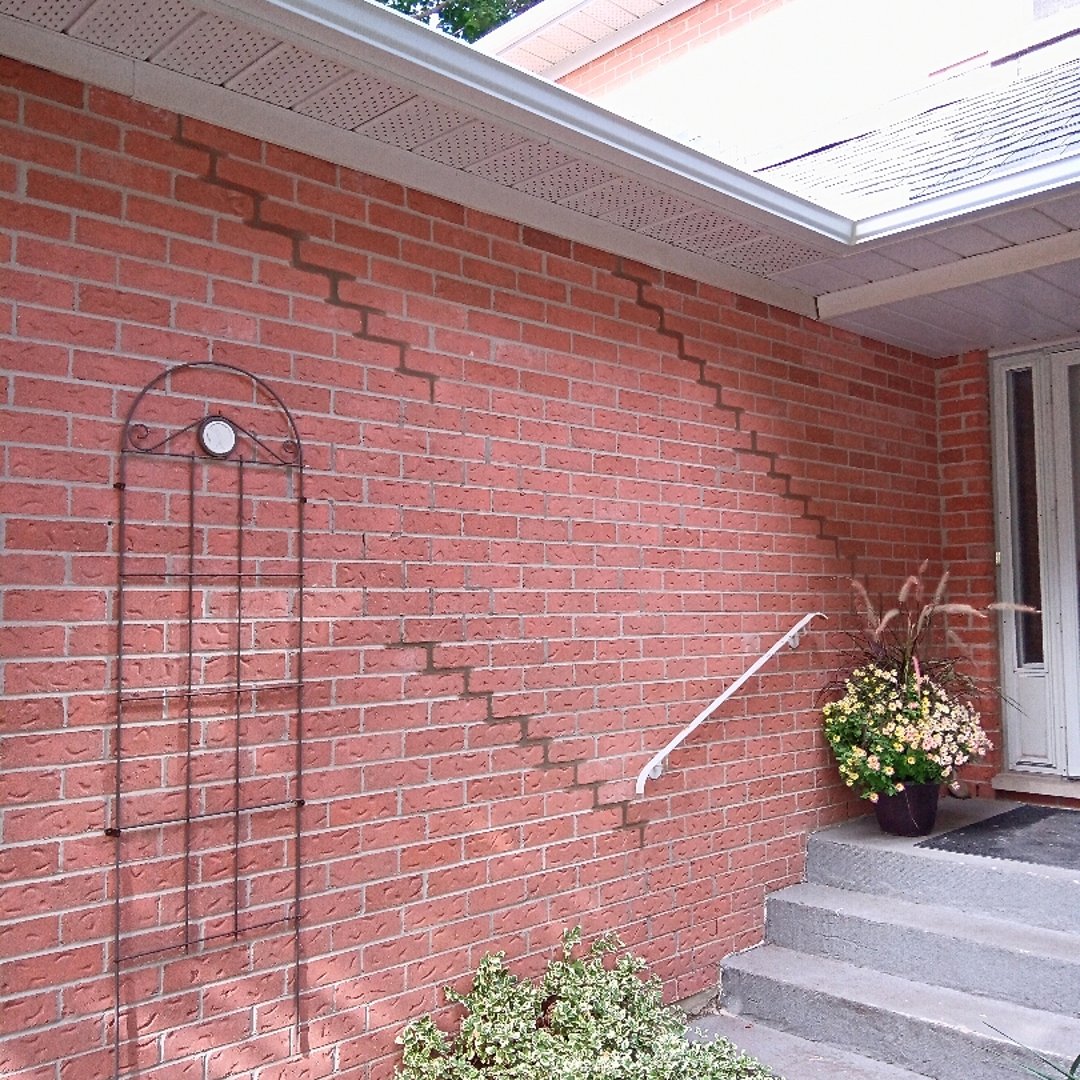
- What it looks like: A zig-zag crack that follows mortar joints (one of the most common brick crack types, called a stair-step crack).
- What usually causes it: Minor movement, mortar weakness, or stress near openings/corners. Sometimes it traces back to foundation settlement.
- Why it matters: If it grows, it can point to ongoing movement or water entry.
- What to do next: Monitor with photos. If it widens, spreads, or comes with bulging, book an assessment.
Case Snapshot: Foundation Movement Causing Brick Cracks — Toronto
A couple bought an older home and noticed brick cracking and coming loose along one wall. Turned out the foundation had shifted—once that was addressed by a foundation contractor, we came in to repair the brick damage.
"Once the foundation was repaired, Fix My Brick did an excellent job of repairing the brick at a cost below what we had anticipated." — Ronald D., Toronto
The lesson: Stair-step cracks sometimes point to something deeper. If the pattern is extensive or keeps returning after repair, foundation assessment may be the real next step.
4) Horizontal cracking or bulging
- What it looks like: A long sideways crack, or bricks that look pushed outward.
- What usually causes it: Moisture trapped behind the brick, rust expansion from steel lintels or ties, failing anchors, or structural movement.
- Why it matters: These are often stability issues—not just cosmetic.
- What to do next: Treat this as urgent. Contact us for a brick repair assessment.
5) Efflorescence (white powder or white staining)
- What it looks like: White powder, crust, or streaking on the brick face or mortar.
- What usually causes it: Water dissolves salts inside the masonry and carries them to the surface as it evaporates.
- Why it matters: It's a moisture clue, not just a stain. If it keeps coming back, water is moving through the wall repeatedly.
- What to do next: If it returns after cleaning (or you see other damage), book an assessment. Use the brick damage checklist to sort what you're seeing.
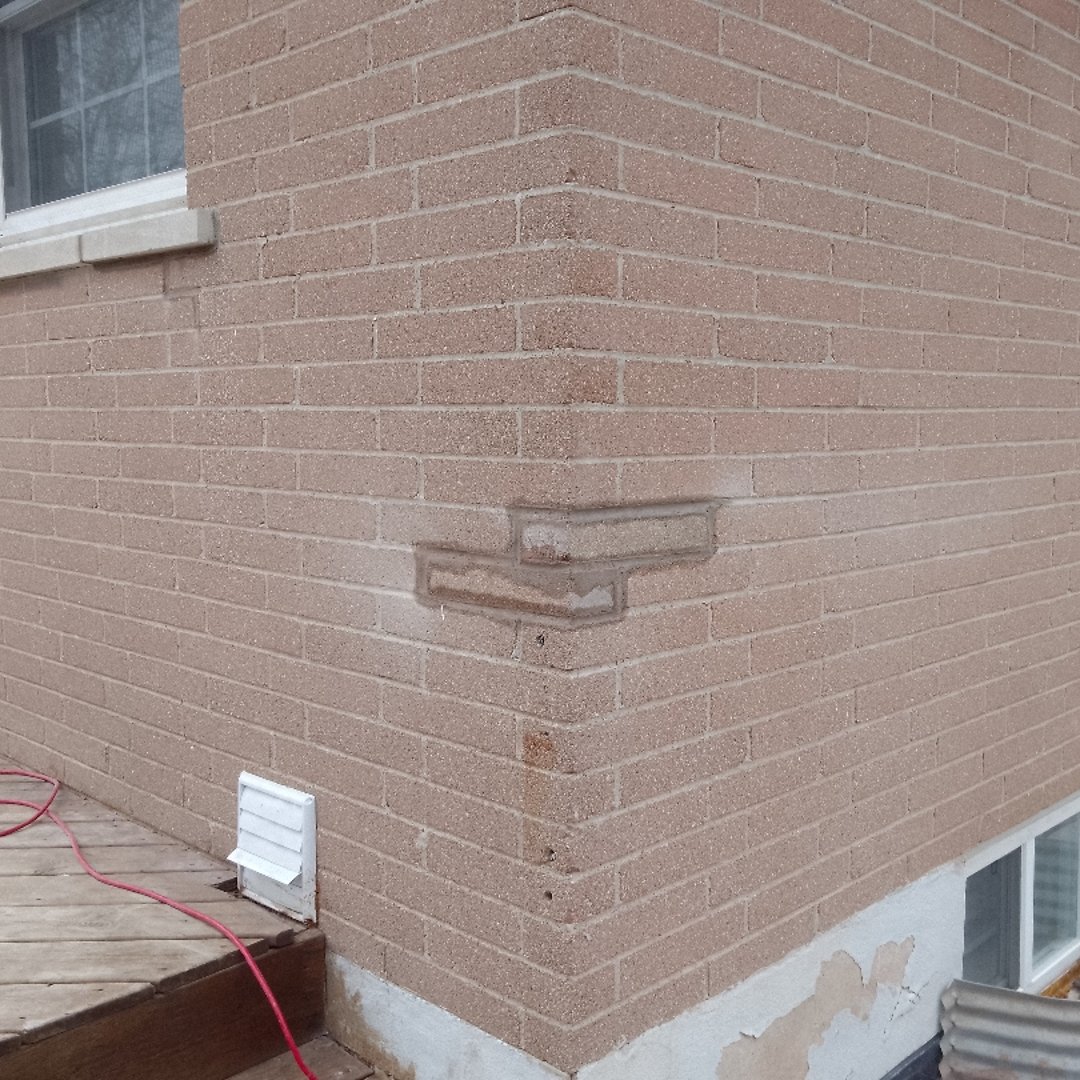
6) Cracks or gaps around windows, doors, and lintels
- What it looks like: Cracks above openings, gaps at trim lines, or rust staining above a window/door.
- What usually causes it: A rusting steel lintel expanding, or movement around openings. Older homes with original lintels are especially prone.
- Why it matters: Openings are common water entry points—cracks here often mean water is already getting behind the brick.
- What to do next: If cracks are spreading or you see rust, book an assessment.
Case Snapshot: Cracks Under Window + Cinder Block Replacement
A homeowner noticed cracks forming under their front window and along the side of their garden wall. When we looked, the cinder blocks behind the corner garden had also cracked.
The fix: Repaired the brick cracks under the window and replaced the deteriorated cinder blocks—both in one visit.
"Luke and Phillip did an amazing job repairing the cracks under our window and the side of our garden. They also replaced cinder blocks that had cracked on the side of the house." — Michelle H.
7) Interior clues near the wall
- What it looks like: Water stains, peeling paint, damp drywall, or musty smells on an inside wall that backs onto brick.
- What usually causes it: Moisture is getting through or around the masonry—usually through failed joints or cracks.
- Why it matters: If you're seeing it inside, the wall has been wet long enough for moisture to travel through. That's not a new problem.
- What to do next: Note where you see it and when, then get the exterior assessed.
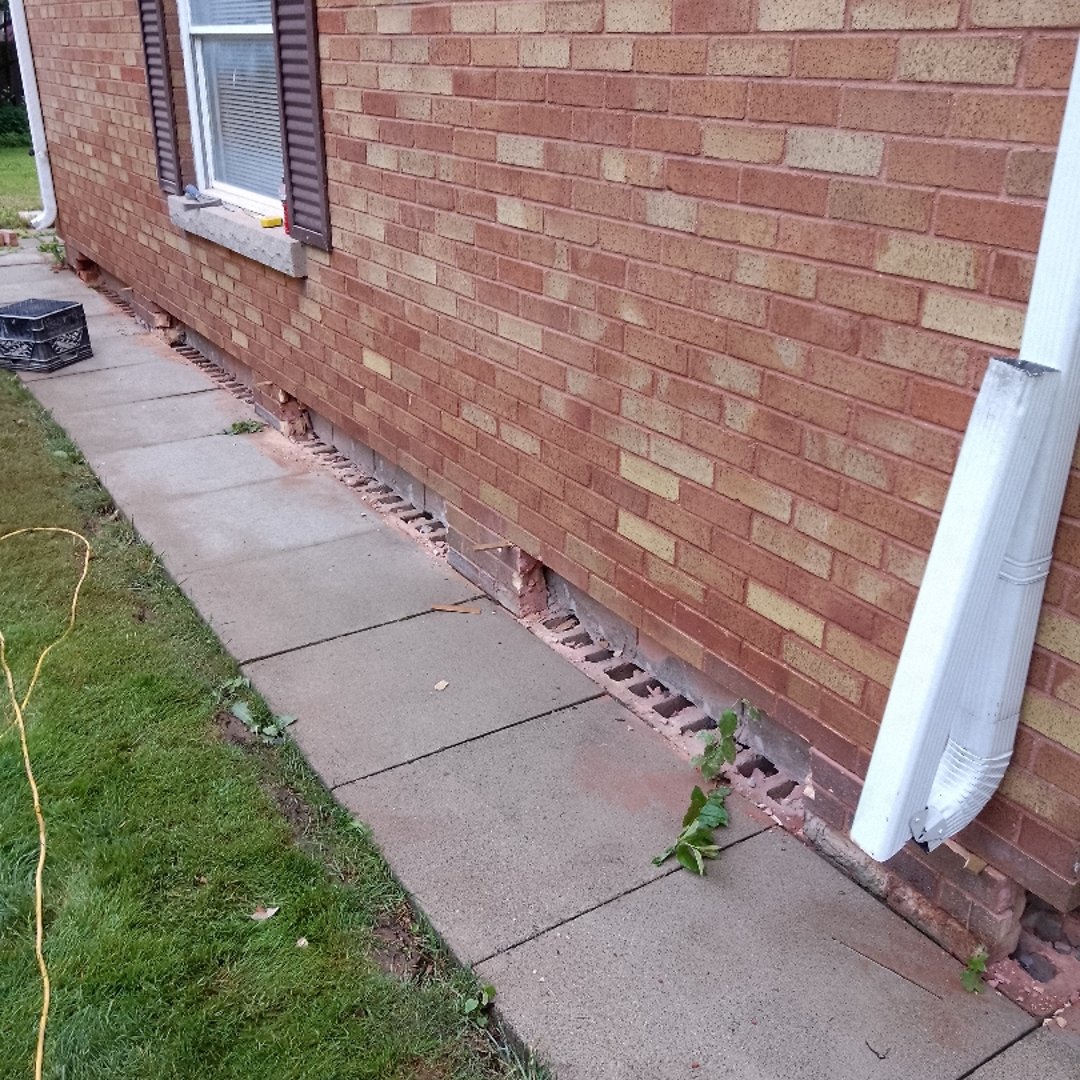
8) A loose brick you can feel move
- What it looks like: A brick that shifts when touched, or a corner that feels unstable.
- What usually causes it: Failed mortar bond, ongoing moisture damage, or a deteriorated brick that's lost its grip.
- Why it matters: Loose bricks can fall. Near entrances and walkways, it's a safety risk—these are the calls we prioritize.
- What to do next: Treat it as urgent if it's near where people walk. Book an assessment through /services/brick-repair.
9) Chimney-specific damage (even if the wall looks okay)
- What it looks like: Spalling, missing joints, step cracking, leaning, or gaps in chimney masonry.
- What usually causes it: Chimneys get hit from all sides—more sun, more wind, more freeze-thaw cycles. Joints fail faster up there.
- Why it matters: Chimney brick can become a fall hazard, and water entry at the chimney often causes interior damage you don't see until it's spread.
- What to do next: Have it checked: /services/chimney-repair.
Case Snapshot: Full Chimney Replacement with Brick Matching — Hamilton Area
A homeowner needed their entire chimney replaced and was worried the new brick would look obviously different from the rest of the house.
The fix: We matched the replacement brick so closely you can't tell where the old ends and new begins. Left the yard tidy.
"They replaced my entire chimney and you wouldn't even know it was replaced. The bricks matched so well." — Janet D.
Why Brick Gets Damaged in Ontario
We work across Southern Ontario—from the GTA to London and everywhere in between. Our crews serve Toronto and the GTA (including Scarborough, North York, Markham, Richmond Hill, and Vaughan), Hamilton and the Golden Horseshoe, Mississauga and Brampton (Peel Region), Burlington and Oakville (Halton), Kitchener-Waterloo-Cambridge, London, Niagara Region (including Niagara Falls), Durham Region (Oshawa, Whitby, Ajax, Pickering), and Guelph. The climate is hard on masonry across all these areas. Here's what we see most:
- Freeze-thaw cycling: Southern Ontario typically sees 30-40 freeze-thaw cycles per winter. Water soaks in, freezes, expands, and pushes brick and mortar apart from the inside.
- De-icing salts: We see the worst spalling on homes near driveways and sidewalks. Salt splash accelerates surface breakdown.
- Moisture movement: Brick and mortar are porous by design—they're meant to breathe. But when water stays trapped (bad grading, clogged weep holes, sealed surfaces), damage accelerates.
- Incompatible mortar: If someone repointed with mortar that's harder than the original brick, the brick takes the stress and cracks first. We see this often on older homes with soft heritage brick.
- Age and previous repairs: Patch jobs with mismatched mortar, sealed areas that trap moisture, and 50+ years of weather all add up.
"Sealing isn't always the answer. Trapping moisture can make things worse. The goal is proper drainage and mortar that lets the wall breathe."
Cosmetic vs Structural — How to Think About It
More often cosmetic (monitor): light staining, mild efflorescence that doesn't return, one small hairline mortar crack.
More often structural concern (book an assessment): bulging, leaning, spreading cracks, separation at corners/openings, or any loose brick.
Not sure? Book an assessment. We'd rather tell you "this can wait" than have you wait too long.
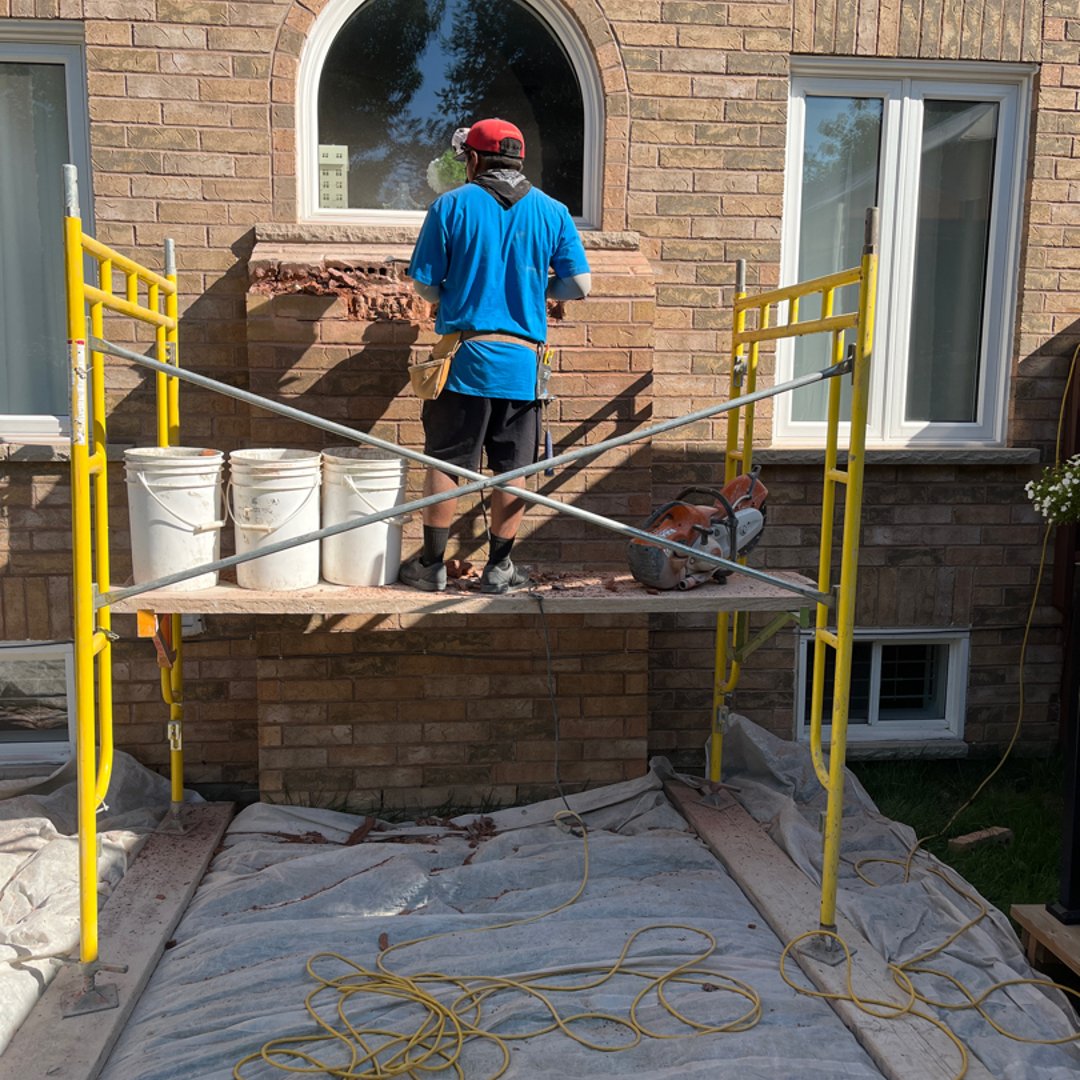
What We Look For During an Assessment
When we come out to assess, here's what we do:
- Walk the full perimeter — not just the problem spot you called about. We've lost count of how many times we've found worse damage on the other side of the house.
- Take photos and document — we share these with you so you understand exactly what we're seeing.
- Check mortar hardness — if it crumbles when scratched, it's already failing. If it's harder than the brick, the brick takes the damage (common with bad 1980s-era repoints).
- Trace water sources — cracks and open joints are symptoms. We look for what's causing the moisture: bad grading, overflowing gutters, failed flashing.
- Recommend repair vs replacement — we'll tell you which bricks can be stabilized and which need to come out.
- Plan for matching — brick colour, mortar colour, joint profile. The goal is a repair you can't spot from the street.
"Fix My Brick replaced spalling brick on my 120 year old house. I was worried about how the new brick would match with the existing, but Ryan did a great job of it." — Brad C., Hamilton
What Happens If You Ignore It
Here's the progression we see when homeowners wait too long:
- Mortar opens up → more water gets in
- More water → spalling speeds up and spreads to adjacent bricks
- Small cracks become wider paths → cracking grows and travels along mortar joints
- A local weak spot becomes a larger section → what was a $800 repair becomes a $3,000+ job
We're not trying to scare you into calling—but we've seen too many homeowners pay triple because they waited "just one more winter."
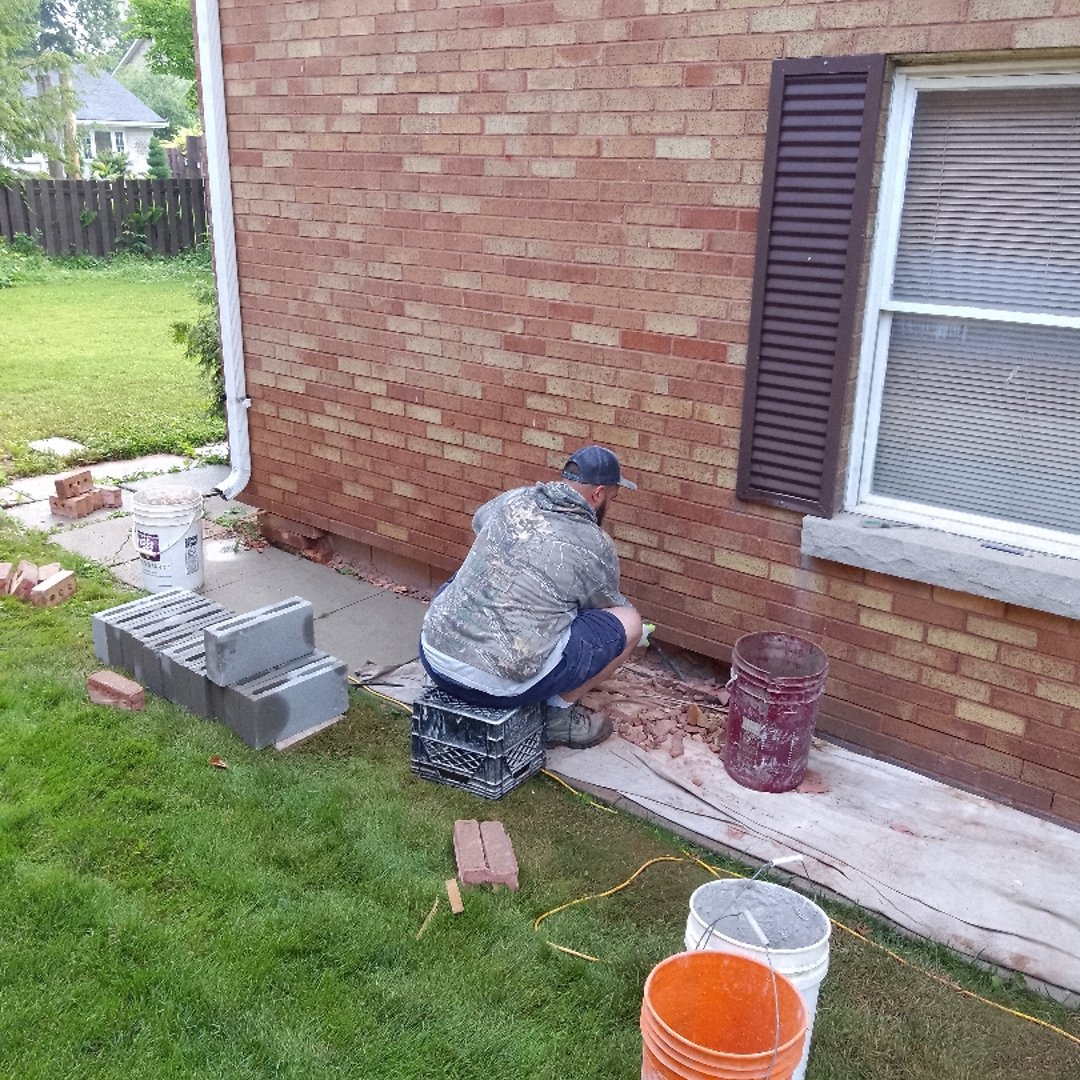
Case Snapshot: Garage Base Brick Repair — Hamilton
A homeowner noticed damage at the base of their garage where the brick meets the driveway. Salt splash and moisture had been working on it for years.
The fix: Repaired the damaged section with matched brick. The result was seamless.
"They did an AMAZING job fixing our brick around the base of our garage. It is flawless!" — Tracey W., Hamilton
What Homeowners Ask Us Most
"Can you really match brick on an older home?"
Usually, yes. We source reclaimed brick when needed, test mortar colours on-site, and match joint profiles. On a 120-year-old Hamilton home, we matched replacement brick so well the homeowner couldn't tell where the repair was.
"What if the mortar colour doesn't match after it dries?"
It happens sometimes—mortar can cure darker or lighter than expected. We stand behind our work. One customer called us 6 months after a job because the mortar hadn't lightened as expected. We came back, agreed it wasn't right, and fixed it.
"Ryan came back with the team and not only fixed the issues but used that time as a training moment for the team. They showed me they completely stand behind their product and service." — Chris B.
Next Steps
- Use the brick damage checklist — a 2‑minute self-assessment to organize what you're seeing.
- If you're seeing Level 1 or Level 2 signs, book a free on-site quote. We'll walk the property, document what we find, and give you a clear scope.
- If you want to understand your options first, start with /services/brick-repair or /services/tuckpointing.
We work across Southern Ontario—Toronto and the GTA, Hamilton, Mississauga, Brampton, Burlington, Oakville, Kitchener-Waterloo-Cambridge, London, Niagara, Durham Region, Guelph, and surrounding communities. If you're not sure whether we service your area, just ask.
Topics
Need Professional Masonry Services?
Our expert team is ready to help with all your masonry repair and restoration needs across Ontario.