Ultimate Brick Porch Construction and Repair: A Step-by-Step DIY Guide

Tools and Materials for DIY Brick Porch Construction

DIY Brick Porch Construction requires certain tools and materials. Here are the necessary items:

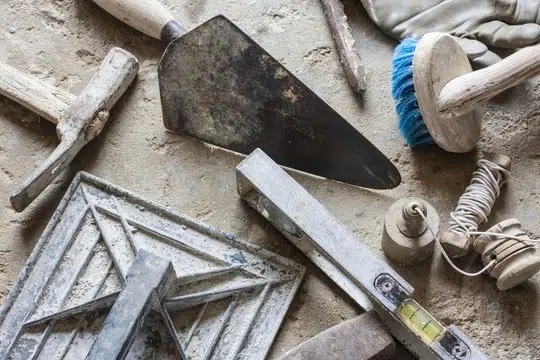
  1. Brick saw: for cutting bricks.
  2. Trowel & jointer: for mortar joints.
  3. Chalk line & level: for marking and keeping levels correct.
  4. Bricks & Mortar: the building blocks.

Protective gear like gloves & goggles are essential for safe construction. Before starting, plan every step of the process. Finally, make sure your porch is clean enough to eat off of.

Preparation for Brick Porch Construction

Before starting with the brick porch construction, it is essential to prepare the area for the same. This includes planning, designing, and architecture of the porch with proper measurements.

3-Step Guide for Brick Porch Construction:

  1. Step 1: Clear the area where the brick porch needs to be constructed. Remove any grass, plants or debris to create a level surface.
  2. Step 2: Excavate the area to the required depth by taking into account the thickness of the brick, mortar, and any sub-base required. Compact the soil to create a solid base.
  3. Step 3: Install a layer of gravel and sand base and compact it again. Check for levelness and slope before starting the brick porch construction.

Note: Ensure to check for any underground utilities present before digging. Additionally, make sure to have a proper drainage system in place to avoid any water accumulation, which can lead to damage. Adequate curing time is also essential to avoid any cracks in the bricks.

According to the Brick Industry Association, brick masonry structures have a lifespan of more than 100 years if constructed appropriately. Before you start, make sure your site is suitable for construction – after all, you don’t want your porch to be the only thing collapsing.
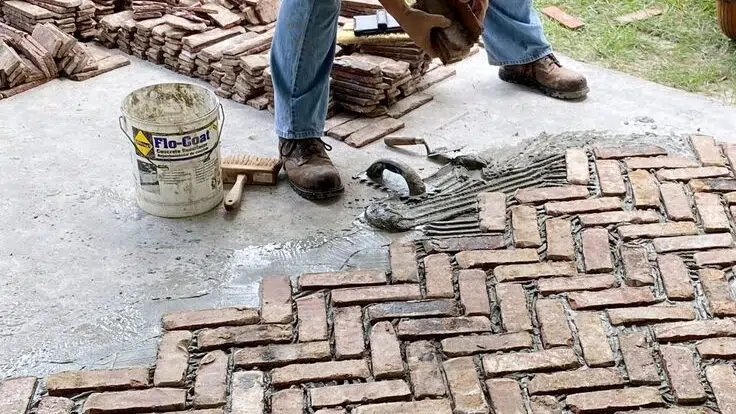
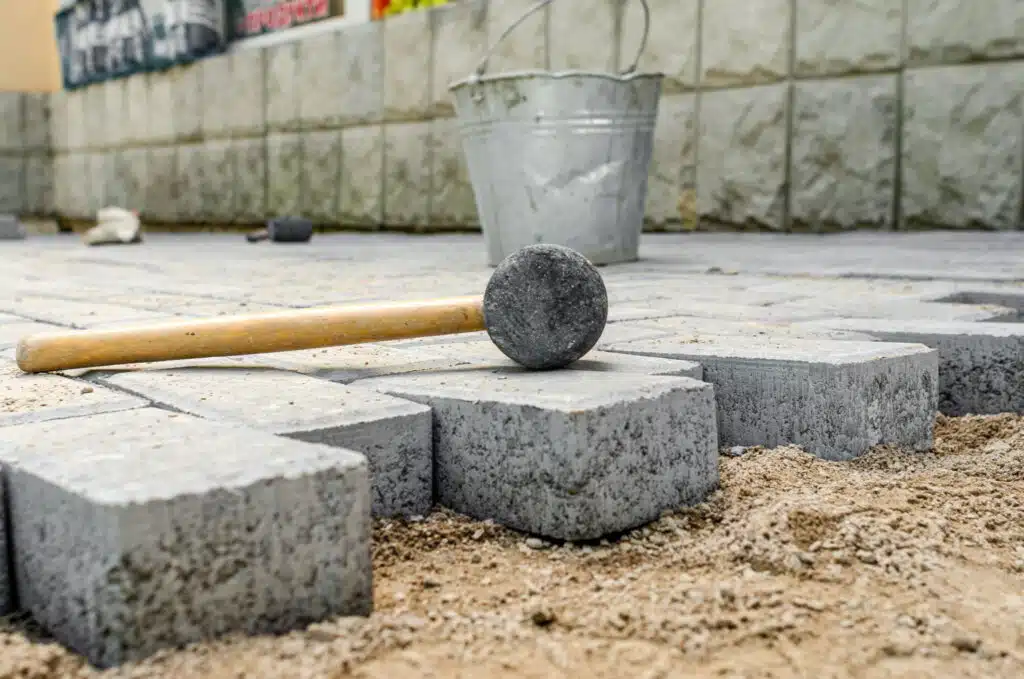
Brick porch construction.

Assessing the Site

Assessing the Porch Site

Before building the brick porch, it’s important to assess the site. Check for obstructions like tree roots, underground pipes, or cables. Make sure the area is leveled and drainage is taken care of.

Next, check the soil type. It must be able to support a brick structure with reinforced concrete. Consider hiring a geotechnical engineer to determine if extra support, like piers or pilings, is needed.

Lastly, get the necessary permits before starting the porch project. This ensures the success of the project and compliance with local codes and regulations.

Tips for Assessing Your Porch Building Site

  • To make the porch building process easier, remember these tips.
  • First, measure your space accurately with the right tools. That way, you won’t buy too many materials and create waste.
  • Second, check the site regularly during construction. Unevenness or shifting could cause structural problems.
  • Lastly, consider environmental factors. Choose materials that can withstand harsh weather conditions.

DIYers: always measure twice and cut once!

Determining the Porch Size and Layout

To start constructing a brick porch, first determine the size and layout. This decision affects the entire project. To visualise different possibilities, make a table including factors such as available space, regulations and aesthetics. Popular dimensions are 6x8ft or 8x10ft, or you could consider wraparound porches or steps.

Think critically about the porch’s purpose: is it just an entryway or do you want furniture? Research typical porch dimensions for inspiration.

Proper planning saves time and money – but changing plans mid-project can be costly and frustrating. Consult professionals like architects or contractors before settling on an idea. Foresight during the details stage sets us up for successful project completion.

Excavating and Grading the Area

  1. Mark off the area where the porch will be constructed.
  2. Then, remove all vegetation and roots.
  3. Excavate the soil to at least six inches.
  4. Grade the area with a rake until level.
  5. If needed, add new soil or sand and compact it with a compactor machine.
  6. Test the grading by pouring water on it, to make sure there are no low spots.

Remember: Properly preparing the foundation of your brick porch is essential. If not done right, it may become uneven or damaged over time. Investing in this early stage will save you from costly repairs later. HomeAdvisor reports that foundation repair costs range from $3,323 to $10,254. Don’t lay a shaky foundation!
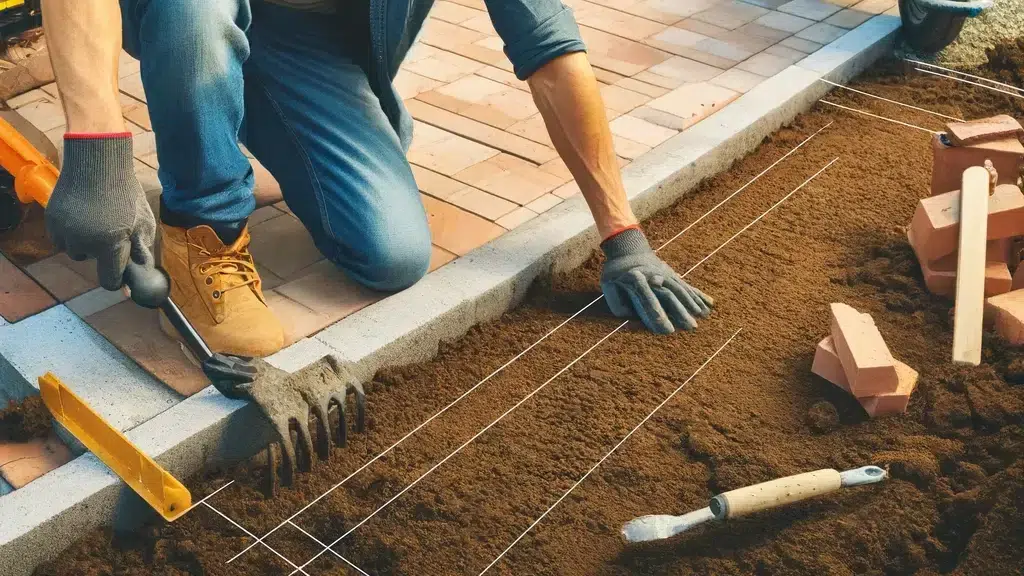
Preparing the soil for brick porch construction.

Laying the Foundation for a Brick Porch

Paragraph 1: The key to a sturdy and long-lasting brick porch lies in its foundation. A solid foundation ensures that the porch can withstand the weight of heavy foot traffic and endure harsh weather conditions.

Paragraph 2: Here is a 6-step guide to laying a strong foundation for your brick porch:

  1. Excavate the area where the porch will be located to the desired depth.
  2. Compact the soil using a plate compactor or tamper.
  3. Install a layer of crushed stone or gravel to provide a stable base.
  4. Compact the stone layer with a plate compactor or tamper.
  5. Add a layer of sand to level the stone layer and provide a smooth surface for laying the bricks.
  6. Finally, wet the sand layer to settle it in place.

Paragraph 3: It is important to note that the foundation should always be built on undisturbed or compacted soil to prevent shifting or settling in the future. Additionally, it is recommended to consult with a masonry expert in choosing the appropriate type and size of bricks for your porch.

Paragraph 4: The Great Fire of London in 1666 destroyed much of the city, including the wooden structures that were common at the time. The demand for brick increased rapidly, and the craft of bricklaying became essential in rebuilding the city. Today, bricklaying is a skilled profession that requires precision and expertise to ensure the durability and aesthetic appeal of masonry structures.

Get ready to dig deep, because the success of your porch starts with a solid foundation.

Pouring the Concrete Footings

Constructing a sturdy brick porch requires concrete footings. This forms the base on which the structure sits, and must be done with accuracy. Here is a step-by-step guide to create concrete footings:

  1. Measure out the area needed for the supports using posts, strings, and level markers.
  2. Dig around each marker until it’s 6 inches wider than the future pillar width.
  3. Put 4 inches of gravel in each hole, evenly spread.
  4. Make footing forms that are level with the string line. You can use wood framing boards or metal stakes with fencing wire tied at the top.
  5. Pour cement into each form segment-by-segment, and make sure it is even with the frames’ top without making any changes.
  6. Smooth off the freshly poured cement using a bull float.
  7. Let the cement cure according to normal drying standards.

Unique Details:

It is vital to make sure the columns are placed correctly and the measurements match the eventual height needed per local building codes.

Real-Life Account:

We once ran into an issue with improper placement of footings, causing the scheme to cave in. This resulted in a costly start-over.

Building the Concrete Block Foundation

Creating a concrete block foundation for your brick porch is a vital step. It ensures the porch can support weight, pressure and natural elements. Here’s a 5-step guide:

  1. Clear away any debris or vegetation. Level and mark the boundaries.
  2. Dig a trench two feet deep and wider than the blocks.
  3. Put a layer of gravel, followed by sand in the trench.
  4. Place the blocks in rows. Use mortar to secure them.
  5. Leave it to cure before continuing with construction.

Don’t forget proper drainage when building a porch for heavy rainfall. Wood or stones can also be used for foundations, but check with an expert first. One homeowner made a costly mistake by not seeking help. That’s why it’s important to use proper techniques from foundations to completion of any DIY project. Now, get your hands dirty and start laying those bricks! When you’re done, you’ll have a sturdy porch to rest on.

Laying the Bricks for a Brick Porch

Laying the Bricks for a Sturdy and Beautiful Brick Porch

To lay a strong and aesthetically pleasing brick porch, one should follow the proper steps. It is essential to prepare for the job by acquiring the necessary equipment and materials, ensuring the site’s readiness, and having a plan in place.

Here are the four steps to lay bricks for a beautiful porch:

  1. Prepare the foundation and set up a level base
  2. Organize the bricks and start laying on the edge
  3. Use mortar to bond the bricks together and ensure proper alignment
  4. Cut and fit the bricks as required to complete the pattern

It is crucial to ensure that the bricks are leveled, aligned, and spaced evenly to avoid any weak spots and unsightly gaps. Using a spirit level and measuring tools could assist in achieving a professional finish.

When laying bricks, cleanliness is crucial. Dust off excess mortar on the bricks before it dries up. It is also necessary to clean the porch’s surface and surrounding area regularly to avoid staining and keep the porch looking new.

To avoid costly mistakes and ensure that the bricks fit well, consider seeking advice from professional masons or bricklayers.

According to This Old House, “Properly constructed brick porch could last for over a century with little maintenance.”

By carefully following these steps, you too can lay a durable and striking brick porch that will serve you for years to come. Get ready to embrace your inner bricklayer and whip up some mortar magic with these tips!

Preparing the Mortar Mix

To build a reliable brick porch, you must mix the mortar right. A perfectly blended mortar will help keep the structure sturdy for years. Here’s a five step plan for the perfect mix:

  1. Pour clean water into a container
  2. Add dry mix gradually while stirring with a trowel
  3. Mix until it’s smooth & uniform
  4. Don’t add too much water or the mix will weaken
  5. For all purpose construction, the best sand to cement ratio is 5:1

Here’s a tip: mix up enough mortar before starting any masonry work. Unmixed ingredients can cause bricks to loosen and fail.

After laying them all day, I’m building up a tolerance – just like my brick porch!

Laying the Bricks in a Running Bond Pattern

Construct a brick porch with a running bond pattern for an aesthetic appeal. Prepare the base by removing any debris and spread 4 inches of crushed stone. Firmly compact the stone using a tamper machine. Start at one corner with a row of full bricks followed by a row of half bricks. Alternate the pattern for each row. Depending on the dimensions, some bricks may need trimming. Mark off where cuts should be done using a chalk line. Spread sand over the brick’s surface and brush continuously until no spaces remain visible. Alterations in laying patterns may arise during construction, necessitating modifications.

Constructing a brick porch with a running bond pattern has a long history. It is now one of the most iconic building designs worldwide. Sadly, cutting people out of our lives isn’t as easy as cutting bricks to fit a porch.

Cutting Bricks to Fit the Porch’s Edges and Corners

Cutting bricks to fit the edges and corners of a porch is a demanding task. Follow these 4 steps to get better results:

  1. Measure up. Check the area where bricks are meant to go.
  2. Cut it out. Use a chisel or bolster to cut bricks to size.
  3. Shape it. Hammer the cut bricks, if needed, for a neat look.
  4. Place them. Put the shaped bricks in the desired pattern.

Take care not to overdo it. Too much interference can weaken the brick.
Planning and skillful techniques are important when cutting bricks.
Make sure you have all the requirements ready before starting. Changing the plan mid-process can lead to major problems.
Create a beautiful brick porch today!
Remember: a little patching goes a long way, but a lot of patching goes even further.

Brick Porch Repair Tips and Techniques

DIY Techniques for Achieving Professional Brick Porch Repairs

When it comes to brick porch repair, it’s important to get it right to ensure longevity and a professional finish. Here are some tips and techniques for achieving just that:

  1. Assess the Damage: Inspect the porch for cracks, missing bricks, and any other damage. Take note of the extent of the damage before starting repairs.
  2. Choose the Right Mortar: To ensure a secure repair, the right type and consistency of mortar must be used. A professional-grade mortar mix should be used, and water should be added to the mix slowly until a thick, workable consistency is achieved.
  3. Remove the Damaged Bricks: To replace damaged bricks, carefully remove the existing ones and clear the area of debris and dust. Make sure the area is clean and dry before starting repairs.
  4. Replace the Bricks and Mortar: Apply the mortar to the area with a trowel, and then carefully lay the new bricks in place. Use a spirit level to ensure the bricks are level and aligned with the existing ones.
  5. Finishing Touches: Once the mortar has dried, finish the repair by gently brushing off any excess mortar and smoothing out any rough areas.

When repairing a brick porch, remember to also keep in mind the mortar’s color, which should match the existing mortar. Additionally, ensure that the new bricks match the existing ones in size, shape, and color.

To prevent future damage, consider applying a weatherproof sealer to protect the porous brick from moisture and prevent cracking caused by freeze-thaw cycles. It’s also important to keep the porch clean and free of debris to prolong its lifespan.

By following these tips and techniques, you can achieve a long-lasting and professional-looking brick porch repair. Brick porches may be tough, but so is the realization that you have to deal with common problems like cracking and shifting.

Common Problems with Brick Porches

Brick porches are a house’s essential beauty and strength. But, they’re vulnerable to problems like cracks, erosion, and weathering from nature. This can lead to water damage, which weakens foundations and causes more issues. So, identify and address these problems with repointing, replacing damaged bricks, adding sealants, and more.

Also, take preventive steps like regular cleaning and avoiding harsh chemicals. This way, you can ensure your porch’s durability. Repairing your brick porch requires professional expertise. So, find an experienced mason to fix it.

Home Advisor’s 2021 survey showed that repairing a brick porch is usually around $700-$2000, depending on the damage and repairs needed. Who needs a knight in shining armor when you have a DIY repair kit?

DIY Repair for Brick Porches

When it comes to fixing your brick porch, DIY techniques can save you money and time. Here’s a 4-step guide:

  1. Examine the condition of the bricks and mortar joints.
  2. Use a chisel or hammer to remove loose or damaged mortar.
  3. Mix new mortar and repack the joints.
  4. Let it dry, then smooth it out with a trowel.

You should clean your brick porch every few months. Sandpaper or wire brush can help. Then, apply a sealer to protect it from moisture and weathering.

In short, DIY repairs can be a cost-effective alternative. With these tips, you can maintain and fix minor damages. But, if you don’t want a wonky porch, hire a professional!

Professional Repair for Brick Porches

Professionally repair a brick porch with the right techniques. Hire experienced masons who use top-notch material for lasting results. Tuckpointing is one method to replace damaged mortar between bricks. Rebuild sections of the porch by removing and replacing bricks. Restore appeal with a sealed or painted surface after cleaning. Avoid metal tools, power washers, and harsh chemicals when cleaning or repairing. Regular maintenance like clearing debris and controlling vegetation prolongs the life of a brick porch. Need a professional finish? Follow these tips for a great look that won’t frighten the neighbours!

Tips for a Professional Finish for a Brick Porch

Achieving Professional Results for Your Brick Porch: Discover the best practices for constructing and repairing your brick porch with a professional finish that you can be proud of.

Six Simple Tips for a Beautiful Brick Porch:

  1. Prepare the Surface: Remove any debris or old mortar from the bricks and ensure a clean surface for your new construction or repair job to begin.
  2. Choose the Right Mortar: Select the right type of mortar for the job, depending on the weather and the type of brick you are working with. Pay attention to the ratios and consistency of your mortar mix as well.
  3. Pay Attention to Detail: Achieve a straight and level surface by using a spirit level, and carefully apply the mortar to ensure a consistent finish.
  4. Allow for Proper Drying Time: Allow the mortar to dry and set for at least 24 hours before walking on or applying additional weight to the surface.
  5. Protect Your Hard Work: Seal the surface of your brick porch to protect it from the elements and ensure it lasts for years to come.
  6. Seek Professional Guidance: If you’re not confident in your masonry skills, consider consulting with a professional for advice and guidance.

Additional Considerations for Brick Porch Construction and Repair: To achieve the best results for your brick porch, consider exterior factors that could impact the durability and longevity of your construction, such as choosing the right type of brick for your climate and making sure to reinforce any weak points in your porch’s structure.

Uncovering the Rich History of Brick Porches: Brick porches have been a popular choice for homeowners for centuries, providing a sturdy and attractive entryway to any home. The use of brick in porch construction dates back to the 19th century, when brick was often used to create the foundation and steps leading up to a home’s entrance. Over the years, the construction techniques and materials have evolved, but the classic charm and durability of brick porches remain a constant.

If your brick porch looks like a game of Jenga, it’s time to ensure proper alignment and leveling.

Ensuring Proper Brick Alignment and Leveling

For a professional finish on your brick porch, precise alignment and leveling are essential. This step’s crucial for the porch’s appearance and durability. Here’s a 5-step guide to get it right:

  1. Measure the area.
  2. Create a slope to direct water away from the house foundation.
  3. Use a string line system to keep each row in line, horizontally and vertically.
  4. Adjust brick height with mortar. Check regularly with a spirit level.
  5. Fill any gaps or spaces with mortar.

Use high-quality materials too. Damaged or subpar bricks can lead to an uneven finish that won’t last. The Brick Industry Association says clay brick pavers can last up to 100 years or more, if installed correctly. So, who needs a therapist when you can perfect your mortar joint finishing techniques?

Proper Mortar Joint Finishing Techniques

For a perfect finish, faultless mortar joint techniques are needed. Mix the mortar to the right consistency and keep it moist. Accomplish professional results with this four-step process:

  1. Scrap off excess mortar – Use a trowel to remove extra material, leaving only half an inch of joint space.
  2. Edging with the Jointer – Use a concave or v-shaped blade to create curved edges between joints, combing down towards them.
  3. Striking with Tuckpointer – Fill gaps at the face of the brick by swinging the jointer back and forth in circles across the joints surface.
  4. Brushing-down method – Remove extra material from any crevice with a stiff-bristled brush before it hardens onto wet surfaces.

Lime is often chosen as the mortar mix due to its high level of elegance. Add pigments for unique shades if necessary. Keep your work area clean – brush down each new section before continuing, so as not to soil already washed regions.

Historians say ancient Egyptians stonemasons used mortar to build the Great Pyramid 4,500 years ago. Their methods still exist today, modernised with equipment and practices that have developed over time. Get your porch so clean it’ll make your mother-in-law ask what secrets you’re hiding!

Cleaning and Sealing the Brick Porch Surface.

Maintaining the brick porch is a must. It boosts the structure’s lifespan and beauty. To keep it safe, we need to clean and seal it. Here are 4 steps:

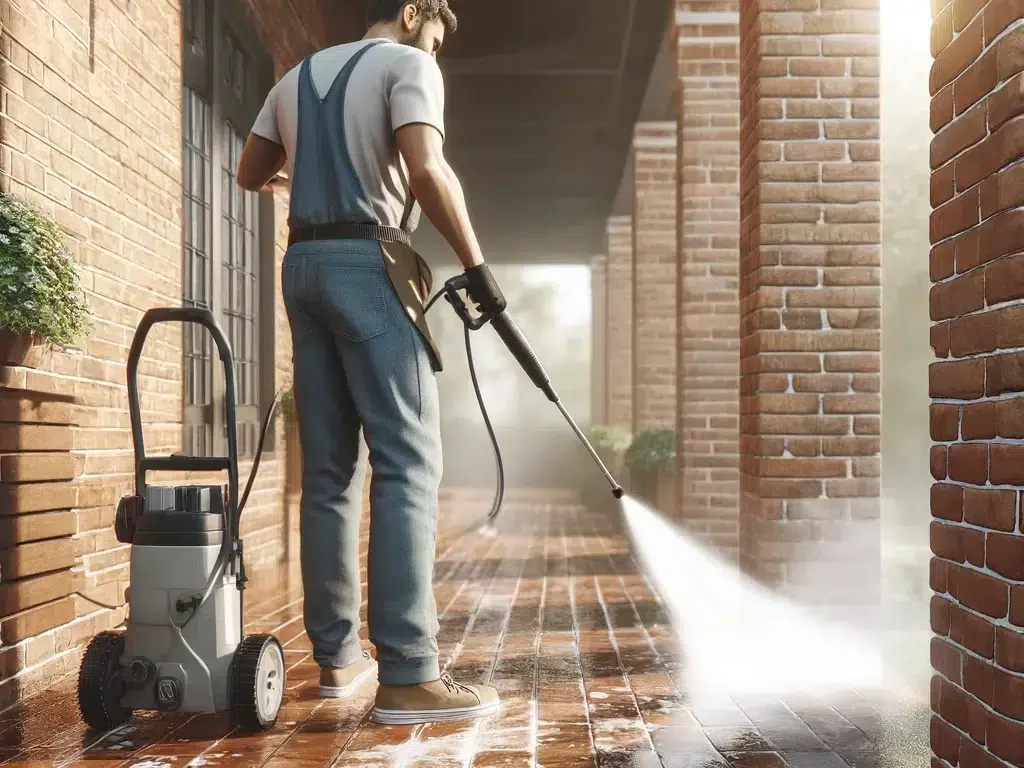
  1. Sweep debris off, then spray with a pressure washer or garden hose.
  2. Mix a cleaning solution according to instructions. Use a pump sprayer or brush to apply it. Let it sit for 10-15 minutes, and rinse off.
  3. Test previous sealer first. Then use a paint roller or sprayer to put on thin coats of new sealant. Let each coat dry before adding more.
  4. Polish with high-quality polishers that prevent slipping.

Follow manufacturer instructions for products. Clean and reseal regularly, so you get the best results and quality. If unsure, seek help from flooring pros.

Frequently Asked Questions

1. Can I build my own brick porch?

Yes, it is possible to build your own brick porch with the right tools, materials, and knowledge. However, it is important to have experience in masonry or seek the help of a professional to ensure proper construction and avoid any safety hazards.

2. What are the basic steps involved in DIY brick porch construction?

The basic steps for DIY brick porch construction include site preparation, foundation pouring, brick laying, mortar mixing, joint finishing, and sealant application. It is important to follow government regulations and safety precautions during each step of the process.

3. How do I repair a crack in my brick porch?

To repair a crack in a brick porch, clean the area, remove any loose debris, and fill the crack with mortar. Smooth out the surface and let it dry for a few days. Then, apply a sealant to protect against water damage and future cracks.

4. How often should I maintain my brick porch?

Maintenance for brick porches is important to ensure its longevity. It is recommended to clean your brick porch once a year with a pressure washer and to apply sealant every 2-3 years. It is also important to inspect regularly for any signs of damage or wear and tear.

5. How can I prevent water damage on my brick porch?

To prevent water damage on your brick porch, make sure the porch is properly sloped to allow water to drain away from the foundation. It is also important to apply a sealant to protect against water penetration and to inspect regularly for any signs of water damage.

6. What are some tips for achieving a professional finish on my DIY brick porch?

To achieve a professional finish on your DIY brick porch, ensure that the foundation is level and properly poured, use high-quality materials, follow a consistent pattern while laying bricks, and take your time with joint finishing. It may also be helpful to seek advice from a professional mason.

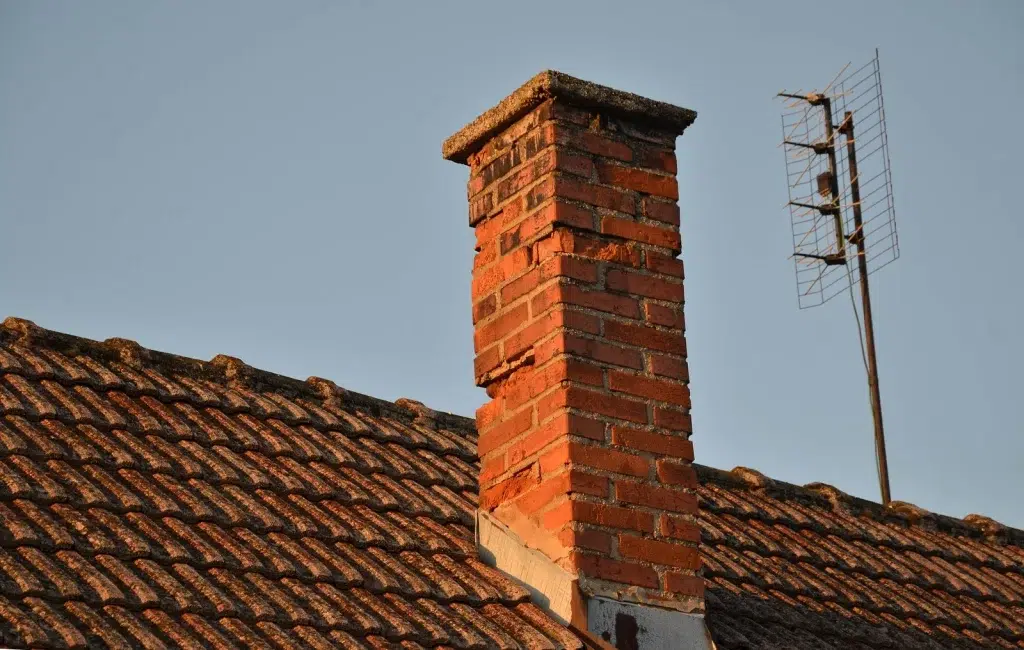
Chimney Repair in Toronto: Expert Services for Your Home

Importance of chimney maintenance and repair in Toronto

As a Toronto homeowner, you understand the importance of maintaining a safe and efficient home. Your chimney is a critical component of your home’s heating system, and neglecting its maintenance can lead to serious issues. Regular chimney repair and maintenance are essential to ensure the safety of your family, protect your home from damage, and keep your heating costs under control.

B. Unique challenges and common chimney issues specific to Toronto
1. Harsh winter conditions and freeze-thaw cycles affecting chimney deterioration

Toronto’s harsh winter conditions, characterized by frequent freeze-thaw cycles, can take a toll on your chimney. The constant expansion and contraction of moisture within the bricks and mortar can lead to cracks, spalling, and other forms of deterioration. Over time, these issues can compromise your chimney’s structural integrity and create potential safety hazards.

2. Prevalent brick and masonry chimneys in Toronto homes

Many Toronto homes feature beautiful brick and masonry chimneys that add character and charm to the property. However, these materials are particularly susceptible to damage from the elements and require specialized care to maintain their appearance and function. Without proper maintenance, brick and masonry chimneys can develop leaks, loose bricks, and other issues that can be costly to repair.

3. Statistics highlighting the importance of chimney repair in Toronto

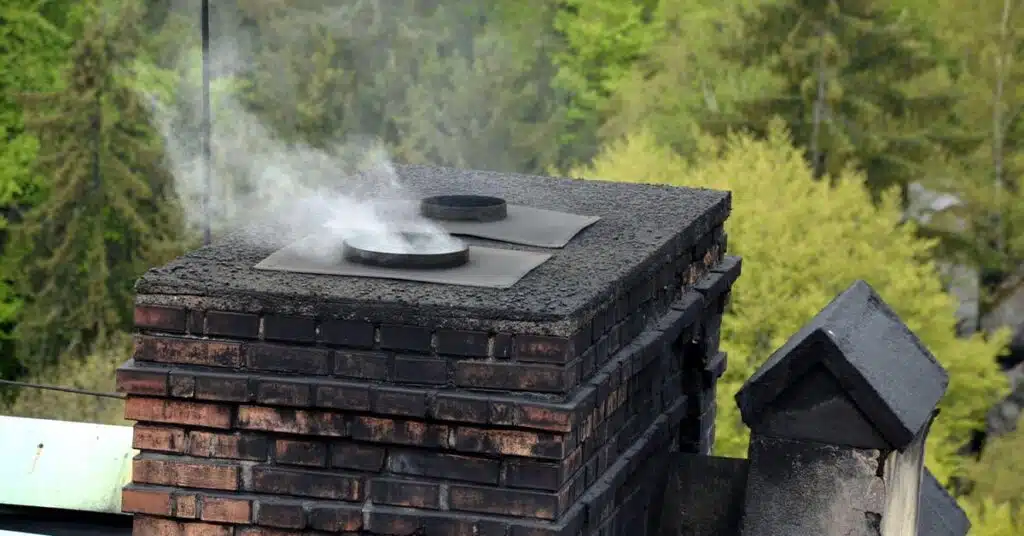
According to the Toronto Fire Services, chimney fires account for a significant number of residential fires in the city each year. In many cases, these fires are caused by a buildup of creosote, a highly flammable substance that can accumulate in poorly maintained chimneys. Regular chimney inspections and cleanings can help prevent these dangerous and costly fires.

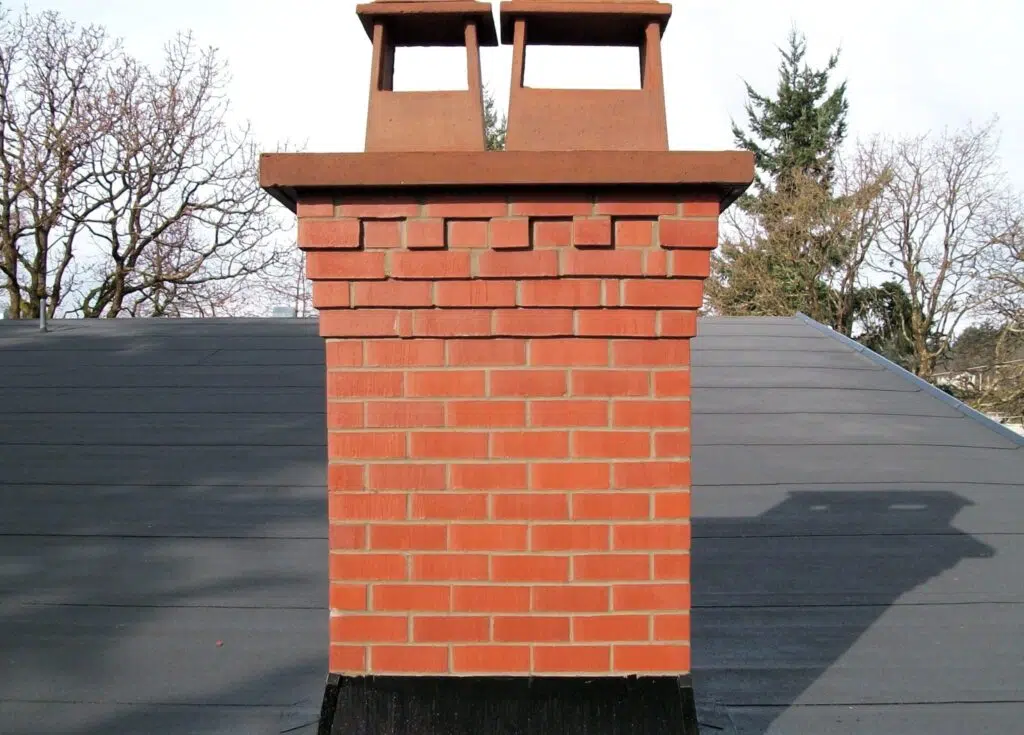
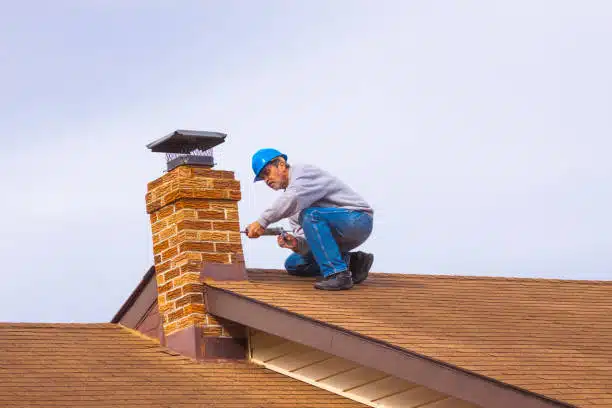
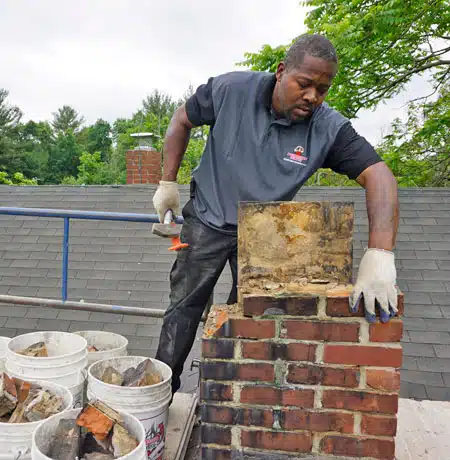
Damaged chimney

Why Fix My Brick

20+ years of experience in Chimney Repair, Removal and Restoration

At Fix My Brick, we have proudly served the Toronto community for over 20 years. Our team of certified chimney professionals and masonry experts has the knowledge, skills, and experience to handle all your chimney repair and maintenance needs. We understand the unique challenges faced by Toronto homeowners and are committed to providing exceptional service and long-lasting results.

2. Certified chimney professionals and masonry experts

Our team consists of certified chimney professionals and masonry experts who have undergone extensive training and education in the latest industry techniques and best practices. We stay up-to-date with the latest advancements in chimney repair technology to ensure that we provide our customers with the most effective and efficient solutions for their chimney issues.

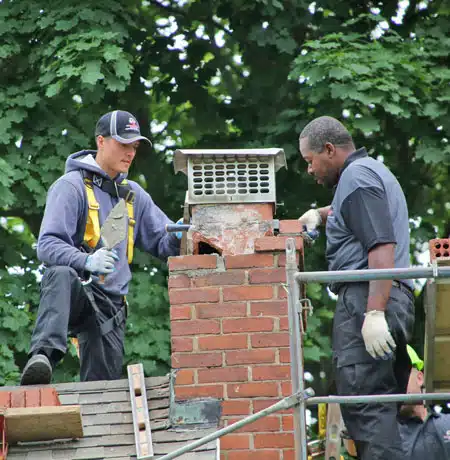
Repaired and restored chimney

V. Why Choose Us?
A. Expertise and experience in chimney repair specific to Toronto

With over 20 years of experience, our team has unmatched expertise in addressing the unique challenges faced by Toronto homeowners. We have a deep understanding of local building codes, weather conditions, and common chimney issues, allowing us to provide tailored solutions that meet the specific needs of our customers.

B. Certified chimney professionals and masonry experts

Our team consists of masonry experts who have undergone rigorous training and education in the latest industry techniques and best practices.

C. Exceptional customer service and communication

We are committed to providing exceptional customer service and communication throughout every project. From the initial consultation to the final inspection, our team will keep you informed and involved in the process, answering any questions and addressing any concerns you may have. We pride ourselves on our transparency, reliability, and dedication to customer satisfaction.

D. Transparent pricing and detailed cost estimates

We understand that chimney repair and maintenance costs can be a concern for Toronto homeowners. That’s why we offer transparent pricing and detailed cost estimates for all our services. Our team will provide a clear breakdown of the work to be performed, the materials to be used, and the associated costs, so you can make an informed decision about your chimney repair and maintenance needs.

E. Customer success stories, testimonials, and case studies from Toronto homeowners

Over the years, we have helped countless Toronto homeowners resolve their chimney issues and protect their homes. We have a proven track record of success, as evidenced by the many positive reviews, testimonials, and case studies from our satisfied customers. Visit our website to read about the experiences of other Toronto homeowners who have trusted us with their chimney repair and maintenance needs.

F. Guarantees and warranties on repairs

We stand behind the quality of our work and offer guarantees and warranties on our chimney repair services. We use only the highest-quality materials and industry-leading techniques to ensure long-lasting results. In the unlikely event that an issue arises related to our workmanship, we will promptly address the problem and make it right.

G. Emergency repair services and availability

We understand that chimney issues can happen unexpectedly and require immediate attention. That’s why we offer emergency repair services and flexible availability to our Toronto customers. If you experience a chimney emergency, such as a leak, chimney fire, or structural damage, our team is ready to respond quickly and efficiently to minimize damage and ensure your safety.

II. Types of Chimney Repairs
A. Chimney crown repair
1. Explanation of chimney crown and its function

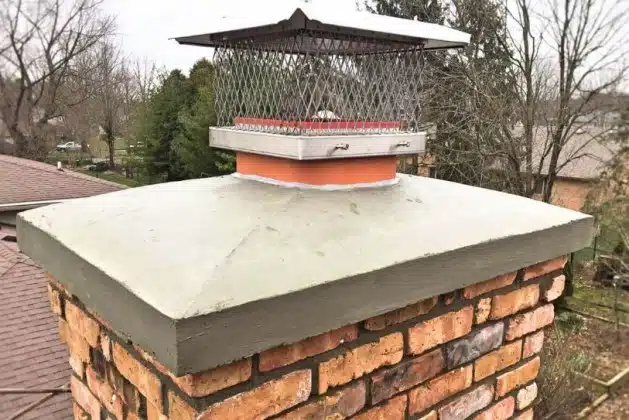
The chimney crown is the concrete or mortar slab that sits atop your chimney, protecting it from water infiltration and other external elements. A properly functioning chimney crown is essential to prevent moisture from seeping into the bricks and mortar, which can cause significant damage over time.

2. Common issues with chimney crowns in Toronto

Chimney crowns are prone to cracking, chipping, and deterioration. These issues can allow water to enter the chimney, leading to further damage and potential safety hazards. In some cases, improper installation or poor-quality materials can also contribute to chimney crown problems.

3. Our approach to chimney crown repair

We take a comprehensive approach to chimney crown repair. Our team will thoroughly inspect your chimney crown to identify any issues and determine the best course of action. We use high-quality, durable materials and industry-leading techniques to repair or replace your chimney crown, ensuring a long-lasting solution that will protect your chimney for years to come.

4. Consequences of neglecting chimney crown repairs

Neglecting chimney crown repairs can have serious consequences for your home and family. Water infiltration can lead to brick and mortar damage, compromising your chimney’s structural integrity. In addition, moisture can create an ideal mold and mildew growth environment, posing potential health risks to your family. By addressing chimney crown issues promptly, you can avoid costly repairs and ensure the safety and efficiency of your home’s heating system.

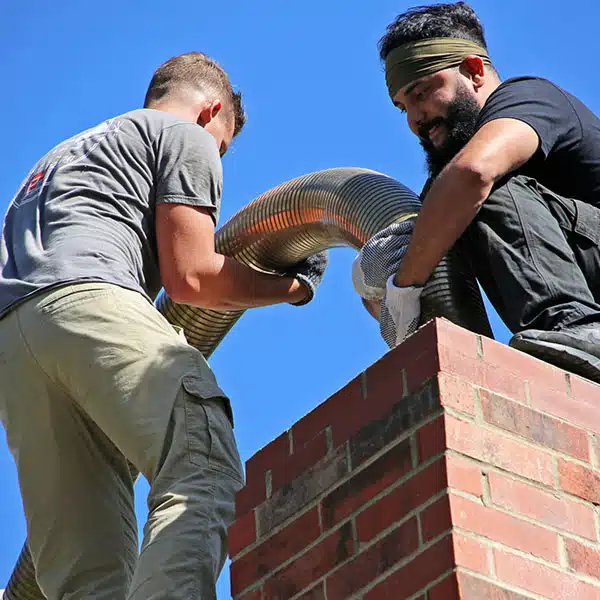
B. Chimney liner repair and replacement
1. Importance of chimney liner and its role

The chimney liner is a crucial component of your chimney system, protecting the masonry from heat and corrosion while ensuring proper venting of combustion byproducts. A damaged or deteriorating chimney liner can lead to decreased efficiency, increased risk of chimney fires, and potential carbon monoxide leaks into your home.

2. Signs of a damaged or deteriorating chimney liner

There are several signs that may indicate a damaged or deteriorating chimney liner, including:

  • Visible cracks or holes in the liner
  • Flaking or crumbling pieces of the liner falling into the fireplace
  • Increased smoke or odours coming from the fireplace
  • Decreased heating efficiency or difficulty starting fires

If you notice any of these signs, it’s essential to contact a professional chimney repair company to assess the situation and recommend the appropriate solution.

3. Our services for liner repair and replacement

We offer comprehensive chimney liner repair and replacement services to ensure the safety and efficiency of your chimney system. Our team will inspect your chimney liner using advanced tools and techniques to determine the extent of the damage and recommend the best course of action. We use high-quality, durable materials and industry-leading installation methods to repair or replace your chimney liner, ensuring a long-lasting solution that will protect your home and family.

4. Benefits of timely chimney liner repair or replacement

Timely chimney liner repair or replacement offers numerous benefits for Toronto homeowners, including:

  • Improved safety and reduced risk of chimney fires
  • Enhanced heating efficiency and lower energy costs
  • Protection against carbon monoxide leaks and other potential health hazards
  • Extended lifespan of your chimney system and prevention of costly repairs

By addressing chimney liner issues promptly, you can enjoy peace of mind knowing that your home and family are protected.

C. Chimney brick repair and tuckpointing
1. Description of chimney brick damage and its causes

Chimney bricks are exposed to a variety of elements that can cause damage over time, including moisture, extreme temperatures, and physical impact. Common types of chimney brick damage include:

  • Cracks and fissures
  • Spalling (flaking or crumbling of the brick surface)
  • Mortar deterioration
  • Loose or missing bricks

A combination of factors, such as age, weather conditions, improper installation, and lack of maintenance, can cause these issues.

2. Tuckpointing process and its benefits

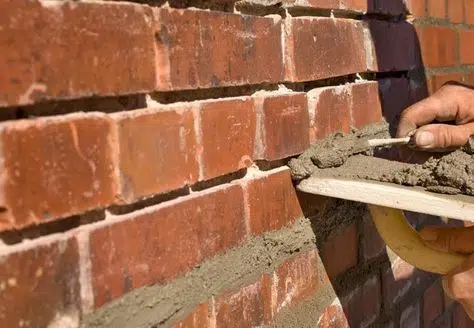
Tuckpointing is a specialized masonry repair technique that involves removing damaged mortar and replacing it with new, colour-matched mortar. This process helps to restore the structural integrity of your chimney, prevent water infiltration, and enhance its overall appearance. Tuckpointing is a cost-effective solution for addressing mortar deterioration and extending the lifespan of your chimney bricks.

3. Our expertise in brick repair and tuckpointing

Our team of masonry experts has extensive experience in chimney brick repair and tuckpointing. We use industry-leading techniques and high-quality materials to ensure long-lasting results that will protect your chimney and enhance its appearance. Our team will carefully assess the extent of the damage and recommend the most appropriate solution for your specific needs and budget.

4. Consequences of neglecting brick repair and tuckpointing

Neglecting chimney brick repair and tuckpointing can have serious consequences for your home and family. As mortar deteriorates and bricks become loose or damaged, your chimney’s structural integrity is compromised, increasing the risk of collapse or other safety hazards. In addition, water infiltration through damaged bricks and mortar can lead to costly interior damage and potential health risks associated with mold and mildew growth.

D. Chimney flashing repair
1. Explanation of chimney flashing and its purpose

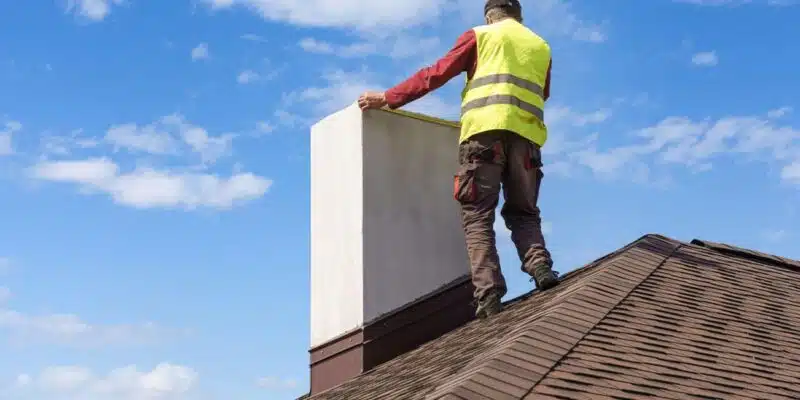
Chimney flashing is a thin metal sheet that is installed around the base of your chimney where it meets the roof. Its primary purpose is to create a waterproof seal, preventing moisture from seeping into the chimney or your home’s interior. Properly installed and maintained flashing is essential to protect your chimney and roof from water damage.

2. Common flashing issues and their consequences

Common chimney flashing issues include:

  • Improper installation or poor-quality materials
  • Corrosion or damage due to age or weather conditions
  • Separation of the flashing from the chimney or roof
  • Cracks or holes in the flashing

These issues can allow water to penetrate the chimney and roof, leading to costly damage, such as:

  • Brick and mortar deterioration
  • Roof leaks and interior water damage
  • Mold and mildew growth
  • Decreased energy efficiency

Our approach to flashing repair and replacement

We understand the critical role that chimney flashing plays in protecting your home from water damage. Our team of experts will thoroughly inspect your chimney flashing to identify any issues and recommend the most appropriate solution. We use high-quality, durable materials and industry-leading installation techniques to ensure a long-lasting, waterproof seal that will protect your chimney and home for years to come.

4. Importance of proper flashing installation and maintenance

Proper chimney flashing installation and maintenance are essential to prevent water damage and ensure the longevity of your chimney and roof. Improper installation or poor-quality materials can lead to premature failure and costly repairs. Regular inspections and timely repairs by a professional chimney repair company can help you avoid these issues and protect your home’s value and safety.

E. Chimney leak repair
1. Causes of chimney leaks in Toronto

Chimney leaks are a common problem for Toronto homeowners, and several factors can contribute to their development, including:

  • Damaged or deteriorated chimney crown
  • Cracked or spalling bricks and mortar
  • Faulty or improperly installed flashing
  • Damaged or missing chimney cap
  • Condensation buildup within the chimney

Toronto’s harsh weather conditions, such as heavy rainfall, snow, and freeze-thaw cycles, can exacerbate these issues and increase the risk of chimney leaks.

2. Importance of addressing chimney leaks promptly

Addressing chimney leaks promptly is crucial to prevent further damage to your home and ensure the safety of your family. Left unchecked, chimney leaks can lead to:

  • Structural damage to your chimney and home
  • Mold and mildew growth, posing potential health risks
  • Decreased energy efficiency and increased heating costs
  • Potential fire hazards due to damaged chimney components

By contacting a professional chimney repair company at the first sign of a leak, you can minimize damage and avoid costly repairs.

3. Our leak detection and repair services

We offer comprehensive chimney leak detection and repair services to help Toronto homeowners address this common problem. Our team of experts uses advanced diagnostic tools and techniques to accurately identify the source of the leak and recommend the most effective solution. We provide a range of repair services, including chimney crown repair, brick and mortar repair, flashing replacement, and chimney cap installation, to ensure a long-lasting, leak-free solution.

4. Risks associated with untreated chimney leaks

Untreated chimney leaks can pose significant risks to your home and family, including:

  • Structural damage and potential chimney collapse
  • Extensive interior water damage and costly repairs
  • Health risks associated with mold and mildew growth
  • Increased risk of chimney fires due to damaged components
  • Decreased home value and curb appeal

By addressing chimney leaks promptly with the help of a professional chimney repair company, you can protect your home, family, and investment.

III. Benefits of Regular Chimney Maintenance and Repair
A. Improved safety for your Toronto home and family

Regular chimney maintenance and repair are essential for ensuring the safety of your Toronto home and family. A well-maintained chimney reduces the risk of:

  • Chimney fires caused by creosote buildup or damaged components
  • Carbon monoxide leaks due to improper venting or structural issues
  • Structural collapse or falling bricks, posing safety hazards
  • Health risks associated with mold and mildew growth

By investing in professional chimney maintenance and repair services, you can enjoy peace of mind knowing that your home and family are protected.

B. Enhanced energy efficiency and reduced heating costs

A properly functioning chimney is crucial for maintaining the energy efficiency of your home’s heating system. Regular maintenance and repair can help:

  • Ensure proper venting and draft, allowing your heating system to operate at peak efficiency
  • Prevent heat loss through damaged or deteriorated chimney components
  • Reduce the amount of fuel needed to heat your home, leading to lower energy costs
  • Extend the lifespan of your heating system by minimizing strain and wear

By partnering with a professional chimney repair company for your maintenance and repair needs, you can enjoy a more efficient and cost-effective home heating solution.

C. Extended chimney lifespan and prevention of costly repairs

Regular chimney maintenance and timely repairs can significantly extend the lifespan of your chimney and prevent costly future repairs. By addressing minor issues before they escalate, you can:

  • Prevent extensive damage to bricks, mortar, and other chimney components
  • Avoid the need for major structural repairs or complete chimney rebuilds
  • Maintain the appearance and value of your home’s exterior
  • Minimize the risk of unexpected and costly emergency repairs

Investing in proactive chimney maintenance and repair is a smart choice for Toronto homeowners looking to protect their homes and save money in the long run.

D. Compliance with Toronto building codes and regulations

Maintaining your chimney in accordance with Toronto building codes and regulations is not only a legal requirement but also essential for ensuring the safety and value of your home. Professional chimney repair companies stay up-to-date with the latest local building codes and regulations, ensuring that all chimney repairs and maintenance services are performed to the highest standards. By working with a knowledgeable team, you can:

  • Ensure your chimney meets all necessary safety and performance requirements
  • Avoid potential fines or legal issues related to non-compliance
  • Protect your home’s value and marketability by maintaining a safe and code-compliant chimney

Trust a professional chimney repair company to help you navigate Toronto’s building codes and regulations, providing expert guidance and services to keep your chimney in top condition.

IV. Chimney Maintenance Services
A. Chimney inspection
1. Importance of regular chimney inspections

Regular chimney inspections are crucial for identifying potential issues early and preventing costly repairs or safety hazards. The National Fire Protection Association (NFPA) recommends annual chimney inspections to ensure proper function and safety. During an inspection, a certified chimney professional will:

  • Assess the overall condition of your chimney, both internally and externally
  • Identify any signs of damage, deterioration, or potential hazards
  • Recommend necessary repairs or maintenance services
  • Provide guidance on safe chimney use and maintenance practices

By scheduling annual chimney inspections with a professional company, you can stay ahead of potential problems and ensure the longevity and safety of your chimney.

2. Levels of chimney inspections and their differences

There are three levels of chimney inspections, each designed to address different needs and situations:

Level 1: A basic visual inspection of readily accessible chimney components suitable for annual maintenance or when no changes have been made to the chimney or heating system.

Level 2: This is a more detailed inspection involving the use of specialized tools and cameras. It is recommended when changes have been made to the chimney or heating system or when a Level 1 inspection reveals potential issues.

Level 3: This is the most comprehensive inspection involving the removal of certain chimney components to access hidden areas. It is necessary when a Level 2 inspection indicates a potential hazard or major issue.

A certified chimney professional will recommend the appropriate inspection level based on your chimney’s condition and history, ensuring a thorough and accurate assessment.

3. Our chimney inspection process

We follow a rigorous chimney inspection process to ensure the most accurate and comprehensive assessment of your chimney’s condition. Our process includes:

  • Visual examination of readily accessible chimney components
  • Use of specialized tools, such as cameras and moisture meters, to assess hidden areas
  • Detailed documentation of findings, including photographs and written reports
  • Clear communication of any issues or concerns, along with recommended solutions
  • Personalized guidance on chimney maintenance and safety practices

Our team of certified chimney professionals has the knowledge and experience to identify potential issues and provide expert recommendations for maintaining the safety and efficiency of your chimney.

4. Advanced tools and technologies used for accurate assessment

Professional chimney repair companies invest in the latest tools and technologies to ensure the most accurate and efficient chimney inspections. Some of the advanced tools they use include:

  • High-resolution cameras for detailed visual inspections of hard-to-reach areas
  • Moisture meters to detect hidden water damage or leaks
  • Combustible gas detectors to identify potential gas leaks or carbon monoxide issues
  • Thermal imaging cameras to pinpoint areas of heat loss or structural concerns

By utilizing these cutting-edge tools, certified chimney professionals can provide a comprehensive assessment of your chimney’s condition and identify potential issues that may not be visible to the naked eye.

B. Chimney cleaning and sweeping
1. Benefits of regular chimney cleaning and sweeping

Regular chimney cleaning and sweeping offer numerous benefits for Toronto homeowners, including:

  • Reduced risk of chimney fires by removing flammable creosote buildup
  • Improved heating efficiency and performance by ensuring proper venting
  • Extended lifespan of chimney components by preventing corrosion and deterioration
  • Enhanced indoor air quality by minimizing soot, debris, and potential allergens
  • Compliance with local fire safety codes and home insurance requirements

By scheduling regular chimney cleaning and sweeping services with a professional company, you can enjoy a safer, more efficient, and longer-lasting chimney.

2. Risks associated with neglecting chimney cleaning

Neglecting regular chimney cleaning and sweeping can lead to various risks and issues, such as:

  • Increased risk of chimney fires due to creosote buildup
  • Decreased heating efficiency and higher energy costs
  • Potential carbon monoxide leaks or poor indoor air quality
  • Premature deterioration of chimney components
  • Costly repairs or replacements due to advanced damage
  • Violation of local fire safety codes or home insurance policies

Don’t put your home and family at risk by neglecting chimney cleaning and sweeping. Trust the professionals to keep your chimney clean, safe, and efficient.

3. Professional chimney cleaning and sweeping services

Professional chimney repair companies offer comprehensive chimney cleaning and sweeping services to keep your Toronto chimney in top condition. Certified chimney sweeps use industry-leading tools and techniques to:

  • Remove creosote, soot, and debris from chimney walls and components
  • Inspect the chimney for any signs of damage or deterioration
  • Verify proper venting and draft for optimal performance
  • Clean and adjust chimney caps, dampers, and other components as needed
  • Provide personalized recommendations for chimney maintenance and safety

These companies follow strict safety protocols and industry best practices to ensure a thorough and efficient cleaning process, leaving your chimney clean, safe, and ready for use.

4. Recommended frequency of cleaning based on usage and Toronto’s conditions

The recommended frequency of chimney cleaning and sweeping depends on various factors, including the type of fuel used, the frequency of use, and the unique conditions in Toronto. As a general guideline:

  • Wood-burning fireplaces or stoves: Clean and sweep at least once a year, or more frequently if used heavily or if creosote buildup exceeds 1/8 inch.
  • Gas fireplaces: Clean and inspect annually to ensure proper function and safety.
  • Oil furnaces: Clean and inspect annually to prevent soot buildup and ensure efficient operation.

Toronto’s harsh winter conditions and the prevalence of wood-burning fireplaces may necessitate more frequent cleaning and sweeping to prevent creosote buildup and ensure optimal performance. A professional chimney repair company can provide personalized recommendations based on your chimney’s unique usage and condition.

C. Chimney waterproofing
1. Explanation of chimney waterproofing and its advantages

Chimney waterproofing is the process of applying a specialized sealant to the exterior of your chimney to prevent water infiltration and moisture-related damage. The advantages of professional chimney waterproofing include:

  • Protection against water damage to chimney components and adjacent structures
  • Prevention of freeze-thaw cycle damage in Toronto’s harsh winter conditions
  • Extended lifespan of bricks, mortar, and other chimney materials
  • Reduced risk of mold, mildew, and other moisture-related issues
  • Improved energy efficiency by preventing heat loss through water-damaged components

Professional chimney repair companies use high-quality, breathable waterproofing sealants that allow moisture to escape while preventing water infiltration, ensuring your chimney’s long-term protection and performance.

2. Unique waterproofing challenges in Toronto

Toronto’s climate presents unique challenges for chimney waterproofing, including:

  • Frequent freeze-thaw cycles during winter months, can cause cracking and spalling of bricks and mortar
  • Heavy rainfall and snow accumulation lead to increased moisture exposure
  • Aging chimney materials in historic homes, which may be more susceptible to water damage
  • Varying soil conditions and foundation settling, can impact chimney stability and water resistance

Professional chimney repair companies have the knowledge and experience to address these unique challenges and provide effective waterproofing solutions tailored to Toronto’s climate and building conditions.

3. Our waterproofing solutions and products

We use industry-leading waterproofing solutions and products to ensure the highest level of protection for your Toronto chimney. Our waterproofing process includes:

  • Thorough cleaning and preparation of the chimney surface
  • Application of a high-quality, breathable waterproofing sealant
  • Use of specialized techniques to ensure complete coverage and penetration
  • Attention to detail around flashing, crown, and other vulnerable areas
  • Final inspection and quality control to verify proper application and performance

We select waterproofing products that are specifically designed for use on masonry chimneys, offering superior water resistance, breathability, and durability in Toronto’s challenging climate conditions.

4. Long-term benefits of professional chimney waterproofing

Investing in professional chimney waterproofing offers numerous long-term benefits for Toronto homeowners, such as:

  • Extended chimney lifespan and reduced need for costly repairs or rebuilds
  • Protection against water-related safety hazards, such as chimney collapse or gas leaks
  • Improved home value and curb appeal by maintaining a well-protected chimney
  • Peace of mind knowing your chimney is resistant to Toronto’s harsh weather conditions
  • Potential savings on energy costs and improved heating efficiency

By choosing a professional chimney repair company for your waterproofing needs, you can enjoy these long-term benefits and ensure the lasting performance and safety of your Toronto chimney.

VI. Preventive Measures for Toronto Homeowners
A. Regular visual inspections of the chimney exterior

As a Toronto homeowner, one of the most important preventive measures you can take is to perform regular visual inspections of your chimney’s exterior. Look for signs of damage, such as cracks in the bricks or mortar, missing or loose components, or evidence of water infiltration. If you notice any issues, contact a professional chimney repair company for an assessment and repair recommendations.

B. Proper use and maintenance of the fireplace

Proper use and maintenance of your fireplace can go a long way in preventing chimney issues and ensuring the safety and efficiency of your home. Some key tips include:

  • Using only properly seasoned wood in wood-burning fireplaces
  • Having gas fireplaces inspected and serviced annually
  • Avoiding the use of flammable liquids or excessive amounts of paper to start fires
  • Ensuring proper ventilation and draft by opening the damper before use
  • Disposing of ashes safely and regularly

By following these guidelines and scheduling regular professional maintenance, you can minimize the risk of chimney issues and enjoy a safe, efficient fireplace.

C. Timely reporting of any observed issues or changes

If you notice any changes or issues with your chimney, it’s essential to report them to a professional as soon as possible. Some signs to watch for include:

  • Visible damage to the chimney exterior or interior components
  • Unusual odors, sounds, or performance issues when using the fireplace
  • Evidence of water infiltration or moisture-related damage
  • Excessive creosote buildup or soot accumulation

By reporting these issues to a professional chimney repair company in a timely manner, you can prevent minor problems from escalating into major repairs and ensure the ongoing safety and performance of your chimney.

D. Scheduling annual professional inspections and cleanings

One of the most effective preventive measures for Toronto homeowners is to schedule annual professional chimney inspections and cleanings. A certified chimney professional will:

  • Thoroughly assess the condition of your chimney and fireplace components
  • Clean and remove creosote, soot, and debris to prevent fire hazards
  • Identify any potential issues or areas of concern
  • Provide personalized recommendations for repairs, maintenance, or upgrades
  • Ensure your chimney is operating safely and efficiently

By making annual chimney inspections and cleanings a priority, you can protect your Toronto home, family, and investment for years to come.

VII. Contact Information and Next Steps
A. Strong, Toronto-specific call-to-action (CTA) encouraging visitors to contact us for their chimney repair needs

Don’t let chimney issues put your Toronto home and family at risk. Contact us today to schedule your professional chimney inspection and repair services. Our certified chimney experts are ready to help you protect your investment, ensure your safety, and enjoy a well-maintained, efficient chimney for years to come.

Frequently Asked Questions

  1. Why is chimney maintenance essential in Toronto?
    • Chimney maintenance is crucial in Toronto due to the harsh winter conditions, including freeze-thaw cycles that can damage chimney structures. Regular maintenance ensures the safety of your home by preventing chimney fires and structural damage caused by deteriorating bricks and mortar.
  2. What are the common chimney issues in Toronto homes?
    • Many Toronto homes have brick and masonry chimneys that are susceptible to weather-related damage. Common issues include cracks from freeze-thaw cycles, spalling bricks, mortar deterioration, and creosote buildup, which can all lead to serious safety hazards.
  3. How often should I have my chimney inspected and cleaned in Toronto?
    • Due to the accumulation of creosote and the rapid deterioration caused by Toronto’s climate, it’s recommended to have your chimney inspected and cleaned at least once a year, ideally before the heating season begins.
  4. What should I do if I notice a crack in my chimney?
    • If you notice a crack or any signs of wear on your chimney, it’s essential to contact a certified chimney repair professional immediately. Early repair can prevent further damage and potentially hazardous conditions, ensuring your chimney’s safety and functionality.
  5. Can chimney issues affect my home’s heating efficiency?
    • Yes, chimney issues can significantly affect your home’s heating efficiency. A blocked or damaged chimney can restrict airflow and exhaust, leading to inefficient heating and increased heating costs. Regular maintenance ensures optimal performance of your heating systems.
  6. What are the risks of neglecting chimney maintenance in Toronto?
    • Neglecting chimney maintenance can lead to several risks, including potential chimney fires from creosote buildup, carbon monoxide leakage due to improper exhaust, and severe structural damage that can be costly to repair. Maintaining your chimney is essential for safety and efficiency.
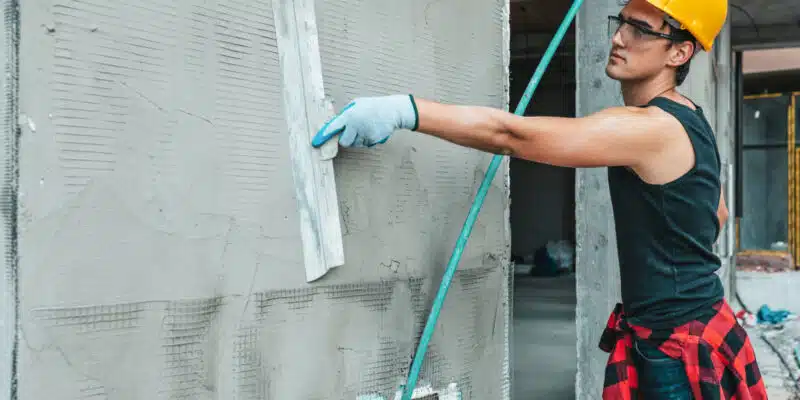
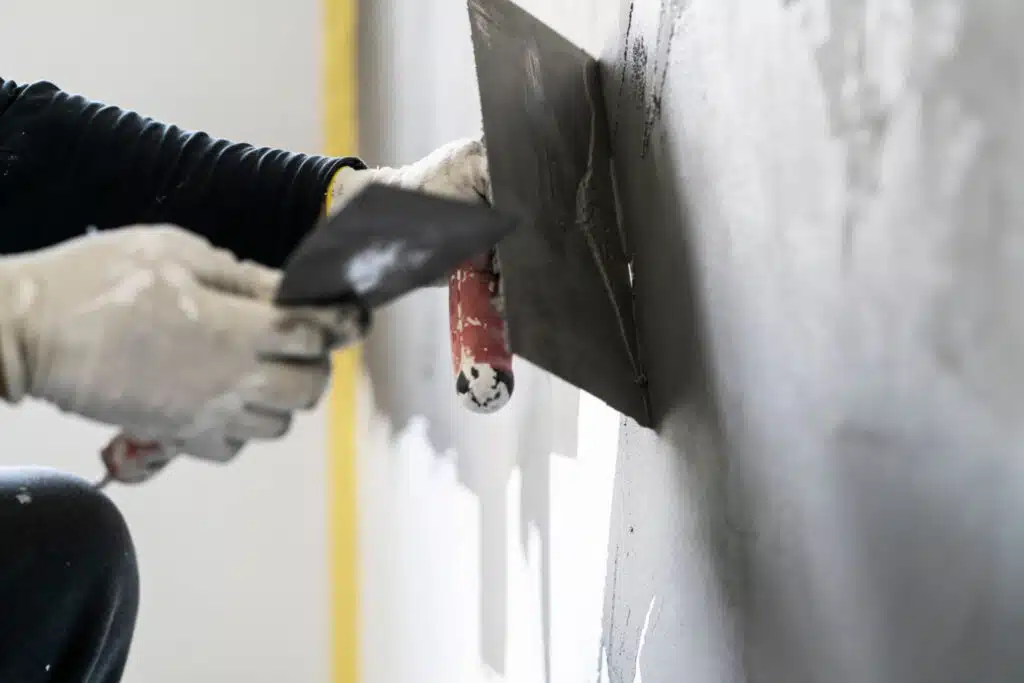
This image shows a construction worker wearing a yellow hard hat and blue gloves, working on a wall. The worker is using a tool to apply or smooth a material, likely plaster or drywall, onto the wall. The wall appears to be an unfinished interior space, with exposed framing and wiring visible. The worker is wearing a checkered shirt, suggesting this is an active construction or renovation project.

How to Tuckpoint Mortar Joints in 7 Easy Steps

Tuckpointing refers to the repair or replacement of mortar joints in brick. Tuckpointing is the act of packing mortar into damaged joints using a tool called a -tuck pointer. The structural integrity of brick walls is dependent on mortar joints. Mortar joints are essential for brick walls’ structural integrity.

They keep water out, hold the bricks together and bear the wall’s compressive weight. The mortar is the weakest link in the brick wall and is intended to deteriorate quicker than the brick. You may be able to repair mortar and not have to replace damaged brick later.

What is Tuckpointing?

Tuckpointing refers to the repair or reinforcement of mortar joints in brickwork. Mortar joints are spaces between bricks that have been filled with cement, sand, and water. Mortar joints can crack or become crumbly over time due to weathering and structural movement.

Tuckpointing strengthens mortar joints and improves brickwork’s appearance. A clean, neat joint will be free from debris. It will be the same color and style as the rest brickwork.

Why is Tuckpointing Important?

Tuckpointing has both aesthetic and functional benefits. Tuckpointing can strengthen mortar joints and prevent water damage. Tuckpointing can also improve brickwork’s aesthetics.

When Should Tuckpointing Be Done?

When mortar joints have cracked or become crumbly, tuckpointing should be performed. To ensure strong brick mortar joints and no defects, it is a good idea for new construction to have tuckpointing.

In 7 Easy Steps, How to Tuckpoint Mortar Joints

1. Inspection of the joint: Look closely at the joint that needs to be repaired. Check for cracks, gaps, or any other damage.

2. You can remove loose material by using a chisel or hammer. You must be careful not to cause damage to the bricks.

3. Clean the joint with a stiff brush.

4. Mix the tuckpointing mortar. Tuckpointing mortar is made up of cement, water, and sand. Mix the mortar according to the manufacturer’s instructions.

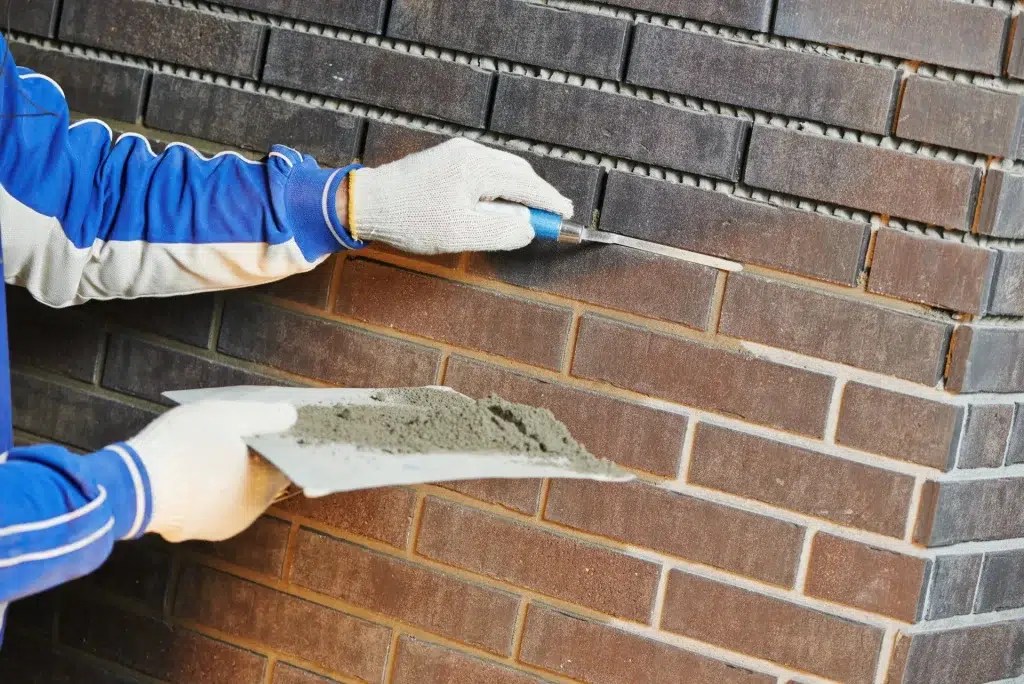
5. Fill the joint with mortar: Use a trowel or putty knife to fill the joints. Make sure you pack the mortar into the joint tightly.

6. Smoothen the joint with a damp sponge

7. Let the mortar dry: The mortar should dry for at most 24 hours before it is exposed to weather or wears.

Tuckpointing can be done in just a few hours. These seven steps will help you repair mortar joints or strengthen them.

How to Identify Mortar Joints that Need Tuckpointing

Mortar joints are spaces between bricks on a wall. These joints can crack or become loose over time. This allows water to seep into the mortar and cause damage. You may notice the following signs. Your mortar joints might need to be tuckpointed.

Mortar crumbling or flaking away

– The brick’s face is noticeably receded by mortar

– There are gaps between brick and mortar.

– Mortar can be stained or discolored

A professional can help you determine if your mortar joints should be tuckpointed. A professional will assess the mortar joints and recommend the best course.

Tuckpointing

How to Tuckpoint Mortar Joints

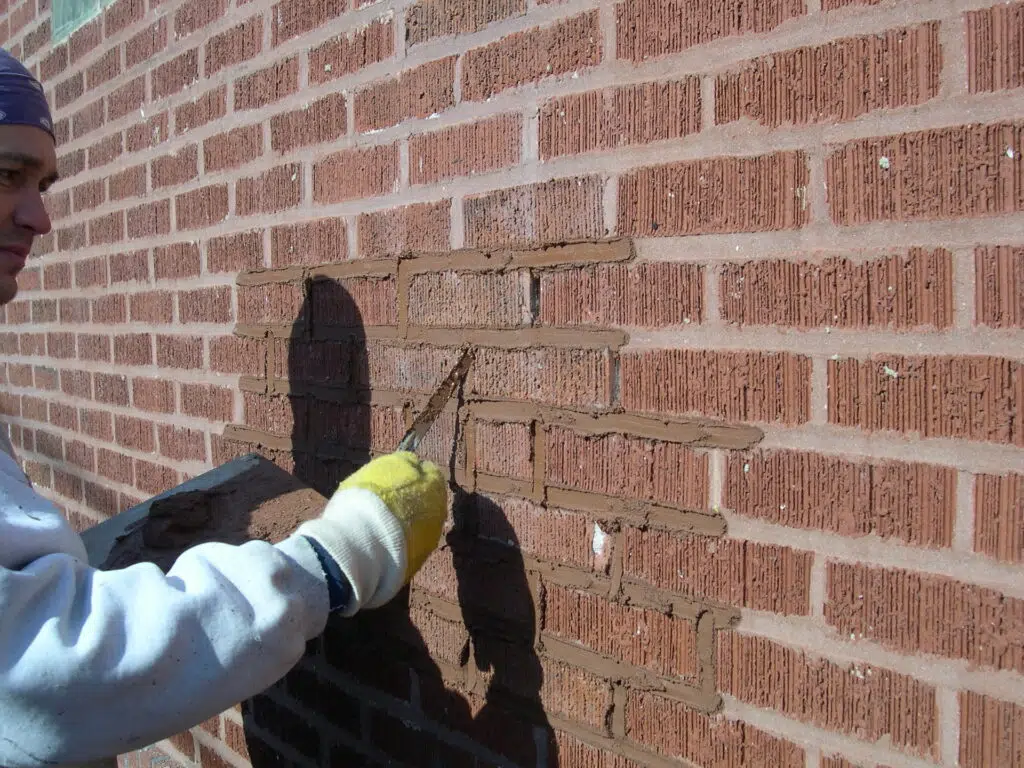
Tuckpointing refers to the repair of mortar joints. Tuckpointing involves removing old mortar from joints and replacing it with new mortar. Although it is quite simple, tuckpointing can be time-consuming. These seven steps will help you tuckpoint mortar joints.

1. To remove old mortar from joints, use a chisel or hammer. To protect your eyes against flying debris, make sure you wear safety glasses.

2. Make sure to vacuum up all dust and debris.

3. Follow the manufacturer’s instructions to mix the mortar.

4. Place the mortar in a small bag and trim the corner.

5. The disposable bag can be used to pipe mortar into joints.

6. To smoothen the mortar, use a pointing tool.

7. Let the mortar dry for 24 hours before applying any stress.

It is an easy way to prolong the life of bricks and maintain your home’s beauty. You can make sure your bricks last for many years by investing a little bit of time and effort.

How to Prepare the Surface for Tuckpointing

1. Use a wire brush to remove all mortar and lose joints.

2. Clean out all debris from joints.

3. To prevent mortar from drying too quickly, wet the surface.

4. If necessary, bond the surface with a bonding agent.

5. Mix the tuckpointing Mortar

6. Tuckpointing Mortar

7. Finalization

How to Mix and Apply Mortar for Tuckpointing

1. Mortar is the glue between bricks, concrete blocks, and stones. It’s made from Portland cement, lime, and sand in different proportions.

2. To tuckpoint, the first step is to identify what type of mortar was used. This can be done simply by looking at the mortar’s color and hardness.

3. After you have identified the mortar type, you can mix up a batch that matches it.

4. Mix the mortar by first adding the dry ingredients (cement lime, sand, and salt) to a wheelbarrow.

5. Slowly add water and stir it into the mixture until it becomes peanut butter-like inconsistency.

6. Next, apply mortar to joints. You can use a trowel, or another tool to do this.

7. After the mortar has been set, smoothen it with a brush and take out any excess.

8. Before you can continue, allow the mortar to cure at least 24 hours.

9. Optional sealer can be applied to the joints. This will protect the joints from weathering and other damage.

Chimney Repair-Tuckpointing

How to Finish the Tuckpointing Job

1. Use a wire brush to remove any Mortar that remains in the joints.

2. Mix a new batch of Mortar and spray it with water to wet the Mortar joints.

3. Use a putty knife to pack Mortar in the joints and then smooth it out. Don’t overfill the joints.

4. Before painting or staining the Mortar, let it dry for at most 24 hours.

5. To remove excess Mortar from bricks, use a wire brush.

6. If you wish, apply caulking to Mortar joints and let it dry completely before painting or staining.

7. Enjoy your new truck

Tips to Prevent Mortar Joint Failure in the Future

Mortar joints are an important part of any masonry structure. However, they are often neglected in terms of repair and maintenance. There are many reasons mortar joints may fail, but the most common reason is poor installation or poor mortar mix. Here are some tips to help prevent mortar joint failures in the future.

1. High-quality mortar mixes are essential to prevent mortar joint failure. A lower-quality mortar mix or one that is less durable will result in a weaker joint and more likely to crack and fall apart.

2. Make sure you install control joints correctly – Control joints are placed in masonry structures to control cracking and allow for cracks to form. If they aren’t installed correctly, they can cause more damage than good. Control joints must be installed correctly and at the right depth.

3. Avoid overworking the mortar. Once the mortar has been placed, it is important not to overwork it. Overworking mortar can make it less resilient and more likely to fail. To avoid damage to mortar joints, keep the float at a low angle when troweling Mortar.

4. Proper curing techniques are important – Once the Mortar is installed, it’s essential to properly cure it in order to preserve its strength and durability. For the first few days following the installation, you can mist the Mortar several times per day with water. This will allow the Mortar to cure evenly and slowly, and prevent cracking or other damage.

5. Regularly inspect Mortar joints – Mortar joints must be inspected for signs of damage and deterioration on a regular basis. To prevent further damage, any problems should be addressed immediately.

These tips will help you prevent mortar joint failures in the future. They will also keep your masonry structure looking great for many years.

Frequently Asked Questions

  1. What is Tuckpointing, and Why Does Your Home Need It?
    • Tuckpointing is the art of filling in or repairing the mortar joints between bricks, vital for your home’s structural integrity. This preventive maintenance task is critical as it seals out water, binds bricks firmly, and bears the wall’s weight, prolonging your home’s lifespan and curbing the need for extensive brick replacement later on.
  2. How Can You Tell if Your Mortar Joints Require Tuckpointing?
    • If you observe mortar crumbling away, bricks recessing behind the mortar line, visible gaps, or discoloration in the mortar, it’s time for tuckpointing. Addressing these early signs can avert more severe damage and expensive repairs down the line.
  3. When is the Best Time to Undertake Tuckpointing?
    • Tuckpointing should be on your to-do list when you spot cracks or when the mortar begins to crumble. Not only does timely tuckpointing reinforce structural stability, but it also ensures your brickwork remains unblemished and robust from the start in new constructions.
  4. Is Tuckpointing a DIY Project, or Should You Call the Pros?
    • While tuckpointing may seem straightforward, it’s a nuanced task best left to professionals. Expert masons have the tools and techniques to perform the job correctly, ensuring a finish that matches your home’s original brickwork and mortar, both in strength and style.
  5. What Steps are Involved in Tuckpointing Your Mortar Joints?
    • Professional tuckpointing includes joint inspection, removing loose mortar carefully, thorough cleaning, creating the right mortar mix, filling and packing joints with precision, smoothing, and allowing the mortar to set and cure properly. This meticulous process ensures lasting results and a seamless look.
  6. How Do You Maintain Mortar Joints After Tuckpointing?
    • Prevent future mortar joint issues with quality mixes, correct control joint installation, avoiding overworking mortar, using proper curing techniques, and regular inspections for early detection of problems. These practices ensure your masonry remains in peak condition for years to come.

Retaining Wall Maintenance: Tips for Keeping Your Investment Looking New

Imagine watching your hard-earned investment crumble before your eyes – that’s what can happen when retaining walls are neglected. Just like your teeth need regular check-ups and cleaning, so does your retaining wall! Maintaining your retaining wall is a crucial task that every responsible homeowner should prioritize. Not only does it enhance your property’s curb appeal, but it also ensures the long-lasting durability of the wall.

But where do you start? How do you effectively keep your retaining wall in pristine condition? Fear not – we’ve got you covered. In this comprehensive guide, we’re going to share essential tips on retaining wall maintenance: from regular cleaning to conducting inspections for cracks and bulges to ensuring proper drainage systems are in place.

We’ll also look at some unique approaches, like planting vegetation around the base and adding decorative features like lighting, which can significantly contribute to your wall’s integrity.

Remember, neglecting your retaining wall can lead to costly and painstaking repairs in the long run. So let’s dive in and discover how to protect your investment effectively!

Importance of Retaining Wall Maintenance

Regular maintenance is key to keep your retaining wall looking like new. Neglecting upkeep leads to costly repairs or replacement. Attention should be given to structural stability, erosion control and aesthetic appeal. This will prolong the wall’s life.

Inspections biannually check for signs of cracking, leaning or bulging. This early detection helps avoid damage to property and surrounding areas. Applying sealant every other year protects the wall from weather wear-down.

Don’t forget drainage maintenance! Cleaning gutters and downspouts is crucial to prevent water damage and erosion. This ensures proper drainage at the foundation and increases its longevity.

Manufacturers’ recommendation for maintenance activities extends the life of retaining walls. With careful attention, these structures can last up to 50 years with minimal repairs. A small investment in ongoing care saves time and money on future repairs.

Maintaining your retaining wall may seem hard, but with these tips, your investment will stand for years!

Basic Maintenance Tips

To help maintain your retaining wall investment, basic maintenance tips with cleaning the retaining wall, inspecting for any damage, and fixing minor damage are essential. Regular cleaning can prevent buildup of debris, while inspecting for any damage can detect potential issues early on. For minor damage, timely fixes can prevent small issues from turning into costly repairs.

Cleaning the Retaining Wall

In order to keep your wall’s structural integrity, it is essential to keep it clean. Removing dirt and debris will prevent weather or other damage. Here is a four-step guide on how to clean the retaining wall:

  1. Get rid of any loose dirt or leaves from the surface.
  2. Use a pressure washer, adjusted for the material of the wall, to wash away dirt and stains.
  3. Mix water and detergent in a bucket. Scrub stubborn stains with a stiff-bristled brush.
  4. Rinse with clean water until all soap residue is gone. Let the wall dry before more maintenance.

Avoid harsh chemicals, opt for eco-friendly cleaners instead. If you find any cracks while cleaning, repair them immediately. Water can seep in and cause major issues. After cleaning, apply a sealant coat to keep the walls looking nice and protect them from further damage. With regular cleaning, you can keep your walls attractive and sound for years.

Inspecting for any Damage

Regular inspections of your assets keep you informed and help identify possible damages before they become expensive repairs. To guarantee your assets are in the best condition, here’s what to do:

  1. Begin with a thorough visual assessment of the asset. Look out for small scratches, dents, or rusting – they could be signs of damage.
  2. Check for any loose parts or bolts.
  3. See if there are any leaks in fluid lines, materials, or fuel tanks.
  4. Pay attention to electrical wiring and search for frayed or damaged lines.
  5. Lastly, check safety devices like lights, switches, and warning alarms.

Be sure to follow these steps carefully during routine inspections. Each asset is unique, though, so there may be specific areas that require more attention. Don’t let a minor problem turn into a huge one by ignoring the warning signs.

Conduct regular checks alongside preventative maintenance protocols to make sure you don’t miss anything major! After all, fixing a minor damage in life isn’t as easy as fixing a scratch on your car.

Fixing Minor Damage

Minor destruction can happen to anything, anytime. It’s critical to address it quickly. Fix minor damage with a professional approach to prevent it from getting worse. Here are some key steps for fixing minor damage:

  1. Find the Damage: Identify the damage and determine its severity.
  2. Clean the area: Clean and sanitise the damaged area with the right cleaning equipment.
  3. Check the severity: Analyse the damage and decide if it requires professional help or not.
  4. Start Repairs: If it’s moderate or minor damage, then start precautionary measures like applying adhesives/sealants or patching the defective zone.

Avoid DIY fixes for major damage that needs immediate professional help. Ignoring this crucial procedure can result in long-term repercussions for your health.

AAA research shows that US drivers spend $750 annually on car repairs and upkeep. Go advanced and show off your mechanical skills!

Advanced Maintenance Tips

To keep your retaining wall in excellent condition for years to come, follow the advanced maintenance tips provided in this section. Reinforcing the wall and waterproofing the wall are two crucial sub-sections that we will shortly explore to help you understand how to protect your valuable investment.

Reinforcing the Wall

  1. Inspect the wall for damages, cracks, and holes that need attention.
  2. Choose materials like brick, concrete, gypsum board, insulation foam, or other reinforcements based on the project’s requirements.
  3. Clean and clear the work area, then layer the wall until desired strength is achieved.
  4. Give the work a finishing touch with paint or plaster.
  5. Conduct routine maintenance checks after reinforcing to catch potential issues.
  6. For longevity, use only high-quality reinforced materials approved by professionals.
  7. Don’t wait any longer – reinforce your walls! Make them waterproof if you don’t want your house to become a waterpark.

Waterproofing the Wall

Waterproofing your wall is key for its longevity and to prevent moisture damage. Here’s how you can do it:

  1. Inspect for Problem Areas: Check for cracks, gaps, and damp patches.
  2. Prepare the Surface: Clean and remove any paint, dirt or debris.
  3. Apply Waterproof Coating: Use a material that protects against water damage. Brush on two to three coats.

Avoid ordinary paint or incompatible materials. Invest in high-quality waterproofing materials, even if it costs more – prevention is better than cure!

Plus, save yourself the time and trouble of building a retaining wall – leave it to the professionals and use your time for more important pursuits – like perfecting your dark humour!

Professional Retaining Wall Maintenance Services

As a homeowner, you want to keep your retaining wall looking nice. Professional masonry services can help. They can identify drainage issues and damage to the structure. Plus, they can clean and seal the wall.

Inspections are also available. By doing scheduled inspections, you can find potential problems before they get too bad.

Pro Tip: Hire a pro to maintain your retaining wall at least once a year. It’ll save you time and money in the long run. Like sanity, proper maintenance of your wall is key!

Dos and Don’ts of Retaining Wall Maintenance

Retaining Wall Maintenance: Best Practices

Maintaining walls can be overwhelming. But it’s essential to keep your investment looking new. Here are the best practices for wall maintenance.

Dos:

  1. Inspect the wall regularly and look for any signs of damage.
  2. Clear out debris from behind the wall.
  3. Use a power washer with mild detergent to clean dirt buildup.
  4. Repair any cracks or gaps ASAP.
  5. Apply a sealant to protect from water damage and UV rays.
  6. Hire a professional mason for larger repairs.

Don’ts:

  • Use harsh chemicals or pressure washers with high setting.
  • Use sharp tools or equipment that could puncture holes.
  • Paint the retaining wall.

It’s important to know the type of material your wall is made of. Different materials have different maintenance needs. For example, timber walls need to be treated annually. Concrete walls require more frequent inspections for cracks.

My client had a collapsed wall due to neglected inspections. He had attempted DIY repairs without consulting professionals, which led to permanent damages. Large repairs should always be done with an expert opinion.

Retaining wall maintenance can be easy with these tips. Protect your investment!

Conclusion

Retaining Wall Care: Keep it Simple!

Make sure your retaining wall has proper drainage. Don’t put heavy items on or near it. Fix any cracks or damage quickly.

Do these things to protect your investment.

Pro Tip: Get a professional mason to inspect and repair your wall. That way, it’ll look and work great!

Frequently Asked Questions

  1. How often should I maintain my retaining wall?
    • It is recommended to inspect your retaining wall annually. Minor maintenance can be done every two years, while major repairs should be done every five years.
  2. How do I clean my retaining wall?
    • Use a pressure washer on a low setting to remove dirt and grime from the surface. For tough stains, mix water and bleach and apply it to the surface with a soft-bristled brush.
  3. What should I do if my retaining wall is leaning?
    • Leaning retaining walls can be hazardous. It is best to contact a professional masonry contractor to assess the situation and provide the appropriate repairs.
  4. Can I paint my retaining wall?
    • Yes, you can paint your retaining wall. However, it is important to use paint that is specifically designed for masonry surfaces. Be sure to clean the surface thoroughly before painting.
  5. How do I prevent water damage to my retaining wall?
    • Proper drainage is key to preventing water damage. Ensure that your retaining wall has proper drainage systems installed, and check them regularly.
  6. How do I know when it is time to replace my retaining wall?
    • If your retaining wall has extensive damage, is severely leaning, or is over 20 years old, it may be time to consider replacement. It is important to contact a professional masonry contractor to assess the situation.

Boost Your Home’s Value and Aesthetics with a Brick Porch

Introduction

Want to add value and durability to your home? A brick porch is the answer! Low maintenance and great weather resistance, it can last for decades. Plus, it gives your property an elegant, classic look. And, unlike wood or concrete, brick won’t rot, warp or corrode.

Choose from different patterns and colors to match your home’s style. From herringbone and basket weave to earthy tones and pops of color, there’s something for everyone. Add pergolas or awnings for a bit of shade and comfort.

Finally, hire professional masonry contractors. They’ll ensure precise installation and help you achieve the desired finish- instantly boosting your home’s curb appeal!

Why a Brick Porch is Great for Curb Appeal

Brick Porch: Boost Your Home’s Curb Appeal

A brick porch is an excellent way to enhance the curb appeal of your home. It not only adds charm and character to the exterior of your home, but it also serves as an inviting entryway. Brick porches are durable and require minimal maintenance, making them a perfect choice for homeowners who want an appealing and long-lasting entrance to their home.

A brick porch provides a classic and timeless look that can blend seamlessly with any architectural style. It also offers a range of design options, from traditional to modern, making it easier to customize your porch to your liking. The various brick patterns and colors available allow you to select one that complements the overall look of your home.

Aside from its aesthetic appeal, a brick porch is also an investment in the value of your home. It adds to the visual appeal of your property, attracting potential buyers. Moreover, a well-built brick porch can increase the overall value of your property if you ever plan to sell your house.

Incorporating a brick porch into your home’s exterior is a smart decision that can increase the value of your property while improving its appearance. Don’t miss out on this opportunity to enhance your home’s curb appeal!

Who needs Botox when you can give your home a facelift with a beautiful brick porch?

A beautiful brick porch.

Enhances Home Appearance

A brick porch has beauty beyond the surface. It adds depth and dimension to a home’s exterior, plus enhances its style. Crafting a porch with brick gives warmth, texture, and visual appeal plus adds value to the property.

Brick is permanent and requires little maintenance. It gets more charming with age plus offers cost savings.

A brick porch also provides safety and traction in bad weather. It supports heavy outdoor furniture and potted plants. Design elements like columns, railings, steps, and archways give personality and functionality. Mix traditional and modern touches for a stunning area that fits your tastes.

Investing in a brick porch is an excellent way to get long-term curb appeal. With charm, practicality, and detailing options, it’s no wonder they remain popular with homeowners. Get it now and outlast your ex’s grudges!

Durable and Long-Lasting

Brick porches are known for being dependable and long-lasting. They require minimal upkeep and can withstand tough weather, high foot traffic, and wear and tear. Plus, they last a long time!

Plus, there are tons of styles and designs that fit any home. Classic or modern, brick porches add charm and an inviting atmosphere to your property.

Moreover, brick porches have unique features. Fire-resistant and offering better insulation than other materials, they require less upkeep than wood or concrete porches. This makes them incredibly cost-effective.

In conclusion, a brick porch is a great investment; it looks great and is easy to maintain. Consider adding one today and enjoy the benefits!

Easy to Maintain

Maintaining a brick porch is so easy! It’s durable and sturdy, with no need to worry about rust, moisture or insects. A simple soap and water clean is enough to keep it looking great. Plus, its smooth surface means no yearly sealing, staining or painting is needed – saving time and money.

Uniquely, the brick porch won’t crack or chip. Its interlocking design and rough texture offer a safer option than other materials. And, a study by The National Association of Home Builders found that 90% of homebuyers prefer homes with brick detailing.

Investing in a brick porch gives great curb appeal, and lower maintenance requirements for years to come. Plus, it’s like a blank canvas – awaiting your personal touch. Just imagine a giant flamingo statue in your front yard!

A homeowner cleaning his brick porch.

Versatile in Design

Porch Bricks: The Chameleon of Design.

A brick porch is an impressive design option for any home’s exterior. It blends with different architectural designs and can be tailored to match any homeowner’s tastes.

For example:

Column 1Column 2Column 3
Architectural StyleBrick TypeColor Options
Colonial RevivalStandard Modular BrickTraditional Red, Black and Brown
Mediterranean RevivalTumbled Brick PaversRustic Earth Tones, Terracotta
Craftsman StyleExtruded Brick Clay TilesModern Gray, Creamy Neutrals or Multi-Color Blend

Bricks can also be laid in various ways. Horizontally, vertically or even in intricate patterns!

Plus, they’re incredibly durable and timeless, adding value to your home. Low maintenance costs compared to wood decks, concrete patios and vinyl railings make them even more appealing.

A personal story was once shared about a family’s love for their brick porch. Grandma used to tend to her flowers every morning, before relaxing in her rocking chair, appreciating her lawn’s view with a peaceful smile. This is why Porch Bricks have stood the test of time as a preferred building material.

Adding a brick porch to your home not only increases curb appeal but also provides the perfect spot for judging your neighbours’ lawn ornaments.

Benefits of Adding a Brick Porch to Your Home

A Brick Porch Adds Value to Your Home

A brick porch is an excellent addition to your home, as it enhances the curb appeal of the property, augments outdoor living space, and provides a welcoming entryway. It also creates a defined, stylish transition space between indoors and outdoors.

Here are the four benefits of adding a brick porch to your home:

  • It adds value to your home. Brick porch installation is an investment that can pay off in the long run, as it boosts your home’s resale value.
  • It enhances curb appeal. A brick porch creates a stunning visual impact, giving your home a polished look that stands out among the neighborhood homes.
  • It serves as an outdoor living space. A brick porch is a versatile outdoor space that can be used for relaxing, entertaining, or dining.
  • It provides a welcoming entryway. A brick porch adds a warm and inviting touch to your home, welcoming guests and family alike into your abode.

It is important to note that brick porches require minimal maintenance and are incredibly durable. The masonry brick material is easy to clean and is resistant to wear and tear, making it a long-lasting solution.

Add a Brick Porch to Your Home Today

Do not miss out on the benefits of a brick porch for your home. It is an investment worth considering to improve your property value, enhance curb appeal, increase living space, and add a welcoming entryway. Consult with a masonry expert today to learn more about the right brick porch design and installation plan for your home.

Brick porches add more value to your home than your ex’s collection of rare vinyls.

Increases Property Value

Adding a brick porch to your home can be a great way to boost its value. It gives your house an inviting entrance, making it look more attractive and adding to its curb appeal. Plus, it’s low-maintenance and durable, so you don’t need to worry about expensive repairs down the line.

John and Alice proved this when they added a porch to their home before putting it on the market. They received multiple offers almost instantly and were able to sell their home quickly and at a higher price. Who knows? Maybe you could do the same! And hey – building the porch might be a great workout too!

Provides a Functional Space for Outdoor Activities

Transform your outdoor space with a brick porch! It’s perfect for entertaining, sipping tea, or just reading.

Brick is durable and requires minimal care. Plus, its solid structure can handle heavy furniture.

Customize with steps and railings for a stylish look that boosts your property value. Build it and watch them come!

Entices Potential Buyers

A brick porch can make your home way more attractive to potential buyers! It creates a great first impression and adds to the curb appeal. Plus, the design options are endless – from classic to modern.

Your porch gives you extra space. You can use it as a sitting area or to store items like shoes and umbrellas. It also protects you from bad weather and increases security too.

Plus, a brick porch is durable and requires little maintenance. Adding extra features like lighting and decorative elements adds even more charm to your property.

Why DIY when you can hire a pro and have time to enjoy a cold one on your new porch?

Hiring a Professional Masonry Contractor

Professional Masonry Contractors for a Successful Brick Porch Installation

Brick porches are a great addition to your house aesthetic. However, to ensure the best results, you need to hire a professional masonry contractor. A reputable contractor will provide consultation, design, and installation services.

During your consultation, the contractor will inspect your premises, discuss your ideas, and provide an estimate of the project’s cost. Afterward, they will provide design ideas that ensure your brick porch meets your preferences and serves your purpose.

To ensure the installation process is seamless, the contractor will also offer a timeline for the project, ensuring you know when to expect the project’s completion. Additionally, reputable contractors have the right equipment to complete the task safely and within the necessary regulations.

To avoid losses and shoddy workmanship, ensure that the contractor is licensed, insured, and experienced. Do not compromise quality for cost. Furthermore, make inquiries to ensure the contractor has a track record of excellence in their projects. Choose prudently, and you will have a beautiful brick porch that will leave everyone envious.

The Importance of Hiring a Professional Masonry Contractor

George Washington University was expanding, and they needed a skilled contractor to replicate their historic buildings’ stonework facades. A company of inexperienced workers got the job, and the product was disastrous. They were unable to recreate the historic design, and the final result was an out-of-country replica. It was a total fiasco that ended up costing the University financially, and ruining their expansion plans.

This emphasizes the essence of hiring a professional masonry contractor for your brick porch’s successful installation. Don’t let your porch become a DIY disaster zone – hire a pro and let them lay the bricks, while you lay back and admire the curb appeal.

Find a Reputable Contractor

Finding a Dependable Masonry Contractor

To get quality masonry work, you need a reliable contractor. Research their expertise, experience, and testimonials. Make sure they’re licensed and insured with competitive rates.

Get the Right Contractor

After figuring out your project needs, pick a mason who specializes in the job. See how they communicate and get detailed quotes to compare prices.

More Tips on Choosing a Qualified Contractor

  • Get references from people you know and check legal compliance using regulatory platforms.
  • Look for an experienced contractor with good customer service.

Pro Tip:

Interview them to test their problem-solving skills, material knowledge, and technical proficiency before hiring them. Ask for proof of their past successes before giving them the job.

Ask for References and Past Work

It’s key to ask a masonry contractor for proof of their past work and references. Here are 6 important points to consider when requesting references:

  • Get a portfolio of their most recent jobs.
  • Ask for permission before speaking to their references.
  • Inquire about past projects similar to yours.
  • Request references from professional organizations.
  • Find out if any local clients would be willing to share their experiences.
  • Try not to use subcontractors as it could lead to low-quality work.

You can also search online for reviews. Look at forums, message boards, social media, and review sites like Yelp and Google Reviews. For example, one family was looking for a mason. They asked for 5 references, but only got 4. After checking with the contractor’s impartial representatives, none of the references had great things to say. So, the family decided not to hire them.

It’s best to hire a qualified and insured masonry contractor. DIY disasters might make good YouTube videos, but not good repairs!

Check for License and Insurance

Hunting down a qualified masonry contractor necessitates a lot of digging to guarantee first-rate results. As well as glancing through customer reviews, it’s essential to ensure the contractor’s license and insurance are still valid. Here are four key points to consider:

  • Check with the State Licensing Board: To guarantee credibility, make sure their license is current.
  • Insurance is mandatory: To protect all parties, verify if they possess liability insurance.
  • Worker’s Compensation Insurance: This cover safeguards contractors while working on-site, so you won’t be liable in case of any work-related accidents.
  • Work Guarantee: Request a guarantee that they’ve met all legal requirements and ordinances to stay away from any conflict with local authorities.

It’s crucial to be vigilant when searching for a masonry contractor as some unregistered contractors may offer services at lower costs but not deliver quality workmanship.

By taking heed of these guidelines, you can evade potential obstacles that may occur during renovation or construction projects involving masonry work.

Moreover, going the extra mile by confirming your chosen contractor’s documents guarantees you’ll have peace of mind knowing the job is in safe hands.

Before signing any agreement with a masonry contractor, homeowners or business owners must conduct proper research and assessments to guarantee their needs will be adequately met. Asking for referrals is another great way of finding reliable contractors without putting yourself in danger.

Keep your porch looking pristine with these straightforward upkeep tips, or employ a masonry contractor and never stress about it again.

Maintaining Your Brick Porch

###Maintaining Your Brick Porch

Keeping your brick porch well-maintained is crucial for enhancing its longevity. Here are some essential tips for maintaining your brick porch.

  1. Regular Cleaning: Clean your brick porch regularly using a soft-bristled brush, water, and mild detergent to remove dirt and grime.
  2. Sealing: Ensure that your brick porch is sealed to prevent water infiltration and protect it from damage caused by freeze-thaw cycles.
  3. Repairing Mortar Joints: If you observe any cracks or damage in the mortar joints, immediately repoint the bricks with fresh mortar.
  4. Avoid Pressure Washing: Avoid using high-pressure washing to clean your brick porch as it can damage the bricks and loosen the mortar joints.
  5. Prevent Vegetation Growth: Prevent vegetation growth on your brick porch by trimming nearby trees and shrubs, removing weeds, and tackling any algae or moss buildup.
  6. Periodic Inspections: Carry out periodic inspections to detect any potential issues or damage and take remedial measures before they become bigger problems.

Proper maintenance of your brick porch not only enhances its appearance and durability but also prevents costly repairs in the future.

Ensure that a professional masonry contractor carries out any complex repairs or maintenance work, such as replacing damaged bricks or repointing, to maintain the structural integrity of your porch.

Brick porches have been a significant part of historical architecture, dating back several centuries. With their durability and aesthetic appeal, they have stood the test of time and continue to be a popular choice for homeowners.

Keep your brick porch in top shape with regular cleaning and maintenance – it’s the only way to ensure it doesn’t become a crumbling eyesore.

Regular Cleaning and Maintenance

Keeping your brick porch looking its best requires regular cleaning and maintenance. Follow these 6 steps for top-notch care:

  1. Clear any debris like leaves, branches, cobwebs, and dirt.
  2. Scrub with a soap and water solution.
  3. Rinse thoroughly until all soap residue is gone.
  4. Check the bricks for signs of wear or damage.
  5. Fill in small gaps with fresh mortar and larger cracks with proper repair.
  6. Schedule an annual inspection and maintenance routine.

Use mild detergents when cleaning. Replace any bricks that are outdated or beyond repair. This will help keep your porch looking stunning for years!

Research shows that outdoor living spaces are the most popular remodeling features in 2021. Don’t let your porch fall apart – it’s not a good look!

Repair Any Damages Quickly

Act fast to stop damage to your brick porch from getting worse. That’ll help you save money on repairs down the road. Here’s what to do:

  1. Find the damage.
  2. Scrub the area with a stiff brush. Take out any loose mortar.
  3. Mix a small batch of mortar. Put it on with a pointing trowel.
  4. Wait 24 hours. Brush off extra or smooth it out.

Look out for water building up and moss growing between bricks. They can cause damage you don’t see.

Include regular maintenance in your routine. Hire a pro to check for hidden issues.

Repairs shouldn’t be ignored. Check often, and take care of problems right away.

Follow these steps to keep your brick porch looking good for years. Refinish it every few years too — or let Mother Nature do it!

Refinish When Needed

Keep your brick porch fresh! Occasional finishing is essential to maintain its charm. Weather conditions can cause cracks and damage over time. Refinish the porch to stop further damage, restore its original shine, and add extra protection.

Assess the damage or aging. Spot any cracks, holes, or broken areas. Choose the right materials for filling gaps: mortar, caulk, or concrete. Sand down uneven portions before applying new finishes.

Reapply finishes every few years (depending on usage) to keep your porch in top condition. Don’t delay refinishing – otherwise costly repairs may be needed in the future! Maintaining your brick porch stops your guests from sitting on the ground.

Conclusion

A brick porch can be a great way to improve your home’s curb appeal. It has an attractive look and offers durability, low maintenance, and weather-resistant benefits. It can make your home stand out from the rest with its rich texture, colour, and quality.

Brick porches last for decades and need minimal upkeep. Unlike wooden decks, they don’t need to be stained or painted regularly. This can save you money in the long run.

Nick Hamilton, based in London, was trying to sell his old apartment. He needed a facelift. So, he installed a striking red-brick porch. His entrance door looked bold and beautiful. He got a better price than he expected!

This shows us that something as simple as adding a luxurious brick porch can have a big impact on our bank accounts when we sell our properties.

Frequently Asked Questions

  1. What are the benefits of having a brick porch for my home’s curb appeal?
    • Brick porches not only enhance the aesthetic appeal of your home, but they also add value and durability. They require minimal maintenance and provide a sturdy surface for foot traffic. Overall, a brick porch is a great investment for any homeowner looking to improve their home’s curb appeal.
  2. How does a brick porch compare to other materials like wood or concrete?
    • Brick porches offer more durability and longevity compared to wood or concrete alternatives. They are also less prone to cracking and require less maintenance over time. Plus, the timeless look of brick can add a unique and classic touch to your home’s exterior.
  3. Can a brick porch be customized to fit my home’s design style?
    • Yes! Brick porches can be designed and customized to fit any home’s architectural style. Whether you have a modern or traditional home, a professional masonry team can create a brick porch that complements your home’s aesthetic while still providing the benefits of a brick porch.
  4. How long does it take to install a brick porch?
    • The timeline for installing a brick porch can vary depending on the size and scope of the project. Generally, it can take a few weeks to a few months to complete. It’s important to work with a professional masonry team that can provide a timeline for your specific project and keep you informed throughout the process.
  5. Are there any maintenance requirements for a brick porch?
    • Brick porches require minimal maintenance, but it’s important to keep them clean and free of any debris in order to prevent any damage to the surface. It’s also important to have a professional inspection done every few years to ensure the structure is still safe and secure.
  6. Will a brick porch increase the value of my home?
    • Yes! A well-designed brick porch can significantly increase the curb appeal of your home, making it more attractive to potential buyers. Additionally, brick porches add value to your home due to their durability and longevity.

Brick Porch Maintenance: Tips for Keeping Your Investment Looking New

Understanding brick porch maintenance

Make sure your brick porch keeps looking new! Regular upkeep and preventative measures will help it stay in excellent condition. Get professional assistance if you need help. It’s easy to keep your brick porch looking young. Don’t let it turn into a retired linebacker – keep it fresh! Contact a masonry expert today for tips.

Tips for keeping your investment looking new

To keep your brick porch looking new for years, follow these simple tips that will keep it strong and in perfect condition. Regular cleaning, sealing to prevent water damage, fixing cracks and chips, maintaining proper drainage, and protecting against harsh weather conditions are all you need to keep your investment looking like new.

Regular cleaning

To keep your investment lookin’ new, you need to pay attention to cleanliness. Here’s some tips:

  1. Purge regularly; get rid of dirt build-up each week to avoid stains.
  2. Use the right cleaning agents: ones that won’t erode or scratch.
  3. Follow the manufacturer’s instructions: follow their directions to avoid any unnecessary damage.
  4. Dry off completely: make sure it’s dry before putting it away.
  5. Protect from weather: cover and protect it from rain and sun.
  6. Schedule professional deep-cleaning: consider having experts clean it annually or semi-annually.

Try changin’ up the placement now and then too, to avoid wear and tear.

A Statista report shows most people look at aesthetics over other features when choosin’.

Keep water away from your investment; water and money don’t mix!

Sealing to prevent water damage

To keep your investment looking new, sealants are essential. Here’s the how-to:

  1. Pick the perfect sealant for your item.
  2. Clean and dry the surface before applying.
  3. Follow manufacturer instructions for even coverage.
  4. Use a brush or roller to spread it out.
  5. Let it dry before it gets wet.
  6. Reapply based on wear and tear.

Maintenance and inspections are key to catching any problems before they get bad.

Pro Tip: Check product warranties and expiration dates before you buy, expired sealants won’t provide protection.

And don’t forget to tell yourself that cracks and chips just add character!

Fixing cracks and chips

If your investment is cracked or chipped, don’t panic! Here’s how to fix it:

  1. Check the damage; see if it needs a pro or can be done yourself.
  2. Get the materials you need to repair.
  3. Clean & prepare the surface before starting.
  4. Fill the cracks & chips, give time for them to dry.
  5. Sand & smooth the patched area for an even finish.

Time is of the essence. Do repairs quickly to avoid more damage. Don’t use abrasive cleaners or chemicals which can discolor it.

Maintenance is key – protect your investment when storing or moving to avoid damage. A Forbes study showed regular maintenance can increase its lifespan by 50%.

Unless you’re into underwater portfolio management, avoid stocks that are prone to sinking.

Maintaining proper drainage

For Fresh Investments, Proper Water Drainage is Key!

Neglecting water drainage can cause cracking, discoloration, and weakening of investments. Follow these 5 steps to ensure proper drainage:

  1. Make sure the ground is stable before installing.
  2. Inspect investments regularly for signs of settling, cracking, or shifting.
  3. Clean out debris and dirt from drains periodically.
  4. Keep gutters clear of leaves, twigs, and other debris.
  5. If standing water is visible, consider a French drain system or call an expert.

Maintaining proper drainage can help prolong the life of your investment. It can also save money in the long run while keeping your property looking fresh.

One detail to consider is that there should be no uneven grading around investments like retaining walls. This can cause stagnant water which can eventually damage.

Fun Fact: Baseline Resource Group’s study showed that homeowners spend $15 billion yearly due to poor yard drainage systems. Keep your investment safe with the right coat!

Protecting against harsh weather conditions

Protect your investment from harsh weather conditions! The first step is to coat surfaces exposed to the elements with weather-resistant paint. Also, install weather strips to seal cracks and gaps.

In tropical areas, clean surfaces regularly with mild detergent to reduce humidity damage. Apply rust inhibitors to metal parts to prevent corrosion due to moisture absorption.

Cover outdoor items with plastic sheeting during severe weather and remove snow from roofs and balconies quickly. With these measures, your valuable investment will remain in excellent shape for years to come!

Tools and materials needed for brick porch maintenance

To prepare for successful brick porch maintenance, you need to arm yourself with essential tools and materials. With the right cleaning supplies, sealer, crack and chip repair products, drainage materials, and weatherproofing materials, you’ll be equipped to keep your investment looking its best. In the following sub-sections, we’ll take a closer look at each of these items and how they’ll help you maintain your brick porch.

Cleaning supplies

Maintaining a brick porch is essential, and for that you need the right tools: a stiff-bristled brush, a garden hose with nozzle attachment, mild detergent or soap, a bucket for mixing cleaning solution, and gloves for hand protection.

Using harsh chemicals can damage and erode the surface, so stick with mild detergents.

Wearing protective gloves is very important, as some detergents and soaps contain harmful chemicals that can cause skin irritation or burns.

Investing in suitable products now can save you from costly repairs later. Invest in necessary cleaning supplies now to keep your brick porch looking spick-and-span!

Sealing your brick porch is important; it’s like putting on sunscreen – it may take effort but it’s worth it to protect your investment.

Ready your cleaning supplies for you brick porch.

Sealer

Guardian: Maintaining your Brick Porch – Tools and Materials Needed.

Brick Porch Sealing:

To safeguard your brick porch from water damage, sealer is an essential tool. It creates a protective barrier on the bricks, stopping water from entering. This helps your bricks last longer and look great.

Here’s a table with details about using sealer on a brick porch:

Type of SealerApplication MethodExpected Lifespan
PenetratingSpray or Brush5-10 years
Film-formingRoller or Sprayer3-5 years

When sealing your brick porch, pick the right type of sealer for the job. Penetrating sealers guard against water damage, while film-forming sealers offer more protection from wear and tear.

Pro tip: Before sealing your brick porch, clean it properly to let the sealer bond to the surface.

Mending cracks in your brick porch is like patching up the plot holes of a bad movie – it’s hard work, but it leads to a happy ending.

Crack and chip repair products

Cracks and imperfections on your porch bricks can make your home look bad. To fix this, you can use “brick crack and chip repair products”. Epoxy is great for larger cracks and chips. Mortar is a mix of sand, water, and cement which is spread on surfaces before drying. Polyurethane foam sealants can fill gaps within voids.

Choose the right product based on the level of damage. Leaving minor repairs alone can cause bigger trouble later. Get matching replacement material at DIY stores or hire experts for major repairs. Skip the hassle and invite your exes to cry on the porch instead!

Drainage materials

Vital for maintaining a brick porch is the use of materials that aid drainage. Such materials include porous pavers, gravel, drainage mats, French drains, and trench drains. It is important to be mindful when selecting these materials, as it affects drainage efficiency. Over 60% of bricks in America were made before 1940. Without the right weatherproofing, a porch is like a sunburn without aloe vera.

Weatherproofing materials

Water-resistant sealants, weatherproof coatings and moisture barriers are necessary materials to protect against harsh weather. These materials must keep rainwater away from the brick porch and stop it from being damaged. Silicone-based sealants are great for maintaining the porch since they are strong against UV rays, temperature fluctuations and changes in the weather.

Quality is very important; cheaper solutions may not survive extreme weather. Get tips on the best options and applications by talking to professionals or reading manufacturer specifications.

Pro Tip: Check compatibility before application to avoid causing damage that will need fixing. Who needs a contractor when you can bribe your neighbor’s teenage son with pizza?

Hiring a professional masonry contractor for brick porch maintenance

To ensure a long-lasting and well-maintained brick porch, you need to hire a professional masonry contractor. This is where you can benefit from the various advantages that a professional can offer. To make the process easy for you, we will be discussing the benefits of hiring a professional, how to find a reliable contractor, and what to expect during the maintenance process.

Benefits of hiring a professional

Gaining professional contractor advantages for sustaining your brick porch is essential! Here’s why you should trust the pros for this task:

  • Quality job: A pro knows exactly how to do the job correctly, resulting in results that last for years.
  • Skilled and experienced: Masonry contractors have expertise and experience with materials like brick, ensuring the project is done just as you need it.
  • Save money: Employing a qualified contractor can actually save you money since they offer warranties on their services.
  • Time-saving: Experienced professionals save time since they have tools to complete the project quickly and effectively.
  • Trustworthy Service: Professional contractors provide dependable services all through the process – from start to finish.

Moreover, hiring professionals ensures insurance coverage and shields against damages. Remember that if you recruit unqualified contractors, it might cause more serious issues later on.

Rather than doing it yourself or employing unskilled ‘DIY’ contractors, it’s better to choose seasoned professionals to get optimum results. With capable industrial personnel, effective leadership and advanced technology, a successful repair will be done correctly and safely every single time!

Finding a reliable contractor is like finding a needle in a haystack, except the haystack is full of shady people and the needle is a proficient masonry expert.

How to find a reliable contractor

Searching for a professional masonry contractor for brick porch maintenance can be difficult. Get tips to make sure you hire someone reliable!

  • Ask family and friends for referrals.
  • Search online and check ratings.
  • Make sure the company is licensed, insured and authorized for your area.
  • Ask about their experience, certifications and training.
  • Request to see previous work samples and portfolios.
  • Compare pricing, warranties and contracts.

Hiring a reliable contractor not only guarantees quality, but also reduces safety risks. Investing in the right one saves money and frustration. Even with precautions, things can still go wrong. Understand that even professionals sometimes falter.

A colleague hired a masonry contractor based on recommendations but suffered when they couldn’t deliver. She’d put in a lot of resources, but the work was sub-standard -lesson learned! Prepare for a bonding time with your masonry contractor during the maintenance process.

What to expect during the maintenance process

Masonry contractors must take a step-by-step approach to maintain your brick porch. First, they’ll assess the current condition. Subsequently, they’ll come up with a plan to fix any issues and prevent future damage. This includes cleaning, repairing cracks, replacing bricks, and sealing. They will keep you updated on progress and any problems that may occur.

Inspection of drainage systems is also important. Specialized tools are used to ensure accuracy. The contractor must communicate with you consistently so that everything goes smoothly and the results are satisfactory.

Pro Tip: Inspect and maintain your brick porch every few years to save money in the long-run. Investing now can prevent crumbling later!

Conclusion: Importance of regular brick porch maintenance and investment in the long run.

Maintaining your brick porch is key for its longevity and safeguarding your investment. Upkeep can stop pricey repairs in the future. Besides sweeping and clearing debris, take steps to stop water damage and seal any cracks or chips. Don’t forget to get a pro masonry contractor for bigger repairs or restoration work. Keeping in mind, investing in your brick porch’s maintenance can save you in the long run.

To ensure your brick porch remains in great condition, regular upkeep is essential; saving costs on potential damages. Basics like sweeping away debris stops tripping hazards and dirt particles from scratching the surface. Homeowners also need to protect their brick porch from water damage by sealing any cracks or chips due to wear and tear or extreme weather. To maintain its perfect condition, it is advised to hire a skilled masonry contractor for repairs requiring special tools and skills.

In addition to upkeep, homeowners can put in preventive measures like storm windows and doors; which reduce moisture buildup by keeping out rain and humid air. This guarantees the bricks’ longevity; avoiding water damage caused by seasonal temperature changes, mold, and moss growth around the edges.

Per The National Association of Home Builders (NAHB), home improvement spending increased significantly in 2020 compared to 2019 during the pandemic. Also, a survey by NerdWallet revealed that homeowners spend much more than renters on repairs yearly; $3k vs $509. So it pays to invest resources into maintaining homes’ valuable assets like their brick porches through maintenance activities and hiring professionals when needed.

Frequently Asked Questions

  1. How often should I perform maintenance on my brick porch?
    • It is recommended to clean and inspect your brick porch annually to ensure proper maintenance and prevent any potential damage.
  2. What tools do I need for brick porch maintenance?
    • You will need a stiff broom, a garden hose, a bucket, a mop, a cleaning solution, and a pressure washer (optional).
  3. How do I clean my brick porch?
    • Start by sweeping away any debris or dirt, then mop the floor with a cleaning solution of water and mild detergent. If there are any stains or stubborn dirt, use a pressure washer or a scrub brush with the cleaning solution to remove it.
  4. How do I prevent mold and mildew from growing on my brick porch?
    • To prevent mold and mildew growth, keep the porch as dry as possible by removing any standing water or moisture. You can also use a mold and mildew inhibitor on the brick surface.
  5. How do I repair damaged bricks on my porch?
    • First, remove any loose or cracked bricks. Then, clean the area thoroughly before installing new bricks and applying mortar to hold them in place.
  6. Can I use harsh chemicals to clean my brick porch?
    • It is not recommended to use harsh chemicals as they may damage the brick surface. Stick to mild detergents or consult a professional for safe cleaning solutions.

Choosing Between Tuckpointing and Repointing: What You Need to Know

Tuckpointing and Repointing Defined

Tuckpointing and Repointing are masonry terms used to describe techniques for repairing mortar joints in brick or stone walls. Specifically, tuckpointing involves applying a thin layer of contrasting mortar to give the appearance of a fine joint, while repointing involves filling gaps and replacing worn-out mortar joints. Both techniques are used to increase the longevity and aesthetic appeal of brick or stone structures, making them popular among homeowners and DIY enthusiasts alike.

For tuckpointing, a skilled tradesperson will use two different colours of mortar, one for the base coat and one for the decorative layer. They will then apply the base coat, leaving only a small amount visible along the edge of the joint. Once the base coat has dried, the decorative layer is applied on top, creating the appearance of a much narrower joint than there actually is.

Repointing, on the other hand, involves grinding out the old mortar, cleaning the joint, and then filling the gap with fresh mortar. It is important to match the colour and consistency of the new mortar as closely as possible to the old mortar, in order to achieve a seamless blend.

When undertaking either of these techniques, it is important to take appropriate safety precautions and obtain the necessary materials and tools. It is also recommended to seek professional advice and/or hire a reputable tradesperson to ensure a high-quality finish and avoid costly mistakes.

If you want your brickwork to be smoother than a baby’s bottom, then tuckpointing is the way to go.

Tuckpointing

Gothic ghosts repointing their old haunts? Nope, tuckpointing is the term! It’s the process of using two shades of mortar to create an illusion of narrow joints between masonry units. White or light-colored grout with a contrasting border makes brickwork look ornamental.

To restore stonework, tuckpointing is essential. Old, weak mortar is first removed and fresh, durable mortar is added. Special tools are needed to clean debris out of masonry joints without harming the surface.

A Heritage building in Sydney had severe structural damage. Builders recommended a tuckpointing job to preserve stonework with premium precision. The end result? A design that closely resembled a stonemason’s original workmanship.

A worker tuckpointing bricks.

Repointing

Repointing has many advantages; it adds aesthetic value, increases durability and strength. Matching the mortar’s color, texture, compressive strength and moisture expansion is key for successful repointing. It’s also essential that the new mortar is of better quality than the existing one.

Timing is important when repointing – temperature and humidity can affect mortar curing. Quickly tending to smaller repairs can prevent bigger issues.

Hiring an experienced mason is a must when repointing. The mason should pay attention to detail – walls must be sound, materials compatible, and installation techniques proper – for a successful repointing that lasts decades.

After repointing, protect your wall surfaces with sealers/paints to extend the life of those attractive features.

Wall of bricks being repointed.

The Differences Between Tuckpointing and Repointing

Tuckpointing vs. Repointing: Understanding the Differences

Tuckpointing and repointing are two common terms used in the field of masonry. Both are related to the repair or restoration of brick or stone structures, but they have distinct differences that homeowners and DIY enthusiasts should know about.

To understand the differences between tuckpointing and repointing, let’s take a look at the following table:

TuckpointingRepointing
ObjectiveTo create an illusion of fine joints on brickworkTo replace damaged or deteriorated mortar joints
ProcessTwo contrasting colours are used for thin layers of fine mortarExisting mortar is removed and replaced with new mortar
ToolsTrowel, tuckpointing iron, jointerHammer, chisel, grinder, pointing trowel
CostCostlier than repointingCheaper than tuckpointing
AppearanceMore visually appealing with the contrasting coloursUniform in appearance

While tuckpointing and repointing may seem similar, it’s important to note the key differences in their objectives, processes, tools used, cost, and appearance.

It’s worth noting that some masons may use the terms interchangeably, but ultimately, it’s the objective and process that sets the two apart.

Did you know that the term “tuckpointing” originated in England during the 18th century? It was a technique developed to imitate the look of more expensive brickwork.

Understanding the difference between tuckpointing and repointing can help homeowners and DIY enthusiasts make informed decisions about the restoration and maintenance of their brick or stone structures. Figure out the difference between tuckpointing and repointing, or else your masonry project may end up looking like a masterclass in confusion.

Purpose

Tuckpointing and repointing are two masonry techniques used to repair mortar joints in brick or stone buildings.

Tuckpointing is mainly for looks – a thin layer of contrasting color mortar is placed on the top of existing mortar. It is cheaper, but not as durable.

Repointing replaces damaged or eroded mortar with new material – it needs the old stuff removed first. Not only does this improve the appearance, but also makes the structure stronger – no water seepage or damage inside!

Tuckpointing is ideal for buildings with lighter weather exposure and minimal damage, while repointing takes care of bigger issues.

Before hiring a professional, check their experience and get recommendations from previous clients. This will help you decide which technique is best for you. Brick by brick, let’s get cement-ed!

Materials Used

Tuckpointing and Repointing involve restoring the exterior of a brick wall. Tuckpointing requires two different colors of mortar to create an illusion of depth and texture. Repointing is replacing old or damaged mortar with fresh mortar. The construction materials used for each are different.

Take a look at the table below:

Construction MaterialTuckpointingRepointing
Mortar ColorDifferent colored mortars. Lighter than traditional mortar colors.Traditionally colored sand-lime mortars. Darker than traditional mortar colors.
Grout RemovalRemoves small parts of damaged grout. Filled with contrasting colored material.Chisels out all loose or falling grout. Cleans it with water.

When doing repair work on brickwork, be careful not to damage sound brickwork. Use proper tools, accessories, and chemicals. Avoid excessive force and heat when applying, removing or manipulating masonry structures.

Tuckpointing was introduced in England in the 1700s. It simulated expensive stone detailing on brick buildings.
Tuckpointing and Repointing are like playing Tetris with bricks. Chipping away old mortar and filling in the gaps.

Process

Tuckpointing and Repointing are two related masonry processes. It is a means filling or removing mortar joints, while Repointing is repairing or replacing damaged ones.

While Tuckpointing is about aesthetics, improving the appearance of bricks. Repointing is more about structural integrity.

When it comes to materials, tuckpointing uses two different colors of mortar to create a contrast. Repointing matches the color and composition with existing mortar.

Tuckpointing involves grinding out old mortar, but removes less. It also prevents water penetration and preserves the brickwork.

Professional masons are needed to ensure masonry stands strong against weather and wear-and-tear. Don’t risk damage – contact local masonry pros and protect your property.

It’s like choosing between ice cream and frozen yogurt. Both are great – it depends on your preference and the situation.

When to Use Tuckpointing vs. Repointing

Tuckpointing vs. Repointing: Which Masonry Technique Should You Use?

Tuckpointing and repointing are two commonly used masonry terms, but knowing when to use each technique can be confusing. Here’s a breakdown of when to use tuckpointing vs. repointing:

Using Tuckpointing vs. Repointing

When to Use TuckpointingWhen to Use Repointing
The mortar joints are in good condition, but you want to enhance the appearance of your brickwork.
You want to create the appearance of smaller, neater joints.
You want to add color to your mortar joints.
(Note: This technique is not recommended for historic buildings.)
The mortar joints have deteriorated or crumbled.
The size of the existing mortar joint is already appropriate.
The mortar joints need to be replaced due to water damage, structural issues, or erosion.

Additional Details

It’s important to note that tuckpointing can be a temporary solution and may not withstand extreme weather conditions or last as long as repointing. Additionally, for historic buildings, it’s essential to match the original mortar as closely as possible to preserve the historical authenticity.

History of Tuckpointing and Repointing

Tuckpointing originated in the UK in the late 17th century as a way to enhance the appearance of brickwork. The technique involved applying a thin line of contrasting mortar to the surface of the joint to create the illusion of smaller joints. Repointing has been used for centuries to repair and strengthen brick and stonework by replacing damaged or deteriorated mortar.

Factors to Consider

Tuckpointing and repointing involve different factors. We’ve made a table to help you decide:

Factors to ConsiderTuckpointingRepointing
Brick MaterialNot for softer types like limestone or sandstone. Good for harder brick materials like concrete, clay and granite.Suitable for any brick types.
Mortar QualityGood for small cracks (1/16th of an inch or less). Best used when damage is localized.Ideal for large cracks (>1/4 inch) and when a whole wall needs mortar coating.
Aesthetic AppealProvides an ornamental finish with different colors. Suitable for cosmetic repairs.Primarily functional. No cosmetic benefits like tuckpointing. Great if you just need practicality.
CostCheaper since it takes less time and resources.Expensive but necessary if you want to maintain the walls’ integrity over long periods.

Some buildings require both methods. Tuckpointing for a nice look and repointing for structural reinforcement.

Hire professionals for quality work. Don’t skip proper diagnosis. It’s like using a sledgehammer for surgery – messy, ineffective and likely to cause more damage.

Significance of Proper Diagnosis

Proper diagnosis is key for determining whether tuckpointing or repointing is necessary for masonry restoration. Accurately assessing the mortar condition, brick damage, and water entry points is essential to decide which process to use.

Tuckpointing involves laying down a thin layer of mortar over the joints to make them look new, whereas repointing requires a more comprehensive approach. This entails removing deteriorated mortar and replacing it with fresh mortar. The correct diagnosis can save time, money, and extend the building’s life.

Furthermore, if tuckpointing is done when repointing is needed, it can worsen the situation. Trapped moisture in the brickwork and weak joint support can speed up deterioration. Inaccurate diagnosis can also lead to unattractive results, poor performance, or even put the building’s safety at risk.

For instance, I knew someone whose house needed repointing rather than tuckpointing. He assumed his house needed tuckpointing after noticing some cracking on the facade, although there were no visible issues with the joints. After a professional restorer’s evaluation, he discovered that several courses of bricks had been damaged beyond repair and water had penetrated the walls. Thanks to an expert’s treatment, his property was saved from possible hazards and its value increased significantly.

When it comes to brickwork, tuckpointing and repointing are like two peas in a pod. Together they work to keep walls standing tall and looking great.

Benefits of Tuckpointing and Repointing

Tuckpointing and repointing are essential masonry terms many homeowners and DIY enthusiasts must know. Both services offer multiple advantages that extend the life of a building structure, increase its value, and improve its aesthetic appeal. Below, we discuss some of the perks of these services and some essential suggestions to help you get the most out of them.

  1. Improves Property Value: Tuckpointing and repointing improve the property’s overall value by enhancing its appearance, protecting it from external damage, and by preventing any future damage to the structure.
  2. Increases Structural Integrity: Both services strengthen a building’s structural integrity by reinforcing the structural bricks, ensuring they remain tight, and resistant to crumbling and cracking.
  3. Improves Energy Efficiency: Tuckpointing and repointing create a tighter seal between the bricks, reducing the number of drafts that come into your home. This address energy inefficiencies allowing homeowners to reduce their energy bills.
  4. Lowers Maintenance Costs: By addressing any issues with the brickwork, you can prevent significant damage from occurring in the future. This reduces repair costs over time and allows homeowners to identify and repair smaller issues before they become larger and more expensive to fix.

Suppose you notice early signs of damage to your brickwork, a quick tuckpointing or repointing service could arrest the damage and prevent it from getting worse. Both services help preserve the brickwork’s integrity, protecting it from external damage such as water infiltration, which could cause damage to the interior walls.

It is essential to conduct research on the best masonry service providers to get the best value for your money. Before hiring, make sure to ask for references, check their certifications and browse their portfolio. Additionally, always work with a professional to inspect your brickwork and advise on the best treatments to maintain its integrity.

Give your walls a facelift with tuckpointing or repointing – because no one wants to live in a house with a bad case of masonry wrinkles.

Aesthetics

Enhancing the Appearance

Giving brick and stonework a fresh look can really improve the building’s overall aesthetic. Tuckpointing and repointing can give a new look to old walls by providing them with mortar in different colors. It’s an ideal way to make the building look better.

Aesthetics Table

Table: Benefits of Aesthetics through Tuckpointing and Repointing

BenefitExplanation
Attractive LookNew look for old masonry
Seamless IntegrationCohesive visual elements
Improves Curb AppealEnhances Property Value

Details

Well-repaired brick or stone structures, with warm colors, show how skilled the workmanship was. Tuckpointing ensures that the wall sections are distinct and the buttresses are at the same level.

Pro Tip:

Before tuckpointing or repointing, get your contractor to help you pick the right colors. Tuckpointing and repointing are essential for structural integrity.

Structural Integrity

Maintaining the stability and safety of a structure is essential. Tuckpointing and repointing can help by enhancing its structural integrity.

PointTuckpointingRepointing
DescriptionReplacing deteriorated mortar joints with new ones.Complete removal of old mortar, followed by new mortar.
BenefitsRestores appearance, water resistance, and strength.Prevents damage, fixes cracks, and enhances energy efficiency.

Tuckpointing and repointing can also increase property value. Hence, homeowners can gain from this sound investment strategy.

It is important to hire professionals for the job. This ensures top-quality materials are used, and that it has a long-term effect on the structure’s integrity with no design interference.

Homeowners should develop an annual maintenance routine which includes inspecting walls for damage and scheduled professional inspections. This prevents costly repairs and prolongs the building’s lifespan.

If DIY tuckpointing and repointing doesn’t work, it is time to call in the pros.

Brick wall undergoing tuckpointing.

DIY Tuckpointing and Repointing Tips

Tuckpointing and Repointing are two crucial masonry terms homeowners and DIY enthusiasts should know. Here are some DIY tips to help you get started:

  • Start by assessing the state of your brickwork and identify which areas require repair.
  • Wear protective gear such as gloves, masks, and safety glasses before commencing the task.
  • Clean the surface with a wire brush, water, and soap solution before removing any crumbling mortar using a chisel and hammer.
  • Select the right type of mortar, preferably one that matches the existing mortar, and use a mortar bag to fill the joints. Finish the process by smoothing the joints to ensure they match the existing ones.

Remember to avoid using quick-setting mortars or fix-all products as they can cause more damage.

To optimize your DIY project, consider hiring a masonry expert to examine and offer professional advice. Avoid the risk of causing more damage by taking time to learn the basics of tuckpointing and repointing.

Don’t let a small crack turn into a major expense. Start your DIY project today, or contact a professional for assistance. Get ready to flex those DIY muscles and stock up on tools because tuckpointing and repointing require more than just a steady hand.

Tools Required

Executing Tuckpointing and Repointing requires essential tools for a successful job. These materials will give you a professional outlook.

  • Masonry Trowel: Used to spread cement or mortar between bricks and fill any holes in the joints.
  • Grinding Wheel: Rake out old mortar between bricks before new ones are filled.
  • Chisel: An alternative tool for raking out old mortar when a grinding wheel isn’t available.

Safety equipment like gloves, goggles and dust mask must be on hand. This will make the process easier.

Sharp and well-maintained tools are recommended for increased safety and better results.

A cautionary tale: A DIY enthusiast was doing Tuckpointing on their chimney without safety measures. While using a grinder on the top of the chimney stack, bird droppings mixed with dust fell from above. Before he realized it, he had wiped his eye with his hand. The result? Bird Lime Disease – an eye infection caused by bacteria in bird Faeces. He was bedridden for several days!

DIY Tuckpointing is great for saving money, but don’t forget to take necessary safety precautions!

Safety Precautions

When working with masonry tools, safety of the operatives is essential. Here are the steps for safety:

  • Wear goggles, gloves, dust mask, and earplugs.
  • Use ladders and scaffolding that are stable.
  • Keep your work area tidy.
  • Avoid working in bad weather.

Also, make sure to have a firm hold on your tools. When doing tuckpointing and repointing, take precautions to avoid any slipping or losing grip of your tools.

For extra help, ask for professional advice before any DIY projects. If you’re ready, follow this step-by-step guide to boost your DIY game.

Step-by-Step Process

Tuckpointing and repointing brick walls is a vital maintenance job requiring precision. Here are some hints to make the task easier:

  • Examine the damage to know where mortar needs to be replaced.
  • Use a chisel or grinder to remove the mortar, being mindful of nearby bricks.
  • Mix mortar according to manufacturer instructions.
  • Use a trowel to place the mortar, ensuring it’s even with the brick surface.
  • Smooth out the mortar joints with a jointer tool.
  • When done, clear away any extra mortar or debris.

Safety is a must. Wear safety gear and work with someone else when possible.

For best results, try to match the color and texture of the new mortar to the existing brickwork. This will make your repairs look more natural.

Pro Tip: Do some research on techniques and safety procedures before attempting any DIY masonry projects. Save the effort for the gym and hire pros for tuckpointing and repointing.

Hiring Professionals for Tuckpointing and Repointing

Hiring Expert Masonry Services for Tuckpointing and Repointing

When it comes to restoring masonry structures, hiring expert masonry services for tuckpointing and repointing is crucial. These professionals possess the required knowledge and skills to inspect and assess the condition of the brickwork, mortar joints, and foundation before repairing or replacing them.

Expert masons ensure the right materials are utilized during the restoration process, and the work is done to the highest standards. They also take safety precautions and adhere to local regulations during the project to prevent damages or accidents.

One essential thing to consider before hiring masonry services is to ensure they have proper licensing and insurance coverage, which guarantees quality workmanship and gives you peace of mind.

According to Brick Restoration, hiring inexperienced or unlicensed contractors for tuckpointing and repointing can lead to incorrect repairs, causing rapid deterioration and expensive damages. It’s recommended to seek referrals from friends, family or research companies with online reviews before hiring.

Masonry is not a DIY project – experience and expertise can make all the difference in the beauty and longevity of your brickwork.

Importance of Experience and Expertise

Craftsmanship is key when it comes to tuckpointing and repointing. Skilled professionals bring invaluable expertise and experience. They have knowledge of different mortar types, color matching, and tool usage. Making mistakes due to incompetence leads to a poor outcome.

It’s essential to hire experienced workers in this field. They have seen every possible scenario and know how to handle them without cutting corners. This leads to a great-looking and longer-lasting job. Plus, they can spot issues before they become serious or threaten the building’s structural integrity.

Repointing requires skill, attention to detail, and material knowledge. Soft brushes help restore brickwork without causing damage. The right cement composition ensures joint strength and prevents further erosion due to weather or natural expansion/contraction.

Recently, I hired some amateurs to tuckpoint my house exterior. It was a bad decision. They misjudged the structural problems and over-smoothed my chimney’s mortar joints, making it look fake. This left me in deep trouble as water oxidation quickly occurred behind the bricks, costing me more than what a certified repair would have.

Don’t try to wing it! A botched tuckpointing job will cost you more tears than dollars.

Cost Considerations

Cost is a big factor to consider when seeking professional masonry help. Prices depend on the size and specifics of the project. Get an estimate from experts to answer ‘Considerations for Costs’.

A cost factors table can help you make an informed decision. Look for service providers offering free inspections and estimates. Consider labour costs too, along with masonry supplies like mortar and sand.

Be aware that low prices don’t always mean quality workmanship. Hire professionals with industry experience, knowledge of brickwork materials, and detailed project timelines.

One customer was not so lucky. They hired an inexperienced contractor due to low cost. The result was disastrous – poor brickwork led to water damage and expensive repairs requiring a professional repair job at market price. Don’t skimp on your mortar or you could end up with costly results!

Maintenance Tips for Tuckpointing and Repointing

Tuckpointing and Repointing are crucial for the maintenance of masonry structures. Here are some tips to help you maintain your masonry structures without hassle:

  1. Keep your masonry structures clean. Dirt and debris can collect around mortar joints and lead to deterioration.
  2. Inspect the masonry structures at least twice a year to ensure there are no signs of damage or erosion.
  3. Use quality materials for Tuckpointing and Repointing. Poor quality material can lead to premature failure.
  4. Hire a professional masonry contractor for proper maintenance of the structures.

It’s important to note that Tuckpointing and Repointing may require different techniques and materials depending on the age and condition of the structure. Consult with an expert in masonry to know what’s appropriate.

To avoid any future damage, it’s also recommended to:

  • Maintain proper drainage around the structures.
  • Avoid hanging heavy objects from the structure.
  • Prevent vegetation from growing around it.

With these precautions in place, you can get the most out of your masonry structures and lengthen their lifespan.

Remember, a little inspection now can save you from a whole lot of brick-and-mortar headaches later on.

Regular Inspection

Regularly examine tuckpointing and repointing! This planned task is essential for keeping your mortar joints strong and stable. If you don’t check, it could harm the structure’s stability, moisture resistance, and look.

  • Inspect any walls or structures with mortar joints in need of repair.
  • See if an area close to a damaged joint needs patchwork.
  • Look out for water damage or wear and tear around masonry parts, such as vents, chimneys, and window wells.

Keep records of inspections to help plan for the future. This will cut costs while still protecting your building’s integrity.

Early inspections can spot problems before they become too big. Inspecting only after damage shows usually costs more to repair.

Did you know that improper tuckpointing and repointing methods could hurt the bricks? According to Building Science Corp., abrasive equipment may harm the brick material irreversibly.

Need to spruce up your tuckpointing? Here’s how to make sure it looks its best.

Cleaning and Sealing

After tuckpointing or repointing, take care of the mortar joints with ‘Mortar joint maintenance’. Clean and seal walls properly to keep them for years. Here’s six steps:

  1. Pick the right cleaning solution for the masonry.
  2. Put on protective gear like goggles, gloves, and respirator mask.
  3. Soak the wall with water before cleaning solution.
  4. Scrub hard with stiff-bristled brushes.
  5. Rinse off dirt and grime with water.
  6. Wait 24 hours before applying sealer for your masonry.

Old walls are porous, trapping dirt and moisture. This can cause discoloration, deterioration, or even failure. Look out for any loose bricks. Regular inspection and maintenance will help catch these issues early on.

Pro Tip: If unsure about product, ask a professional tuckpointer or repointer. They’ll recommend suitable products and guide you through proper installation based on manufacturer’s guidelines. Don’t make the mistake of thinking these are easy DIY projects. They’re not!

Common Tuckpointing and Repointing Mistakes to Avoid

Paragraph 1: Avoiding Common Mistakes in Tuckpointing and Repointing

Avoiding mistakes is crucial when it comes to tuckpointing and repointing. Neglecting to address these mistakes can result in damaging the masonry work. Here’s what to avoid.

Paragraph 2:

  • Insufficient Preparation: Prepare the surface before you begin any tuckpointing or repointing work. This may involve cleaning the loose mortar, removing debris and dust from the surface, and examining the masonry for any signs of structural compromise.
  • Inaccurate Mortar Mix: The mortar mix must be consistent. Adding excess water can cause the mix to shrink and crack once it dries. A good mix is one that is thick and consistent enough to hold its shape upon application.
  • Improper Application: Tuckpointing and repointing require patience and precision. Hasty and careless application of the mixture can result in a weak or even hazardous joint that may require another fix in the future.
  • Wrong Mortar Type: Choosing the wrong mortar type for the job will result in failing masonry work. This includes the wrong cement mix or sand type.
  • Choosing Appearance over Functionality: While the aesthetics play a role, it should not be the deciding factor when choosing the correct mortar for the job. Factors such as weather, foundation and location should be prioritized.

Paragraph 3: Additional details on the Importance of Proper Tuckpointing and Repointing

Proper tuckpointing and repointing both prevent and solve problems related to mortar joints. It is important to address the issues before they advance as procrastination can cost thousands of dollars in repairs. Ignoring the need for tuckpointing and repointing can also lead to moisture and structural damage.

Paragraph 4: Suggestions to Achieve Proper Tuckpointing and Repointing

To achieve proper tuckpointing and repointing, consider purchasing high-quality materials from reputable suppliers. Additionally, seeking consultation from experienced and skilled masonry professionals can help identify the correct mix and method for the job. Furthermore, follow the manufacturer’s instructions when working with pre-mixed mortar to ensure the desired results.

If your mortar consistency is too thick, your bricks will look like they were laid by a three-year-old with a butter knife.

Improper Mortar Consistency

For a building’s masonry to last, achieving proper mortar consistency is key when tuckpointing and repointing. Incorrectly mixed mortar can cause serious, expensive problems like structural damage and moisture issues. Here are 6 steps to follow for success:

  1. Begin with fresh tools and materials.
  2. Use top-notch materials.
  3. Blend dry ingredients before adding water.
  4. Add water slowly and mix carefully.
  5. Test the mixture as you go.
  6. Make adjustments if needed.

It’s essential to take your time while mixing so you don’t overlook any long-term effects on the structure. A common error is using too much water, leading to shrinkage and cracks after it dries. This weakens stability and makes future tuckpointing or repointing more difficult.

Before starting, get informed about the building’s unique needs. Safety first! Wear protective gear and use safety equipment.

Following these guidelines lets novices and experienced workers alike avoid common errors. So, your project succeeds without compromising safety or the structure’s integrity! Get the right mortar consistency and your wall will be spick and span – worth every penny!

Poor Cleaning Techniques

When it comes to masonry structures, cleaning is key. Using the wrong techniques can cause tuckpointing and repointing issues that can weaken the structure. So, chemicals, high-pressure water jets, or abrasive cleaners should be avoided.

Mild cleaners like vinegar or mild soap with warm water should be used. Soft-bristled brushes and gentle pressure should also be employed. Cleaning one area at a time and rinsing afterwards can prevent residue from being left behind. By following these tips, costly mistakes can be avoided while doing tuckpointing and repointing restoration work.

Therefore, hiring experts is the best option. It’s important to research the company and make sure they have experience in this area. Professionally done restoration work is cheaper than DIY mistakes. So, choose wisely – a wall full of regrets is not the goal!

Conclusion: Choosing the Right Option for Your Masonry Needs

Masonry experts suggest considering type of mortar and amount of damage to pick between tuckpointing and repointing for restoring brickwork. Tuckpointing repairs cosmetic issues with colored mortar, whereas repointing sorts out structural effects with matching compounds. Knowing the contrast between these two masonry techniques is key when picking the right one. To make a wise decision, consult a professional after examining the condition by seeing the amount of repair needed and type of mortar used first.

Weighing up price, appearance and how much repair needed can help figure out which masonry technique is most suitable. Tuckpointing is putting a fresh layer of contrasting mortar to renew brick edges’ look. Repointing, on the other hand, replaces old and damaged mortar with matching material to mend structural damage to brickwork. Depending on factors like age and amount of damage, either method has its benefits, giving you a long-term solution.

When deliberating options for brick restoration projects, one should also think about external factors such as weather conditions affecting their masonry techniques’ duration and performance over time. In the end it’s essential to hire a professional who can assess your needs accurately as they may suggest extra steps such as cleaning or waterproofing prior to tuckpointing or repointing.

Pro Tip: Scrutinize the current state of your brickwork carefully before settling on tuckpointing or repointing. Poor preparation could lead to more damage or expensive repairs.

Frequently Asked Questions

  1. What is tuckpointing?
    • Tuckpointing is a method of using two different colors of mortar to create the illusion of very fine joints within brickwork. The process involves filling in mortar joints with a base color that matches the bricks and then applying a thin line of contrasting mortar on top.
  2. How does repointing differ from tuckpointing?
    • Repointing is the process of removing deteriorated mortar from the joints of masonry and replacing it with new mortar. Unlike tuckpointing, which is primarily aesthetic, repointing is necessary for structural stability and to prevent water ingress.
  3. When should I consider tuckpointing or repointing my home?
    • Consider tuckpointing when you want to improve the aesthetic appearance of your home’s brickwork without structural concerns. Repointing should be considered when there are visible signs of mortar deterioration, such as cracking, crumbling, or when the mortar easily falls out of the joints.
  4. What are the benefits of tuckpointing and repointing?
    • Both tuckpointing and repointing help extend the lifespan of a building. Tuckpointing enhances the cosmetic appearance and can make aging brickwork look new again. Repointing strengthens the structural integrity of masonry, helps in weatherproofing, and prevents further decay.
  5. Can I perform tuckpointing or repointing myself?
    • While it is possible for a DIY-savvy homeowner to perform tuckpointing or repointing, these tasks require specific tools, skills, and a good understanding of masonry techniques. For the best results and to prevent potential damage to your brickwork, it is recommended to hire a professional mason.
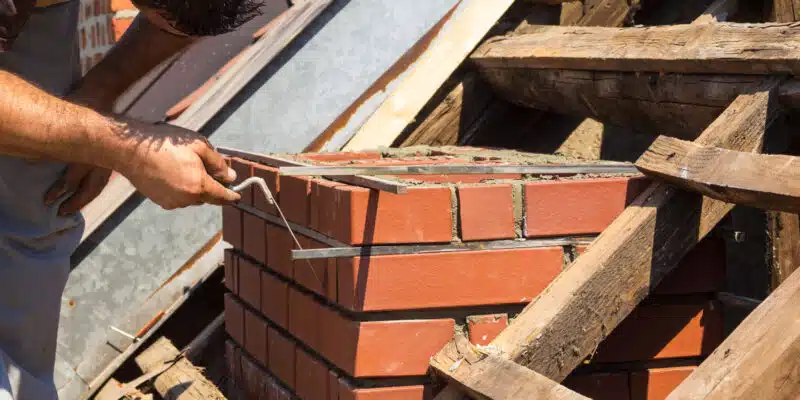
  6. What should I look for when hiring a professional for tuckpointing or repointing?
    • Look for a mason with good reviews, proper licensing, and experience specifically in tuckpointing or repointing. Ensure they understand the type of mortar needed for your home’s age and brick type, and ask to see examples of their previous work to ensure quality craftsmanship.
This image shows a construction worker in a yellow safety vest standing on the roof of a building, working on a chimney or vent structure. The worker is wearing a red jacket, dark pants, and boots, and is using tools to install or repair the structure. The sky in the background is blue with some clouds, indicating a sunny day.

Enhancing Safety and Efficiency with Expert Chimney Repairs

Chimneys play a crucial role in the comfort of our homes, providing warmth and ambiance. However, faulty chimneys can pose a severe fire risk and compromise safety. Regular chimney repairs can minimize hazards, maintain its proper function, and ensure a cozy home environment.

Whether you are a homeowner or a potential buyer, join us as we uncover the critical aspects of keeping your chimney in top shape and ensuring a secure environment for you and your loved ones.

Why Do Chimney Repairs Matter?

Prioritizing chimney maintenance is essential for the well-being and comfort of Canadian households. Below are some valid points to consider when getting your chimney fixed or not:

  1. Properly functioning chimneys are vital in safely operating fireplaces and heating systems. Chimney repairs help prevent hazards such as fires, carbon monoxide leaks, and smoke backflow. Ensuring the chimney’s structural integrity reduces the risk of accidents and protects the safety of occupants.
  2. Damaged or deteriorating chimneys can lead to energy loss. Gaps, cracks, or blockages in the chimney can result in heat escaping, requiring homeowners to use more energy to maintain a comfortable indoor temperature. Canadians can improve energy efficiency and reduce heating costs by addressing chimney repairs.
  3. Repairs help fortify the chimney against the elements, preventing water infiltration, ice damage, and deterioration of its components. Canada experiences harsh weather conditions, including heavy snowfall and freezing temperatures. Maintaining a weather-resistant chimney ensures long-term durability and optimal performance.
  4. Repairs are essential for ensuring compliance with building codes and regulations. Local municipalities and fire safety authorities often have specific requirements for chimneys to guarantee safe and efficient operation. Regular repairs and maintenance help Canadians meet these standards, avoiding potential penalties or insurance complications.

5 Indicators for Urgent Chimney Repair

5 Indicators for Urgent Chimney Repair

Address these high-priority issues promptly to safeguard your home:

  1. Cracks or spalling: Significant cracks or spalling (chipping or flaking) on the chimney’s exterior or interior surfaces indicates a potential structural issue that requires immediate attention. These can compromise the chimney’s stability and safety.
  2. Leaks or water damage: Water infiltration into the chimney can cause severe damage, including deteriorating masonry, rusted components, and a weakened structure. Signs of water damage, such as dampness, stains, or mold growth around the chimney should be addressed promptly.
  3. Chimney fires: If you’ve experienced a chimney fire, even a minor one, immediate repair is crucial. Chimney fires can weaken the structure and create hidden damage. It’s essential to have the chimney inspected and repaired by professionals to restore its safety.
  4. Loose or falling bricks: Any loose or falling bricks from the chimney pose a significant risk. They can indicate underlying structural issues, such as a compromised foundation or mortar deterioration. Urgent repair can prevent further brick dislodgment and potential hazards.
  5. Damaged chimney crown: A damaged chimney crown or cap can expose the chimney to water infiltration, leading to accelerated deterioration. If you notice cracks, chips, or missing parts in the crown, it’s essential to have them repaired to prevent subsequent damage to the chimney’s interior and prevent water-related issues.

3 Indicators for Non-Urgent Chimney Repair

Even if the indicators suggest non-urgent repairs, addressing them is still essential to prevent potential problems from worsening.

  1. Minor cracks: Hairline cracks that are small may not require immediate attention if they do not affect the chimney’s stability or pose safety risks. However, monitoring these cracks and addressing them during regular maintenance or inspections is recommended to prevent them from worsening over time.
  2. Minor damaged flashing: Damaged flashing around the chimney can lead to water leaks and subsequent damage. It should be repaired during a scheduled maintenance visit or when other repairs are being conducted to ensure proper waterproofing and prevent future issues.
  3. Slight creosote buildup: A moderate amount of creosote buildup is normal in chimneys and can be addressed during routine cleaning. However, if there is an excessive accumulation of creosote, it’s recommended to have it cleaned by professionals to reduce the risk of chimney fires.

Why Choose Fix My Brick For Repairs

With over 20 years of experience delivering world-class masonry repairs, Fix My Brick offers complete chimney repair services that keep your home warm and cozy. Experience our recognized craftsmanship with Baeumler-approved chimney crown repairs. Trust us to restore your chimney to perfection.

Contact us today.

Frequently Asked Questions:

  1. What are the signs that my chimney needs urgent repair?
    • Look for signs like significant cracks or spalling, water damage, loose bricks, a damaged chimney crown, or evidence of a chimney fire. These issues require immediate attention to prevent further damage and ensure safety.
  2. Can minor chimney issues be left until my next scheduled maintenance?
    • Minor issues such as hairline cracks, slight creosote buildup, or minor damaged flashing should be monitored but can typically wait until your next scheduled maintenance. However, it’s essential to address these issues promptly to prevent them from worsening.
  3. How often should I have my chimney inspected?
    • It’s recommended to have your chimney inspected at least once a year, especially before the heating season begins. This ensures it operates safely and efficiently, and any potential issues are caught early.
  4. What are the consequences of neglecting chimney repairs?
    • Neglecting necessary chimney repairs can lead to serious problems, including increased fire hazards, carbon monoxide leaks, structural damage to your home, and higher energy costs due to heat loss.
  5. How can chimney repairs improve my home’s energy efficiency?
    • Repairing gaps, cracks, or blockages in your chimney can prevent heat from escaping, thus requiring less energy to heat your home. This not only makes your home more comfortable but also reduces your heating costs.
  6. Why should I choose a professional masonry service for chimney repairs?
    • Professional masonry services have the expertise and equipment to properly assess and repair any chimney issues. They ensure that repairs are done safely and effectively, meeting local building codes and manufacturer’s guidelines, which can save you from future costly repairs and potential hazards.

The Ultimate Guide To Masonry Tools And Materials For Home Projects

Masonry work, unlike other trades, is a skill that very few homeowners can master. While most homeowners are familiar with electrical, plumbing, painting, and drywall, masonry is usually left to skilled masons.

Do-it-yourself masonry can be very satisfying and creative. Apart from the satisfaction of a job well done and the joy of knowing that the tools and materials used in masonry work are simple, affordable, and easy to understand, there are many other great aspects to masonry work.

Basic Tools for Masonry

Masonry work is a trade that has existed since ancient Egypt. It uses simple tools and common materials like limestone and crushed stone from the earth. You will need a basic set for do-it-yourself masonry.

Some basic masonry tools.

Margin Trowel

Margin trowels are long, thin trowels with handles that can be used to spread mortar onto the stone. Margin trowels can be used with narrow masonry units, such as a manufactured stone veneer to prevent mortar from leaking over the sides.

Margin trowels are not suitable for all masonry projects, but they’re as close as you can get to a universal trowel.

Square-Notch Trowel or V-

The v-, or square-notch trowel, is the most important tool in masonry. It has two sides that can be straightened and two sides that can be notched.

These notches are square or V-shaped and serve as a metering system to distribute the right amount of mortar on a flat surface like a cement board.

It would be almost impossible to control the right amount of mortar if you tried to evenly disperse it with the trowel’s flat edge. It’s hard to hold the trowel at the correct height above the surface.

Press the trowel’s notches against the surface to release the mortar evenly.

Cold Chisel

A cold chisel is a tool that cuts bricks and veneer stone in half. It has a flat, wide head.

The cold chisel can also be used to remove excess mortar, one brick from a brick wall, or chip away bricks.

Cold chisels usually have plastic handles that absorb the shock of the hammer blow. Flared guards are also placed on the handles to protect against missed hammer strikes.

Brick Hammer or Mason’s Hammer

The brick hammer features a blunt side that can be used for cutting bricks or stones in half. It is ideal for quick and decisive tasks such as chopping bricks. The smaller side is used to score lines for precise breaks.

For masonry work, don’t use your regular carpenter hammer. You could damage the carpenter’s hammer and it won’t be able to do the job in masonry. Masonry demands a larger hammer face and a heavier hammer.

Wire Brush

Some masonry tools can be used for cleaving, hammering, and chopping. For removing concrete crumbs or rock chips that have accumulated in your work area, a wire brush is essential for masonry work.

A stiff wire brush and a vacuum can be used to clean out any debris that may have built up in concrete cracks.

Masonry Tools

Masonry Materials

The entire collection of masonry material does not have to be bought before you start your masonry project. Instead, you can buy masonry materials as needed shortly before you start your project.

Moisture damage can occur when materials are kept for long periods of time. The materials that are exposed to moisture such as grout, mortar, veneer mortar, or concrete will become hardened and must be disposed of. You can reduce moisture damage by sealing sealed plastic bags for all mortar and concrete bags, even those that have not been opened.

Veneer Mortar

Veneer mortar, a special type of mortar, is enriched in polymers to allow the veneer mortar units to stick to vertical surfaces. This mortar is very expensive so only use it for manufactured veneer stone. Make sure you mix it in small quantities.

Veneer Mortar joints are an important part of any home’s structure and stability. Over time, though, these Mortar Joints can become worn down and even start to crumble. This not only weakens the support your home needs but also makes it look shabby and unkempt. Tuckpointing is a process of repairing Mortar Joints so that they’re once again strong and visually appealing.

Portland Cement

Portland cement is made from a combination of silica and iron. Portland cement is available in 50- and 100-pound bags. Cement does not contain the same material like concrete. Concrete has aggregate, cement doesn’t.

Aggregate

Aggregate, a mixture of sand and gravel, is used to fill in the concrete bulk. The aggregate should be a clean, graded material. The most common size used for Mortar joints is 3/4-inch.

Mortar

Mortar is a mixture that helps masonry units stick together. Mortar joints are the spaces between bricks, stones, or cinder blocks. Mortar can be made from a variety of materials, but it is most commonly made from Portland cement, water, and sand. Mortar joints can be either flush or recessed.

Flush mortar joints are when the mortar is level with the face of the brick. This type of joint is best for protection against weather and forces acting on the wall from the outside. Recessed mortar joints are when the mortar is set back from the face of the brick. This type of joint allows for expansion and contraction of the masonry units caused by changes in temperature.

Masonry Tools

Conventional Grout

Grout is a mix of Portland cement and some other sand. Grout is used to fill the spaces between masonry units. It is also a part of the mortar mix. The main function of grout is to provide support and reinforcement to masonry construction. It also acts as a waterproofing agent.

Portland cement is the main ingredient in the grout. Other ingredients include water, sand, and sometimes lime. The ratio of these ingredients varies depending on the type of grout being mixed.

Grout can be mixed by hand or with a mixer. The amount of water added to the mix should be just enough to make the mix workable. Too much water will make the grout weak and susceptible to cracking.

Ready-Mix Concrete

Ready-mix concrete is a mix of Portland cement, gravel, and sand that only requires water to harden. Ready-mix concrete can be used when fencing posts or deck supports are needed.

Rebar

Reinforcing bars or rebar are steel bars that can be added to masonry and then embedded into it to increase its strength. For larger projects, such as concrete sidewalks, rebar can be used.

Frequently Asked Questions:

1. What are the essential tools needed for DIY masonry projects? For DIY masonry projects, essential tools include a margin trowel, square-notch or V-notch trowel, cold chisel, brick hammer, and wire brush. These tools help in spreading mortar, cutting bricks, and cleaning the work area effectively.

2. What is the purpose of using a square-notch trowel in masonry? A square-notch trowel is crucial for evenly distributing mortar on flat surfaces like cement boards. Its notched design helps control the amount of mortar applied, ensuring consistent coverage and adhesion.

3. Why is a brick hammer preferred over a regular carpenter’s hammer in masonry? A brick hammer is designed specifically for masonry work with a blunt side for cutting bricks and a sharper edge for scoring. It is more robust than a carpenter’s hammer, making it suitable for the heavy-duty nature of masonry tasks.

4. Can old masonry materials like mortar and concrete be stored for long periods? Storing masonry materials like mortar and concrete for extended periods is not recommended as exposure to moisture can cause them to harden and become unusable. It’s best to purchase these materials close to when you’ll use them and store them in sealed plastic bags to minimize moisture exposure.

5. What is veneer mortar, and when should it be used? Veneer mortar is a polymer-enriched type of mortar designed for sticking veneer units to vertical surfaces. It is particularly used for manufactured stone veneer and should be mixed in small batches due to its high cost.

6. What is the difference between mortar, grout, and concrete in masonry? Mortar is used to bond masonry units together and is typically made of Portland cement, sand, and water. Grout, which also contains Portland cement, fills spaces between units and adds reinforcement. Concrete, differing from both, includes aggregate and is used for larger structural elements like fencing posts or deck supports.

The image shows a close-up view of a masonry worker's hands working on a brick structure. The worker is holding a tool, likely a trowel, and is in the process of laying or repairing bricks. The image features a stack of red bricks and wooden beams, indicating an ongoing construction or repair project. The overall scene depicts the hands-on work involved in masonry and brick laying.

What You Need to Know About Restoring Your Chimney?

A fireplace can be one of the primary centerpieces of a home. Whether it is used in your kitchen, a bedroom, or living area, the warmth and light that it exudes draws people near it for fellowship. If you’ve spent the money to install/maintain a fireplace in your home, then you know that it should work as well as it looks. 

The hidden yet primary worker of a fireplace is a chimney. When a fire is lit, it goes overtime to ensure that the smoke is funneled outside rather than filling your home. Without a properly working chimney, your fireplace will either be purely decorative or a nightmare when you strike a match in the firebox. 

When you set out to repair or restore your chimney, it’s best to get an idea of how much it is going to cost, how it can be done, and what sorts of repairs you might need. Here’s an overview of some basic knowledge that will help you make the right decisions for your home, family, and beautiful fireplace. 

How Much Do Chimney Repairs Cost? 

restoring your chimney

Costs will vary depending on what feature of your chimney needs repairs, but the average cost would be around $576. Your price will depend on the material your chimney is made from, the size, the kind of issues you are dealing with, etc. 

A basic brick-and-mortar repair could cost anywhere between $253-$2,532, and the price point will fluctuate depending on what type of material your chimney is built from. Brick repair will be a cheaper option, whereas stucco can easily go from $1,266-$5,064 if your repair needs are more extensive. Individual features (cracks, wood rot, etc.) can be as low as a few hundred dollars to repair if there isn’t much, but issues like spalling (broken or missing bricks and stones), repointing, or tuckpointing (replacing mortar, sometimes aesthetically) can cost much more. 

One of the most costly issues you could encounter is waiting too long to fix an issue (especially in the crowning) which could result in the need for a full replacement of the chimney. In that case, you could be paying well into the thousands instead of hundreds, so be sure to jump on repairs in a timely manner! 

And if you notice damage to your chimney, hold off using the fireplace until you can get it fixed! Working with a damaged chimney can cause even more damage and be dangerous. 

Are Chimney Repairs Covered by Insurance? 

Homeowners’ insurance tends to cover unexpected or unprecedented events (also known as “Acts of God”) such as natural disasters. If your chimney is damaged by a violent flood, earthquake, tornado, etc. then you have a good chance that your insurance will cover the repairs. 

However, if your repair needs stem from something a little less catastrophic – like old, worn-out materials or your contractor doing a bad job building it – then you might have a little more trouble filing a claim. Insurance companies need to see proof that the damage didn’t come from your own lack of routine maintenance or ill-chosen craftsman. 

The best thing to do is to check your fireplace and chimney regularly for issues and get people that you can trust to install anything that it needs. Then, know what your insurance plan covers and keep yourself up to date on what it offers. Do your best to find the plan that is best for your family! “Insurance is an investment,” says Pete Karageorgos, the director of consumer and industry relations at the Insurance Bureau of Canada “so you want to take the time and do it right.” 

Can a Roofer Repair a Chimney? 

Whether or not a roofer is the best choice to repair your chimney depends on what exactly the repair is! 

If your issue has to do with a leak, there are a couple of things to look into before hiring anyone. Water coming down your chimney can be an issue that stems from a broken cap or crown (what covers the chimney up at the top), or from cracks and broken bits in the chimney itself with the brick or stones. If these are the cases, then you should consider calling a chimney specialist rather than a roofer. Roofers won’t have the experience or knowledge to handle the problem the same way that someone whose expertise lies in chimneys will. 

A third option, though, is that your chimney might be leaking from the flashing. Flashing is a thin piece of metal that attaches the chimney to the rest of the roof around it. When it becomes warped or out of place (or maybe even attacked by wild animals seeking your chimney for a new home), water can come through what was once airtight. In these cases, a roofer is actually a good person to call because the process of replacing the flashing will require the removal of the roof around the chimney, and the ability to put it back together afterwards. Be sure to find an experienced roofer for this and one who will offer you proper materials for your flashing

Other issues with a chimney may require other specialists. Brick masons will be able to rebuild major aspects of your chimney, or even replace it completely if it came to that. And chimney sweeps do more than sing and dance through London: they play an important role in cleaning and maintaining your chimney, as well as fixing moderate damages in the brick and mortar. So while a roofer is great for flashing or other areas of your roof, in these other areas you will get the best quality work with someone who knows exactly how to deal with a chimney. 

What Are the Most Common Types of Chimney Repairs?

Like any part of a house, chimneys need a lot of maintenance and routine checks to make sure that they are functioning properly. And because they deal with fire and gas, neglecting to do these things can be quite hazardous for you and your family. Knowing what some of the most commonly needed chimney repairs are can inform and inspire you to take a look at your own chimney and determine whether or not it might be time to get someone out there to fix it up. 

Blockage

restoring your chimney
Image source – https://www.mychimney.com/blog/4-reasons-regular-chimney-sweep-services-are-so-important/

Blockage is anything that is plugging up the chimney and keeping it from releasing the smoke and gases properly. It might be anything from a bird’s nest to just a buildup of waste and debris, but either way, it is imperative to keep blockage out of your chimney! Unaddressed blockage can result in house fires. 

One of the most dangerous forms of blockage is creosote. As you burn wood in your firebox, both soot and black tar (creosote) will float up the chimney and get deposited in the lining of the flue. Creosote is flammable and is the cause of many chimney fires in homes. Like other blockages, creosote can also impede the escape of carbon monoxide out of the chimney. Carbon monoxide is an odorless, tasteless, and colorless gas that is deadly to humans and frequently found in homes that have malfunctioning chimneys. When there is no airflow in and out of a home, a fire will devour what little oxygen there is, and then carbon dioxide; finally creating carbon monoxide which has nowhere to go if the chimney is blocked. The only option is for it to flow back into your home. 

Ensuring that your chimney is regularly checked and cleared of blockage (and NOT using it if you know that it is blocked!) will reduce the risk of carbon monoxide poisoning. But even so, it’s a good idea to buy a carbon monoxide alarm if you use a fireplace or any fuel-burning device in your home. Far, far better to be safe than sorry! 

Chimney Lining

restoring your chimney
Image source – https://www.kcsweep.com/chimney-liner-install/

The lining in your chimney (also called flue lining) is one of the most important pieces. It is what helps vent your chimney (and prevent things like carbon monoxide poisoning). A cracked lining could be extremely dangerous because it can also spread fires to parts of your home that could catch fire. 

If you do not have a stainless steel flue lining, consider getting one. Steel, rather than clay, is far more heat resistant and therefore damage resistant, and takes much longer to need replacing. Be sure to examine your chimney lining regularly (at least once a year) to ensure that all is working properly and to mitigate any damages! 

Caps and Crowns

restoring your chimney
Image source – https://theconstructor.org/tag/chimney-crown/

When you think about the fact that a fireplace/chimney’s primary function is, well, fire, then it makes sense that its most deadly enemy would be water. A chimney’s cap and crown are on the front lines against this enemy, and if they aren’t in top shape then the structural integrity of your chimney could pay the price. 

A chimney crown is a slab that seals off your chimney from water and the elements. If it is cracked or not as watertight as it is meant to be, then the water can trickle in and cause the mortar of your chimney to soften and begin to crumble. Crowns need to be checked frequently to ensure that they are working up to snuff. 

A chimney cap is a part that covers the flue and keeps everything from rain, debris, and curious wildlife from sneaking in. Without a proper cap, rust and decay can enter the chimney, and gases and fires could enter your home. 

Masonry

restoring your chimney
Image Source – https://www.mychimney.com/blog/4-major-types-chimneys-used-residential-commercial-buildings/

The structure of a chimney itself – the brickwork, stucco, stone, etc. – can actually be one of the most enduring elements of a chimney if the masonry was done right. But with time, erosion, and of course improper maintenance of the cap and crown, the chimney can need repairs just like any other function. 

If a brick is cracked or out of place, then “repointing” or “tuckpointing” can be done to fix the problem. Repointing is grinding out the mortar between bricks that is getting worn down and replacing it with fresh mortar. Tuckpointing is replacing the mortar and choosing that matches both the original mortar and the bricks to refine the lines and create an aesthetic approach to the repair. 

It is possible that you may have to replace entire bricks on your chimney if there has been too much damage done to them. This can be frustrating, but remember that it is cheaper in both the financial realm and in the peace of mind to pay someone to replace a few bricks instead of dealing with an entirely collapsed chimney. 

All of this may sound expensive, overwhelming, and maybe not even worth having a fireplace to deal with in the first place. But that does not have to be the case! Remember that fireplaces are an investment for you and your home, and keeping them that way can make your days in the house that much better, and also improve the value of your home. 

The best times to have an inspection of your chimney is right before and right after the wintertime (which is when fireplace use is the most prominent). It’s important to catch issues before they become dangerous or catastrophic events that can claim lives. It doesn’t have to be scary with some precautions and knowledge about how your fireplace works and what sorts of things to be aware of. And your inspector, of course, should know these things as well and can discuss them with you. 

A fireplace can be one of the primary centerpieces of a home. Whether it is used in your kitchen, a bedroom, or living area, the warmth and light that it exudes draws people near it for fellowship. Don’t let small issues detract from that fact, and give your chimney what it needs to protect the fireplace so that your house and family can enjoy all of the benefits! 

Frequently Asked Questions:

1. How much does a typical chimney repair cost? Chimney repairs can range from $253 to over $5,000, depending on the extent of the damage and the materials needed.

2. Are chimney repairs covered by homeowners insurance? Chimney repairs are usually covered if the damage is caused by “Acts of God” like tornadoes or earthquakes, but not for wear and tear or poor maintenance.

3. Can a roofer repair my chimney? A roofer can repair chimney issues related to flashing, but for structural repairs or issues related to the chimney’s masonry or flue, it’s best to contact a chimney specialist.

4. What are common types of chimney repairs? Common repairs include fixing blockages, repairing or replacing chimney linings, and addressing issues with caps and crowns.

5. Why is it important to repair a chimney promptly? Delaying chimney repairs can lead to more severe issues, including structural damage, water leaks, and increased fire hazards.

6. When should I inspect my chimney? Inspect your chimney before and after the winter season or more frequently if you use your fireplace extensively. This helps catch issues early before they become major problems.