The Ultimate Guide To DIY Masonry Restoration: Achieve Amazing Results

Introduction to DIY Masonry Repair and Restoration

Gaining an in-depth understanding of DIY Masonry Repair and Restoration is essential. Here’s a six-step guide to get you started:

  1. Identify the type of damage.
  2. Gather necessary tools and materials.
  3. Clean the damaged area.
  4. Prepare the masonry mixture.
  5. Fill gaps or cracks carefully.
  6. Cure restoration for optimal results.

It’s important to follow the steps precisely. Safety precautions are a must. Wear proper clothing and eye protection when handling equipment and materials. Opt for high-quality materials – they’ll make your repairs last longer. Now you have the knowledge to tackle minor repairs yourself. Don’t miss out on adding value to your home with regular maintenance of your masonry structures.

Preparation for Masonry Repair and Restoration

Before Proceeding with Masonry Repair and Restoration, Make Sure that You Have Completed Efficient Preparation

The key to executing successful masonry repair and restoration lies in meaningful preparation. This includes carefully examining your structure, identifying the underlying cause of the damage, and sourcing the correct materials and tools. By completing these crucial preparatory steps, you can avoid further damage to your masonry and maintain its overall integrity.

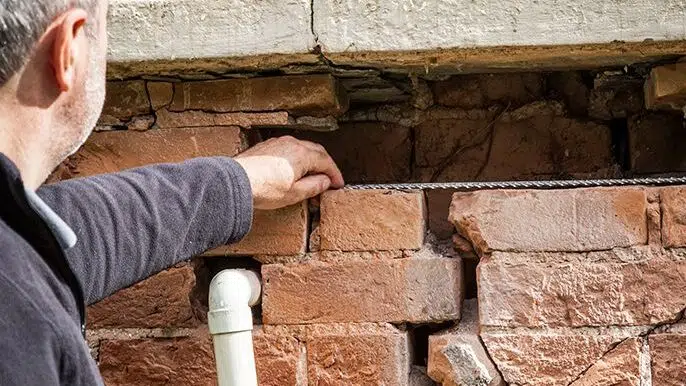
Conducting a Thorough Inspection of Your Masonry before Starting Repair and Restoration

Before beginning any work, ensure that you have assessed the extent of the damage to your masonry. Conduct a thorough inspection of your structure, identifying any cracks, gaps, or weakened areas. This will enable you to tailor your repair and restoration efforts to meet the specific needs of your masonry, delivering the most effective results.

Homeowner inspecting his masonry damage.

The Importance of Sourcing High-Quality Materials and Tools for Your Masonry Restoration Project

When sourcing materials and tools for your masonry restoration project, ensure that you choose high-quality products that are specifically designed for the job. Using inferior materials can reduce the overall effectiveness of your repair process, resulting in further damage to your structure. Additionally, using the appropriate tools for the job can significantly improve the efficiency and accuracy of your work.

Don’t Risk Further Damage – Start Your Masonry Repair and Restoration Journey Today!

By taking the time to thoroughly prepare for your masonry repair and restoration project, you can ensure the best possible outcome. Don’t wait until your masonry is beyond repair – take action now to protect and preserve your structure for years to come. With patience, diligence, and the right materials and tools, you can embark on a successful masonry repair and restoration journey today!

If you think a crack in your masonry structure is just a minor issue, it’s time to cement your understanding of proper inspection techniques.

Inspection of Masonry Structure

Before repairing or restoring masonry, assessing the condition is essential. An inspection can help spot defects, damages, and deterioration that require urgent attention. This assists in deciding the best approach and methods for repair and restoration.

Attention must be paid to walls, chimneys, archways, etc., for cracks, bulges, and signs of distress. Missing mortar joints and bowing walls are indicators of major structural damage.

The inspection includes:

  • Mortar quality
  • Presence of moisture
  • Cracks in bricks
  • Lintel and arch inspection
  • Drainage systems
  • Corrosion in steel reinforcements
  • Staining due to salt buildup

Regular inspections ensure structural stability, prolong lifespan, and prevent future costs. Small irregularities can become costly problems. Scheduled inspections every few years optimize time management for repair projects. Knowing your materials is key.

Identify the Type of Material

Understanding Material Composition:

To repair and restore masonry, it is important to know the material composition. Whether concrete, brick, or stone, the type of material influences the bond strength and durability of restorative products used.

Conducting a lab test can help determine the physical properties, like compression strength and moisture content. This plays a vital role in choosing suitable repair methods.

It is essential to identify any unique features that have been added after the initial construction. This includes cornices or carvings that may have been missed during an initial survey. Assessing these correctly helps select appropriate conservation techniques without changing historical markers.

Studying the composition of materials can reveal how architecture varies from region to region. It can also uncover innovation in architectural styles that can’t be replicated with modern methods.

Before starting masonry repair, make sure you have the right tools! Toothpicks won’t do the job.

Tools Required for Masonry Repair and Restoration

Masonry repair and restoration require key tools for successful and secure results. These include:

  • masonry trowels for mixing, spreading, and forming mortar
  • chisels to fit desired patterns and sizes
  • buckets for mixing mortars
  • mason’s hammer for stonecutting
  • masonry saws to cut and shape brick/tile/stone
  • a caulking gun for filling gaps between materials like concrete blocks.

Protective gear such as gloves, safety glasses, dust masks, and hard hats should also be worn, as this kind of repair exposes workers to falling debris.

Power drills with diamond-tipped bits are useful for drilling holes into brick walls. Investing in good quality masonry repair tools is essential for preventing costly and lengthy damage repairs.

Make sure to have the right equipment ready before starting restoration. The right tools and techniques will guarantee a long-lasting structural integrity. Cleaning up after a party is tough – imagine fixing centuries-old masonry!

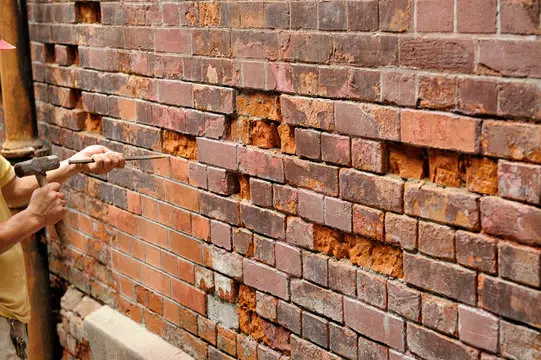
Cleaning and Removal of Damage in Masonry

To achieve a professional finish in masonry repair and restoration, it is vital to understand the process of cleaning and removing damage from masonry surfaces. This involves utilizing specific techniques to eliminate any existing damage or debris on the surface.

Here is a 5-step guide to follow when cleaning and removing damage from masonry surfaces:

  1. Begin by assessing the damage to determine the extent of repair required
  2. Protect surrounding areas and cover any delicate elements with tape or plastic sheets
  3. Use a pressure washer or chemical cleaner to remove dirt, grime, and stains from the masonry surface
  4. For deeper damage, use a chisel or grinder to remove damaged sections of masonry
  5. Dispose of debris and allow the masonry surface to dry completely before proceeding with any restoration work

For more delicate or intricate masonry surfaces, it is important to use a gentler cleaning approach. Consider using a soft-bristled brush or low-pressure washer, to avoid causing any further damage. Always test any cleaning solutions on a small, inconspicuous area before applying it to the entire surface.

Recently, a historic building underwent major restoration work that included cleaning and repairing the damaged masonry. With the help of expert masons and specialized cleaning equipment, the building’s facade was restored to its former glory. The resulting transformation was stunning and highlighted the importance of proper masonry repair and restoration techniques. Don’t be fooled by the term ‘loose debris’, it’s not like it’s going to blow away on its own – it needs some serious attention.

Careful removal of damaged bricks from a masonry wall.

Removing Loose Debris and Grime

To have a clean and safe masonry surface, it is important to get rid of any debris and grime on it. This is essential for a successful restoration project. Removing these elements prepares the surface for further cleaning and repair work. Here’s a 6-Step Guide to effectively remove Loose Debris and Grime from masonry:

  1. Put on gloves and clear away big debris such as fallen bricks, mortar, or rocks.
  2. Use a soft-bristled brush or broom for small dirt particles stuck on the surface.
  3. If needed, use a pressure washer set at low pressure to clean, without damage.
  4. Mix detergent with warm water and use in a pressure washer if the brick surfaces are stained or neglected.
  5. Scrub the affected areas with a soft-bristled brush after applying the solution. Allow time for soaking then rinse with high-pressure water.
  6. Don’t use harsh chemicals when there’s vegetation around, as they can harm plants and animals.

Keep in mind that you may need extra steps, depending on how long the debris has been there. Speak to a professional about extra measures, so you don’t cause more damage to your property.

Pro Tip: Start with minimal pressure when using high-pressure washers. Increase pressure gradually until you get satisfactory results, while preventing damage to your masonry surfaces. Fixing cracks in masonry is like filling in the gaps in a relationship. Do it right, or it will keep crumbling apart.

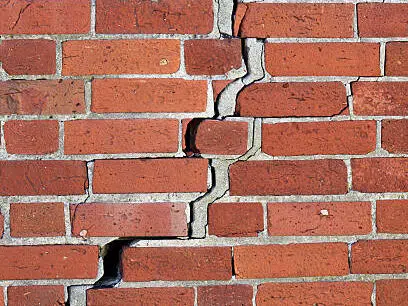
Repairing and Sealing Cracks and Holes

Masonry damage? Time to fix up those cracks and holes! Repairing and sealing them stops further damage and keeps the structure standing. Follow these 3 simple steps:

  1. Clean the area – remove any dust, debris, or residue.
  2. Fill the gap – use a masonry repair filler.
  3. Seal the area – apply a masonry sealer over the filler.

Larger gaps might need metal reinforcement rods for stability.

Pro Tip: Use high-quality materials for long-lasting results!

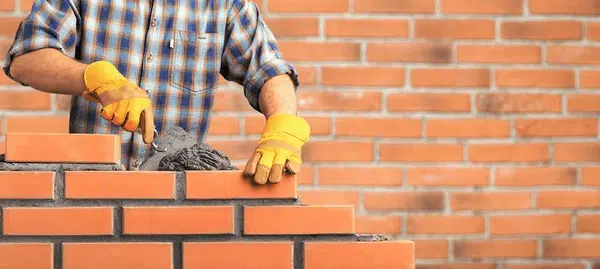
Rebuilding and Replacing Damaged Masonry

To restore the structural integrity of damaged masonry, it is necessary to undertake rebuilding and replacement procedures. This involves the proper identification of the damaged areas and the use of appropriate materials and tools to repair or replace them.

Here is a 3-step guide to help you with rebuilding and replacing damaged masonry:

  1. Assessment – Inspect the entire structure to identify the nature and extent of the damage. Focus on the mortar joints, as these are the most vulnerable points. Remove any damaged areas and clean the surface properly.
  2. Preparation – Prepare the replacement material and create a bond that mimics the surrounding masonry. Mix the mortar according to the specifications provided by the manufacturer and apply it on the replacement section before carefully fitting it in place. Level and pack it properly and leave it to dry for the recommended time.
  3. Finishing – Once the replacement material has dried, clean it properly to remove any residual material. Remove any unsightly marks or stains that might appear on the surface. Finally, apply a coat of waterproofing agent to protect against weathering.

While rebuilding and replacing damaged masonry is a strenuous process, it is crucial to use proper safety equipment, follow specific instructions, and pay attention to the condition of the masonry structure. Failure to do so can compromise the structural integrity of the building.

To ensure a professional finish, consider hiring a trained masonry professional who can handle the intricate details and deliver quality workmanship.

Remember, the key to a professional and long-lasting finish is attention to detail and the use of appropriate materials and tools. By following these steps, you can repair and restore damaged masonry to its former glory.

When it comes to replacing individual bricks or stones, remember: it’s like playing a game of Jenga, but with bigger consequences.

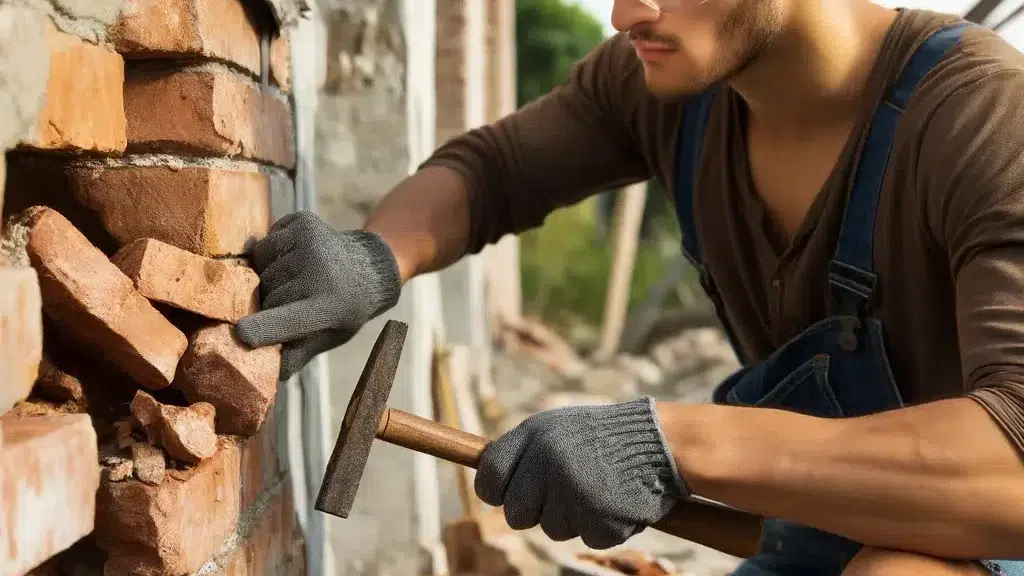
Replacing Individual Bricks or Stones

Rebuilding a damaged masonry wall requires precision and accuracy. Here’s what to do:

  1. Take a cold chisel and hammer, and remove the mortar around the broken brick or stone.
  2. Use a flat bar to remove the old brick or stone.
  3. Clean out any debris from the cavity. Use a wire brush to clean off loose mortar from other bricks or stones.
  4. Put fresh mortar on the cavity with a pointing trowel. Make sure it fills all gaps before placing the new brick or stone.
  5. Carefully insert the new brick or stone and press down until it’s snug in the spot.
  6. Use a pointing tool to smooth and level excess mortar around the joint.

Remember to select replacement bricks or stones that match existing ones in size, color, texture, etc.
Also, wear gloves and safety glasses to protect yourself from any potential injury.
Ah, if only rebuilding life was as simple as rebuilding a wall!

Rebuilding Sections of the Wall or Structure

If a masonry wall or structure is damaged, sometimes it’s necessary to rebuild sections of it. Here’s a 5-step guide to do this efficiently:

  1. Find out how much of the wall or structure needs rebuilding and what materials are needed.
  2. Demolish the damaged section while taking care of other nearby structures.
  3. Get bricks, blocks, stones, mortar mixers, chisels, hammers, cutting blades, and utility knives.
  4. Rebuild from the base up using mortar mix between layers.
  5. Clean and seal the surfaces 24 hours after finishing.

Remember to follow safety regulations and consider an expert’s opinion before repairing work. If unsure, consider hiring a professional bricklayer with special tools and knowledge. Don’t let damages go unattended! Start rebuilding today for a secure future.

Finishing Techniques for Professional Results

Achieving a Professional Masonry Finish

To achieve the desired professional finish for masonry repair and restoration, it is essential to know the proper finishing techniques. These techniques can make a significant difference in the final outcomes of your DIY masonry projects. Following the guidelines below will deliver a pleasing and long-lasting finish that will enhance the aesthetic appeal of your home or building.

5-Step Guide for a Professional Masonry Finish

  1. Clean the surface: Use a high-pressure washer, a wire brush, or a stiff bristle brush to clean the surface. Pay attention to every crack and crevice to remove all dirt, grime, loose mortar, and other debris.
  2. Repair and Patch: Use a suitable patching compound to fill any gaps, cracks, or missing mortar. Allow it to cure as recommended by the manufacturer.
  3. Sand and Smooth: Sand the repaired surface once the patch has dried, using a sandpaper with 180-grit or higher. This will level any unevenness and create a smooth surface.
  4. Apply Finish Coats: For a natural finish, use a mortar-based mix for the final coats. For painted finishes, use a suitable paint or coating. Apply the finish coats with a hawk and trowel, following the original pattern.
  5. Cure and Seal: Allow the surface to cure completely before sealing it. Use a sealant that matches the finish to protect it from water and other elements.

Essential Tips for Professional Masonry Finishing

Applying a final coat to the repaired surface while wet will lead to bulges and bumps on your masonry surface. This can make your masonry patch look unsightly and unprofessional. Therefore, be patient and allow each coat to cure completely before moving to the next one.

A True Story of Masonry Restoration

John, a DIY enthusiast, attempted to repair his home’s masonry wall to save money. He patched the holes with mortar and painted over them. However, within a few months, the paint flaked, and the patched areas began to crumble. Disappointed with the results, he hired a professional masonry repair service who had to strip the paint, redo the patching, and apply a new finish. John learned that proper preparation, patching, and finishing were crucial for a long-lasting and professional look.

Remember, the right mortar mix can make or break your DIY masonry project, so choose wisely and mix thoroughly.

Applying the Appropriate Mortar Mix

When selecting the right mortar mix for your finishing techniques, there are several factors to keep in mind. These include types of bricks or blocks, location, weather conditions, and the required finish.

Table 1 below provides some common mortar mixes for various conditions and finishes. Each column is labeled with a factor to consider when picking the right mix.

Mix typeBrick/Block typeLocationWeather ConditionsFinish
Type N mortar mixStandard brick, BlockIndoor & outdoorModerate weatherGeneral purpose tuckpointing
Type S mortar mixStone, interlocking bricksOutdoor, below-gradeCold weatherStructural masonry
Type M mortar mixStone, concrete blocksOutdoor, above-gradeHigh wind, earthquake-prone areasHeavy loads and foundation walls

It’s important to follow manufacturer instructions for mixing and application carefully. And remember: safety first!

Mortar mix has been used since Roman times, when lime, sand, and water were the most prevalent building materials. Nowadays, cement-based mixes are more popular, as they reduce construction time and provide greater strength.

For perfect color and texture matching, use these tips!

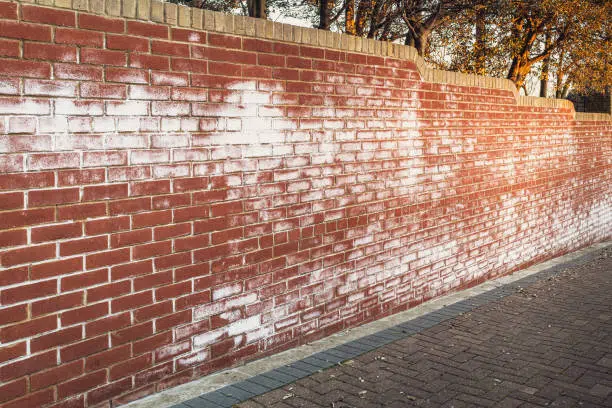
Matching Colors and Textures to Blend Masonry

Creating a unified look with masonry takes careful attention to matching colors and textures. Consider the structures and materials surrounding your project when selecting a blend. A seasoned mason can help blend new masonry with existing structures for a smooth finish.

Picking the right materials is key when doing a project with different surfaces, for example, brick and stone. Uncover similarities between the surfaces to make it easier to match shades and textures. Use samples of existing materials to get exact color matches.

Don’t forget about elements such as sunlight, shadows, and angles when blending masonry finishes. These things affect how colors look in different settings. Analyze these factors in relation to your desired result before beginning the project.

Our Masonry Pros suggest looking into all elements of matching colors and textures for blending masonry, including surrounding structures and hidden elements that could impact your project’s end result. Keep brickwork looking neat with proper care and maintenance, because crumbled masonry is a disaster for any professional.

Maintenance and Care for Masonry

Masonry Upkeep and Maintenance: Regular masonry maintenance goes a long way in preserving the strength and longevity of your structure. Keep an eye out for signs of wear and tear, such as cracks, leaks, and loose mortar.

To maintain the health of your masonry, ensure that it is free of water damage and moisture, as this can lead to structural issues over time. Additionally, regularly clean the surface to prevent dirt and grime buildup, which can cause discoloration.

It is essential to check for any vegetation growth on the masonry, as this can cause cracking and damage to the structure. Furthermore, ensure that any repairs or restorations to the masonry are done by a professional to ensure the best results.

There have been cases where improper maintenance and care of masonry structures has led to severe damage and costly repairs. For example, neglecting to address water damage on a structure can result in crumbling bricks and weakened foundation. Don’t neglect your masonry or it might crumble faster than your sense of humor at a dad joke convention.

Importance of Regular Maintenance

Maintaining masonry is essential to keep it strong and looking good. It can save you money on repairs and replacements, and keep you safe from hazardous conditions. If neglected, it’ll only deteriorate further, making it hard to repair.

To keep your masonry in tip-top shape, do periodic inspections for cracks, erosion and weather damage. Also, get rid of vegetation near it as it can cause harm over time. Use proper cleaning methods during regular cleaning to avoid any risk.

If needed, hire a professional for better quality care or for fixing structural issues. Doing this regularly will help your property stay structurally sound and attractive.

Maintaining masonry the right way and consistently will make sure it stays in good condition for years. So don’t let it crumble like your self-esteem after a break-up!

Tips for Keeping Your Masonry in Good Condition

Safeguarding your masonry’s quality is essential for its duration and looks. Here are a few tricks to make sure your masonry stands the test of time:

  • Check your masonry regularly for any wear or damage.
  • Make sure downspouts, gutters and drainage systems are working correctly to avoid water damage.
  • Use suitable cleaning techniques and substances to get rid of dirt, stains and pollutants.
  • Fix any splits or breaks immediately to prevent further damage.
  • Contact professional services each year for a more thorough inspection and maintenance.

Apply waterproofing compounds on your masonry to guard it from the elements. This will stop moisture infiltration while still letting it breathe. Plus, be conscious of any nearby trees or plants that could cause obstruction or other kinds of destruction.

Recall that proper upkeep is the key to stretching the life of your masonry. By taking proactive measures now, you can save yourself from costly repairs in the future.

Start today by arranging a meeting with a professional mason who can give you personalized advice for maintaining and caring for your special type of masonry. Don’t wait until it’s too late!

Remember, overlooking your masonry is like overlooking your ex – it may seem like a great idea at the time, but in the end, you’ll wish you hadn’t.

Conclusion

Confidently tackle masonry repair and restoration projects after considering various tips and techniques. Have the correct tools to get a professional finish. Take note of the mortar type – it’s essential to preserve your masonry. Inspect your masonry regularly for detecting damage early.

Prior to undertaking major repairs or restorations, always ask an expert for professional advice. Safety must be a priority – wear protective gear while working.

Beware! Improper use of cleaning agents can damage your masonry. Certain acidic cleaners can corrode stone or brickwork if not used correctly. Before using on the entire surface, read manufacturer instructions carefully and test the cleaner on a small area.

Frequently Asked Questions

  1. Can I repair my own masonry without professional help?
    • Yes, with the right tools, materials, and knowledge, it is possible to repair and restore your own masonry. However, it is important to have a good understanding of the process and safety precautions to take before starting any projects.
  2. What are some common types of masonry damage and how can I fix them?
    • Common types of masonry damage include cracks, chips, and spalling. To fix cracks, you will need to use a masonry crack filler and follow the manufacturer’s instructions. For chips and spalling, you will need to mix and apply a patching compound to the damaged area.
  3. What materials and tools do I need for masonry repair?
    • You will need materials such as masonry cement, patching compound, and a waterproofer. Tools necessary may include a trowel, hammer, chisel, wire brush, and safety equipment such as goggles and gloves.
  4. Can I restore the color and texture of my masonry?
    • Yes, there are special products available for restoring the color and texture of masonry. You will need to choose a product that matches the existing color and texture of your masonry to achieve a professional finish.
  5. What safety precautions should I take when doing masonry repair?
    • Before starting any masonry repair projects, it is important to wear safety equipment such as goggles and gloves to protect your eyes and hands. You should also work in a well-ventilated area and be mindful of any potential hazards such as uneven surfaces or loose debris.
  6. How do I maintain my newly repaired masonry?
    • To maintain your newly repaired masonry, it is important to regularly clean it using a pressure washer and mild detergent. You may also want to apply a waterproofer to help protect it from future damage.

Building Your Dream Home: How To Collaborate With A Masonry Designer

Understanding the Importance of Masonry Designers

Collaborate with a masonry designer for optimum results. Their experience and insight is invaluable. Trust them to bring their creative flair and professional know-how. This includes understanding design principles, safety measures, and zoning requirements.

The designer will provide advice on quality materials. They are best suited for your space’s purpose and local building codes. Plus, they have access to great prices from suppliers.

For cost savings, let the designer source materials. They have strong relationships with suppliers. This gives them access to high-quality raw materials at unbeatable prices.

Pro tip: Partner early. This sets expectations between all parties involved. Enjoy the creative process and watch your vision come to life!

Preparing for Your First Meeting with a Masonry Designer

To prepare for your first meeting with a masonry designer for custom masonry, with vision implementation is vital. You can bring your vision to life by identifying it for your space, and establishing your budget and timeline. These sub-sections will help you ensure that you and your designer are on the same page from the very beginning.

Collaborate with a masonry designer for optimum results.

Identifying Your Vision for Your Space

Before meeting a masonry designer, it’s key to have a clear idea of the area you want. Figure out the purpose of the space and activities that will take place. Define your style and any colors or textures you’d like to include. Look into existing structures and landscaping that can be incorporated. Visual aids, such as photos and sketches, are also helpful.

With this vision in mind, you’ll be able to communicate your desires to the designer. They can then make expert suggestions and adjustments. One client wanted a backyard patio, but weren’t sure how to visualise it. With help from the designer and inspiration photos, they created an elegant outdoor retreat with a natural stone fireplace as the centrepiece. The end result was exactly what they wanted.

Remember to set a budget and timeline for your project when speaking with the masonry designer. That way, you’ll be able to create a functional and beautiful design that meets all of your needs.

Establishing Your Budget and Timeline

Structuring Your Finances and Time-period

Constructing a practicable budget and timeline is important for a successful masonry design project. To guarantee a pleasant collaboration between you and your designer, take into account the following points:

  • Specify your budget: Before beginning any project, decide how much you are ready to spend. Be frank with your designer about your financial restrictions.
  • Fix a practical timeline: Establishing an achievable time-frame for the completion of the project is essential. Talk with your designer what can be practically accomplished within your budget and time-frame.
  • Be open to modifications: Adaptability is essential when it comes to structuring your financial plan and time-frame. Unanticipated costs may occur, or unforeseen situations could come up that require changes later on.

When talking about your financial plan and time-frame, make sure to ask questions if you have any hesitations or worries. Knowing all the details from the start will help avoid any miscommunication or issues in the future.

It’s essential to keep in mind that setting up a practical budget/time-frame from the beginning can lead you towards positive outcomes.

According to Houzz, famous online platform where architects or builders have set up their businesses cost around $2-$7 per square foot less than usual rates in traditional brick-like construction projects.

Working with a masonry designer is like playing Tetris, but instead of fitting blocks together, you’re fitting ideas and visions into a unified design.

Collaborating with Your Masonry Designer

To collaborate effectively with your masonry designer on bringing your vision to life, you need to have a good understanding of the process. In order to achieve this, you should focus on discussing custom masonry options and reviewing design concepts and making revisions. These sub-sections will act as solutions to ensure that the final outcome matches your unique vision with the expertise of a masonry designer.

Discussing Custom Masonry Options

When working with a masonry designer, discuss options for a personalized design. Materials, colors, shapes, and styles that fit your taste and fit the architecture. For example, natural stone instead of bricks or concrete blocks. You could also go for a certain pattern or motif to enhance the look of your building’s façade. Communicate these ideas and the designer will make a plan to suit your needs.

Innovative technologies like 3D modeling and virtual reality can help you see how the final product will look before any bricks or stones are laid.

Customized masonry designs have a long history. Ancient artisans crafted amazing structures with local resources like clay, stone, and wood. Today’s designers use modern techniques and tech alongside this ancient artistry to create timeless buildings.

Collaborate with your masonry designer to have a unique masterpiece that reflects your vision and identity. Tiny tweaks make all the difference in achieving perfection!

Reviewing Design Concepts and Making Revisions

When working with your masonry designer, it’s important to review the design concepts and make any updates needed. This ensures that the project meets your expectations and follows the vision. Here’s a 5-step guide on how to review and revise designs while collaborating with your masonry designer:

  1. Clarify Your Goals – Make sure you and your designer have clear objectives for the project. Figure out what you want to accomplish, what designs appeal to you, and make sure they fit the scope of the project.
  2. Evaluate Design Concepts – Review every option your masonry designer provides. Consider functionality, aesthetics, cost, and feasibility.
  3. Ask Questions – Get clarification from your masonry designer about their design choices. Figure out which materials are used, what it will cost, and other important details.
  4. Provide Feedback – Give feedback on what works and what doesn’t for you when reviewing designs by your masonry designer.
  5. Refine Design Concepts – Work with your designer to refine the original designs by making necessary changes until you get the desired outcome.

Also, consider the timeline agreed on for each revision before approving each design update.

I learnt from remodeling my home that having collaborative sessions, where I shared my views, helped my contractor understand my style choices better and interpret them more efficiently into designs during renovation processes.

Working with your masonry designer is like a game of Jenga – stay steady and have a plan.

Design concepts being reviewed by a masonry designer.

Implementing Your Vision with Your Masonry Designer

To implement your vision with your masonry designer, you need to work closely with them. Finalizing plans and obtaining permits, as well as managing the construction process, are important sub-sections to achieve this goal. In this way, you can ensure that your custom masonry project is executed to perfection, whether you’re a homeowner or business owner. Remember, the key to success is effective communication and collaboration with your masonry expert.

Finalizing Plans and Obtaining Permits

Before starting a masonry project, it’s important to finalize plans and get the necessary permits. This ensures that your vision is legal and avoids issues during execution.

  • Collaborate with your masonry designer to bring your concept to life. Discuss materials, measurements and design elements.
  • Find out local requirements for permits, such as for retaining walls or outdoor fireplaces. Check size, height and location limitations.
  • Prepare documents for permit applications – drawings, site plan details and other supporting material. Submit and wait for approval.
  • Review feedback from regulatory agencies on modifications or changes to design.

Remember variables that can delay completion times – weather and material availability.

Custom features using masonry let you create unique outdoor living spaces that reflect your personality. Don’t miss the chance!

With the right masonry designer, decisions will result in an amazing outcome. Managing a construction project is never easy, but a good designer can keep it under control.

Managing the Construction Process

Maximizing the Construction Process with Your Masonry Designer?

Finalize your vision with a skilled masonry designer. Manage the process smoothly. Communication is key to keep aligned with your plan. Changes made on-site can be costly.

Stay transparent and get timely updates from your builder. Discuss payment schedules, contingency plans, and contracts before construction starts. Coordinate closely to stay on-track. Work with your masonry designer for unified results.

Don’t let your dream fade away. Take proactive steps. Stay involved in every stage of the building process alongside the specialized masonry team. This will keep your custom masonry looking great – challenging, but worth it.

Maintaining Your Custom Masonry

To maintain your custom masonry and keep it looking great, you need to follow some simple steps. Regular cleaning and maintenance, as well as addressing any necessary repairs, are the keys to ensuring your masonry withstands the elements and stays in good condition. These sub-sections will assist you in retaining the beauty of your custom masonry and keeping it in top shape.

Regular Cleaning and Maintenance

Caring for custom masonry is important to increase its lifespan and keep it looking great. To ensure your masonry is functional, stylish, and durable, follow these guidelines:

  1. Clean It Regularly: Use a soft-bristled brush and warm, soapy water to remove dust, dirt, and other debris. Pressure wash it every six months or when needed.
  2. Inspect for Damage: Check for cracks, chips, or missing mortar. Don’t ignore these issues – they could lead to further damage. Repair them promptly.
  3. Seal Your Masonry: Sealing protects your masonry from water and UV rays. Get advice from a professional on the right product for your stone or material.
  4. Maintain Landscape Around Masonry: Keep weeds and foliage away from the structure. Plant roots can cause damage when they expand.

Additionally, check for leaks around your masonry, water gently with a hosepipe near new patios or walls, don’t use harsh chemicals (they lower longevity and color faster), and clean with mild soap and water. Fix cracks before they get bigger, and apply sealants suggested by professionals to enhance appearance and prevent deterioration.

Addressing Any Necessary Repairs

It’s essential to take action quickly to address any issues that could affect your custom masonry. Ignoring even minor repairs can lead to more extensive fixes later. Check your wall or structure for any cracks, chips, or fading bricks regularly. Spotting problems early can mean the difference between a simple repair and a major overhaul.

For minor chips or cracks, use epoxy filler that looks like your wall’s original color. If you discover substantial damage like severe cracking, water damage, and crumbling mortar joints, get help from experienced masonry contractors right away.

Also, reseal your masonry occasionally to ensure it stays protected from harsh weather conditions’ damages. Using high-quality sealers can lengthen the life of brickwork and help keep its initial beauty.

European restorers, while restoring ancient masonry treasures like cathedrals, uncovered that hotbeds had been used for centuries to heat structures properly without damaging the walls or supports. They included this old technique in their restoration process by putting hot beds against decaying stone before replacing it with new blocks, creating a stronger bond between old and new stonework.

Having a vision for masonry is great, but bringing it to life is better (and less likely to result in a collapsed chimney)!

Conclusion: Bringing Your Masonry Vision to Life

Achieve your custom masonry vision with expert help!

Working with a masonry designer is key for bringing your masonry vision to life. Their knowledge and skill can craft a design that blends with your architecture.

Consultations are crucial for realizing your vision with unique details and design elements. You’ll benefit from their experience with custom masonry projects. They will guide you on materials, colors, and textures that will make your space beautiful. From statement fireplaces to intricate stonework, they can maximize your project’s potential.

Every detail matters when designing custom masonry projects. Think of durable stones, weather-resistant textures, and finishes that will contribute to the final outcome. Masonry designers pay attention to each detail while ensuring it matches the vision.

Pro Tip: Pick reputable masonry designers who provide high-quality solutions tailored to your needs.

Frequently Asked Questions

  1. What is a Masonry Designer and how can they help bring my vision to life?
    • A Masonry Designer is a professional who specializes in custom masonry projects. They can help you conceptualize and implement your vision by creating a detailed plan that takes into account your preferences, budget, and design aesthetic.
  2. How do I find a reliable Masonry Designer?
    • Research potential Masonry Designers in your area, read reviews, and ask for referrals from friends or colleagues who have worked with someone they trust. Meet with potential designers in person to discuss your project before making a final decision.
  3. What should I expect during the design process?
    • You can expect your Masonry Designer to ask you questions about your vision, preferences, and budget. They will then develop a comprehensive plan that outlines the scope of the project, materials used, and timeline. Expect to have several meetings with your designer to review the plan and make any necessary revisions.
  4. How much does it cost to work with a Masonry Designer?
    • The cost of working with a Masonry Designer varies depending on the complexity of the project and the designer’s experience. Some designers charge a flat fee for their services while others bill hourly. Make sure to discuss payment options with your designer before beginning the project.
  5. Will I have input in the design process?
    • Absolutely. It is important to work with a designer who values your input and incorporates your vision into the final product. Your Masonry Designer will listen to your ideas, preferences, and budget to create a design that meets your needs and exceeds your expectations.
  6. How long does it take to complete a custom masonry project?
    • The timeline for a custom masonry project depends on the scope of the project and the materials used. Your Masonry Designer will provide you with a timeline that outlines the work to be done and the estimated completion date. Factors such as weather conditions and unexpected delays can also impact the project timeline.

Choosing Between Tuckpointing and Repointing: What You Need to Know

Tuckpointing and Repointing Defined

Tuckpointing and Repointing are masonry terms used to describe techniques for repairing mortar joints in brick or stone walls. Specifically, tuckpointing involves applying a thin layer of contrasting mortar to give the appearance of a fine joint, while repointing involves filling gaps and replacing worn-out mortar joints. Both techniques are used to increase the longevity and aesthetic appeal of brick or stone structures, making them popular among homeowners and DIY enthusiasts alike.

For tuckpointing, a skilled tradesperson will use two different colours of mortar, one for the base coat and one for the decorative layer. They will then apply the base coat, leaving only a small amount visible along the edge of the joint. Once the base coat has dried, the decorative layer is applied on top, creating the appearance of a much narrower joint than there actually is.

Repointing, on the other hand, involves grinding out the old mortar, cleaning the joint, and then filling the gap with fresh mortar. It is important to match the colour and consistency of the new mortar as closely as possible to the old mortar, in order to achieve a seamless blend.

When undertaking either of these techniques, it is important to take appropriate safety precautions and obtain the necessary materials and tools. It is also recommended to seek professional advice and/or hire a reputable tradesperson to ensure a high-quality finish and avoid costly mistakes.

If you want your brickwork to be smoother than a baby’s bottom, then tuckpointing is the way to go.

Tuckpointing

Gothic ghosts repointing their old haunts? Nope, tuckpointing is the term! It’s the process of using two shades of mortar to create an illusion of narrow joints between masonry units. White or light-colored grout with a contrasting border makes brickwork look ornamental.

To restore stonework, tuckpointing is essential. Old, weak mortar is first removed and fresh, durable mortar is added. Special tools are needed to clean debris out of masonry joints without harming the surface.

A Heritage building in Sydney had severe structural damage. Builders recommended a tuckpointing job to preserve stonework with premium precision. The end result? A design that closely resembled a stonemason’s original workmanship.

A worker tuckpointing bricks.

Repointing

Repointing has many advantages; it adds aesthetic value, increases durability and strength. Matching the mortar’s color, texture, compressive strength and moisture expansion is key for successful repointing. It’s also essential that the new mortar is of better quality than the existing one.

Timing is important when repointing – temperature and humidity can affect mortar curing. Quickly tending to smaller repairs can prevent bigger issues.

Hiring an experienced mason is a must when repointing. The mason should pay attention to detail – walls must be sound, materials compatible, and installation techniques proper – for a successful repointing that lasts decades.

After repointing, protect your wall surfaces with sealers/paints to extend the life of those attractive features.

Wall of bricks being repointed.

The Differences Between Tuckpointing and Repointing

Tuckpointing vs. Repointing: Understanding the Differences

Tuckpointing and repointing are two common terms used in the field of masonry. Both are related to the repair or restoration of brick or stone structures, but they have distinct differences that homeowners and DIY enthusiasts should know about.

To understand the differences between tuckpointing and repointing, let’s take a look at the following table:

TuckpointingRepointing
ObjectiveTo create an illusion of fine joints on brickworkTo replace damaged or deteriorated mortar joints
ProcessTwo contrasting colours are used for thin layers of fine mortarExisting mortar is removed and replaced with new mortar
ToolsTrowel, tuckpointing iron, jointerHammer, chisel, grinder, pointing trowel
CostCostlier than repointingCheaper than tuckpointing
AppearanceMore visually appealing with the contrasting coloursUniform in appearance

While tuckpointing and repointing may seem similar, it’s important to note the key differences in their objectives, processes, tools used, cost, and appearance.

It’s worth noting that some masons may use the terms interchangeably, but ultimately, it’s the objective and process that sets the two apart.

Did you know that the term “tuckpointing” originated in England during the 18th century? It was a technique developed to imitate the look of more expensive brickwork.

Understanding the difference between tuckpointing and repointing can help homeowners and DIY enthusiasts make informed decisions about the restoration and maintenance of their brick or stone structures. Figure out the difference between tuckpointing and repointing, or else your masonry project may end up looking like a masterclass in confusion.

Purpose

Tuckpointing and repointing are two masonry techniques used to repair mortar joints in brick or stone buildings.

Tuckpointing is mainly for looks – a thin layer of contrasting color mortar is placed on the top of existing mortar. It is cheaper, but not as durable.

Repointing replaces damaged or eroded mortar with new material – it needs the old stuff removed first. Not only does this improve the appearance, but also makes the structure stronger – no water seepage or damage inside!

Tuckpointing is ideal for buildings with lighter weather exposure and minimal damage, while repointing takes care of bigger issues.

Before hiring a professional, check their experience and get recommendations from previous clients. This will help you decide which technique is best for you. Brick by brick, let’s get cement-ed!

Materials Used

Tuckpointing and Repointing involve restoring the exterior of a brick wall. Tuckpointing requires two different colors of mortar to create an illusion of depth and texture. Repointing is replacing old or damaged mortar with fresh mortar. The construction materials used for each are different.

Take a look at the table below:

Construction MaterialTuckpointingRepointing
Mortar ColorDifferent colored mortars. Lighter than traditional mortar colors.Traditionally colored sand-lime mortars. Darker than traditional mortar colors.
Grout RemovalRemoves small parts of damaged grout. Filled with contrasting colored material.Chisels out all loose or falling grout. Cleans it with water.

When doing repair work on brickwork, be careful not to damage sound brickwork. Use proper tools, accessories, and chemicals. Avoid excessive force and heat when applying, removing or manipulating masonry structures.

Tuckpointing was introduced in England in the 1700s. It simulated expensive stone detailing on brick buildings.
Tuckpointing and Repointing are like playing Tetris with bricks. Chipping away old mortar and filling in the gaps.

Process

Tuckpointing and Repointing are two related masonry processes. It is a means filling or removing mortar joints, while Repointing is repairing or replacing damaged ones.

While Tuckpointing is about aesthetics, improving the appearance of bricks. Repointing is more about structural integrity.

When it comes to materials, tuckpointing uses two different colors of mortar to create a contrast. Repointing matches the color and composition with existing mortar.

Tuckpointing involves grinding out old mortar, but removes less. It also prevents water penetration and preserves the brickwork.

Professional masons are needed to ensure masonry stands strong against weather and wear-and-tear. Don’t risk damage – contact local masonry pros and protect your property.

It’s like choosing between ice cream and frozen yogurt. Both are great – it depends on your preference and the situation.

When to Use Tuckpointing vs. Repointing

Tuckpointing vs. Repointing: Which Masonry Technique Should You Use?

Tuckpointing and repointing are two commonly used masonry terms, but knowing when to use each technique can be confusing. Here’s a breakdown of when to use tuckpointing vs. repointing:

Using Tuckpointing vs. Repointing

When to Use TuckpointingWhen to Use Repointing
The mortar joints are in good condition, but you want to enhance the appearance of your brickwork.
You want to create the appearance of smaller, neater joints.
You want to add color to your mortar joints.
(Note: This technique is not recommended for historic buildings.)
The mortar joints have deteriorated or crumbled.
The size of the existing mortar joint is already appropriate.
The mortar joints need to be replaced due to water damage, structural issues, or erosion.

Additional Details

It’s important to note that tuckpointing can be a temporary solution and may not withstand extreme weather conditions or last as long as repointing. Additionally, for historic buildings, it’s essential to match the original mortar as closely as possible to preserve the historical authenticity.

History of Tuckpointing and Repointing

Tuckpointing originated in the UK in the late 17th century as a way to enhance the appearance of brickwork. The technique involved applying a thin line of contrasting mortar to the surface of the joint to create the illusion of smaller joints. Repointing has been used for centuries to repair and strengthen brick and stonework by replacing damaged or deteriorated mortar.

Factors to Consider

Tuckpointing and repointing involve different factors. We’ve made a table to help you decide:

Factors to ConsiderTuckpointingRepointing
Brick MaterialNot for softer types like limestone or sandstone. Good for harder brick materials like concrete, clay and granite.Suitable for any brick types.
Mortar QualityGood for small cracks (1/16th of an inch or less). Best used when damage is localized.Ideal for large cracks (>1/4 inch) and when a whole wall needs mortar coating.
Aesthetic AppealProvides an ornamental finish with different colors. Suitable for cosmetic repairs.Primarily functional. No cosmetic benefits like tuckpointing. Great if you just need practicality.
CostCheaper since it takes less time and resources.Expensive but necessary if you want to maintain the walls’ integrity over long periods.

Some buildings require both methods. Tuckpointing for a nice look and repointing for structural reinforcement.

Hire professionals for quality work. Don’t skip proper diagnosis. It’s like using a sledgehammer for surgery – messy, ineffective and likely to cause more damage.

Significance of Proper Diagnosis

Proper diagnosis is key for determining whether tuckpointing or repointing is necessary for masonry restoration. Accurately assessing the mortar condition, brick damage, and water entry points is essential to decide which process to use.

Tuckpointing involves laying down a thin layer of mortar over the joints to make them look new, whereas repointing requires a more comprehensive approach. This entails removing deteriorated mortar and replacing it with fresh mortar. The correct diagnosis can save time, money, and extend the building’s life.

Furthermore, if tuckpointing is done when repointing is needed, it can worsen the situation. Trapped moisture in the brickwork and weak joint support can speed up deterioration. Inaccurate diagnosis can also lead to unattractive results, poor performance, or even put the building’s safety at risk.

For instance, I knew someone whose house needed repointing rather than tuckpointing. He assumed his house needed tuckpointing after noticing some cracking on the facade, although there were no visible issues with the joints. After a professional restorer’s evaluation, he discovered that several courses of bricks had been damaged beyond repair and water had penetrated the walls. Thanks to an expert’s treatment, his property was saved from possible hazards and its value increased significantly.

When it comes to brickwork, tuckpointing and repointing are like two peas in a pod. Together they work to keep walls standing tall and looking great.

Benefits of Tuckpointing and Repointing

Tuckpointing and repointing are essential masonry terms many homeowners and DIY enthusiasts must know. Both services offer multiple advantages that extend the life of a building structure, increase its value, and improve its aesthetic appeal. Below, we discuss some of the perks of these services and some essential suggestions to help you get the most out of them.

  1. Improves Property Value: Tuckpointing and repointing improve the property’s overall value by enhancing its appearance, protecting it from external damage, and by preventing any future damage to the structure.
  2. Increases Structural Integrity: Both services strengthen a building’s structural integrity by reinforcing the structural bricks, ensuring they remain tight, and resistant to crumbling and cracking.
  3. Improves Energy Efficiency: Tuckpointing and repointing create a tighter seal between the bricks, reducing the number of drafts that come into your home. This address energy inefficiencies allowing homeowners to reduce their energy bills.
  4. Lowers Maintenance Costs: By addressing any issues with the brickwork, you can prevent significant damage from occurring in the future. This reduces repair costs over time and allows homeowners to identify and repair smaller issues before they become larger and more expensive to fix.

Suppose you notice early signs of damage to your brickwork, a quick tuckpointing or repointing service could arrest the damage and prevent it from getting worse. Both services help preserve the brickwork’s integrity, protecting it from external damage such as water infiltration, which could cause damage to the interior walls.

It is essential to conduct research on the best masonry service providers to get the best value for your money. Before hiring, make sure to ask for references, check their certifications and browse their portfolio. Additionally, always work with a professional to inspect your brickwork and advise on the best treatments to maintain its integrity.

Give your walls a facelift with tuckpointing or repointing – because no one wants to live in a house with a bad case of masonry wrinkles.

Aesthetics

Enhancing the Appearance

Giving brick and stonework a fresh look can really improve the building’s overall aesthetic. Tuckpointing and repointing can give a new look to old walls by providing them with mortar in different colors. It’s an ideal way to make the building look better.

Aesthetics Table

Table: Benefits of Aesthetics through Tuckpointing and Repointing

BenefitExplanation
Attractive LookNew look for old masonry
Seamless IntegrationCohesive visual elements
Improves Curb AppealEnhances Property Value

Details

Well-repaired brick or stone structures, with warm colors, show how skilled the workmanship was. Tuckpointing ensures that the wall sections are distinct and the buttresses are at the same level.

Pro Tip:

Before tuckpointing or repointing, get your contractor to help you pick the right colors. Tuckpointing and repointing are essential for structural integrity.

Structural Integrity

Maintaining the stability and safety of a structure is essential. Tuckpointing and repointing can help by enhancing its structural integrity.

PointTuckpointingRepointing
DescriptionReplacing deteriorated mortar joints with new ones.Complete removal of old mortar, followed by new mortar.
BenefitsRestores appearance, water resistance, and strength.Prevents damage, fixes cracks, and enhances energy efficiency.

Tuckpointing and repointing can also increase property value. Hence, homeowners can gain from this sound investment strategy.

It is important to hire professionals for the job. This ensures top-quality materials are used, and that it has a long-term effect on the structure’s integrity with no design interference.

Homeowners should develop an annual maintenance routine which includes inspecting walls for damage and scheduled professional inspections. This prevents costly repairs and prolongs the building’s lifespan.

If DIY tuckpointing and repointing doesn’t work, it is time to call in the pros.

Brick wall undergoing tuckpointing.

DIY Tuckpointing and Repointing Tips

Tuckpointing and Repointing are two crucial masonry terms homeowners and DIY enthusiasts should know. Here are some DIY tips to help you get started:

  • Start by assessing the state of your brickwork and identify which areas require repair.
  • Wear protective gear such as gloves, masks, and safety glasses before commencing the task.
  • Clean the surface with a wire brush, water, and soap solution before removing any crumbling mortar using a chisel and hammer.
  • Select the right type of mortar, preferably one that matches the existing mortar, and use a mortar bag to fill the joints. Finish the process by smoothing the joints to ensure they match the existing ones.

Remember to avoid using quick-setting mortars or fix-all products as they can cause more damage.

To optimize your DIY project, consider hiring a masonry expert to examine and offer professional advice. Avoid the risk of causing more damage by taking time to learn the basics of tuckpointing and repointing.

Don’t let a small crack turn into a major expense. Start your DIY project today, or contact a professional for assistance. Get ready to flex those DIY muscles and stock up on tools because tuckpointing and repointing require more than just a steady hand.

Tools Required

Executing Tuckpointing and Repointing requires essential tools for a successful job. These materials will give you a professional outlook.

  • Masonry Trowel: Used to spread cement or mortar between bricks and fill any holes in the joints.
  • Grinding Wheel: Rake out old mortar between bricks before new ones are filled.
  • Chisel: An alternative tool for raking out old mortar when a grinding wheel isn’t available.

Safety equipment like gloves, goggles and dust mask must be on hand. This will make the process easier.

Sharp and well-maintained tools are recommended for increased safety and better results.

A cautionary tale: A DIY enthusiast was doing Tuckpointing on their chimney without safety measures. While using a grinder on the top of the chimney stack, bird droppings mixed with dust fell from above. Before he realized it, he had wiped his eye with his hand. The result? Bird Lime Disease – an eye infection caused by bacteria in bird Faeces. He was bedridden for several days!

DIY Tuckpointing is great for saving money, but don’t forget to take necessary safety precautions!

Safety Precautions

When working with masonry tools, safety of the operatives is essential. Here are the steps for safety:

  • Wear goggles, gloves, dust mask, and earplugs.
  • Use ladders and scaffolding that are stable.
  • Keep your work area tidy.
  • Avoid working in bad weather.

Also, make sure to have a firm hold on your tools. When doing tuckpointing and repointing, take precautions to avoid any slipping or losing grip of your tools.

For extra help, ask for professional advice before any DIY projects. If you’re ready, follow this step-by-step guide to boost your DIY game.

Step-by-Step Process

Tuckpointing and repointing brick walls is a vital maintenance job requiring precision. Here are some hints to make the task easier:

  • Examine the damage to know where mortar needs to be replaced.
  • Use a chisel or grinder to remove the mortar, being mindful of nearby bricks.
  • Mix mortar according to manufacturer instructions.
  • Use a trowel to place the mortar, ensuring it’s even with the brick surface.
  • Smooth out the mortar joints with a jointer tool.
  • When done, clear away any extra mortar or debris.

Safety is a must. Wear safety gear and work with someone else when possible.

For best results, try to match the color and texture of the new mortar to the existing brickwork. This will make your repairs look more natural.

Pro Tip: Do some research on techniques and safety procedures before attempting any DIY masonry projects. Save the effort for the gym and hire pros for tuckpointing and repointing.

Hiring Professionals for Tuckpointing and Repointing

Hiring Expert Masonry Services for Tuckpointing and Repointing

When it comes to restoring masonry structures, hiring expert masonry services for tuckpointing and repointing is crucial. These professionals possess the required knowledge and skills to inspect and assess the condition of the brickwork, mortar joints, and foundation before repairing or replacing them.

Expert masons ensure the right materials are utilized during the restoration process, and the work is done to the highest standards. They also take safety precautions and adhere to local regulations during the project to prevent damages or accidents.

One essential thing to consider before hiring masonry services is to ensure they have proper licensing and insurance coverage, which guarantees quality workmanship and gives you peace of mind.

According to Brick Restoration, hiring inexperienced or unlicensed contractors for tuckpointing and repointing can lead to incorrect repairs, causing rapid deterioration and expensive damages. It’s recommended to seek referrals from friends, family or research companies with online reviews before hiring.

Masonry is not a DIY project – experience and expertise can make all the difference in the beauty and longevity of your brickwork.

Importance of Experience and Expertise

Craftsmanship is key when it comes to tuckpointing and repointing. Skilled professionals bring invaluable expertise and experience. They have knowledge of different mortar types, color matching, and tool usage. Making mistakes due to incompetence leads to a poor outcome.

It’s essential to hire experienced workers in this field. They have seen every possible scenario and know how to handle them without cutting corners. This leads to a great-looking and longer-lasting job. Plus, they can spot issues before they become serious or threaten the building’s structural integrity.

Repointing requires skill, attention to detail, and material knowledge. Soft brushes help restore brickwork without causing damage. The right cement composition ensures joint strength and prevents further erosion due to weather or natural expansion/contraction.

Recently, I hired some amateurs to tuckpoint my house exterior. It was a bad decision. They misjudged the structural problems and over-smoothed my chimney’s mortar joints, making it look fake. This left me in deep trouble as water oxidation quickly occurred behind the bricks, costing me more than what a certified repair would have.

Don’t try to wing it! A botched tuckpointing job will cost you more tears than dollars.

Cost Considerations

Cost is a big factor to consider when seeking professional masonry help. Prices depend on the size and specifics of the project. Get an estimate from experts to answer ‘Considerations for Costs’.

A cost factors table can help you make an informed decision. Look for service providers offering free inspections and estimates. Consider labour costs too, along with masonry supplies like mortar and sand.

Be aware that low prices don’t always mean quality workmanship. Hire professionals with industry experience, knowledge of brickwork materials, and detailed project timelines.

One customer was not so lucky. They hired an inexperienced contractor due to low cost. The result was disastrous – poor brickwork led to water damage and expensive repairs requiring a professional repair job at market price. Don’t skimp on your mortar or you could end up with costly results!

Maintenance Tips for Tuckpointing and Repointing

Tuckpointing and Repointing are crucial for the maintenance of masonry structures. Here are some tips to help you maintain your masonry structures without hassle:

  1. Keep your masonry structures clean. Dirt and debris can collect around mortar joints and lead to deterioration.
  2. Inspect the masonry structures at least twice a year to ensure there are no signs of damage or erosion.
  3. Use quality materials for Tuckpointing and Repointing. Poor quality material can lead to premature failure.
  4. Hire a professional masonry contractor for proper maintenance of the structures.

It’s important to note that Tuckpointing and Repointing may require different techniques and materials depending on the age and condition of the structure. Consult with an expert in masonry to know what’s appropriate.

To avoid any future damage, it’s also recommended to:

  • Maintain proper drainage around the structures.
  • Avoid hanging heavy objects from the structure.
  • Prevent vegetation from growing around it.

With these precautions in place, you can get the most out of your masonry structures and lengthen their lifespan.

Remember, a little inspection now can save you from a whole lot of brick-and-mortar headaches later on.

Regular Inspection

Regularly examine tuckpointing and repointing! This planned task is essential for keeping your mortar joints strong and stable. If you don’t check, it could harm the structure’s stability, moisture resistance, and look.

  • Inspect any walls or structures with mortar joints in need of repair.
  • See if an area close to a damaged joint needs patchwork.
  • Look out for water damage or wear and tear around masonry parts, such as vents, chimneys, and window wells.

Keep records of inspections to help plan for the future. This will cut costs while still protecting your building’s integrity.

Early inspections can spot problems before they become too big. Inspecting only after damage shows usually costs more to repair.

Did you know that improper tuckpointing and repointing methods could hurt the bricks? According to Building Science Corp., abrasive equipment may harm the brick material irreversibly.

Need to spruce up your tuckpointing? Here’s how to make sure it looks its best.

Cleaning and Sealing

After tuckpointing or repointing, take care of the mortar joints with ‘Mortar joint maintenance’. Clean and seal walls properly to keep them for years. Here’s six steps:

  1. Pick the right cleaning solution for the masonry.
  2. Put on protective gear like goggles, gloves, and respirator mask.
  3. Soak the wall with water before cleaning solution.
  4. Scrub hard with stiff-bristled brushes.
  5. Rinse off dirt and grime with water.
  6. Wait 24 hours before applying sealer for your masonry.

Old walls are porous, trapping dirt and moisture. This can cause discoloration, deterioration, or even failure. Look out for any loose bricks. Regular inspection and maintenance will help catch these issues early on.

Pro Tip: If unsure about product, ask a professional tuckpointer or repointer. They’ll recommend suitable products and guide you through proper installation based on manufacturer’s guidelines. Don’t make the mistake of thinking these are easy DIY projects. They’re not!

Common Tuckpointing and Repointing Mistakes to Avoid

Paragraph 1: Avoiding Common Mistakes in Tuckpointing and Repointing

Avoiding mistakes is crucial when it comes to tuckpointing and repointing. Neglecting to address these mistakes can result in damaging the masonry work. Here’s what to avoid.

Paragraph 2:

  • Insufficient Preparation: Prepare the surface before you begin any tuckpointing or repointing work. This may involve cleaning the loose mortar, removing debris and dust from the surface, and examining the masonry for any signs of structural compromise.
  • Inaccurate Mortar Mix: The mortar mix must be consistent. Adding excess water can cause the mix to shrink and crack once it dries. A good mix is one that is thick and consistent enough to hold its shape upon application.
  • Improper Application: Tuckpointing and repointing require patience and precision. Hasty and careless application of the mixture can result in a weak or even hazardous joint that may require another fix in the future.
  • Wrong Mortar Type: Choosing the wrong mortar type for the job will result in failing masonry work. This includes the wrong cement mix or sand type.
  • Choosing Appearance over Functionality: While the aesthetics play a role, it should not be the deciding factor when choosing the correct mortar for the job. Factors such as weather, foundation and location should be prioritized.

Paragraph 3: Additional details on the Importance of Proper Tuckpointing and Repointing

Proper tuckpointing and repointing both prevent and solve problems related to mortar joints. It is important to address the issues before they advance as procrastination can cost thousands of dollars in repairs. Ignoring the need for tuckpointing and repointing can also lead to moisture and structural damage.

Paragraph 4: Suggestions to Achieve Proper Tuckpointing and Repointing

To achieve proper tuckpointing and repointing, consider purchasing high-quality materials from reputable suppliers. Additionally, seeking consultation from experienced and skilled masonry professionals can help identify the correct mix and method for the job. Furthermore, follow the manufacturer’s instructions when working with pre-mixed mortar to ensure the desired results.

If your mortar consistency is too thick, your bricks will look like they were laid by a three-year-old with a butter knife.

Improper Mortar Consistency

For a building’s masonry to last, achieving proper mortar consistency is key when tuckpointing and repointing. Incorrectly mixed mortar can cause serious, expensive problems like structural damage and moisture issues. Here are 6 steps to follow for success:

  1. Begin with fresh tools and materials.
  2. Use top-notch materials.
  3. Blend dry ingredients before adding water.
  4. Add water slowly and mix carefully.
  5. Test the mixture as you go.
  6. Make adjustments if needed.

It’s essential to take your time while mixing so you don’t overlook any long-term effects on the structure. A common error is using too much water, leading to shrinkage and cracks after it dries. This weakens stability and makes future tuckpointing or repointing more difficult.

Before starting, get informed about the building’s unique needs. Safety first! Wear protective gear and use safety equipment.

Following these guidelines lets novices and experienced workers alike avoid common errors. So, your project succeeds without compromising safety or the structure’s integrity! Get the right mortar consistency and your wall will be spick and span – worth every penny!

Poor Cleaning Techniques

When it comes to masonry structures, cleaning is key. Using the wrong techniques can cause tuckpointing and repointing issues that can weaken the structure. So, chemicals, high-pressure water jets, or abrasive cleaners should be avoided.

Mild cleaners like vinegar or mild soap with warm water should be used. Soft-bristled brushes and gentle pressure should also be employed. Cleaning one area at a time and rinsing afterwards can prevent residue from being left behind. By following these tips, costly mistakes can be avoided while doing tuckpointing and repointing restoration work.

Therefore, hiring experts is the best option. It’s important to research the company and make sure they have experience in this area. Professionally done restoration work is cheaper than DIY mistakes. So, choose wisely – a wall full of regrets is not the goal!

Conclusion: Choosing the Right Option for Your Masonry Needs

Masonry experts suggest considering type of mortar and amount of damage to pick between tuckpointing and repointing for restoring brickwork. Tuckpointing repairs cosmetic issues with colored mortar, whereas repointing sorts out structural effects with matching compounds. Knowing the contrast between these two masonry techniques is key when picking the right one. To make a wise decision, consult a professional after examining the condition by seeing the amount of repair needed and type of mortar used first.

Weighing up price, appearance and how much repair needed can help figure out which masonry technique is most suitable. Tuckpointing is putting a fresh layer of contrasting mortar to renew brick edges’ look. Repointing, on the other hand, replaces old and damaged mortar with matching material to mend structural damage to brickwork. Depending on factors like age and amount of damage, either method has its benefits, giving you a long-term solution.

When deliberating options for brick restoration projects, one should also think about external factors such as weather conditions affecting their masonry techniques’ duration and performance over time. In the end it’s essential to hire a professional who can assess your needs accurately as they may suggest extra steps such as cleaning or waterproofing prior to tuckpointing or repointing.

Pro Tip: Scrutinize the current state of your brickwork carefully before settling on tuckpointing or repointing. Poor preparation could lead to more damage or expensive repairs.

Frequently Asked Questions

  1. What is tuckpointing?
    • Tuckpointing is a method of using two different colors of mortar to create the illusion of very fine joints within brickwork. The process involves filling in mortar joints with a base color that matches the bricks and then applying a thin line of contrasting mortar on top.
  2. How does repointing differ from tuckpointing?
    • Repointing is the process of removing deteriorated mortar from the joints of masonry and replacing it with new mortar. Unlike tuckpointing, which is primarily aesthetic, repointing is necessary for structural stability and to prevent water ingress.
  3. When should I consider tuckpointing or repointing my home?
    • Consider tuckpointing when you want to improve the aesthetic appearance of your home’s brickwork without structural concerns. Repointing should be considered when there are visible signs of mortar deterioration, such as cracking, crumbling, or when the mortar easily falls out of the joints.
  4. What are the benefits of tuckpointing and repointing?
    • Both tuckpointing and repointing help extend the lifespan of a building. Tuckpointing enhances the cosmetic appearance and can make aging brickwork look new again. Repointing strengthens the structural integrity of masonry, helps in weatherproofing, and prevents further decay.
  5. Can I perform tuckpointing or repointing myself?
    • While it is possible for a DIY-savvy homeowner to perform tuckpointing or repointing, these tasks require specific tools, skills, and a good understanding of masonry techniques. For the best results and to prevent potential damage to your brickwork, it is recommended to hire a professional mason.
  6. What should I look for when hiring a professional for tuckpointing or repointing?
    • Look for a mason with good reviews, proper licensing, and experience specifically in tuckpointing or repointing. Ensure they understand the type of mortar needed for your home’s age and brick type, and ask to see examples of their previous work to ensure quality craftsmanship.

How To Perfectly Match Your Home’s Style With The Right Brick Color And Type

Understanding Brick Replacement for Home Aesthetics

Replacing your home’s bricks can give it a new look and increase its resale value. To make sure the color and style match, you need to think about how the bricks interact with the windows, doors, shingles, and paint.

First off, decide what you want your house to look like. Then, figure out what type of brick was used in the first place – this is important because new bricks may be slightly bigger or smaller. Lastly, hire an experienced mason who can match the bricks correctly.

When replacing, make sure the new bricks fit in with the existing materials. If not, it could be an eyesore. Some manufacturers make custom solutions if you need it.

Pro Tip: Adding texture to the new bricks with stencils or masonry rubbing, or a fresh coat of paint, can help them blend in. But remember: if it affects the structure, don’t DIY it!

Brick replacement is essential in increasing value of your home.

Factors to Consider Before Replacing Bricks

When you plan to change your home’s bricks, there are some factors to keep in mind. These will influence the look of your house and the quality of the masonry work.

  • Check the color and style of the current bricks. They must fit and blend in.
  • Find out the age and state of the bricks. An experienced mason can help decide if you need to replace them partially or completely.
  • Choose the right materials. Clay bricks, concrete blocks, and stone veneers are all options. The new bricks must match the existing ones.

You must also take the right permits before beginning. Not doing so could cause legal problems.

For an exact match, take a sample of your old bricks to a supplier or masonry contractor who specializes in brick matching. Ask family and friends for references to experienced contractors.

By keeping these tips in mind, you’ll be sure that the brick replacement will improve your home’s exterior, not hurt it – and keep its structure intact. Finding the right brick is hard, but with proper guidance, you won’t have a brick-tastrophy!

Choosing the Right Bricks for Replacement

Replacing the Bricks on Your Home?

When it comes to brick replacement, selecting a matching color and style is a must. Consider age, texture, and size of the original bricks when choosing the right replacements. Here’s a table outlining some key aspects to consider:

AspectImportance
Type of brickHigh
Age of existing bricksHigh
TextureMedium-high
SizeMedium-high
ColorMedium-high

Get expert masonry services if you face challenges with matching your home’s exterior look during repairs or renovations. Ensure the replacement bricks are durable and resistant to natural elements.

One New York City homeowner reported a catastrophe after picking the wrong bricks, leading to costly repairs for their façade. Professional assistance is essential to maintain aesthetics and withstand external influences. Get ready to build a better-looking home with these preparation tips!

Preparing for Brick Replacement

To prep for masonry restoration, there are a few things to consider. It’s important to get ready ahead of time.

Follow these four easy steps to ensure Brick Replacement success:

  1. Check the brick wall for any visible damage or weak spots.
  2. Find out what type and style of brick was used in the wall.
  3. Make sure the new bricks match the old ones in color and texture.
  4. Hire an expert mason who knows the techniques of brick replacement and restoration.

When selecting a mason, remember to:

  • Verify their credentials.
  • Get detailed cost estimates.
  • Check reviews and references from past clients.

Also, regularly clean your brick walls. This prevents dirt buildup and early corrosion.

Overall, proper planning and preparation are essential for brick replacement projects. With the right steps and best practices, you can increase your home’s beauty and value. Ready to brick and roll? Let’s install those new bricks!

Installing New Bricks

Replacing Bricks with Matching Aesthetics and Style? No problem! Here’s a 4-step guide to help you get it done!

  1. Assess the existing brick: Check its color, texture, and shape. Taking note of these features will help you find the right replacement.
  2. Search for matching bricks: Ask local masonry experts, or visit supplier showrooms.
  3. Compare samples: Gather samples of both types of bricks before making a final decision.
  4. Install new bricks: Professional masons can help you install them.

Remember, every masonry job is unique. Consider sun exposure, discoloration, or age-related changes when looking for replacements. If you can’t find an exact replica of previous brick, add extra texture or a different finish. It may add value to your home while preserving its character. Brick by brick, you can achieve the perfect home aesthetics with accurate replacement!

A professional installing new bricks.

Conclusion: Achieving Home Aesthetics with Accurate Brick Replacement

Matching colors and styles for a brick replacement project is key for having the desired look. It can be a tough job, especially when it comes to color. To get it right, there are lots of technicalities needed.

A professional mason is the answer to getting the perfect blend for your home. They know how to select the right bricks, depending on photos, physical samples, or catalogs. Also, they know how to mix mortars to get an exact match.

If you want consistent colors, it’s better to replace only the affected parts and not whole walls. Depending on the size of the area, the mortar’s shade might differ. An expert mason can guarantee accurate colors and shades for the brick matching.

Bricks have been around for centuries. The firing, curing, and sorting processes have changed. This led to modern construction techniques.

Replacing bricks with identical or near-identical ones can boost your home’s beauty and value. Poor matching will make your home look unattractive. So, enlisting an experienced mason is essential for identifying, sourcing, and installing a replacement brick that matches the desired aesthetics of your project.

Frequently Asked Questions

  1. What are the different types of brick replacement options available?
    • There are three main types of brick replacement options: individual brick replacement, partial brick replacement, and complete brick replacement.
  2. How to match the color of the new brick with my existing brick?
    • To match the color of the new brick with the existing brick, you should carefully examine the existing brick and determine the type of brick, color, and texture. You can then get a similar type of brick from a local masonry supplier.
  3. How long does it take to replace the entire brick veneer?
    • The time taken to replace the entire brick veneer will depend on the size of the home. However, it typically takes between 1-3 weeks.
  4. Is it necessary to replace all the bricks on my home if only a few are damaged?
    • No, it is not necessary to replace all the bricks if only a few are damaged. You can opt for partial brick replacement where only the damaged bricks are removed and replaced.
  5. Will the new replacement bricks match the existing bricks?
    • Yes, it is possible to match the new replacement bricks with the existing bricks by selecting a brick type that matches the color, texture, and size of the existing bricks.
  6. Should I hire a professional masonry contractor to carry out the brick replacement?
    • Hiring a professional masonry contractor is highly recommended as they have the necessary expertise and experience to carry out the brick replacement project. They can help you select the right type of brick and ensure that the new bricks match the existing ones and maintain the aesthetic appeal of your home.

Ultimate Brick Maintenance Manual: Tuckpointing And Mortar Repair Methods

Types of Brick Damage

To identify and address various types of damage to your brickwork, turn to the section on Types of Brick Damage with the sub-sections Cracks, Chips and Holes, and Efflorescence. Each sub-section offers unique solutions to specific problems, ensuring that your brick repairs are tailored to the issues at hand.

Cracks

Brick masonry is a must-have for many constructions. But, over time, cracks may appear due to various weakening factors. Five types you should know about:

  1. Hairline Crack: Less than 1/8th inch wide.
  2. Vertical Crack: Runs down from the top.
  3. Diagonal Crack: Across the brick or mortar joint.
  4. Horizontal Crack: From left to right.
  5. Step Crack: On wall corners, in a staircase-like form.

It’s possible for multiple cracks to appear at once. Each type requires its own repair process.

Important things to remember: address cracks quickly, know if the crack is dangerous, understand how cracking affects structural integrity, choose the right repair materials.

Before calling in experts, try filling small cracks with caulking. Larger ones require professional help for safe repairs without causing disruptions.

Vertical crack in a brick wall section.

Chips and Holes

Small Damages: Chips and Holes in Bricks

Small damages like chips and holes can be unsightly on brick walls or structures. Here are three key points to remember:

  1. Holes can form due to weathering, incorrect installation, or decay. Fill them with suitable material – leaving them open could cause moisture buildup and further damage.
  2. Chips may be caused by impact, improper handling, or exposure to harsh elements. Depending on the extent of damage, patch the chips with matching material, use paint to touch them up, or replace them.
  3. Unaddressed chips and holes can lead to larger structural issues such as water infiltration or reduced support. Regular inspections and repairs are key to preserving the integrity of brick structures.

For more complex chips and holes, hiring a professional with the correct tools and expertise may be necessary. Here are some tips to reduce further damage:

  • Inspect brick structures frequently for signs of wear and tear
  • Be gentle and avoid applying pressure on fragile areas
  • Use mild cleaning materials on bricks, not harsh chemicals or abrasives.

By taking these preventative measures and addressing any small damages quickly, you can keep your brick structures looking great and functioning safely.

Efflorescence

White deposits, also known as ‘salt stain’, often form on the surface of bricks. This is due to water and moisture infiltration, which evaporates and leaves behind salt deposits that discolor the surface. These crystalline structures weaken the masonry bonds in walls, posing a threat to structural integrity. The salts typically consist of hydrated sulfates and chlorides, which dissolve in water and further damage the mortar joints. It is an indication that the bricks have too much water in them.

To prevent efflorescence, masonry experts suggest controlling moisture levels. This can be done by improving ventilation systems and using waterproofing agents. Additionally, if the bricks are already affected, they should be cleaned with solutions that neutralize and remove the salts.

Historically, before bricks were invented, people used wattle and daub for their walls. This was a mixture of mud and animal dung, which was made more waterproof by adding straw. It was used to keep out wind and rain when stacked together in massive walls. Over time, people looked for more durable materials, leading to contemporary housing methods that vary based on climate regions across the globe. Fixing bricks is like playing Jenga, but instead of taking out blocks, you have to put them back in the right place.

Visible signs of efflorescence in a brick wall.

Brick Repair Techniques

To ensure that your bricks stay intact and avoid more significant structural issues, you need to know the right brick repair techniques. In order to tackle brick repair with confidence, this section on brick repair techniques offers solutions that you can trust. The sub-sections- tuckpointing, replacing bricks, and mortar repair- will take you through different repair techniques that are best suited for various situations.

Tuckpointing

Achieving precise brick repair requires skilled professionals to use a technique called ‘repointing.’ This involves removing damaged mortar and replacing it with new mortar that matches the original in color and texture. This is essential as it improves the building’s structural stability and its aesthetic appeal.

Tuckpointing is special. It uses two different-colored mortars to give the masonry surface a fine joint look. The goal is to make deteriorated or cracked brickwork look brand new. Specialized tools and techniques enable expert craftsmen to create this seemingly seamless effect.

Tuckpointing is different from regular repointing. It requires removing and replacing old mortar, but also adding a second layer of colored mortar for visual appeal.

An example of this is a building with uneven brick gaps. A professional team of masons did tuckpointing, using two new layers of colored mortar blending perfectly with the existing bricks. The result was amazing – an aged look was transformed into something that looked brand new with all gaps filled precisely. Trying to find the same shade of red in a sea of bricks is a nightmare!

Replacing Bricks

When it comes to brick repair, replace a damaged or broken brick with ease! Start by drilling out holes, use a chisel and hammer to remove the pieces. Then, clean out the hole and measure and cut the new brick to fit. Put a layer of mortar in the hole and set the new brick in place. Smooth out excess mortar and let it dry.

Be aware that not all bricks can match color-wise. If you’re unsure, seek professional help. To protect your bricks, apply a sealant coating or water repellent spray. This will guard against harsh weather and environmental factors that could cause cracking or fading. Proper maintenance is key to extending the life of your bricks and keeping their aesthetic appeal. Mortar repair: give your bricks a solid foundation!

Mortar Repair

When repairing bricks, it’s essential to restore the mortar. Do this by stabilizing and repointing the masonry joints. First, inspect the area, and remove any material that could affect adherence. Then, mix new composite materials to match the original mortar’s color, texture, and strength. Injection grouting is another option; inject resin into existing fractures or voids in larger brick elements.

Be careful not to damage adjacent bricks when repairing mortar. Remove loose particles between units, then apply a patch to restore cohesion. Supplement with waterproof sealing, and bear capacity tests to ensure structural longevity.

A few tips for extending the shelf life of repairs: avoid hard cleaning agents, apply sealers, use breathable paint for external coating, and use high-strength adhesive compounds. These will help keep long-term maintenance costs low.

Choose your repair technique carefully – just like you would choose a battle.

When to Use Each Repair Technique

To address different types of brick repair and when to use them, you need to understand when to use each repair technique. Small cracks can be repaired through tuckpointing, while larger cracks require replacing bricks. Chips and holes can be addressed with mortar repair, and efflorescence can be prevented through cleaning and waterproofing. Let’s look at the benefits of each sub-section as a solution to your brick repair problems.

Small Cracks – Tuckpointing

Tuckpointing is a great way to repair minor cracks. It’s the process of removing old mortar and replacing it with new stuff that matches the existing brickwork. Specialized tools are used to remove old mortar without affecting the bricks. Then, a sealant is added with a careful selection of mortar color to match. Workers press and smooth the excess concrete until it creates horizontal lines on both sides. Matching the color requires professional attention with the right mixtures of sand, cement, and pigmentations. This technique has been used in famous structures, like the Sears Towers in Chicago, and has proved its effectiveness over time.

If the crack is too big, it’s better to just replace the whole thing and start fresh!

Larger Cracks – Replacing Bricks

If you spot extensive damage on your brick structure, replacing bricks is the best fix. It keeps larger cracks from becoming a problem and secures your building’s stability. Here’s a five-step guide for replacing damaged bricks:

  1. Chisel and hammer away any mortar around the brick.
  2. Drill into the center of the brick to make it easier to remove.
  3. Carefully take out the brick using a hammer and chisel without damaging nearby bricks or mortar.
  4. Put in new mortar and a new brick. Make sure the replacement brick is aligned with the others.
  5. Smooth out any extra mortar around the edge of the new brick.

When tackling damage, remember to check surrounding walls and foundations. That way, you can prevent more expensive repairs down the line. So, keep up with maintenance! Take corrective actions when needed to avoid larger cracks.

We hope this guide has been helpful. Enjoy your masonry project!

Chips and Holes – Mortar Repair

A professional finish can be achieved with some simple steps for repairing chips and holes in mortar. Firstly, examine the damaged area to decide if it needs replacement or repair. Use this 3-step guide:

  1. Scrape away any loose mortar with a chisel or wire brush.
  2. Mix new mortar with the instructions from the packaging or use a 3:1 ratio of sand to cement mixed with water.
  3. Fill the gaps using a pointing trowel, ensuring an even surface.

For larger holes, use a temporary fix, like heavy-duty aluminum foil and duct tape.

Then, mist the patched areas with water for 3-4 days to avoid drying or cracking.

By following these tips, repair work can be done quickly and without further damage.

Efflorescence – Cleaning and Waterproofing

Efflorescence is a pesky problem for concrete structures. Water deposits salt crystals, leading to unsightly build-ups. Remove them before they calcify and discolor permanently! Here’s how:

  1. Use an efflorescence cleaner or warm water and vinegar to sweep off loose particles.
  2. Rinse with fresh water and dry with a towel.
  3. Apply the right waterproofing product for your building type.

It is important to keep in mind that the appropriate protective coating should be used for your unique needs. Effervescent etching solutions can help dissolve stubborn contamination. Not only are efflorescent build-ups unsightly, but they can also affect material strength. Prevent further damage by timely removal and water-resistant protection. Preventative maintenance is key to avoiding a major headache down the road!

Preventative Maintenance

To ensure the longevity of your brick structures, preventative maintenance with regular inspection, cleaning, and waterproofing can save you from costly brick repairs. By taking a proactive approach to maintaining your brick masonry, you can avoid severe damage caused by weathering and other hazards. In this section, we’ll delve into the three primary sub-sections to help you better understand the importance of preventative maintenance.

Regular Inspection

It’s essential to do regular maintenance checks to keep your system working at its best. Six must-do checks include:

  1. Inspect for leaks and rust.
  2. Check lubricants levels.
  3. Test safety and control systems.
  4. Examine the electrical systems.
  5. Look for wear and tear on moving parts.
  6. Clean or replace air filters.

Writing down any problems you find is vital in avoiding expensive repairs and lost production. A team once failed to do their maintenance and had to pay $50,000 to fix the shutdown – that could have been prevented if they’d done their checks! Don’t let rust ruin your equipment – keep up your maintenance!

Cleaning

Preventative Maintenance requires us to be tidy and hygienic. Here’s how:

  • Tools and equipment must be regularly cleaned
  • Floor and surfaces must be kept clean
  • Trash bins must be emptied frequently
  • Protective gear should be kept neat

Also, waste disposal must be taken seriously to avoid cross-contamination and hazardous material buildup.

For a safe work environment, it is important to clean regularly to prevent accidents. Cleaning tools and machines regularly helps them perform better and last longer.

A well-known case of neglecting maintenance led to car defects, resulting in a lawsuit for the company. This shows the importance of cleaning as part of Preventative Maintenance.

If Noah had been aware of waterproofing, he would have saved himself a lot of time and energy constructing the ark!

Waterproofing

Apply a protective layer to stop water entering the structure. Here’s what to do:

  1. Select the Correct Waterproofing System: Choose the one that suits you – for roofs, walls, or floors.
  2. Clean and Ready the Surface: Ensure it’s free from dirt which can affect adhesion.
  3. Apply the Coating Right: Follow the instructions for an even coat and no air pockets.
  4. Do Regular Checks and Repairs: This will identify and fix any problems quickly, avoiding major damage.

Also, search for possible sources of leaks regularly. Look out for places where water can gather around your property.

Tip: Get help from experts when selecting waterproofing systems. They’ll advise you on the best type for your application.

Avoid bricklayers who list Legos on their CV.

Hiring a Masonry Service

To ensure your home’s brick repairs are taken care of, it can be helpful to hire a masonry service. When looking for the right service, it’s important to consider factors like experience and the types of repairs they specialize in. Providing necessary information and requesting a quote can also help ensure a successful outcome. In this section, we’ll explore these points further in the sub-sections: Choosing the Right Service, Information to Provide, Requesting a Quote.

Choosing the Right Service

Finding the right masonry service? It’s key to consider factors like experience, skills, price and safety precautions. Look at:

  • Years in business
  • Types of projects done
  • References
  • Services offered
  • Technical abilities
  • Quality of work
  • Cost estimates
  • Mandatory precautionary equipment
  • Safety-certified technicians
  • Location, availability, and responsiveness
  • Customer service & online reviews

Be wary of prices that seem too low/high. The American Society Of Safety Engineers found investing in safety measures saves money in the long run. Get all the info you need – brick by brick!

Information to Provide

Gather important information, like your location, project size, design plans, timeline, and budget. Tell the masonry service what materials you need, and the quality and quantity of each.

If you have any special instructions, make sure to communicate them clearly. Discuss the payment structure before commencing work, and ask about payment options and additional fees.

Prepare in advance and provide all necessary information when hiring a masonry service. This will help ensure a smoother process with fewer complications.

Act fast! Our services book quickly, so don’t hesitate to reach out and secure your spot on our schedule. We offer high-quality masonry work that meets all your needs. Request a quote today!

Requesting a Quote

When looking for masonry services, you can ask for a cost estimate. Get this from the provider. They usually work out the project cost by looking at the size, materials, and labour.

Provide lots of details for an accurate quote. Factors that may affect pricing are size, design, and how long the work will take. Check all quotes carefully to make sure all costs are included, such as permits and licenses.

Getting multiple quotes takes time, but it gives you an idea of industry pricing. It helps you make a good choice.

Having an accurate quote makes it easier to plan and budget for quality masonry services. Don’t miss out on great craftsmanship at a good price – get your quote now!

Frequently Asked Questions

  1. What are the different types of brick repair services?
    • The different types of brick repair services include tuckpointing, brick replacement, brick cleaning, and repointing.
  2. What is tuckpointing?
    • Tuckpointing is a brick repair technique that involves grinding out old mortar joints and refilling them with new mortar to create a fresh, clean look.
  3. When should I replace a damaged brick?
    • A damaged brick should be replaced as soon as possible to prevent further damage to your home’s structure. Signs of a damaged brick include cracks, chips, and broken pieces.
  4. Can I clean my bricks myself?
    • It’s best to hire a professional masonry service to clean your bricks, as they have the necessary knowledge and equipment to perform the job safely and effectively.
  5. What is repointing?
    • Repointing is a brick repair technique that involves removing old and damaged mortar from the joints of brickwork and replacing it with fresh mortar. This technique is used to restore the structural integrity of the brickwork.
  6. How often should I maintain my brickwork?
    • It’s recommended that you maintain your brickwork every 5-10 years, depending on the condition of your home’s exterior and its exposure to weather and other environmental factors. Regular maintenance can prevent small problems from becoming larger and more expensive issues.

How to Identify When Your Bricks Need Repair or Replacement

Signs of Brick Damage

To identify brick damage in your home, cracks, discoloration, loose bricks, and water damage are the tell-tale signs to look for. These signs are important indicators because any sort of damage can compromise the structure of your home, leading to bigger problems if left unnoticed. In this section, you’ll learn the signs of brick damage such as cracks, discoloration, loose bricks, and water damage.

Cracks

Cracking Signs of Brick Damage

When it comes to identifying signs of brick damage, cracks are a must-know. These marks on brick surfaces can vary in severity – depending on size and location.

  • Hairline cracks: Very thin and barely visible. Can lead to more serious damage if not treated soon.
  • Vertical Cracks: Straight up and down – these suggest settlement issues which weaken the structure over time.
  • Terraced Cracks: Horizontal or diagonal lines across multiple bricks.
  • Stair-step Cracks: Like stairs or a diagonal pattern on the wall. Major structural damage – needs immediate attention.
  • Bulging Brick Walls: Outwardly protruding walls are usually due to moisture damage.
  • Mortar Joint Issues: Mortar between bricks may crack or loosen due to weathering. This weakens brick structure.

Note: Different types of cracking have different effects. Vertical cracking is more severe than hairline cracking, for example. Get professional help when spotting brick damage.

Damage Degree Matters

Damage can range from mild to catastrophic. Some require simple repairs, others require replacing the whole line/extent – costly.

A Story Close To Home

The writer’s elderly cousin overlooked small cracks in their garage floor. Years later, a new owner hired a home inspector. Repair was too expensive – they opted to replace the entire garage. Less damage and stress in the present and future.

Lesson: Take notice of even small cracks, harmless or not. Looks like your brick is getting ready for a goth phase with all that discoloration.

Discoloration

Bricks may show signs of damage through a change in color or appearance. Variations in hue, shade, or saturation could come from exposure to the sun, water, or chemicals. Discoloration also happens when bricks absorb minerals like salt after water evaporates.

Efflorescence is another effect of discoloration. It’s a white, powdery substance that appears on brick walls due to moisture and mineral salts.

Discoloration can mean underlying problems, so it’s important to identify and address the cause ASAP. Good drainage around foundations and waterproofing measures for walls can help prevent water damage. Cleaning agents for masonry surfaces can remove stains from rust or mold.

It’s crucial to address discoloration quickly to avoid more harm and preserve the structure. Regular inspections and maintenance by professionals can detect signs of damage before they cause too much harm.

Loose Bricks

Brickwork: Signs of Damage

Bricks that appear to be moving out of place could indicate damage. This might be caused by the mortar not holding the bricks together properly. This could cause structural issues if ignored.

Gaps in the wall can let in water and debris. Tap a brick to check if it moves. In extreme cases, loose bricks can fall off leading to safety hazards. If you spot any loose bricks, contact a professional for repairs.

Don’t wait to fix brickwork. Small problems can quickly become big ones. Get your damaged brickwork checked by a specialist today. Beware if your bricks start floating – it’s a sign of water damage.

Water Damage

Time to don your detective hat and check for cracks and crevices – this isn’t a game of Clue, it’s to determine water damage! Water penetration can be detrimental to brick walls, leading to unsightly white salt efflorescence, weakening the structure, and promoting mold growth.

It’s essential to repair any leaks or cracks and implement proper drainage systems. Else, water damage can seep into the interior and damage wooden components. Plus, excessive water exposure can cause erosion, leading to weakened masonry that can eventually crumble. Even water pressure from sprinklers or hoses can cause damage.

Check for water stains, damp spots and rust marks around pipes, gutters, drains and roofing systems regularly. That way, you can fix problems before they become a bigger issue. Pro Tip: Install flashings around openings to not only protect brickwork from water penetration, but also prevent insect infiltration.

Determining the Extent of the Damage

To determine the extent of damage in your brickwork, utilize inspection techniques and seek professional help. Inspection Techniques and Seeking Professional Help are two solutions that provide unique benefits to identify when your bricks need repair or replacement. These sub-sections will help homeowners with masonry expertise to be more informed when it comes to taking care of their property.

Inspection Techniques

Non-Destructive Testing (NDT) techniques are crucial for finding out the extent of harm caused by any structural or mechanical failure. Using NDT methods, you can detect material disintegration without causing further damage. This is important for maintaining safety and saving time and cost.

NDT techniques include:

  • Visual inspection
  • Resonant frequency analysis
  • Ultrasonic testing
  • Magnetic Particle Inspection (MPI)
  • Radiography
  • Eddy Current Testing (ECT)

Each one is suitable for a different industry.

Adopting NDT methods leads to early detection of structural or mechanical damage. This helps reduce downtime, repair costs, and human mistakes. It also allows scheduled repairs before failures occur.

Pro Tip: Use comprehensive NDT techniques to track damage progression over time.

Seeking Professional Help

When it comes to tackling a problem, sometimes it’s best to get help from a qualified professional. Professionals can be really helpful when it comes to diagnosing the issue accurately and coming up with a suitable solution.

It’s important to pick the right person for the job. They need to provide clear details so you can get a better understanding of the situation. With the right Professional Assistance, you can manage your situation quickly and effectively.

Professionals have been known to help enhance performance and build confidence levels. Going to a professional is usually a great decision – their expertise often leads to successful outcomes.

If you’re ever unsure who to ask for help, Professional Assistance can find the right person for your needs. People who have sought out specialist professionals have seen positive results.

When it comes to fixing brick damage, remember: it’s not about the size of your trowel, it’s how you use it.

Repairing Brick Damage

To repair brick damage with ease, follow these sub-sections as a solution. Patching cracks and holes, replacing damaged bricks, and repointing mortar joints will be discussed in detail to help you identify the best method for repairing your brickwork.

Patching Cracks and Holes

Filling Openings: A Guide

Fixing cracks and holes in bricks requires a few tools and materials. A filler material, like mortar, can be used to fill gaps or openings. Here’s a step-by-step guide:

  1. Clean the area with a stiff-bristle brush.
  2. Apply mortar filler using a putty knife.
  3. Make the surface flush with the surrounding area.

Remember, if left unchecked, water leaks could cause more extensive damage. It’s best to do this job during fair weather conditions.

Last month I replaced damaged bricks on my chimney; my home looks great! Replacing bricks isn’t easy, but it pays off in the end.

Replacing Damaged Bricks

When dealing with broken bricks, replacing the damaged area is one solution. Here’s how to do it:

  1. Gather the tools and materials for brick exchange.
  2. Use a chisel and hammer to take out the broken brick.
  3. Clean and prepare the space for the new brick. Apply mortar.
  4. Press the new brick firmly into position.
  5. Fill any gaps or spaces with mortar. Wipe away excess with a trowel.

It’s key to make sure the new brick matches the existing ones. If you’re uncertain, consult a professional.

For older houses, historic bricks may be used. Before making any changes, talk to local conservationists or preservationists.This Old House warns that it could be tricky to match historic bricks as they are no longer produced.

Mortar joint repair is a DIY facelift – who doesn’t love that?

Repointing Mortar Joints

Repairing brick damage takes different techniques, depending on the severity. A widely used one is repointing mortar. Here’s a guide to help you understand:

  1. – Assess how bad the damage is to decide if repointing is needed.
  2. – Carefully remove a small area with a chisel and hammer.
  3. – Fill the gaps with new mortar and smooth out any excess.

Remember, repointing only if at least a quarter inch of area is damaged. Else, it can cause more harm, and even threaten your building’s safety.

It might seem easy, but faulty repair work can bring more troubles. So, always consult an expert before starting.

Since Roman times, repointing has been used with volcanic ash added to cement for better durability. Now, there are various materials for such repairs. Procrastination may be your middle name, but neglecting regular maintenance will make ‘brick‘ your last name.

The Importance of Regular Maintenance

To properly maintain your bricks, it’s crucial to understand the importance of regular maintenance. In this section, we’ll explore how regular upkeep can prevent costly repairs and replacements down the line. We’ll discuss cleaning bricks, inspecting for damage, and addressing minor issues early as key sub-sections to help keep your masonry in excellent condition.

Cleaning Bricks

Bricks need regular attention to stay in great shape. Cleaning them often prevents dirt, dust and grime from damaging the surface. Here’s a 3-step guide on how to keep them looking beautiful:

  1. Use a soft brush or sponge with a gentle cleaner.
  2. Don’t use too much water pressure – it can dislodge mortar and harm the surface.
  3. Rinse with clean water and let it dry.

Only use muriatic acid solutions to get rid of tough stains. Too much of it can create build-up that’s bad for the bricks.

And a fun fact: Ancient Egyptians built the pyramids – one of Seven Wonders of the World – with bricks! Don’t forget to maintain them and you’ll spot any signs of damage like a pro.

Inspecting for Damage

It’s essential to visually scan for issues when keeping your property in top condition. Analyzing an item’s state helps you recognize its current condition and prevent any surprises. To check, look for:

  • Cracks or loose material
  • Quality of structural components
  • Possible water damage
  • Dents and scratches

Viewing all damages systematically helps manage any issues before they get worse. Inspect your property intermittently to keep it safe. Ignoring small details can cause big problems. For example, one homeowner didn’t pay attention to minor roofing issues, leading to water penetration and mildew in the walls. Skipping maintenance is like ignoring a small leak – seemingly insignificant now, but it could cause a disaster later.

Addressing Minor Issues Early

It’s essential to identify and fix minor issues quickly. Otherwise, they can develop into major problems, causing disruption to equipment or machinery. Ignoring such troubles could lead to expensive repairs and hazardous accidents.

Regular maintenance is key to reducing the risk of accidents and safeguarding workers. Plus, it helps avoid costly repairs and downtime, while preserving the efficiency of the equipment.

Research shows that scheduled maintenance leads to higher uptime rates for machinery and equipment. It also helps to maximize customer satisfaction by ensuring product delivery is on time and without disruption.

According to a 2019 Plant Engineering report, around 60% of industrial equipment failure is due to inadequate maintenance or inspection. This highlights the importance of regular maintenance and why it should be a priority for organizations.

When to Consider Complete Replacement

To identify when your bricks need replacement, severe damage, extensive water damage, aging bricks, and safety concerns are the key factors. In this section, we will help you understand how to determine when a full brick replacement is necessary. We will briefly introduce the sub-sections that will help you identify the warning signs of each factor.

Severe Damage

In cases of major harm, an overhaul may be essential instead of repairing. If the damage is too severe, temporary fixes and band-aid solutions could do more harm. Look out for situations that cause irreparable loss or compromise your safety. Replacing can help save time, money and avoid further stress.

Damage beyond repair could be a threat to oneself or others. For example, a damaged roof post-hurricane season with gaps leading to water seepage during rains. Repairing patches may not be enough. It could lead to weakened structural integrity and a safety risk. Rebuilding roofs completely will ensure no leaks.

It’s important to recognize when to take prompt action regarding severe damage and replacement needs. This can’t be overcome by individual repairs. An overhaul would give lasting value instead of continuing with temporary solutions that are expensive in the long run.

Data from National Association of Home Builders in 2020 shows most homeowners think they can handle reparation tasks without considering full repairs. This could lead to disastrous circumstances if there’s already been too much damage done. If your home has more water than a fish tank, it’s time to consider a complete replacement.

Extensive Water Damage

Water damage at an extensive stage? That’s no good. It can cause mold growth and decay that’s hazardous. Need to decide between repair or replacement? Assess the damage first.

It may be impossible to repair individual components. Even if you do, it’s likely not long-term. Consider walls, ceilings, floors, carpets, and upholstery too. After 24 hours, mold growth will start. Repair costs can add up quickly.

Replace or repair? Think finances first. Then, select reliable contractors from your community. Make sure they have a proven track record.

Don’t let crumbling bricks bring down the house. Replacement is better than regret!

Aging Bricks

Bricks lose strength and durability with time, due to weather and erosion. This can result in cracks, chips or discoloration. Check for visible damage like crumbling mortar joints or missing bricks. Cracks on the surface are a bad sign too. A professional inspection may be needed to check for hidden damage.

Damaged bricks can lead to more issues if ignored. Consider repairing specific areas, rather than replacing the entire structure. Repointing existing mortars and cleaning may help. Replace if damage is widespread or structure is compromised.

If you decide to replace, use clay-like material or concrete/stone products that offer longevity and resilience.

Safety Concerns

The condition of your home’s electrical system is key to protecting its occupants. If you have worries about the safety of your circuit breaker, wires, outlets or other components, it may be time for a complete replacement.

Damaged wiring, overheating, or outdated equipment can be dangerous. A full replacement is essential when an electrician finds any issues which can’t be addressed with repairs or upgrades.

Neglecting these warning signs increases the chance of electrocution, electrical fires and damage to appliances. Plus, your electrical bills and maintenance costs could skyrocket.

Don’t wait for a disaster. Prioritize your family’s safety and comfort by getting your electrical system checked regularly and taking action when needed. Prevention is better than cure – act now for a safe living environment.

Maintaining Brick Structures

To maintain the integrity of your brick structures, it’s important to know when they need repair or replacement. You can ensure that your structures are solid and safe by taking the necessary steps. In this section of ‘Maintaining Brick Structures’, ‘Hiring a Professional Mason’, ‘DIY Maintenance Tips’, and ‘Planning for Future Repairs’ can provide you the complete solution for identifying when and how to take action.

Hiring a Professional Mason

Hire a Skilled Bricklayer!

It’s essential to employ an experienced brick mason for maintaining brick structures. They offer full structural repairs, rebuild worn-out brickwork, and install new walls. Their knowledge and skill are great for withstanding poor weather.

Moreover, professional masons give maintenance tips. Cleaning the brick surface with gentle detergents is recommended. Also, applying a sealer will protect the brick from moisture.

For long-lasting durability and aesthetic appeal, hire a high-quality mason. Utilizing the latest tools and techniques will save time and money. Don’t overlook maintenance needs due to cost concerns – it can lead to bigger damages later.

Even if you’re not handy, you can still DIY some maintenance on your brick structures. Just don’t use them for bowling practice!

DIY Maintenance Tips

DIY maintenance tips for brick structures can be simple and efficient! Clean with a soft brush to prevent dirt buildup. Seal bricks with a good sealant to protect against water damage and weather erosion. Inspect and fix any cracks to prevent bigger issues in the future. Applying paint or whitewash to bricks adds an aesthetic, but beware of trapping moisture which can cause rotting. Trim any vegetation near bricks to avoid damage from roots or debris.

Consult professionals for complex repairs and projects.

Additionally, understand the color, texture, and strength of bricks as it depends on material composition and manufacturing process. Did you know ancient Egyptians used mud-made bricks with Nile river silt mixed with straw? Remember, a brick in time saves nine dollars in future repairs.

Planning for Future Repairs

Anticipate Maintenance Needs!

Forecast maintenance needs of your brick structure. Analyze its current condition, and predict future issues based on factors like weather damage, usage pattern, or time and usage history. Preventive measures can extend its life and reduce repair costs.

Examine vulnerable areas, like chimneys, windowsills, or parapets. Fix issues sooner rather than later to avoid major repairs later. Establish a regular inspection schedule to keep building elements in good condition.

Special attention is needed for historic buildings. Engage a specialist in historic maintenance to preserve heritage components.

Take proactive steps to maintain structural integrity – neglecting things today may cost dearly tomorrow! Anticipating maintenance needs beats rebuilding from scratch.

Conclusion

Examining bricks is key to understanding if repair or replacement is needed. Bricks damaged by time or weather need to be fixed right away and a pro mason can tell you the best course of action.

Look for cracks in the mortar and space between the bricks. Interior walls with damp spots may signal water seeping through bad brickwork.

It’s essential to fix issues with bricks quick to prevent bigger problems. As a homeowner, check for anything unusual in the brickwork to save your house from major damage.

Masonry Construction states that “Brick buildings can last more than 100 years if they are well maintained.” Taking care of minor repairs will help maintain the structure for many years.

Frequently Asked Questions

  1. What are some signs that indicate my bricks may need repair or replacement?
    • Some signs to look out for include cracks, chips, loose bricks, and water damage. If you notice any of these issues, it’s best to have a professional mason assess the situation.
  2. Can I repair my bricks on my own?
  3. How often should I inspect my bricks?
    • You should inspect your bricks at least once a year, especially if you live in an area with harsh weather conditions or if your home is several years old.
  4. How much does it cost to replace or repair bricks?
    • The cost will vary depending on the extent of the damage and the type of bricks used in your home. It’s best to get a professional estimate from a mason for an accurate cost assessment.
  5. Can I use different types of bricks for replacement?
    • It’s important to use bricks that match the existing ones as closely as possible to maintain the visual consistency of your home. A professional mason can help you find a suitable replacement brick if necessary.
  6. How long will brick repairs or replacements last?
    • With proper care and maintenance, brick repairs and replacements should last for many years. It’s important to have all necessary repairs done promptly to prevent further damage and ensure the longevity of your home’s structure.