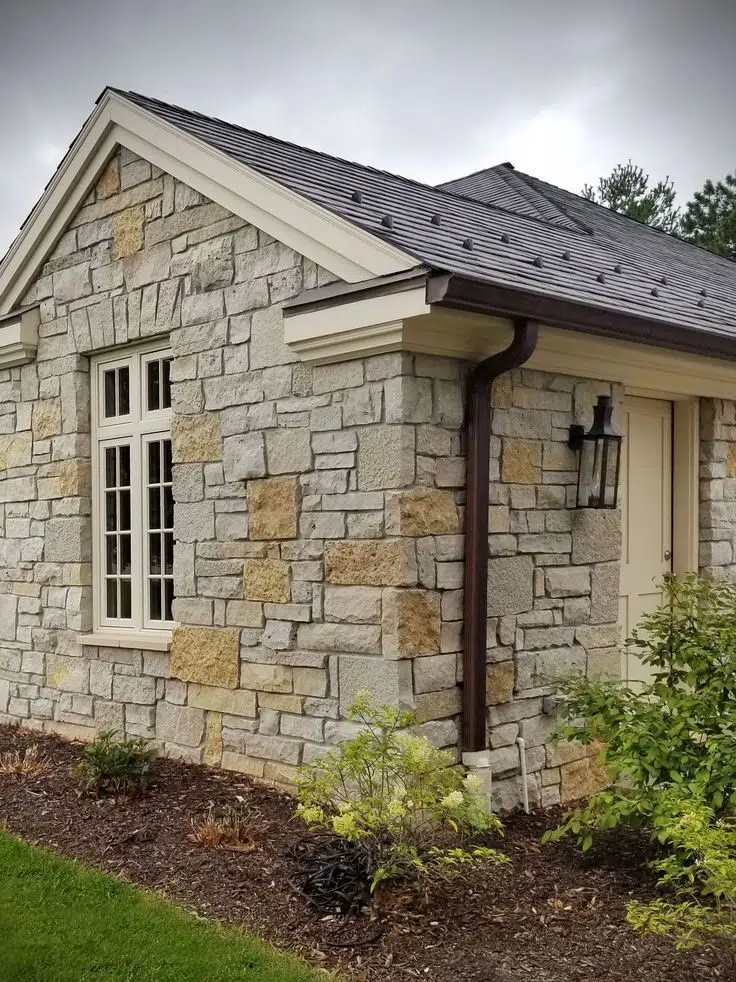
Enhancing Your Masonry Fence: Landscaping and Lighting Ideas


Enhancing Your Masonry Fence: Landscaping and Lighting Ideas

A masonry fence is more than just a boundary marker for your property; it’s an opportunity to create a stunning visual statement that enhances your home’s curb appeal. By integrating thoughtful landscaping and innovative lighting techniques, you can transform your masonry fence into a captivating focal point of your outdoor space. In this comprehensive guide, we’ll explore creative ways to seamlessly blend your masonry fence with your property’s landscaping and outdoor lighting, resulting in a harmonious and eye-catching exterior design.

1. Complementary Plant Selections for Masonry Fences

Choosing the right plants to complement your masonry fence can dramatically enhance its appearance and create a cohesive look for your outdoor space. Consider the following factors when selecting plants:

  • Fence material and color
  • Your climate and plant hardiness zone
  • Maintenance requirements
  • Desired aesthetic (formal, cottage-style, modern, etc.)

Here are some plant ideas that work well with masonry fences:

Evergreen Shrubs

Evergreen shrubs provide year-round color and structure, making them excellent choices for masonry fence landscaping. Some popular options include:

  • Boxwood (Buxus)
  • Yew (Taxus)
  • Holly (Ilex)
  • Juniper (Juniperus)

These shrubs can be pruned into formal shapes or left to grow naturally, depending on your preferred style.

Flowering Perennials

Add pops of color and seasonal interest with flowering perennials. Some beautiful choices include:

  • Lavender (Lavandula)
  • Russian Sage (Perovskia atriplicifolia)
  • Daylilies (Hemerocallis)
  • Coneflowers (Echinacea)

Plant these in groups or drifts along your masonry fence for maximum impact.

Ornamental Grasses

Ornamental grasses add texture, movement, and height to your fence landscaping. Consider these varieties:

  • Fountain Grass (Pennisetum)
  • Feather Reed Grass (Calamagrostis)
  • Blue Fescue (Festuca glauca)
  • Japanese Forest Grass (Hakonechloa macra)

These grasses can soften the hard lines of a masonry fence and create an attractive contrast.

2. Incorporating Climbing Vines and Trellises

Climbing vines and trellises can add vertical interest and soften the appearance of a masonry fence. Here’s how to incorporate them effectively:

Choosing the Right Vines

Select vines that are appropriate for your climate and the amount of sunlight your fence receives. Some popular options include:

  • Climbing Roses
  • Clematis
  • Jasmine
  • Virginia Creeper
  • Wisteria (use caution, as it can be aggressive)

Installing Trellises

When installing trellises on your masonry fence, consider the following tips:

  1. Choose a trellis material that complements your fence (e.g., wood, metal, or vinyl).
  2. Ensure the trellis is securely attached to the fence without damaging the masonry.
  3. Space trellises evenly along the fence for a balanced look.
  4. Consider using decorative brackets or mounting hardware for added visual interest.

Training and Maintaining Vines

Properly training and maintaining your climbing vines is essential for achieving the desired look:

  • Guide young vines onto the trellis using soft plant ties.
  • Prune regularly to control growth and maintain the desired shape.
  • Remove dead or damaged growth to keep the plants healthy and attractive.
  • Fertilize and water as needed to promote vigorous growth.

3. Lighting Techniques to Highlight Fence Textures and Details

Strategic lighting can dramatically enhance the appearance of your masonry fence after dark, highlighting its textures and architectural details. Consider these lighting techniques:

Uplighting

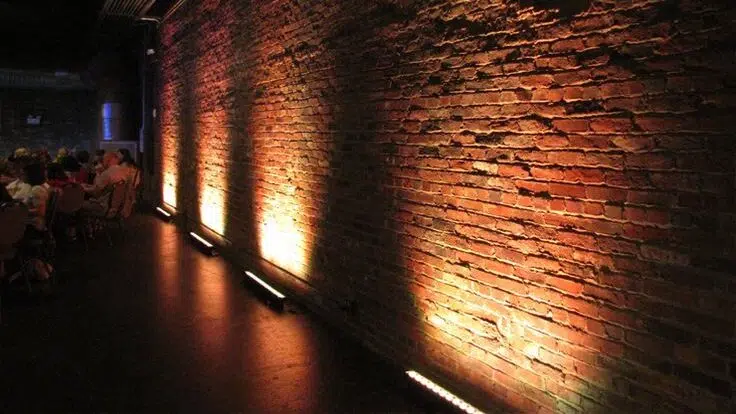
Uplighting involves placing lights at the base of the fence and directing them upwards. This technique creates dramatic shadows and emphasizes the texture of the masonry. Tips for effective uplighting:

  • Use LED spotlights or well lights for energy efficiency and longevity.
  • Space lights evenly along the fence for consistent illumination.
  • Experiment with different angles to achieve the desired effect.

Downlighting

Downlighting involves mounting lights on top of the fence or on nearby structures and directing them downwards. This technique creates a soft, moonlit effect and can illuminate plants at the base of the fence. Consider these tips:

  • Use fixtures with adjustable heads to fine-tune the lighting direction.
  • Choose warm white light for a natural, inviting ambiance.
  • Incorporate motion sensors for energy savings and added security.

Grazing

Grazing involves placing lights close to the fence surface and aiming them at a shallow angle. This technique accentuates the texture of the masonry and creates interesting shadow patterns. Tips for effective grazing:

  • Use linear LED fixtures or individual spotlights, depending on the fence length.
  • Experiment with different distances from the fence to achieve the desired effect.
  • Consider using color-changing LED lights for special occasions or seasonal displays.

4. Creating Outdoor Living Spaces Along Your Masonry Fence

Your masonry fence can serve as an excellent backdrop for outdoor living spaces. Here are some ideas to make the most of the area along your fence:

Seating Areas

Create cozy seating areas by placing furniture against or near your masonry fence:

  • Install built-in benches along the fence for a streamlined look.
  • Place a pergola or arbor against the fence to define a seating area and provide shade.
  • Use weatherproof outdoor furniture to create a comfortable lounge space.

Outdoor Kitchens and Dining Areas

Transform the space along your fence into an outdoor kitchen or dining area:

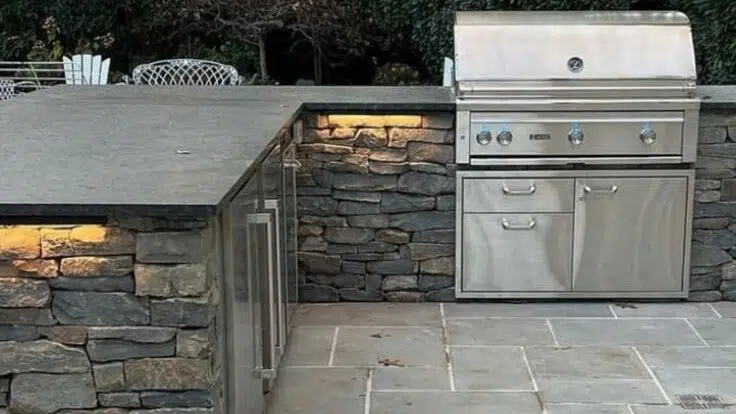
  • Install a built-in grill or outdoor kitchen against the fence.
  • Create a bar area by mounting countertops and shelving on the fence.
  • Set up a dining table and chairs near the fence for al fresco meals.

Water Features

Incorporate water features to add a sense of tranquility to your outdoor space:

  • Install a wall fountain or waterfall feature on your masonry fence.
  • Create a small pond or water garden near the fence.
  • Use the fence as a backdrop for a decorative birdbath or bubbling rock feature.

5. Seasonal Decor Ideas for Masonry Fences

Keep your masonry fence looking fresh and inviting throughout the year with these seasonal decor ideas:

Spring

  • Hang colorful flower baskets from the fence.
  • Create a vertical herb garden using mounted planters.
  • Decorate with pastel-colored outdoor pillows and throw blankets.

Summer

  • String outdoor lights or lanterns along the fence for evening ambiance.
  • Hang sun-resistant artwork or outdoor-friendly mirrors.
  • Create a tropical oasis with potted palms and bright flowers.

Fall

  • Drape autumn garlands or wreaths along the fence.
  • Display pumpkins and gourds in varying sizes and colors.
  • Hang dried corn stalks or wheat sheaves for a rustic touch.

Winter

  • Wrap evergreen garlands and white lights around the fence.
  • Hang oversized ornaments or snowflakes for a festive look.
  • Create winter container gardens with evergreens, berries, and pinecones.

Conclusion

By implementing these landscaping and lighting ideas, you can transform your masonry fence from a simple boundary marker into a stunning feature that enhances your property’s overall aesthetic. Remember to consider your fence’s material, your climate, and your personal style when selecting plants, lighting, and decor. With thoughtful planning and creativity, your masonry fence can become a beautiful and functional element of your outdoor living space, providing privacy, security, and visual interest throughout the year.

Whether you’re looking to create a lush garden backdrop, a cozy outdoor room, or a striking nighttime display, these ideas will help you make the most of your masonry fence. Don’t be afraid to experiment with different combinations of plants, lighting techniques, and seasonal decorations to find the perfect look for your home. With proper care and maintenance, your enhanced masonry fence will continue to be a source of pride and enjoyment for years to come.

\n\n\n

How can I enhance the appearance of my masonry fence?

You can enhance your masonry fence by integrating thoughtful landscaping, innovative lighting techniques, and seasonal decorations to create a visually appealing outdoor space.

What types of plants are suitable for landscaping around masonry fences?

Suitable plants include evergreen shrubs like boxwood, flowering perennials like lavender, and ornamental grasses like fountain grass. Selecting plants should consider the fence’s material, your climate, and the desired aesthetic.

How can climbing vines improve the look of my masonry fence?

Climbing vines, such as clematis or jasmine, add vertical interest and soften the appearance of a masonry fence. They can be trained to grow on installed trellises for a more attractive display.

What lighting techniques can highlight my masonry fence at night?

Techniques like uplighting, downlighting, and grazing can enhance your masonry fence after dark by emphasizing its textures and architectural details. Using LED fixtures is recommended for energy efficiency.

What outdoor living space ideas can I incorporate along my masonry fence?

Ideas include creating cozy seating areas with benches, installing an outdoor kitchen or dining area, or adding water features like fountains to enhance the atmosphere.

How can I keep my masonry fence looking fresh with seasonal decor?

For seasonal decor, you can hang flower baskets and create herb gardens in spring, string lights in summer, display pumpkins in fall, and wrap garlands in winter to add charm and variety throughout the year.

What maintenance is required for climbing vines on my masonry fence?

Maintain climbing vines by training them onto a trellis, pruning regularly to control growth, removing damaged parts, and providing adequate water and fertilizer for healthy growth.

What factors should I consider when choosing plants for my masonry fence?

Consider the fence material and color, your local climate and hardiness zone, maintenance requirements, and the desired aesthetic style (like formal or cottage-style) for selecting plants.

How should I install and use trellises with climbing plants on a masonry fence?

Choose a trellis material that complements your fence, securely attach it without damaging the masonry, and space trellises evenly along the fence for a balanced look for the climbing plants.

What are some energy-efficient lighting options for my masonry fence?

LED spotlights or well lights are recommended for energy efficiency and longevity when lighting your masonry fence.

How to Conduct a Thorough Brick Inspection of Your Historic Home

Owning a historic brick home is a source of pride and a connection to the past. However, with great beauty comes great responsibility. Regular inspections are crucial to maintaining the integrity and charm of your historic brick structure. This comprehensive guide will walk you through the process of conducting a thorough brick inspection, helping you identify potential issues early and preserve your home’s unique character for years to come. 1. Tools Needed for a DIY Brick Inspection Before you begin your inspection, gather the following tools to ensure you’re well-equipped for the task: – Flashlight – Binoculars – Digital camera – Notepad and pen – Measuring tape – Small mirror on an extendable handle – Screwdriver or awl – Ladder (for accessing higher areas safely) – Moisture meter (optional but helpful) Having these tools on hand will allow you to thoroughly examine your brick structure from various angles and document any issues you encounter. 2. Key Areas to Examine and Common Red Flags When inspecting your historic brick home, pay close attention to these critical areas and watch for common signs of trouble: Exterior Walls Start with a visual inspection of all exterior brick surfaces. Look for: – Cracks: Note their location, length, and width. Hairline cracks may be normal, but wider or growing cracks could indicate structural issues. – Spalling: This occurs when the face of the brick flakes off, often due to moisture penetration and freeze-thaw cycles. – Efflorescence: White, powdery deposits on the brick surface indicate salt migration, which can be a sign of moisture problems. – Mortar deterioration: Check for crumbling, missing, or recessed mortar joints. – Bulging or bowing: Any sections of the wall that are no longer plumb could signal structural problems. Foundation Examine the foundation for signs of settling or water damage: – Horizontal cracks: These can indicate serious structural issues and should be addressed immediately. – Stair-step cracks: Often a sign of foundation settling or soil movement. – Water stains or dampness: Look for dark patches or streaks on the foundation walls. Chimneys Use binoculars to inspect your chimney from the ground, looking for: – Leaning or tilting: This could indicate a structural problem at the roofline or within the chimney itself. – Damaged or missing bricks: Pay special attention to the top of the chimney, where exposure to the elements is greatest. – Deteriorated mortar joints: Particularly in the upper sections of the chimney. Interior Walls Don’t forget to inspect interior brick surfaces: – Dampness or discoloration: These can indicate water penetration through the exterior walls. – Cracks: Especially those that correspond to exterior cracks. – Loose or crumbling plaster: This may signal underlying brick or mortar issues. 3. Documenting and Photographing Issues Proper documentation is crucial for tracking the condition of your historic brick home over time. Follow these steps to create a comprehensive record: 1. Create a floor plan or use an existing one to map out the location of any issues you find. 2. Take clear, well-lit photographs of each problem area. Include a ruler or other object for scale when necessary. 3. Write detailed descriptions of each issue, including measurements and your observations about severity. 4. Date all documentation and organize it in a dedicated folder or digital file for easy reference. 5. Consider creating a spreadsheet to track issues over time, including dates of discovery and any repairs made. This systematic approach will help you monitor the progression of any problems and provide valuable information for professionals if their services are needed. 4. When to Call in a Professional Masonry Expert While many homeowners can conduct basic inspections, certain situations warrant the expertise of a professional mason or structural engineer: – Large cracks (wider than 1/4 inch) or cracks that appear to be growing – Significant bulging or bowing of walls – Extensive mortar deterioration or brick spalling – Signs of foundation settling or movement – Water infiltration issues that you can’t easily trace or resolve – Any structural concerns, especially those involving load-bearing walls or chimneys Remember, it’s always better to err on the side of caution when it comes to the structural integrity of your historic home. A professional can provide a more in-depth assessment and recommend appropriate repair strategies that respect the historical nature of your property. 5. Creating a Maintenance Plan Based on Inspection Results After completing your inspection and addressing any immediate concerns, use your findings to develop a proactive maintenance plan: 1. Prioritize repairs based on severity and potential for further damage if left unaddressed. 2. Schedule regular cleaning of your brick surfaces to prevent the buildup of dirt and pollutants that can contribute to deterioration. 3. Plan for repointing of mortar joints as needed, typically every 25-50 years depending on exposure and brick quality. 4. Implement a water management strategy, including proper gutter and downspout maintenance, to direct water away from your brick walls and foundation. 5. Consider applying a breathable water repellent to exterior brick surfaces every 5-10 years to provide additional protection against moisture infiltration. 6. Schedule annual inspections to catch any new issues early and update your maintenance plan accordingly. By following a regular maintenance schedule, you can prevent minor issues from becoming major problems and preserve the beauty and integrity of your historic brick home. Conclusion Conducting a thorough brick inspection of your historic home is a valuable skill that can save you time, money, and headaches in the long run. By familiarizing yourself with the inspection process, recognizing common issues, and knowing when to seek professional help, you’re taking important steps to protect your investment and preserve a piece of history. Remember, the key to successful brick maintenance is vigilance and prompt action. Regular inspections, coupled with timely repairs and preventive measures, will ensure that your historic brick home continues to stand strong and beautiful for generations to come. If you ever feel overwhelmed or uncertain about the condition of your brick structure, don’t hesitate to consult with a qualified masonry expert who specializes in historic preservation. Your home’s rich history and unique character are worth the effort to maintain and protect.\n\n\n

What is your return policy?

You can return any item within 30 days of receipt for a full refund, provided it is in its original condition.

How long does shipping take?

Shipping typically takes 3-7 business days, depending on your location and the shipping method selected.

Do you offer customer support?

Yes, we offer customer support via email and live chat from 9 AM to 5 PM on weekdays.

Can I change my order after it has been placed?

Changes can be made to your order within 24 hours of placement by contacting our support team.

What payment methods do you accept?

We accept all major credit cards, PayPal, and Apple Pay.

Maintaining Your Masonry Fence in Ontario’s Harsh Climate

Maintaining Your Masonry Fence in Ontario’s Harsh Climate

Masonry fences are a beautiful and durable addition to any property, but Ontario’s diverse and sometimes harsh climate can take its toll on these structures. From freezing winters to humid summers, your masonry fence faces a variety of challenges throughout the year. In this comprehensive guide, we’ll explore essential maintenance tips to keep your masonry fence looking great and functioning well, no matter what Mother Nature throws its way.

Seasonal Inspection and Cleaning Routines

Regular inspections and cleaning are crucial for maintaining the integrity and appearance of your masonry fence. By establishing a routine, you can catch potential issues early and prevent costly repairs down the line.

Spring Inspection

As the snow melts and temperatures rise, it’s time for a thorough spring inspection:

  • Check for winter damage, such as cracks or loose mortar
  • Look for signs of moisture penetration or efflorescence
  • Inspect the foundation for any shifting or settling
  • Examine the overall structure for any leaning or bulging

Summer Cleaning

Take advantage of warm weather to give your fence a good cleaning:

  1. Start with a gentle brush to remove loose dirt and debris
  2. Use a garden hose with a spray nozzle to rinse the fence
  3. For stubborn stains, use a mild detergent and soft-bristled brush
  4. Avoid high-pressure washing, which can damage mortar and bricks
  5. Allow the fence to dry completely after cleaning

Fall Preparation

Before winter sets in, prepare your fence for the colder months:

  • Remove any climbing plants or vines that may have grown on the fence
  • Clear away leaves and debris that could trap moisture
  • Apply a water-repellent sealer to protect against moisture infiltration
  • Trim nearby trees or shrubs to prevent damage from falling branches

Winter Vigilance

While major maintenance tasks are difficult in winter, stay vigilant:

  • Keep snow cleared away from the base of the fence
  • Avoid using de-icing salts near the masonry, as they can cause damage
  • Monitor for any ice dams or large icicles forming on the fence

Dealing with Freeze-Thaw Cycles and Moisture Issues

Ontario’s freeze-thaw cycles can be particularly damaging to masonry structures. As water freezes, it expands, potentially causing cracks in bricks and mortar. Here’s how to protect your fence:

Moisture Prevention

  • Ensure proper drainage around the fence to prevent water accumulation
  • Apply a high-quality, breathable sealant to the masonry surface
  • Keep gutters and downspouts clear to prevent water from splashing onto the fence
  • Consider installing a capstone or coping to divert water away from the top of the fence

Addressing Existing Moisture Problems

If you notice signs of moisture damage:

  1. Identify and fix the source of water infiltration
  2. Allow the masonry to dry completely before making repairs
  3. Replace damaged bricks or repoint mortar as necessary
  4. Consider applying a waterproof membrane to the foundation of the fence

Repairing Minor Cracks and Damage

Catching and repairing minor damage early can prevent more significant issues down the road. Here’s how to address common problems:

Hairline Cracks

  1. Clean the crack thoroughly with a wire brush
  2. Apply a masonry crack filler with a caulking gun
  3. Smooth the filler with a putty knife and allow it to dry
  4. Sand the area lightly if needed and touch up with masonry paint

Loose or Damaged Mortar

  1. Remove loose mortar with a chisel and hammer
  2. Clean out the joint with a wire brush
  3. Wet the area slightly to improve adhesion
  4. Apply new mortar with a pointing trowel, matching the existing joint style
  5. Allow the mortar to cure for at least 24 hours

Spalling Bricks

If you notice bricks with flaking or peeling surfaces:

  1. Remove loose material with a wire brush
  2. Apply a masonry patching compound to the damaged area
  3. Shape the compound to match the brick’s texture
  4. Allow to dry and cure according to the product instructions

Protecting Against Efflorescence and Staining

Efflorescence, the white, powdery substance that sometimes appears on masonry, is a common issue in Ontario due to our climate. Here’s how to deal with it:

Preventing Efflorescence

  • Ensure proper drainage around the fence
  • Use a breathable sealant to prevent moisture penetration
  • Choose high-quality, low-efflorescence bricks and mortar for new construction

Removing Efflorescence

  1. Start with a dry brush to remove loose efflorescence
  2. For stubborn deposits, use a mild vinegar solution and scrub gently
  3. Rinse thoroughly with clean water
  4. Allow the fence to dry completely
  5. Apply a breathable sealant to prevent future occurrences

Dealing with Other Stains

For other types of stains on your masonry fence:

  • Use appropriate cleaning solutions based on the type of stain (e.g., rust, algae, graffiti)
  • Always test cleaning products on a small, inconspicuous area first
  • Avoid harsh chemicals that could damage the masonry
  • Consider professional cleaning for persistent or extensive staining

When to Call a Professional for Maintenance or Repairs

While many maintenance tasks can be handled by homeowners, there are times when it’s best to call in a professional masonry expert:

Structural Issues

  • Significant leaning or bulging of the fence
  • Large cracks or separations in the masonry
  • Signs of foundation settling or shifting

Extensive Damage

  • Widespread mortar deterioration
  • Multiple damaged or spalling bricks
  • Severe water damage or efflorescence

Complex Repairs

  • Rebuilding sections of the fence
  • Installing new drainage systems
  • Applying specialized sealants or coatings

Routine Professional Maintenance

Consider scheduling professional inspections and maintenance every 3-5 years to ensure your fence remains in top condition. Experts can:

  • Perform thorough inspections using specialized equipment
  • Identify potential issues before they become major problems
  • Provide professional cleaning services
  • Offer advice on long-term maintenance strategies

Conclusion

Maintaining your masonry fence in Ontario’s challenging climate requires diligence and care, but the results are well worth the effort. By following these maintenance tips and staying proactive in your approach, you can ensure that your masonry fence remains a beautiful and durable feature of your property for years to come.

Remember, regular inspections, timely repairs, and addressing moisture issues are key to preserving your fence’s integrity. Don’t hesitate to seek professional help for complex issues or if you’re unsure about any aspect of maintenance. With proper care, your masonry fence will continue to enhance your property’s value and curb appeal, standing strong against Ontario’s diverse weather conditions.

\n\n\n

[QUESTION]

[ANSWER]

[QUESTION]

[ANSWER]

How to Conduct a Thorough Brick Inspection of Your Historic Home

Owning a historic brick home is a source of pride and a connection to the past. However, with great beauty comes great responsibility. Regular inspections are crucial to maintaining the integrity and charm of your historic brick structure. This comprehensive guide will walk you through the process of conducting a thorough brick inspection, helping you identify potential issues early and preserve your home’s unique character for years to come.

1. Tools Needed for a DIY Brick Inspection

Before you begin your inspection, gather the following tools to ensure you’re well-equipped for the task:

  • Flashlight
  • Binoculars
  • Digital camera
  • Notepad and pen
  • Measuring tape
  • Small mirror on an extendable handle
  • Screwdriver or awl
  • Ladder (for accessing higher areas safely)
  • Moisture meter (optional but helpful)

Having these tools on hand will allow you to thoroughly examine your brick structure from various angles and document any issues you encounter.

2. Key Areas to Examine and Common Red Flags

When inspecting your historic brick home, pay close attention to these critical areas and watch for common signs of trouble:

Exterior Walls

Start with a visual inspection of all exterior brick surfaces. Look for:

  • Cracks: Note their location, length, and width. Hairline cracks may be normal, but wider or growing cracks could indicate structural issues.
  • Spalling: This occurs when the face of the brick flakes off, often due to moisture penetration and freeze-thaw cycles.
  • Efflorescence: White, powdery deposits on the brick surface indicate salt migration, which can be a sign of moisture problems.
  • Mortar deterioration: Check for crumbling, missing, or recessed mortar joints.
  • Bulging or bowing: Any sections of the wall that are no longer plumb could signal structural problems.

Foundation

Examine the foundation for signs of settling or water damage:

  • Horizontal cracks: These can indicate serious structural issues and should be addressed immediately.
  • Stair-step cracks: Often a sign of foundation settling or soil movement.
  • Water stains or dampness: Look for dark patches or streaks on the foundation walls.

Chimneys

Use binoculars to inspect your chimney from the ground, looking for:

  • Leaning or tilting: This could indicate a structural problem at the roofline or within the chimney itself.
  • Damaged or missing bricks: Pay special attention to the top of the chimney, where exposure to the elements is greatest.
  • Deteriorated mortar joints: Particularly in the upper sections of the chimney.

Interior Walls

Don’t forget to inspect interior brick surfaces:

  • Dampness or discoloration: These can indicate water penetration through the exterior walls.
  • Cracks: Especially those that correspond to exterior cracks.
  • Loose or crumbling plaster: This may signal underlying brick or mortar issues.

3. Documenting and Photographing Issues

Proper documentation is crucial for tracking the condition of your historic brick home over time. Follow these steps to create a comprehensive record:

  1. Create a floor plan or use an existing one to map out the location of any issues you find.
  2. Take clear, well-lit photographs of each problem area. Include a ruler or other object for scale when necessary.
  3. Write detailed descriptions of each issue, including measurements and your observations about severity.
  4. Date all documentation and organize it in a dedicated folder or digital file for easy reference.
  5. Consider creating a spreadsheet to track issues over time, including dates of discovery and any repairs made.

This systematic approach will help you monitor the progression of any problems and provide valuable information for professionals if their services are needed.

4. When to Call in a Professional Masonry Expert

While many homeowners can conduct basic inspections, certain situations warrant the expertise of a professional mason or structural engineer:

  • Large cracks (wider than 1/4 inch) or cracks that appear to be growing
  • Significant bulging or bowing of walls
  • Extensive mortar deterioration or brick spalling
  • Signs of foundation settling or movement
  • Water infiltration issues that you can’t easily trace or resolve
  • Any structural concerns, especially those involving load-bearing walls or chimneys

Remember, it’s always better to err on the side of caution when it comes to the structural integrity of your historic home. A professional can provide a more in-depth assessment and recommend appropriate repair strategies that respect the historical nature of your property.

5. Creating a Maintenance Plan Based on Inspection Results

After completing your inspection and addressing any immediate concerns, use your findings to develop a proactive maintenance plan:

  1. Prioritize repairs based on severity and potential for further damage if left unaddressed.
  2. Schedule regular cleaning of your brick surfaces to prevent the buildup of dirt and pollutants that can contribute to deterioration.
  3. Plan for repointing of mortar joints as needed, typically every 25-50 years depending on exposure and brick quality.
  4. Implement a water management strategy, including proper gutter and downspout maintenance, to direct water away from your brick walls and foundation.
  5. Consider applying a breathable water repellent to exterior brick surfaces every 5-10 years to provide additional protection against moisture infiltration.
  6. Schedule annual inspections to catch any new issues early and update your maintenance plan accordingly.

By following a regular maintenance schedule, you can prevent minor issues from becoming major problems and preserve the beauty and integrity of your historic brick home.

Conclusion

Conducting a thorough brick inspection of your historic home is a valuable skill that can save you time, money, and headaches in the long run. By familiarizing yourself with the inspection process, recognizing common issues, and knowing when to seek professional help, you’re taking important steps to protect your investment and preserve a piece of history.

Remember, the key to successful brick maintenance is vigilance and prompt action. Regular inspections, coupled with timely repairs and preventive measures, will ensure that your historic brick home continues to stand strong and beautiful for generations to come. If you ever feel overwhelmed or uncertain about the condition of your brick structure, don’t hesitate to consult with a qualified masonry expert who specializes in historic preservation. Your home’s rich history and unique character are worth the effort to maintain and protect.

\n\n\n

What tools are needed for a DIY brick inspection?

Essential tools for a DIY brick inspection include a flashlight, binoculars, a digital camera, a notepad and pen, measuring tape, a small mirror on an extendable handle, a screwdriver or awl, a ladder, and optionally a moisture meter.

What key areas should be inspected in a historic brick home?

Key areas to inspect include the exterior walls, foundation, chimneys, and interior walls. Look for signs of cracks, moisture issues, mortar deterioration, and any visible damage.

What are some common red flags to look for during a brick inspection?

Common red flags include wider or growing cracks, spalling, efflorescence, crumbling mortar joints, bulging walls, horizontal or stair-step cracks in the foundation, and dampness or discoloration in interior walls.

How should issues found during the inspection be documented?

Document issues by creating a floor plan or map, taking clear photographs with a scale for reference, writing detailed descriptions, dating documentation, and possibly using a spreadsheet to track issues and repairs over time.

When should a homeowner call a professional masonry expert?

A professional should be consulted for large or growing cracks, significant wall bulging, extensive mortar deterioration, signs of foundation movement, untraceable water infiltration issues, or any structural concerns involving load-bearing walls or chimneys.

What should be included in a maintenance plan after an inspection?

A maintenance plan should prioritize repairs, schedule regular cleaning, plan for repointing mortar, implement a water management strategy, apply water repellents periodically, and schedule annual inspections to catch new issues early.

Why is regular inspection important for historic brick homes?

Regular inspections are crucial for identifying potential issues early, preventing minor problems from escalating, and preserving the unique character and structural integrity of the historic brick home for future generations.

What steps can be taken to protect a historic brick home?

To protect a historic brick home, conduct regular inspections, perform timely repairs, maintain proper gutter and downspout systems, apply breathable water repellents, and document changes to track the home’s condition over time.

Matching Mortar in Historic Brick Homes: A Guide to Materials and Techniques

Restoring historic brick homes is a delicate process that requires careful attention to detail, especially when it comes to matching mortar. The right mortar not only enhances the aesthetic appeal of a historic structure but also plays a crucial role in preserving its structural integrity. In this comprehensive guide, we’ll explore the intricacies of matching mortar in historic brick homes, from understanding traditional compositions to applying compatible materials using proper techniques.

Understanding Historic Mortar Compositions

Before diving into the matching process, it’s essential to understand the composition of historic mortars. Unlike modern Portland cement-based mortars, historic mortars were typically made with lime as the primary binder. These lime-based mortars had several advantages:

  • Flexibility: Lime mortars could accommodate minor building movements without cracking.
  • Breathability: They allowed moisture to evaporate, preventing trapped moisture issues.
  • Self-healing properties: Small cracks in lime mortars could heal themselves over time.
  • Compatibility with soft bricks: Lime mortars were softer than the bricks, preventing damage to the masonry.

Historic mortars often contained a mixture of lime, sand, and sometimes additional materials like clay or animal hair for added strength. The exact composition varied depending on the region, available materials, and the specific requirements of the building.

Analyzing Existing Mortar for Proper Matching

To accurately match historic mortar, a thorough analysis of the existing mortar is crucial. This process typically involves the following steps:

  1. Visual Inspection: Examine the color, texture, and aggregate composition of the existing mortar.
  2. Hardness Testing: Assess the mortar’s hardness using simple field tests or more advanced laboratory methods.
  3. Chemical Analysis: Determine the precise composition of the mortar, including the binder-to-aggregate ratio and any additives.
  4. Microscopic Examination: Study the mortar’s microstructure to identify specific characteristics and components.

Professional laboratories specializing in historic material analysis can provide detailed reports on mortar composition, which are invaluable for creating an accurate match.

Mixing and Applying Compatible Mortar

Once the existing mortar has been analyzed, the next step is to mix and apply a compatible replacement mortar. Here’s a general process to follow:

1. Selecting Materials

Choose materials that closely match the original mortar composition:

  • Lime: Use either hydrated lime or lime putty, depending on the analysis results.
  • Sand: Select sand with a similar color, texture, and grain size distribution to the original mortar.
  • Additives: If the original mortar contained additional materials, source appropriate equivalents.

2. Mixing the Mortar

Follow these steps to mix the mortar properly:

  1. Measure the ingredients according to the specified ratios.
  2. Mix dry ingredients thoroughly before adding water.
  3. Add water gradually, mixing until the desired consistency is achieved.
  4. Allow the mixture to rest for 15-20 minutes before final adjustments.

3. Applying the Mortar

Proper application techniques are crucial for a successful restoration:

  • Remove old, deteriorated mortar to a depth of 2-3 times the joint width.
  • Clean the joints thoroughly, removing all dust and debris.
  • Pre-wet the masonry to prevent rapid moisture loss from the new mortar.
  • Apply the mortar in layers, allowing each layer to reach a “thumbprint-hard” consistency before applying the next.
  • Tool the joints to match the original profile and texture.
  • Protect the newly applied mortar from rapid drying, extreme temperatures, and direct sunlight.

Common Mistakes in Mortar Matching and How to Avoid Them

Even experienced professionals can make mistakes when matching historic mortars. Here are some common pitfalls and how to avoid them:

1. Using Modern Portland Cement

Portland cement is often too hard and impermeable for historic brickwork. Stick to lime-based mortars that match the original composition.

2. Incorrect Color Matching

Avoid relying solely on pigments to match color. Instead, focus on using appropriate sand and lime to achieve the right hue naturally.

3. Improper Joint Preparation

Failing to remove enough old mortar or inadequately cleaning the joints can lead to poor adhesion. Take the time to prepare the joints properly.

4. Inconsistent Mixing

Variations in mixing can lead to inconsistencies in color and texture. Use precise measurements and mix thoroughly for consistent results.

5. Rushed Application

Applying mortar too quickly or in unfavorable weather conditions can compromise its strength and appearance. Be patient and work in appropriate conditions.

The Role of Proper Mortar in Preserving Historic Brickwork

Using appropriate mortar in historic brick restoration is not just about aesthetics; it’s crucial for the long-term preservation of the structure. Here’s why:

  • Structural Integrity: Compatible mortar helps maintain the building’s structural stability by allowing for natural movement and preventing stress on the bricks.
  • Moisture Management: Proper mortar allows the masonry system to breathe, preventing moisture-related issues like spalling and freeze-thaw damage.
  • Historic Authenticity: Using historically accurate mortar preserves the building’s original character and construction techniques.
  • Longevity: Well-matched mortar can significantly extend the lifespan of historic brickwork, reducing the need for future repairs.

Conclusion

Matching mortar in historic brick homes is a complex but essential aspect of preservation. By understanding historic mortar compositions, carefully analyzing existing materials, and using appropriate mixing and application techniques, you can ensure that your restoration work not only looks authentic but also contributes to the long-term preservation of these invaluable structures.

Remember, when in doubt, it’s always best to consult with preservation specialists or experienced masons who have a track record in historic restoration. With the right approach and attention to detail, you can help these historic brick homes continue to tell their stories for generations to come.

\n\n\n

error: No faq

No FAQs available.

Maintaining Your Masonry Fence in Ontario’s Harsh Climate


Maintaining Your Masonry Fence in Ontario’s Harsh Climate

Masonry fences are a beautiful and durable addition to any property, but Ontario’s diverse and sometimes harsh climate can take its toll on these structures. From freezing winters to humid summers, your masonry fence faces a variety of challenges throughout the year. In this comprehensive guide, we’ll explore essential maintenance tips to keep your masonry fence looking great and functioning well, no matter what Mother Nature throws its way.

Seasonal Inspection and Cleaning Routines

Regular inspections and cleaning are crucial for maintaining the integrity and appearance of your masonry fence. By establishing a routine, you can catch potential issues early and prevent costly repairs down the line.

Spring Inspection

As the snow melts and temperatures rise, it’s time for a thorough spring inspection:

  • Check for winter damage, such as cracks or loose mortar
  • Look for signs of moisture penetration or efflorescence
  • Inspect the foundation for any shifting or settling
  • Examine the overall structure for any leaning or bulging

Summer Cleaning

Take advantage of warm weather to give your fence a good cleaning:

  1. Start with a gentle brush to remove loose dirt and debris
  2. Use a garden hose with a spray nozzle to rinse the fence
  3. For stubborn stains, use a mild detergent and soft-bristled brush
  4. Avoid high-pressure washing, which can damage mortar and bricks
  5. Allow the fence to dry completely after cleaning

Fall Preparation

Before winter sets in, prepare your fence for the colder months:

  • Remove any climbing plants or vines that may have grown on the fence
  • Clear away leaves and debris that could trap moisture
  • Apply a water-repellent sealer to protect against moisture infiltration
  • Trim nearby trees or shrubs to prevent damage from falling branches

Winter Vigilance

While major maintenance tasks are difficult in winter, stay vigilant:

  • Keep snow cleared away from the base of the fence
  • Avoid using de-icing salts near the masonry, as they can cause damage
  • Monitor for any ice dams or large icicles forming on the fence

Dealing with Freeze-Thaw Cycles and Moisture Issues

Ontario’s freeze-thaw cycles can be particularly damaging to masonry structures. As water freezes, it expands, potentially causing cracks in bricks and mortar. Here’s how to protect your fence:

Moisture Prevention

  • Ensure proper drainage around the fence to prevent water accumulation
  • Apply a high-quality, breathable sealant to the masonry surface
  • Keep gutters and downspouts clear to prevent water from splashing onto the fence
  • Consider installing a capstone or coping to divert water away from the top of the fence

Addressing Existing Moisture Problems

If you notice signs of moisture damage:

  1. Identify and fix the source of water infiltration
  2. Allow the masonry to dry completely before making repairs
  3. Replace damaged bricks or repoint mortar as necessary
  4. Consider applying a waterproof membrane to the foundation of the fence

Repairing Minor Cracks and Damage

Catching and repairing minor damage early can prevent more significant issues down the road. Here’s how to address common problems:

Hairline Cracks

  1. Clean the crack thoroughly with a wire brush
  2. Apply a masonry crack filler with a caulking gun
  3. Smooth the filler with a putty knife and allow it to dry
  4. Sand the area lightly if needed and touch up with masonry paint

Loose or Damaged Mortar

  1. Remove loose mortar with a chisel and hammer
  2. Clean out the joint with a wire brush
  3. Wet the area slightly to improve adhesion
  4. Apply new mortar with a pointing trowel, matching the existing joint style
  5. Allow the mortar to cure for at least 24 hours

Spalling Bricks

If you notice bricks with flaking or peeling surfaces:

  1. Remove loose material with a wire brush
  2. Apply a masonry patching compound to the damaged area
  3. Shape the compound to match the brick’s texture
  4. Allow to dry and cure according to the product instructions

Protecting Against Efflorescence and Staining

Efflorescence, the white, powdery substance that sometimes appears on masonry, is a common issue in Ontario due to our climate. Here’s how to deal with it:

Preventing Efflorescence

  • Ensure proper drainage around the fence
  • Use a breathable sealant to prevent moisture penetration
  • Choose high-quality, low-efflorescence bricks and mortar for new construction

Removing Efflorescence

  1. Start with a dry brush to remove loose efflorescence
  2. For stubborn deposits, use a mild vinegar solution and scrub gently
  3. Rinse thoroughly with clean water
  4. Allow the fence to dry completely
  5. Apply a breathable sealant to prevent future occurrences

Dealing with Other Stains

For other types of stains on your masonry fence:

  • Use appropriate cleaning solutions based on the type of stain (e.g., rust, algae, graffiti)
  • Always test cleaning products on a small, inconspicuous area first
  • Avoid harsh chemicals that could damage the masonry
  • Consider professional cleaning for persistent or extensive staining

When to Call a Professional for Maintenance or Repairs

While many maintenance tasks can be handled by homeowners, there are times when it’s best to call in a professional masonry expert:

Structural Issues

  • Significant leaning or bulging of the fence
  • Large cracks or separations in the masonry
  • Signs of foundation settling or shifting

Extensive Damage

  • Widespread mortar deterioration
  • Multiple damaged or spalling bricks
  • Severe water damage or efflorescence

Complex Repairs

  • Rebuilding sections of the fence
  • Installing new drainage systems
  • Applying specialized sealants or coatings

Routine Professional Maintenance

Consider scheduling professional inspections and maintenance every 3-5 years to ensure your fence remains in top condition. Experts can:

  • Perform thorough inspections using specialized equipment
  • Identify potential issues before they become major problems
  • Provide professional cleaning services
  • Offer advice on long-term maintenance strategies

Conclusion

Maintaining your masonry fence in Ontario’s challenging climate requires diligence and care, but the results are well worth the effort. By following these maintenance tips and staying proactive in your approach, you can ensure that your masonry fence remains a beautiful and durable feature of your property for years to come.

Remember, regular inspections, timely repairs, and addressing moisture issues are key to preserving your fence’s integrity. Don’t hesitate to seek professional help for complex issues or if you’re unsure about any aspect of maintenance. With proper care, your masonry fence will continue to enhance your property’s value and curb appeal, standing strong against Ontario’s diverse weather conditions.

\n\n\n

What are the main challenges to masonry fences in Ontario’s climate?

Ontario’s climate poses challenges such as freezing winters and humid summers, which can lead to damage, moisture penetration, and structural issues in masonry fences.

How often should I inspect and clean my masonry fence?

Regular inspections and cleaning should be conducted at least seasonally, with specific routines recommended for spring, summer, fall, and winter to maintain the fence’s integrity and appearance.

What should I look for during a spring inspection of my masonry fence?

During spring inspection, check for winter damage like cracks or loose mortar, signs of moisture or efflorescence, foundation shifting, and any leaning or bulging in the structure.

What maintenance should be performed before winter?

Before winter, remove climbing plants, clear leaves and debris, apply a water-repellent sealer, and trim nearby trees to prevent moisture accumulation and damage from falling branches.

How can I address minor cracks in my masonry fence?

To repair minor cracks, clean the crack, apply masonry crack filler, smooth it out, allow it to dry, and touch up with masonry paint if needed.

What is efflorescence and how can I prevent it?

Efflorescence is a white, powdery substance that can appear on masonry due to moisture. It can be prevented by ensuring proper drainage, using a breathable sealant, and selecting low-efflorescence materials for construction.

When is it necessary to call a professional for masonry fence maintenance?

Call a professional when noticing structural issues like significant leaning, large cracks, or extensive damage, such as widespread mortar deterioration or severe water damage.

What should I do if I notice signs of moisture damage in my masonry fence?

If you see signs of moisture damage, fix the source of infiltration, allow the masonry to dry, replace damaged bricks or mortar as necessary, and consider applying a waterproof membrane.

How can I clean stains or remove efflorescence from my masonry fence?

For cleaning stains, use appropriate solutions for each type of stain, test on a small area first, and avoid harsh chemicals. For efflorescence, use a dry brush or a mild vinegar solution followed by rinsing with water.

What are the benefits of scheduling routine professional maintenance?

Routine professional maintenance can help identify potential issues early, ensure thorough inspections, provide specialized cleaning, and offer advice on long-term maintenance strategies to keep your fence in good condition.

The Ultimate Guide to Chimney Repair: Ensuring Safety and Longevity for Your Home

1. Introduction to Chimney Repair

Your chimney is more than just a decorative feature of your home; it’s a crucial component of your heating system that requires regular maintenance and occasional repairs to function safely and efficiently. In this comprehensive guide, we’ll explore everything you need to know about chimney repair, from identifying common issues to understanding professional repair techniques. Whether you’re a homeowner in southern Ontario or anywhere else, this guide will help you maintain your chimney’s integrity and know when to seek expert help from professionals like Fix My Brick.

1.1 Importance of a well-maintained chimney

A well-maintained chimney is essential for several reasons:

  • Safety: It prevents the buildup of dangerous gases like carbon monoxide in your home.
  • Efficiency: A clean, properly functioning chimney ensures your fireplace or wood stove operates at peak efficiency.
  • Longevity: Regular maintenance can extend the life of your chimney and avoid costly repairs or replacements.
  • Home value: A well-maintained chimney contributes to your home’s overall value and curb appeal.

1.2 Common signs of chimney damage

Recognizing the signs of chimney damage early can save you time, money, and potential safety hazards. Look out for:

  • Cracked or missing bricks
  • White staining on the exterior (efflorescence)
  • Rust on the firebox or damper
  • Strong odors coming from the fireplace
  • Debris in the firebox or flue
  • Difficulty starting or maintaining fires

2. Types of Chimney Damage

2.1 Cracks and structural issues

Cracks in your chimney can range from minor surface issues to severe structural problems. They can be caused by settling, extreme temperature changes, or water damage. Left unaddressed, these cracks can lead to more significant issues, including chimney collapse.

2.2 Water damage and leaks

Water is one of the biggest enemies of chimneys. Leaks can occur due to damaged flashing, cracked chimney crowns, or deteriorated mortar joints. Water damage can lead to:

  • Rusted dampers and fireboxes
  • Deteriorated flue lining
  • Stained walls and ceilings
  • Mold growth
  • Structural damage to the chimney and surrounding areas

2.3 Mortar deterioration

Over time, the mortar between bricks can deteriorate due to exposure to the elements. This can lead to loose bricks, water infiltration, and reduced structural integrity of the chimney.

2.4 Flue liner problems

The flue liner protects your home from heat and combustion gases. Common issues include:

  • Cracks or gaps in clay tile liners
  • Deterioration of metal liners due to corrosion
  • Improper sizing or installation
  • Creosote buildup

2.5 Chimney cap and crown damage

The chimney cap and crown are your chimney’s first line of defense against the elements. Damage to these components can lead to water infiltration, animal intrusion, and debris buildup in the flue.

3. DIY Chimney Inspection

3.1 Safety precautions

Before attempting any DIY chimney inspection, ensure you take the following safety precautions:

  • Use a sturdy ladder and have a spotter
  • Wear non-slip shoes
  • Use safety glasses and a dust mask
  • Avoid inspections during wet or icy conditions

3.2 What to look for externally

During an external inspection, check for:

  • Cracks or gaps in the mortar joints
  • Loose or missing bricks
  • Signs of water damage or staining
  • Leaning or tilting of the chimney structure
  • Damaged or missing chimney cap
  • Vegetation growing on or near the chimney

3.3 Internal inspection tips

For an internal inspection:

  • Use a flashlight to examine the firebox for cracks or damage
  • Check the damper for proper operation and signs of rust
  • Look for any debris or creosote buildup in the flue
  • Inspect the flue liner for cracks or missing pieces
  • Check for any signs of water damage or staining inside the fireplace

4. Professional Chimney Repair Techniques

4.1 Tuckpointing and repointing

Tuckpointing is the process of removing deteriorated mortar from joints and replacing it with fresh mortar. This technique helps maintain the structural integrity of the chimney and prevents water infiltration. Repointing is a similar process but involves replacing all the mortar joints, not just the damaged ones.

4.2 Chimney relining

When the existing flue liner is damaged beyond repair, chimney relining is necessary. This process involves installing a new liner, typically made of stainless steel or a ceramic compound, to ensure proper venting of combustion gases.

4.3 Rebuilding and restoration

In cases of severe damage, partial or complete chimney rebuilding may be necessary. This process involves dismantling the damaged portions of the chimney and reconstructing them using new materials while maintaining the original design and structural integrity.

4.4 Waterproofing and sealing

Applying a waterproof sealant to the exterior of the chimney can help prevent water damage and extend the life of repairs. This process should only be done after addressing any existing damage and ensuring proper ventilation.

5. When to Call a Professional

5.1 Signs of severe damage

While some minor chimney maintenance can be done by homeowners, certain signs indicate the need for professional intervention:

  • Large cracks or gaps in the chimney structure
  • Leaning or tilting of the chimney
  • Extensive water damage or leaks
  • Damaged or deteriorated flue liner
  • Strong odors or smoke entering the home
  • Difficulty starting or maintaining fires

5.2 Benefits of expert chimney repair services

Professional chimney repair services offer several advantages:

  • Expertise in identifying and addressing complex issues
  • Access to specialized tools and materials
  • Knowledge of local building codes and safety regulations
  • Warranty on work performed
  • Potential cost savings by addressing issues early and correctly

6. Chimney Repair Costs

6.1 Factors affecting repair costs

The cost of chimney repairs can vary widely depending on several factors:

  • Type and extent of damage
  • Height and accessibility of the chimney
  • Materials required for repair
  • Local labor costs
  • Any necessary permits or inspections

6.2 Average costs for common repairs

While costs can vary, here are some rough estimates for common chimney repairs:

  • Tuckpointing: $500 – $2,500
  • Chimney cap replacement: $150 – $500
  • Flue liner replacement: $2,500 – $7,000
  • Partial rebuilding: $1,000 – $3,500
  • Complete chimney rebuild: $4,000 – $15,000+

7. Preventing Future Chimney Damage

7.1 Regular maintenance tips

To prevent future chimney damage:

  • Clean your chimney annually or more frequently if used heavily
  • Install a quality chimney cap to prevent water and animal intrusion
  • Address minor repairs promptly to prevent larger issues
  • Keep trees trimmed away from the chimney
  • Ensure proper ventilation and use of your fireplace or wood stove

7.2 Importance of annual inspections

Annual professional inspections are crucial for:

  • Identifying potential issues before they become major problems
  • Ensuring your chimney meets current safety standards
  • Maintaining the efficiency of your heating system
  • Protecting your home and family from fire and carbon monoxide risks

8. Choosing a Chimney Repair Service

8.1 What to look for in a reputable company

When selecting a chimney repair service, consider the following:

  • Proper licensing and insurance
  • Certifications from industry organizations
  • Years of experience in chimney repair
  • Positive customer reviews and testimonials
  • Clear, detailed written estimates
  • Warranty on work performed

8.2 Questions to ask before hiring

Before hiring a chimney repair service, ask the following questions:

  1. Are you licensed and insured?
  2. What certifications do your technicians hold?
  3. How long have you been in business?
  4. Can you provide references from recent clients?
  5. What is your process for inspecting and diagnosing chimney issues?
  6. Do you offer a warranty on your work?
  7. How long will the repair process take?
  8. Will you obtain any necessary permits?

9. Conclusion

9.1 Recap of key points

Maintaining a safe and efficient chimney requires regular inspection, timely repairs, and professional expertise when needed. By understanding common chimney issues, recognizing signs of damage, and implementing preventive measures, you can extend the life of your chimney and ensure the safety of your home.

9.2 Importance of timely chimney repair

Addressing chimney issues promptly can prevent minor problems from escalating into major, costly repairs. Regular maintenance and timely repairs not only ensure the safety and efficiency of your heating system but also protect your home’s value and your family’s well-being.

If you’re in southern Ontario and need expert chimney repair services, don’t hesitate to contact Fix My Brick. Our team of experienced professionals is ready to help you maintain the safety and integrity of your chimney for years to come.

Why is it important to maintain a chimney?

A well-maintained chimney is crucial for safety, efficiency, longevity, and preserving your home’s value. It prevents dangerous gas buildups, ensures efficient heating, and contributes to the overall appeal of your property.

What are common signs of chimney damage?

Common signs include cracked or missing bricks, white staining (efflorescence), rust on the firebox, unpleasant odors from the fireplace, debris in the flue, and difficulty starting or maintaining fires.

What types of chimney damage should I be aware of?

Key types of chimney damage include cracks and structural issues, water damage and leaks, mortar deterioration, flue liner problems, and damage to the chimney cap and crown.

What safety precautions should I take for a DIY chimney inspection?

Ensure you use a sturdy ladder with a spotter, wear non-slip shoes, protective eyewear, and a dust mask, and avoid inspections in wet or icy conditions.

When should I call a professional for chimney repair?

You should call a professional if you notice large cracks, leaning structures, extensive leaks, damaged flue liners, strong odors or smoke entering your home, or difficulty maintaining fires.

What are some professional chimney repair techniques?

Professional techniques include tuckpointing and repointing to repair mortar, chimney relining to replace flue liners, rebuilding for severe damage, and waterproofing to prevent future leaks.

What factors affect chimney repair costs?

Factors include the type and extent of damage, height and accessibility of the chimney, required materials, local labor costs, and any necessary permits or inspections.

How can I prevent future chimney damage?

Preventive measures include annual cleaning, installing a quality chimney cap, addressing minor repairs promptly, keeping trees trimmed, and ensuring proper ventilation of your fireplace or wood stove.

What should I look for when choosing a chimney repair service?

Look for proper licensing and insurance, certifications, years of experience, positive customer reviews, detailed estimates, and a warranty on the work performed.

What are the benefits of hiring a professional for chimney repairs?

Professional services provide expert diagnosis, specialized tools, knowledge of building codes, warranties on their work, and potential cost savings by addressing issues correctly and early.

The Ultimate Guide to Chimney Caps: Protection, Function, and Installation


The Ultimate Guide to Chimney Caps: Protection, Function, and Installation

Chimney caps are an often overlooked yet crucial component of any home with a fireplace or wood-burning stove. These small but mighty devices play a significant role in protecting your home, improving your chimney’s performance, and ensuring the safety of your family. In this comprehensive guide, we’ll explore everything you need to know about chimney caps, from their basic functions to installation and maintenance.

1. Introduction to Chimney Caps

1.1 What is a chimney cap?

A chimney cap is a protective covering installed at the top of a chimney. Typically made of metal, it consists of a roof and sides that allow smoke to escape while preventing various elements from entering the chimney. Think of it as a small “hat” for your chimney, providing both functional and aesthetic benefits.

1.2 Why are chimney caps important?

Chimney caps are essential for several reasons:

  • They protect your chimney and home from water damage
  • They prevent animals and debris from entering your chimney
  • They improve the safety and efficiency of your fireplace or stove
  • They can enhance the overall appearance of your roof

2. Functions and Benefits of Chimney Caps

2.1 Protection from water damage

One of the primary functions of a chimney cap is to keep water out of your chimney. Without a cap, rain, snow, and sleet can easily enter the flue, leading to moisture damage inside your chimney and potentially your home. This moisture can cause:

  • Deterioration of the chimney liner
  • Rusting of metal components
  • Cracking of masonry due to freeze-thaw cycles
  • Mold and mildew growth
By installing a chimney cap, you create a barrier that directs water away from the flue opening, protecting your chimney and home from these costly issues.

2.2 Preventing animal intrusion

Chimneys can be attractive nesting spots for birds, squirrels, raccoons, and other small animals. A properly installed chimney cap acts as a physical barrier, preventing these critters from entering your home. This is crucial because animal nests can:

  • Block the flue, leading to poor ventilation and potential carbon monoxide buildup
  • Create fire hazards due to flammable nesting materials
  • Introduce parasites and diseases into your home
By keeping animals out, chimney caps help maintain a safe and healthy living environment.

2.3 Spark arrestor for fire safety

Many chimney caps include a spark arrestor, which is a wire mesh designed to catch and extinguish sparks and embers before they can escape the chimney. This feature is crucial for preventing roof fires and reducing the risk of wildfires, especially in dry or wooded areas. Some local building codes even require spark arrestors as a safety measure.

2.4 Reducing downdrafts

Downdrafts occur when wind blows across the top of the chimney, pushing smoke and gases back down into your home. A quality chimney cap can help minimize these downdrafts by:

  • Creating a barrier that deflects wind
  • Improving the draw of the chimney
  • Maintaining consistent airflow
This results in better fireplace or stove performance and improved indoor air quality.

2.5 Improving energy efficiency

When your fireplace or stove is not in use, a chimney cap helps prevent heated or cooled air from escaping through the chimney. This can lead to improved energy efficiency in your home, potentially reducing your heating and cooling costs.

3. Types of Chimney Caps

3.1 Single-flue caps

Single-flue caps are designed to cover one chimney flue. They are the most common type of chimney cap and are suitable for most residential chimneys. These caps come in various shapes and sizes to fit different flue dimensions and can be easily installed or replaced.

3.2 Multi-flue caps

Multi-flue caps are designed to cover multiple flues on a single chimney. They’re ideal for homes with more than one fireplace or appliance venting through the same chimney structure. These caps offer comprehensive protection while maintaining a cohesive look on your roof.

3.3 Custom chimney caps

For unique chimney designs or homeowners looking for a specific aesthetic, custom chimney caps are available. These can be tailored to fit unusual chimney shapes or to complement the architectural style of your home.

3.4 Chimney cap materials

Chimney caps are available in several materials, each with its own advantages:

  • Copper: Durable, attractive, and develops a beautiful patina over time
  • Stainless steel: Resistant to rust and corrosion, long-lasting
  • Galvanized steel: Affordable and functional, but may rust over time
  • Aluminum: Lightweight and corrosion-resistant, but less durable than other options
The choice of material often depends on your budget, climate, and aesthetic preferences.

4. Choosing the Right Chimney Cap

4.1 Factors to consider

When selecting a chimney cap, consider the following factors:

  • Climate and weather conditions in your area
  • Type of fuel your fireplace or stove uses (wood, gas, etc.)
  • Aesthetic preferences and compatibility with your home’s style
  • Budget constraints
  • Local building codes and regulations
Taking these factors into account will help you choose a cap that best meets your needs and complies with local requirements.

4.2 Measuring your chimney for a cap

Accurate measurements are crucial for selecting the right size chimney cap. To measure your chimney:

  1. Measure the outside dimensions of the flue tile(s)
  2. Measure the height of the flue tile above the crown
  3. Determine the shape of your flue (round, oval, square, or rectangular)
  4. If you have a masonry chimney, measure the outside dimensions of the chimney crown
With these measurements, you can select a cap that will fit properly and provide optimal protection.

4.3 Building codes and regulations

Before installing a chimney cap, check your local building codes and regulations. Some areas have specific requirements for:

  • Spark arrestor inclusion
  • Minimum height of the cap above the flue
  • Materials used in cap construction
  • Installation methods
Ensuring compliance with these regulations is essential for safety and avoiding potential fines or issues with home insurance.

5. Installation Process

5.1 DIY vs. professional installation

While some homeowners may choose to install their chimney cap themselves, professional installation is often recommended. Consider the following when deciding between DIY and professional installation:

  • Your comfort level with working at heights
  • The complexity of your chimney structure
  • Your experience with home improvement projects
  • The potential risks and liability of improper installation
If you’re unsure about any aspect of the installation process, it’s best to consult with a professional chimney service.

5.2 Tools and materials needed

If you decide to install the chimney cap yourself, you’ll need the following tools and materials:

  • Chimney cap
  • Screwdriver or drill
  • Masonry screws or bolts
  • Silicone caulk
  • Safety equipment (gloves, safety glasses, sturdy shoes)
  • Ladder or roof scaffolding
Ensure you have all necessary items before beginning the installation process.

5.3 Step-by-step installation guide

Here’s a basic guide to installing a chimney cap:

  1. Ensure the chimney crown is clean and in good condition
  2. Apply a bead of silicone caulk around the edge of the chimney crown
  3. Place the chimney cap over the flue, ensuring it’s centered and level
  4. Secure the cap using masonry screws or bolts, following the manufacturer’s instructions
  5. Apply additional silicone caulk around the base of the cap for added waterproofing
  6. Check that the cap is securely fastened and doesn’t wobble
Remember to prioritize safety throughout the installation process and don’t hesitate to call a professional if you encounter any difficulties.

6. Maintenance and Care

6.1 Regular inspection tips

To ensure your chimney cap continues to function effectively, perform regular inspections:

  • Check for visible damage or rust at least twice a year
  • Inspect after severe weather events
  • Look for signs of animal activity or nesting
  • Ensure the cap is still securely fastened to the chimney
Regular inspections can help you catch and address issues before they become major problems.

6.2 Cleaning your chimney cap

Keeping your chimney cap clean is essential for its proper function:

  • Remove debris like leaves and twigs from the mesh or screening
  • Clean off any soot or creosote buildup
  • Use a wire brush to remove light rust on metal caps
  • For stubborn grime, use a mild detergent solution and rinse thoroughly
Regular cleaning helps maintain the cap’s effectiveness and extends its lifespan.

6.3 When to replace your chimney cap

Even with proper maintenance, chimney caps will eventually need replacement. Consider replacing your cap if:

  • There’s significant rust or corrosion
  • The mesh or screening is damaged or missing
  • The cap is loose and can’t be securely reattached
  • There are cracks or holes in the cap’s structure
Timely replacement ensures continued protection for your chimney and home.

7. Common Issues and Troubleshooting

7.1 Clogged chimney caps

Clogged chimney caps can lead to poor draft and potential smoke backup. To address this issue:

  • Regularly remove debris from the cap’s mesh or screening
  • Check for and remove any animal nests
  • Consider installing a cap with larger mesh openings if clogging is frequent
If you’re unable to clear the clog safely, contact a professional chimney service.

7.2 Rusted or damaged caps

Rust and damage can compromise your chimney cap’s effectiveness:

  • For light rust, clean with a wire brush and apply a rust-inhibiting paint
  • Replace caps with significant rust or structural damage
  • Address any underlying moisture issues that may be causing accelerated rusting
Regular maintenance can help prevent rust and extend the life of your chimney cap.

7.3 Improper installation problems

Issues arising from improper installation can include:

  • Water leaks due to poor sealing
  • Caps becoming loose or falling off in high winds
  • Inadequate protection from animals or debris
If you suspect your chimney cap was installed incorrectly, have it inspected and reinstalled by a professional to ensure proper function and protection.

8. Chimney Caps vs. Other Chimney Components

8.1 Chimney caps vs. chimney crowns

While both are important for chimney protection, chimney caps and crowns serve different purposes:

  • Chimney caps: Cover the flue opening, preventing water, animals, and debris from entering
  • Chimney crowns: The concrete or mortar top of the chimney that slopes away from the flue, directing water away from the masonry
Both components work together to provide comprehensive protection for your chimney system.

8.2 Chimney caps vs. chase covers

Chimney caps and chase covers are sometimes confused, but they serve different functions:

  • Chimney caps: Protect the flue opening on masonry chimneys
  • Chase covers: Cover the entire top of a factory-built or prefabricated chimney chase
The type of covering you need depends on your chimney’s construction and design.

9. Conclusion: The Importance of Professional Chimney Services

While this guide provides a comprehensive overview of chimney caps, their functions, and maintenance, it’s important to recognize the value of professional chimney services. Experienced chimney professionals can:

  • Accurately assess your chimney’s needs
  • Recommend the most appropriate cap for your specific situation
  • Ensure proper installation and sealing
  • Perform thorough inspections and cleanings
  • Address any underlying issues with your chimney system
Regular professional maintenance, combined with your own vigilance, will help ensure that your chimney cap and overall chimney system continue to protect your home effectively for years to come.

By understanding the importance of chimney caps and maintaining them properly, you’re taking a significant step towards protecting your home, improving energy efficiency, and ensuring the safe operation of your fireplace or wood-burning stove. Whether you’re installing a new cap or maintaining an existing one, remember that this small investment can prevent costly damage and provide peace of mind for you and your family.

\n\n\n

What is a chimney cap?

A chimney cap is a protective covering installed at the top of a chimney, typically made of metal, which allows smoke to escape while preventing water, animals, and debris from entering the chimney.

Why are chimney caps important?

Chimney caps are important because they protect against water damage, prevent animal intrusion, improve the safety and efficiency of your fireplace or stove, and can enhance the appearance of your roof.

What are the main functions of chimney caps?

The main functions of chimney caps include protecting from water damage, preventing animal intrusion, serving as a spark arrestor for fire safety, reducing downdrafts, and improving energy efficiency by preventing heated or cooled air from escaping.

What types of chimney caps are available?

There are various types of chimney caps, including single-flue caps, multi-flue caps, and custom chimney caps, available in materials such as copper, stainless steel, galvanized steel, and aluminum.

How do I choose the right chimney cap?

When choosing a chimney cap, consider factors such as climate, type of fuel used in your fireplace, aesthetic preferences, budget, and local building codes and regulations.

What is the installation process for a chimney cap?

The installation process involves ensuring the chimney crown is clean, applying silicone caulk, placing the cap over the flue, securing it with masonry screws or bolts, and adding additional caulk for waterproofing.

How do I maintain my chimney cap?

Maintenance involves regular inspections for damage, cleaning debris and soot, and replacing the cap if there is significant rust, damage, or if the mesh is compromised.

What are common issues with chimney caps?

Common issues include clogged caps, rust or damage, and problems stemming from improper installation, such as water leaks or caps becoming loose.

What is the difference between a chimney cap and a chimney crown?

A chimney cap covers the flue opening to keep water, animals, and debris out, while a chimney crown is the sloped concrete or mortar top of the chimney that directs water away from the masonry.

Why should I consider professional chimney services?

Professional chimney services can provide expert assessments, recommend appropriate caps, ensure proper installation and sealing, perform thorough inspections, and address any underlying chimney system issues.

Exploring the Timeless Charm of Brick Architecture

Brick Architecture: A Timeless Marvel

Brick architecture has long captivated designers and architects around the world. From the ancient ziggurats of Mesopotamia to the modern brick facades of contemporary design, bricks have proved to be both versatile and enduring.

In this article, we delve into the history, techniques, and aesthetic appeal of brick architecture, showcasing examples from various eras and cultures. We’ll explore how architects have used brick to create stunning, durable structures and the role this material has played in shaping architectural trends.

Description of the image

Join us as we journey through the enduring beauty and versatility of brick architecture, from ancient structures to modern designs.

Ultimate Guide to Masonry Cleaning: Best Techniques and Sealing Tips

Overview of Masonry Cleaning and Sealing Techniques

Masonry surfaces need special cleaning and sealing techniques to stay beautiful and strong. This helps stop moisture from getting in, reduce damage from environmental elements, and extend the life of masonry structures.

Chemical cleaning, power washing, steam cleaning, and sandblasting are ways to clean masonry. Chemical cleaning works for tough stains. Power washing sprays high-pressure water to get rid of dirt and grime. Steam cleaning softens dirt and grime with hot water vapour before rinsing it off with low-pressure water spray. Sandblasting uses pressurized air or water with abrasive materials like sand or grit to remove hard stains.

Sealing masonry creates a barrier between the surface and the outside world.
Penetrating sealers fill the pores of concrete blocks or brickwork. Film-forming sealers make a thin membrane on the surface of bricks or pavers. Clear acrylic coating adds an extra layer on top.

It’s important to do regular maintenance such as repointing and replacing missing mortar between bricks. This stops water from getting into cracks and causing structural damage.

To keep masonry looking good, don’t use harsh chemicals when cleaning. Instead, hire professional cleaners to prepare them for reapplication of sealer every 2-3 years, depending on weather changes.

Different Methods for Cleaning Masonry

Different Techniques to Clean and Seal Masonry

When it comes to cleaning and sealing masonry, homeowners have various techniques to choose from. Here’s a brief guide to three basic methods to help you make an informed decision:

  1. Chemical Cleaning – It is commonly used for removing tough stains and grime that have built up over time. This method involves the use of chemical cleaners that break down the dirt and stains, making them easier to remove.
  2. Pressure Washing – This technique uses high-pressure water to remove the dirt and grime from the masonry surface, be it brick, stone or concrete. It is an aggressive approach to cleaning and requires skilled handling to avoid any damage to the surface.
  3. Abrasive Cleaning – This method involves the use of abrasive materials like sand, glass beads, or walnut shells, that are propelled at high speed to remove the dirt and stains from the surface. This technique is effective but requires careful handling to avoid any damage to the surface.

It’s important to remember that each method has its pros and cons, and the choice of technique will depend on the type of masonry, age, condition, and the kind of stains or dirt that need to be removed.

Masonry cleaning and sealing provide more than just an aesthetic improvement, it also helps to protect the masonry from damage, erosion, and weathering. Hiring a professional masonry contractor ensures that the cleaning and sealing of your masonry are done correctly and effectively.

The history of masonry goes back thousands of years, and has played a significant role in building construction. The use of different types of masonry, such as brick and stone, has also contributed to the unique architectural styles across different cultures and regions.

Pressure washing: when a little water and a lot of pressure is all it takes to clean up even the most stubborn of masonry messes.

Pressure Washing

High-Pressure Water Cleaning or Pressure Washing is a great way to clean masonry. It easily removes dirt, grime, and other contaminants from bricks and stones.

Here’s a 6-step guide:

  1. Prepare the area to avoid damage.
  2. Choose the right nozzle.
  3. Connect your pressure washer and fill with water and detergent.
  4. Stand 8 feet away and hold the wand with two hands. Don’t spray windows!
  5. Sweep water from bottom-up or top-down, don’t miss any spots!
  6. Rinse off soap residue.

Note: Pressure washing should not replace sealing. Plus, cold water could harm delicate surfaces like plaster. Wear gloves and goggles and keep kids away.

My friend used a leaf blower instead of renting a professional pressure washer; however, it didn’t work. Proper equipment is key for saving time and money! Clean your masonry without a trip to the spa!

Chemical Cleaning

Chemical treatment is a viable way to clean masonry surfaces. It changes the properties of substances on the surface, making it easier to remove contaminants. Different formulations can cause corrosion and discoloration, so safety must be taken into account.

Chemical cleaning can be an aggressive and irreversible process, which can alter the surface texture. Test any chemicals used on a small area before applying them to larger areas.

A masonry cleaner needs experience, knowledge of mixing ratios, and understanding of temperature effects. According to APT Bulletin Volume 39 Number 2/3 (2008), in St Pancras Station, inappropriate cleaning caused damaging effects on its carved stone ornamentation.

Chemical cleaning is effective, but should be done carefully with the right skillsets to avoid damage and get desired outcomes. Blasting is like a power washer on steroids, but don’t let it get out of control!

Abrasive Blasting

Using high-performance abrasives for cleaning is a great way to remove dirt, stains and other contaminants from masonry surfaces. Here are five points to consider when using this method:

  • Choose the right abrasive based on the type of masonry.
  • Use the proper equipment.
  • Ensure safety measures like protective gear and ventilation.
  • Control dust with wet blasting or dust suppression systems.
  • Avoid damaging delicate areas by adjusting the pressure and angle.

This method is great for removing thick coatings, graffiti marks or tough stains. But, it requires experience and knowledge to avoid damaging the surface or causing health risks.

Historic England’s Practical Building Conservation Series tells us that high-performance abrasives are great for cleaning historic buildings with hard stone or glazed brick facades.

Steam isn’t just for clothes anymore – it’s great for masonry too!

Steam Cleaning

High-Temperature Vaporization is an advanced cleaning method. It uses a special steam cleaning machine that converts water into high-pressure steam. This steam penetrates masonry surfaces like brick and stone. When the steam comes in contact with dirt, it loosens it for easier cleaning.

Advantages:

  • High heat kills bacteria
  • Eco-friendly solution – only water used
  • Removes stubborn stains

Disadvantages:

  • Can damage delicate materials
  • Requires specialized machines and professionals
  • Can cause damage due to pressure variations

Vaporization leaves minimal residue compared to other traditional methods like sandblasting or chemical treatments. There are two types of steam cleaners: residential and commercial. Commercial ones generate more pressure than residential ones, making them suitable for challenging environments.

Kari keeps her house immaculate by hiring professionals to maintain it, including its masonry. Who needs a face mask when you’ve got a poultice cleaning masonry?

Poultice Cleaning

Getting Rid of Tough Stains with Poultice Cleaning

To take out persistent stains on masonry, poultice cleaning is a useful method. This involves smearing a pasty mixture onto the masonry surface and letting it dry. The paste absorbs the stain, which is then easy to scrape or wash off.

A Guide to Poultice Cleaning:

  1. Pick an appropriate poultice material based on the kind of stain and type of masonry.
  2. Mix the poultice material according to instructions from the manufacturers.
  3. Smear a thick layer of poultice material over the stained area and leave it for the specified time mentioned in instructions before taking it off.

There are certain tips and warnings related to poultice cleaning depending on various materials and types of organic compounds in the stains. Pay attention when selecting materials to make poultices, mixing water quantities, etc., to stay away from any potential harm during this process.

To make sure you get it right, use materials that work better for the location where they’re applied. Wetting the stained surface before applying increases its permeability and aids in simple stain removal. If you do everything correctly, this technique should not cause any scratches or damage to the underlying surfaces. Seal your masonry and give it a long-lasting hug from Mother Nature!

Different Methods for Sealing Masonry

Paragraph 1 – Masonry Sealing: Understanding the Various Techniques

Masonry sealing is performed using various techniques to protect the masonry from environmental elements and maintain its aesthetic appeal. Here are some of the different methods used for sealing masonry.

Paragraph 2 – A 3-Step Guide to Sealing Masonry

  1. Surface Preparation: Before sealing, it is essential to clean the surface to remove any dirt, debris, or stains. This can be done using pressure washing, chemical cleaning, or hand scrubbing.
  2. Choosing the Sealant: There are different types of sealants, including water repellents, penetrating sealers, surface coatings, and color enhancers. The choice depends on the type of masonry, its exposure to environmental elements, and the desired look.
  3. Application Techniques: Application techniques include spraying, rolling, brushing, or dipping. The method used depends on the sealant type, surface area, and accessibility.

Paragraph 3 – Additional Details about Sealing Masonry

Penetrating sealers are preferred for porous masonry, as they allow the masonry to breathe and prevent moisture damage. Surface coatings, on the other hand, are used for non-porous masonry, providing a long-lasting and glossy finish. Color enhancers are used to enhance the natural color of masonry.

Paragraph 4 – A True Story

Robert, a homeowner, hired a masonry contractor to seal his outdoor brick walls. The contractor didn’t properly prepare the surface, resulting in the sealant not adhering correctly. This caused the masonry to discolor and peel over time. To avoid such mishaps, it’s essential to hire trusted experts and ensure surface preparation is done correctly.

If walls could talk, they’d thank you for choosing a film-forming sealer to protect their secrets.

Film-Forming Sealers

Protecting masonry from harm? Clear coatings to the rescue! Film-Forming Sealers are one such variety. A table can explain how they work:

TypePropertiesBest ForLimitations
Acrylic-BasedHigh UV & water resistance, easy to applyExterior walls, high-moisture areasSlippery when wet, won’t bond well
PolyurethaneExtremely durable, protects against harsh weatherCommercial buildings, outdoor useExpensive, hard to apply evenly, discoloration over time

When using sealants, be environment-conscious. High VOC content? Not cool.

For best results:

  • Follow label instructions
  • Apply in dry conditions
  • Use appropriate precautions.

It’s a win-win! Get the protection you need, and feel emotionally secure too. Who needs a therapist when you have penetrating sealers?

Penetrating Sealers

A penetrating masonry sealer is famous for going deep into the material pores. It works as a waterproofing agent, preventing water from entering the surface. At the same time, it allows air circulation and stops efflorescence.

ProsCons
Vapour transmission is allowedMay need several coats
Provides long-term protectionMay not work against stains
No gloss or surface filmCannot fill larger gaps/cracks

It is necessary to pick a sealer that can penetrate deep enough into the masonry’s surface. Silane-based penetrating sealers can penetrate up to several inches.

It is important to note that penetrating sealers may not be effective against particular stains, like oil or graffiti. In such cases, you will need to use a different type of sealer.

As per This Old House magazine: “Penetrating sealers work best on dense materials with low porosity.” Get a masonry makeover without a facelift! Use these sealers for a natural-looking finish.

Natural-Look Sealers

To keep masonry looking natural, there are many sealers out there. These sealers, known as transparent sealers, create a thin coating on top of the masonry which lets its texture and color shine through. See below for more info!

Table of Sealer Types, Features & Best Uses:

Sealer TypeFeaturesBest for
Silane/SiloxaneRepels water & protects from freeze/thaw damageBrickwork
Acrylic ResinProvides UV protection & resists dirt & mildewStucco & Concrete
Natural Finish WaxEnhances masonry & protects from stains & scratchesInterior Stone Walls

Note: These sealers won’t protect against graffiti or extreme weather. Test a small area before applying to ensure it meets your desired look.

For best results, use a sprayer or brush to apply these sealers in multiple thin coats. Clean & prep the surface first, by removing existing coatings & stains, & allowing time for the surface to dry.

You can protect your masonry without sacrificing its look – natural-look sealers make this possible!

Gloss Sealers

High-gloss or shiny sealers are a great way to make masonry look vibrant and polished! Plus, they provide an extra layer of protection against water, stains, and other elements. Advantages include enhanced color, added shine, and water damage prevention. Disadvantages include the potential for slipperiness when wet, and the need for regular maintenance to maintain the shine.

It’s best to apply two coats of glossy sealer, with sufficient drying time in between. Be sure to follow the manufacturer’s instructions regarding application and curing time. When using a gloss sealer on vertical surfaces, be careful to avoid runs or drips by using proper techniques like spray or roller, rather than brushes.

To keep your sealant looking great, clean it regularly with non-abrasive cleaners. Avoid acidic or harsh chemicals, which can damage the surface. For a pampered look that’ll last, try silane-siloxane sealers!

Silane-Siloxane Sealers

Silane and Siloxane blend sealers are a top-notch way to protect masonry. They form a barrier on surfaces to repel water, stop mold growth, and fight salt damage. Check out the properties below!

  1. Sealant Type: Silane/Siloxane Blend
  2. Application Method: Spray or Brush
  3. Appearance: Clear or slightly milky
  4. Expected Lifespan: 7-10 years

Plus, they penetrate deep and won’t alter the color or texture of your masonry. These sealers also resist UV radiation, so they won’t fade in the sun.

The sealing method has been around since the early ‘70s and has become a go-to for homeowners and builders. So, get ready to protect your masonry with silane and siloxane!

Choosing the Right Cleaning and Sealing Techniques

As a homeowner, it is crucial to know which masonry cleaning and sealing techniques to choose. Proper selection ensures that your masonry looks good and lasts long. Understanding the differences between these techniques will help you make the right choice for your home.

When it comes to masonry cleaning, there are several techniques you can use, including water-based cleaning, chemical cleaning, and sandblasting. Water-based cleaning is ideal for removing dirt and grime, while chemical cleaning is effective for removing paint and heavy stains. Sandblasting removes the upper layer of masonry to reveal a fresh surface.

Similarly, there are various masonry sealing techniques, such as penetrating sealers, film-forming sealers, and water repellent sealers. Penetrating sealers enter the masonry pores and create a chemical bond to repel water, while film-forming sealers create a protective layer on top of the masonry. Water repellent sealers are silicone-based and repel water without changing the masonry’s appearance.

It is essential to choose the right cleaning and sealing technique to suit your masonry type, the extent of the damage, and other factors. For example, using sandblasting on old, weak masonry can cause damage, while also applying a film-forming sealer on highly porous brick can result in bubbling. It is advised to consult with a professional masonry company before selecting the technique to use.

To maintain your masonry’s appearance and longevity, you should also follow some suggestions. For instance, avoid using acid-based cleaners, which can corrode masonry. Use non-abrasive cleaners, soft-bristled brushes, and clean water to rinse. Apply sealers only on dry masonry surfaces, and avoid using high-pressure water to clean your masonry. Understanding the nuances of your masonry and taking care of it through proper cleaning and sealing is essential for its long-lasting supremacy.

Before you start scrubbing away at your brick wall, make sure you know what you’re dealing with – not all masonry is created equal.

Assessing the Type of Masonry

Evaluating masonry requires analysing its properties. When selecting cleaning and sealing methods, these attributes must be taken into account. A table is useful for identifying different types of masonry and their characteristics, such as porosity, density, hardness, and durability.

For instance, granite and limestone have various levels of porosity and weathering resistance. Not all methods work for all types of masonry, so an evaluation is needed to choose the correct procedure.

Remember: the cleaning and sealing technique you use affects the appearance and durability of the masonry. An unsuitable approach can cause discoloration or erosion, leading to costly repairs later.

Thus, it is essential to assess which cleaning and sealing technique should be used on a given masonry material, in order to get optimal results and prevent future problems.

Identifying the Cause of Stains

Analyzing the source of discoloration? Consider all possibilities! Here’s a step-by-step guide:

  1. Check the spot’s location and size.
  2. Discover what caused the stain.
  3. Establish when it happened.
  4. See if anyone tried to clean it before.
  5. Analyze your findings and select a removal method.

Understanding the cause of the blemish helps you choose the best cleaning method. It can be daunting, but carefully inspecting each stain will help you get closer to success.

Pro Tip: Always test a small amount of cleaning solution on a hidden area before using it on a visible spot – some substances can harm certain materials.

Cleaning and sealing your patio shouldn’t harm the environment, so try eco-friendly options and help save the planet!

Considering the Environment and Climate

When picking out cleaning and sealing techniques, you must consider the environment and climate of the place. Factors like humidity, wind speed, and temperature play a major role in deciding what products to use. Places with higher rain may require stronger products to avoid mold. Sealants might also need extra weatherproofing for harsher climates.

Areas may have different types of soil, water, and plant life. This affects the amount of dirt and how to clean it without damaging the surface. Pick techniques that suit the local needs. Professionals experienced in eco-friendly solutions will help you get the best results while protecting the environment. Failure to do so can create expensive problems or security risks.

Don’t make the wrong cleaning and sealing choices; get solutions that preserve the environment and protect your investments. Or, if you want extreme cleanliness, maybe a bubble would work better?

Determining Desired Appearance

Aesthetic outcome is key for selecting the right cleaning and sealing techniques for your surfaces. Visual effect is a top priority to consider.

For glossy finish, look for hard-wearing and shiny texture. Matt feel should be tactile and velvety. Natural look should be original feel and look.

Other factors besides appearance are important too. These may include surface type, location, and usage frequency.

A holistic approach is essential as opposed to basing it solely on visual preferences.

Pro tip: Consult industry professionals to determine best techniques for your needs. DIY may seem cost-effective, but if the end result isn’t what you wanted, you might want to hire a pro.

DIY or Hiring a Professional

Paragraph 1 – A homeowner can choose between self-masonry cleaning and sealing or hire a professional for the job. Both options have their pros and cons.

Paragraph 2 –

  • DIY: The inexpensive option that gives the homeowner absolute control. It requires a significant amount of time, effort, and research but can result in cost savings.
  • Professional: Offers high-quality results in less time and effort. The expert takes the risk and liability out of the equation, but comes at a cost.
  • DIY: The homeowner can choose the equipment used and the cleaning solutions based on their preferences and the masonry type. They can also work on their schedule.
  • Professional: Uses high-quality equipment and solutions that yield better results. The professional can assess the masonry type and choose the optimal solutions and techniques to use.
  • DIY: The homeowner assumes liability and risks associated with the cleaning and sealing processes, such as accidents, damages, or subpar results.
  • Professional: Assumes liability for the job and ensures the homeowner is satisfied with the outcome, providing insurance and warranties for their work.

Paragraph 3 – It is essential to be aware of the masonry type before choosing between DIY and professional cleaning and sealing. Masonry type influences the techniques and solutions required, the equipment to be used, and the level of expertise necessary for the task.

Paragraph 4 – One homeowner tried to clean and seal their masonry by themselves but ended up damaging the surface. They had to hire a professional to repair the damage, which ended up costing more than if they had hired a professional from the start.

DIY masonry cleaning and sealing: saving you money now, but potentially causing you bigger brick problems later.

Pros and Cons of DIY

DIY or hire someone? Think it through! Consider the advantages and disadvantages of each. DIY has its pros: cost-effectiveness, control, new skills, and pride. But, watch out for potential safety hazards, time spent fixing errors, lack of knowledge, and buying tools you may never use again.

Weigh your individual abilities. Ask experienced people for advice. Hire someone with a warranty. Harvard Business Review found that 47% of DIY-ers faced extra expenses due to mistakes.

So why DIY? Let someone else do the work and relax!

Advantages of Hiring a Professional

Gaining a pro’s help has lots of good points, especially for complex tasks that need special knowledge or skill. Nowadays DIY is popular, but many don’t realize the value of hiring a certified expert. With pros, you can relax and be sure they have the latest methods and tools for the job.

Pros are experienced in their field and will strive for the best using an organized process. They look over all the details with their technical knowledge and problem-solving skills – from installations to maintenance and remodeling. Plus they save you time and money, giving high-quality results.

Professionals come with qualifications and certificates. They’re licensed, meaning they’re allowed to do work that meets regulations and safety standards. With years of experience, they can easily solve difficult matters with their practical know-how.

These advantages from choosing a pro over DIY make it worth noting. You can complete your job well and save resources, like money, time and energy. Don’t miss this chance – get a qualified expert now! Keep your masonry clean and sealed – no one wants a house that looks like it’s haunted!

Maintenance Tips for Maintaining Clean and Sealed Masonry

Masonry Maintenance Tips to Keep Your Home Clean and Sealed

To keep clean and well-sealed masonry at home, it is important to undertake proper maintenance. Here are some tips to help you with this task:

  • Keep the masonry clean by regularly cleaning it with a mild detergent and water.
  • Use a waterproof membrane to prevent moisture penetration and damage to the masonry.
  • Replace any damaged or cracked bricks to prevent the problem from spreading.
  • Apply an appropriate sealer to the masonry surface to keep it protected and looking good.
  • Avoid using harsh chemicals or abrasive cleaning tools that can cause damage to the masonry surface.
  • Always seek professional help whenever necessary to avoid causing more harm to the masonry.

It is also essential to consider the type of masonry you have in your home to determine the most suitable cleaning and sealing techniques. Seek advice from professionals to ensure you undertake the right maintenance steps.

For the best results, consider using a variety of masonry cleaning and sealing techniques, as each type has its own unique benefits. Following these tips ensures that your masonry remains in tip-top shape, saving you time and money in the long run.

Keep your masonry looking good as new with regular cleaning, because no one likes the sight of a dirty brick.

Regular Cleaning

For a spick-and-span and steady look, routine masonry upkeep is essential. Not keeping up with maintenance can harm the masonry’s looks and weaken its lifespan. Here are six easy tips to keep it pristine:

  • Utilize non-abrasive cleaners.
  • Dodge harsh chemicals, like acid and bleach.
  • Observe the manufacturer’s directions when using sealants or waxes.
  • Scrub away moss, mildew, and mold with a hard bristle brush.
  • Rinse the surface completely with water after cleaning.
  • Dry the surface totally with a cloth or let it air dry before reapplying sealants or wax.

Maintaining masonry isn’t just for beauty, it’s also to safeguard it from weather damage. Moreover, keeping the brick array in tact is necessary to keep it safe.

Pro Tip: If stains stay after cleaning, employ an expert cleaner who has experience dealing with such issues instead of risking damage to your structure by using harsh chemicals.

Realizing cracks in your masonry is like uncovering a secret – it’s upsetting, but vital for maintenance.

Inspecting for Damage

Searching For Damage: What To Be Aware Of

It’s vital to inspect any masonry for damage on a regular basis. Doing this can help prevent costly fixes and keep the masonry in good condition. Here are a few things to consider when looking for damage:

  • Check for cracks – these can lead to moisture seeping in.
  • Check for signs of wear and tear, like chipped or missing pieces.
  • Inspect the mortar joints between bricks, stones, or blocks. Deteriorated joints can cause structural issues.

You need to closely examine every part of the masonry to identify any damages that could cause problems down the line.

After a big storm or rain, check the exterior of the masonry wall. To do this, place a ladder against the wall and take a closer look.

I had a customer who didn’t notice a crack in their chimney until it started to fall apart due to poor maintenance. By spotting it early on during our inspection, we saved them from expensive repair costs.

Sealing your masonry is important – it’s not something you can do once and expect it to last forever.

Touching Up Sealers as Needed

Maintaining a sealer on sealed masonry is essential. Check high traffic areas where sealer reapplication may be needed. Apply a thin coat to the surface and let it dry properly. Read product instructions carefully as each type of sealer has its own care and application techniques. Too much sealer creates a cloudy haze that harms the masonry. Don’t apply sealer in direct sunlight or humid weather.

Clean the masonry regularly with diluted soap and water or a recommended cleaner. Sealers last three to five years, depending on exposure and climate. Knowing when to reapply ensures good looks for years. Clean and sealed masonry: a gift that lasts, unlike a plant you forgot to water!

Conclusion: Benefits of Properly Cleaning and Sealing Masonry.

Masonry upkeep has lots of benefits for property owners. Cleaning and sealing can stop water damage, bug infestations, and discoloration. Plus, it keeps the look of the house. Coating or sealing helps the masonry last longer by stopping moisture from entering. Cleaning also gets rid of mold, mildew, and dirt. It’s vital to pick right cleaning and sealing methods based on the masonry type. Chemicals and abrasives that could harm stone should be avoided. Have a professional take a look before deciding what to do. Studies show that keeping up with masonry increases home value.

Frequently Asked Questions

  1. What is masonry cleaning?
    • Masonry cleaning is the process of removing dirt, stains, and other contaminants from masonry surfaces such as bricks, stone, and concrete. This is usually done to improve the appearance of the surface and prevent further damage.
  2. What are the different types of masonry cleaning techniques?
    • Some common masonry cleaning techniques include pressure washing, chemical cleaning, and abrasive blasting. Pressure washing uses high-pressure water to clean masonry surfaces, while chemical cleaning uses chemicals to break down stains. Abrasive blasting involves using high-powered equipment to blast away dirt and other contaminants.
  3. What is masonry sealing?
    • Masonry sealing is the process of applying a protective sealant to masonry surfaces to prevent water intrusion and damage. It can also help to prevent staining and discoloration caused by dirt and other contaminants.
  4. What are the different types of masonry sealing techniques?
    • Some common masonry sealing techniques include film-forming sealers, penetrating sealers, and breathable sealers. Film-forming sealers create a barrier on the surface of the masonry, while penetrating sealers soak into the pores of the surface. Breathable sealers allow the masonry to “breathe” while still providing protection.
  5. When should I consider masonry cleaning and sealing?
    • You should consider masonry cleaning and sealing if your masonry surfaces are stained, discolored, or otherwise damaged. Proper cleaning and sealing can help improve the appearance and overall condition of your masonry surfaces and help prevent future damage.
  6. Can I clean and seal my masonry surfaces myself?
    • While it is possible to clean and seal your masonry surfaces yourself, it is usually recommended to hire a professional masonry contractor. They have the experience, tools, and expertise to properly clean and seal your masonry surfaces, ensuring that they are protected and properly maintained for years to come.