DIY vs. Professional Masonry Fence Installation: Pros and Cons

DIY vs. Professional Masonry Fence Installation: Pros and Cons

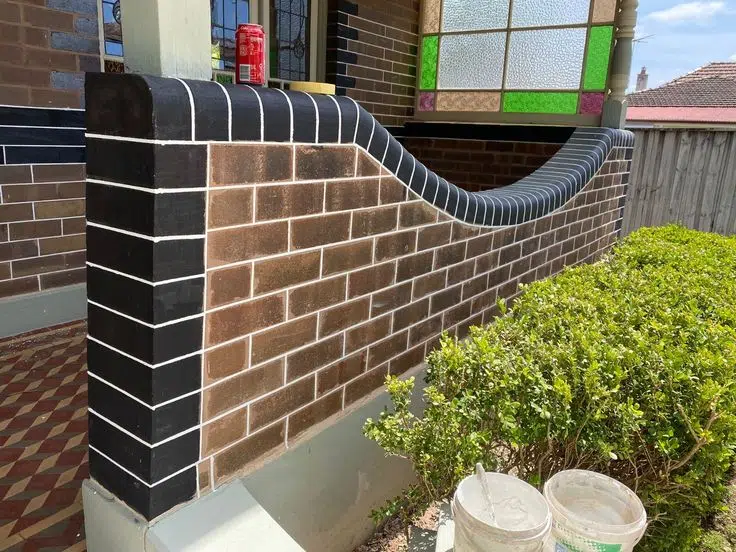
When it comes to enhancing your property’s aesthetic appeal and security, a masonry fence can be an excellent addition. However, homeowners in Ontario often find themselves at a crossroads: should they tackle the project themselves or hire a professional contractor? This comprehensive guide will help you weigh the advantages and disadvantages of both options, ensuring you make an informed decision that best suits your needs, skills, and budget.

Skills and Equipment Required for DIY Masonry Fence Construction

Before diving into a DIY masonry fence project, it’s crucial to understand the skills and equipment necessary for successful completion. Building a masonry fence requires a combination of physical labor, technical knowledge, and specialized tools.

Essential Skills

  • Basic masonry techniques (laying bricks or stones, mixing mortar)
  • Ability to read and follow construction plans
  • Understanding of local building codes and regulations
  • Physical strength and endurance
  • Problem-solving skills for unexpected challenges

Required Equipment

  • Masonry tools (trowels, jointers, levels, etc.)
  • Safety gear (gloves, safety glasses, work boots)
  • Mixing equipment for mortar
  • Wheelbarrow for transporting materials
  • Scaffolding or ladders for taller sections
  • Power tools (circular saw, drill)

While some homeowners may already possess these skills and have access to the necessary equipment, others might find the learning curve steep and the investment in tools substantial.

Potential Pitfalls and Challenges for Inexperienced Builders

DIY masonry fence construction can be rewarding, but it’s not without its challenges. Inexperienced builders should be aware of potential pitfalls that could compromise the quality, safety, and longevity of their fence.

Common Challenges

  1. Improper foundation: A stable foundation is crucial for a masonry fence. Errors in excavation or pouring concrete can lead to an unstable structure.
  2. Inconsistent mortar mix: Achieving the right mortar consistency is vital for proper brick or stone adhesion. Inconsistent mixes can weaken the fence.
  3. Uneven courses: Maintaining level and plumb lines throughout the fence requires skill and patience. Uneven courses can result in an unsightly and potentially unstable fence.
  4. Inadequate drainage: Failing to incorporate proper drainage can lead to water damage and premature deterioration of the fence.
  5. Overlooking expansion joints: Masonry fences need to accommodate thermal expansion and contraction. Forgetting to include expansion joints can cause cracking.

These challenges can be overwhelming for inexperienced builders and may result in costly mistakes or safety hazards if not addressed properly.

Benefits of Hiring a Professional Masonry Contractor

While DIY projects can be fulfilling, hiring a professional masonry contractor offers numerous advantages, especially for complex or large-scale fence installations.

Expertise and Experience

Professional contractors bring years of experience and specialized knowledge to your project. They understand the intricacies of masonry work, local building codes, and best practices for fence construction in Ontario’s climate.

Time and Efficiency

A professional team can complete the project much faster than a DIY approach. They have the manpower, tools, and streamlined processes to work efficiently without compromising quality.

Quality Assurance

Reputable contractors stand behind their work with warranties and guarantees. This ensures that your fence will be built to last and any issues will be addressed promptly.

Access to Materials

Professional contractors often have established relationships with suppliers, giving them access to high-quality materials at better prices than individual homeowners might obtain.

Permits and Inspections

Navigating the permit process and dealing with inspections can be daunting. Professional contractors are familiar with local requirements and can handle these aspects seamlessly.

Cost Comparison: DIY vs. Professional Installation

When considering DIY versus professional installation, cost is often a significant factor. Let’s break down the potential expenses for both options:

DIY Costs

  • Materials (bricks/stones, mortar, concrete for foundation)
  • Tools and equipment (purchase or rental)
  • Permit fees
  • Potential costs for mistakes or rework
  • Your time and labor (opportunity cost)

Professional Installation Costs

  • Labor fees
  • Materials (often at a better rate than retail)
  • Permit handling
  • Warranty coverage

While DIY might seem less expensive upfront, it’s essential to factor in the value of your time, the potential for costly errors, and the long-term durability of the fence. Professional installation often proves more cost-effective when considering the overall lifespan and quality of the fence.

Importance of Proper Installation for Longevity and Safety

Regardless of whether you choose DIY or professional installation, the importance of proper construction cannot be overstated. A well-built masonry fence can last for decades, while a poorly constructed one may need repairs or replacement within a few years.

Safety Considerations

A masonry fence is a substantial structure that must withstand various forces, including wind loads and potential impacts. Proper installation ensures the fence remains stable and doesn’t pose a safety risk to people or property.

Longevity Factors

  • Correct foundation depth and reinforcement
  • Proper mortar joints and weep holes
  • Appropriate use of ties and anchors
  • Correct installation of capstones or coping
  • Adequate drainage provisions

These factors contribute to the fence’s ability to withstand Ontario’s freeze-thaw cycles, heavy rains, and other environmental stressors.

Conclusion: Making the Right Choice for Your Masonry Fence Project

Deciding between DIY and professional masonry fence installation depends on various factors, including your skill level, available time, budget, and the complexity of the project. While DIY can be rewarding for those with the necessary skills and resources, professional installation offers peace of mind, quality assurance, and often better long-term value.

For homeowners in Ontario considering a masonry fence project, carefully evaluate your capabilities against the requirements of the job. If you’re unsure or the project seems daunting, consulting with a professional masonry contractor can provide valuable insights and potentially save you time, money, and stress in the long run.

Remember, a well-constructed masonry fence is an investment in your property’s value and security. Whether you choose to DIY or hire a professional, ensuring proper installation is key to enjoying a beautiful, durable fence for years to come.

\n\n\n
error: No faq

Matching Mortar in Historic Brick Homes: A Guide to Materials and Techniques

Restoring historic brick homes is a delicate process that requires careful attention to detail, especially when it comes to matching mortar. The right mortar not only enhances the aesthetic appeal of a historic structure but also plays a crucial role in preserving its structural integrity. In this comprehensive guide, we’ll explore the intricacies of matching mortar in historic brick homes, from understanding traditional compositions to applying compatible materials using proper techniques.

Understanding Historic Mortar Compositions

Before diving into the matching process, it’s essential to understand the composition of historic mortars. Unlike modern Portland cement-based mortars, historic mortars were typically made with lime as the primary binder. These lime-based mortars had several advantages:

  • Flexibility: Lime mortars could accommodate minor building movements without cracking.
  • Breathability: They allowed moisture to evaporate, preventing trapped moisture issues.
  • Self-healing properties: Small cracks in lime mortars could heal themselves over time.
  • Compatibility with soft bricks: Lime mortars were softer than the bricks, preventing damage to the masonry.

Historic mortars often contained a mixture of lime, sand, and sometimes additional materials like clay or animal hair for added strength. The exact composition varied depending on the region, available materials, and the specific requirements of the building.

Analyzing Existing Mortar for Proper Matching

To accurately match historic mortar, a thorough analysis of the existing mortar is crucial. This process typically involves the following steps:

  1. Visual Inspection: Examine the color, texture, and aggregate composition of the existing mortar.
  2. Hardness Testing: Assess the mortar’s hardness using simple field tests or more advanced laboratory methods.
  3. Chemical Analysis: Determine the precise composition of the mortar, including the binder-to-aggregate ratio and any additives.
  4. Microscopic Examination: Study the mortar’s microstructure to identify specific characteristics and components.

Professional laboratories specializing in historic material analysis can provide detailed reports on mortar composition, which are invaluable for creating an accurate match.

Mixing and Applying Compatible Mortar

Once the existing mortar has been analyzed, the next step is to mix and apply a compatible replacement mortar. Here’s a general process to follow:

1. Selecting Materials

Choose materials that closely match the original mortar composition:

  • Lime: Use either hydrated lime or lime putty, depending on the analysis results.
  • Sand: Select sand with a similar color, texture, and grain size distribution to the original mortar.
  • Additives: If the original mortar contained additional materials, source appropriate equivalents.

2. Mixing the Mortar

Follow these steps to mix the mortar properly:

  1. Measure the ingredients according to the specified ratios.
  2. Mix dry ingredients thoroughly before adding water.
  3. Add water gradually, mixing until the desired consistency is achieved.
  4. Allow the mixture to rest for 15-20 minutes before final adjustments.

3. Applying the Mortar

Proper application techniques are crucial for a successful restoration:

  • Remove old, deteriorated mortar to a depth of 2-3 times the joint width.
  • Clean the joints thoroughly, removing all dust and debris.
  • Pre-wet the masonry to prevent rapid moisture loss from the new mortar.
  • Apply the mortar in layers, allowing each layer to reach a “thumbprint-hard” consistency before applying the next.
  • Tool the joints to match the original profile and texture.
  • Protect the newly applied mortar from rapid drying, extreme temperatures, and direct sunlight.

Common Mistakes in Mortar Matching and How to Avoid Them

Even experienced professionals can make mistakes when matching historic mortars. Here are some common pitfalls and how to avoid them:

1. Using Modern Portland Cement

Portland cement is often too hard and impermeable for historic brickwork. Stick to lime-based mortars that match the original composition.

2. Incorrect Color Matching

Avoid relying solely on pigments to match color. Instead, focus on using appropriate sand and lime to achieve the right hue naturally.

3. Improper Joint Preparation

Failing to remove enough old mortar or inadequately cleaning the joints can lead to poor adhesion. Take the time to prepare the joints properly.

4. Inconsistent Mixing

Variations in mixing can lead to inconsistencies in color and texture. Use precise measurements and mix thoroughly for consistent results.

5. Rushed Application

Applying mortar too quickly or in unfavorable weather conditions can compromise its strength and appearance. Be patient and work in appropriate conditions.

The Role of Proper Mortar in Preserving Historic Brickwork

Using appropriate mortar in historic brick restoration is not just about aesthetics; it’s crucial for the long-term preservation of the structure. Here’s why:

  • Structural Integrity: Compatible mortar helps maintain the building’s structural stability by allowing for natural movement and preventing stress on the bricks.
  • Moisture Management: Proper mortar allows the masonry system to breathe, preventing moisture-related issues like spalling and freeze-thaw damage.
  • Historic Authenticity: Using historically accurate mortar preserves the building’s original character and construction techniques.
  • Longevity: Well-matched mortar can significantly extend the lifespan of historic brickwork, reducing the need for future repairs.

Conclusion

Matching mortar in historic brick homes is a complex but essential aspect of preservation. By understanding historic mortar compositions, carefully analyzing existing materials, and using appropriate mixing and application techniques, you can ensure that your restoration work not only looks authentic but also contributes to the long-term preservation of these invaluable structures.

Remember, when in doubt, it’s always best to consult with preservation specialists or experienced masons who have a track record in historic restoration. With the right approach and attention to detail, you can help these historic brick homes continue to tell their stories for generations to come.

\n\n\n

Why is matching mortar important in historic brick homes?

Matching mortar is crucial for enhancing aesthetic appeal and preserving the structural integrity of historic brick homes. Proper mortar helps maintain stability by accommodating natural movements and preventing moisture-related damage.

What are the primary components of historic mortar?

Historic mortars were typically made with lime as the primary binder, often mixed with sand and sometimes additional materials like clay or animal hair. This composition provided flexibility, breathability, and compatibility with soft bricks.

How can I analyze existing mortar to ensure proper matching?

Analyzing existing mortar involves visual inspection, hardness testing, chemical analysis, and microscopic examination. This thorough analysis helps determine the original mortar’s composition for an accurate match.

What steps should I follow to mix and apply compatible mortar?

The process includes selecting matching materials, carefully measuring and mixing them, and then applying the mortar with proper techniques, such as pre-wetting the masonry and ensuring each layer reaches the right consistency before adding more.

What are common mistakes to avoid when matching historic mortar?

Common mistakes include using modern Portland cement, incorrect color matching, improper joint preparation, inconsistent mixing, and rushing the application. Taking time and care in each step can prevent these issues.

How does the right mortar contribute to the longevity of historic brickwork?

Appropriate mortar contributes to structural integrity, effective moisture management, historic authenticity, and overall longevity of the brickwork by preventing issues like spalling and freeze-thaw damage.

What should I do if I am unsure about matching mortar for a restoration project?

If unsure, it’s best to consult with preservation specialists or experienced masons who are knowledgeable in historic restoration to ensure accurate and effective work.

What are the benefits of using lime-based mortars over modern alternatives?

Lime-based mortars offer flexibility, breathability, and self-healing properties, making them ideal for historic brickwork compared to modern alternatives like Portland cement, which can be too hard and impermeable.

Why is it essential to protect newly applied mortar during installation?

Protecting newly applied mortar from rapid drying, extreme temperatures, and direct sunlight is essential to ensure proper curing, strength, and the overall quality of the restoration work.

How can I ensure the restored brick home retains its historic character?

Using historically accurate mortar and adhering to traditional construction techniques helps preserve the original character and aesthetic of the historic brick home.

The Rich History of Masonry in Brantford, Ontario: From Joseph Brant to Modern Craftsmanship

Brantford, Ontario, a city steeped in history and architectural beauty, owes much of its character to the skilled masons who have shaped its landscape over the centuries. From the early days of Joseph Brant to the modern preservation efforts, masonry has played a pivotal role in defining Brantford’s identity. In this comprehensive exploration, we’ll journey through time to uncover the fascinating story of masonry in Brantford and its enduring impact on the community.

1. Introduction to Masonry in Brantford

Masonry, the art and craft of building structures from individual units of stone, brick, or concrete, has been an integral part of human civilization for thousands of years. In Brantford, this ancient craft has left an indelible mark on the city’s architecture and culture.

Founded in 1784 by Captain Joseph Brant, Brantford has a rich history that intertwines with the development of masonry in the region. The city’s growth from a small settlement to a thriving industrial center is reflected in its diverse array of masonry structures, each telling a story of the era in which it was built.

2. Early Masonry in Brantford (Late 18th – Early 19th Century)

2.1 Joseph Brant and the first recorded masons

Joseph Brant, also known by his Mohawk name Thayendanegea, was not only the founder of Brantford but also one of the first recorded masons in the area. His influence extended beyond leadership and diplomacy to the very foundations of the city’s built environment.

Brant’s involvement in masonry set the stage for the craft’s development in the region. As a Freemason himself, he likely encouraged the spread of masonic principles and practices, which often went hand-in-hand with the physical craft of masonry.

2.2 Influence of Indigenous craftsmanship

The early masonry in Brantford was not solely a European import. Indigenous craftsmanship, particularly that of the Six Nations, played a significant role in shaping the early built environment. Traditional techniques for working with stone and creating sturdy structures influenced the development of masonry in the region.

2.3 Early stone structures and their significance

Some of the earliest masonry structures in Brantford were simple yet sturdy buildings made from locally sourced materials. These early structures, while often modest, laid the groundwork for the more elaborate masonry that would follow. Churches, government buildings, and private residences were among the first to showcase the potential of masonry construction in the area.

3. The Rise of Freemasonry in Brantford (19th Century)

3.1 Establishment of Brant Lodge No. 45

The establishment of Brant Lodge No. 45 in 1820 marked a significant milestone in Brantford’s masonic history. As one of the oldest Masonic lodges in Ontario, it played a crucial role in fostering the growth of both Freemasonry and the masonry craft in the city.

3.2 Notable Freemasons and their contributions to the city

Many prominent Brantford citizens were members of the Masonic lodge, including businessmen, politicians, and craftsmen. These individuals often used their influence and resources to support the development of the city, including the construction of significant masonry buildings.

3.3 The Masonic Temple Building and its history

The Masonic Temple Building, constructed in 1911, stands as a testament to the influence of Freemasonry on Brantford’s architectural landscape. This impressive structure, with its intricate masonry work, served as a hub for the Masonic community until 1945 and remains an important part of Brantford’s architectural heritage.

4. Masonry in Brantford’s Architecture (19th – 20th Century)

4.1 Prominent masonry buildings and landmarks

Brantford’s cityscape is dotted with remarkable masonry structures that showcase the evolution of the craft. Some notable examples include:

  • The Brant County Courthouse (1852)
  • Victoria Park Square (1861)
  • The Carnegie Library (1904)
  • The Bell Telephone Memorial (1917)

Each of these landmarks demonstrates the versatility and durability of masonry construction, as well as the skill of Brantford’s masons throughout history.

4.2 Evolution of masonry techniques and styles

As Brantford grew and prospered, masonry techniques and styles evolved to meet changing tastes and technological advancements. From the simple stone structures of the early 19th century to the ornate Victorian-era buildings and later Art Deco influences, Brantford’s masonry reflects the broader trends in North American architecture.

4.3 The role of stone masons in shaping Brantford’s cityscape

Stone masons played a crucial role in bringing architectural visions to life. Their skill and craftsmanship can be seen in the intricate details of Brantford’s historic buildings, from decorative cornices to precisely laid brickwork. These artisans were instrumental in creating the unique character that defines Brantford’s built heritage.

5. Modern Masonry in Brantford (Late 20th Century – Present)

5.1 Preservation and restoration of historic masonry structures

In recent decades, there has been a growing appreciation for Brantford’s masonry heritage. Preservation and restoration efforts have become a priority, with organizations and skilled professionals working to maintain the city’s historic structures. Companies like Fix My Brick play a vital role in these efforts, employing both traditional techniques and modern technologies to ensure the longevity of Brantford’s masonry buildings.

5.2 Contemporary masonry projects and innovations

While preservation is important, masonry in Brantford continues to evolve. Contemporary projects incorporate new materials and techniques while often paying homage to the city’s rich masonry tradition. Sustainable practices and energy-efficient designs are being integrated into modern masonry construction, demonstrating the adaptability of this ancient craft.

5.3 The importance of masonry in maintaining Brantford’s heritage

Masonry is more than just a construction technique in Brantford; it’s a link to the city’s past and a foundation for its future. The preservation and continued use of masonry in both old and new buildings help maintain Brantford’s unique character and sense of place.

6. The Future of Masonry in Brantford

6.1 Challenges and opportunities for the craft

As Brantford continues to grow and change, masonry faces both challenges and opportunities. The need for skilled masons to maintain historic structures is increasing, while new construction projects offer chances to innovate and adapt the craft for modern needs.

6.2 Training and apprenticeship programs

To ensure the future of masonry in Brantford, training and apprenticeship programs are crucial. Local institutions and organizations are working to pass on traditional skills while also teaching new techniques and technologies relevant to modern masonry practice.

6.3 Sustainable masonry practices

The future of masonry in Brantford is increasingly focused on sustainability. From the use of recycled materials to energy-efficient design principles, masons are finding ways to make this ancient craft environmentally friendly and relevant for the 21st century.

7. Conclusion: The Enduring Legacy of Masonry in Brantford

From the early days of Joseph Brant to the present, masonry has been an integral part of Brantford’s story. The craft has not only shaped the physical landscape of the city but has also contributed to its cultural identity and sense of community. As we look to the future, it’s clear that masonry will continue to play a vital role in preserving Brantford’s heritage while also contributing to its ongoing development.

The rich history of masonry in Brantford is a testament to the skill, creativity, and dedication of generations of craftsmen. As we walk the streets of this historic city, we are surrounded by their legacy – in the sturdy walls of century-old buildings, the intricate details of restored facades, and the innovative designs of new structures.

For those interested in learning more about Brantford’s masonry heritage or seeking expert assistance with masonry restoration and repair, companies like Fix My Brick stand ready to share their knowledge and expertise. Together, we can ensure that the art and craft of masonry continues to thrive in Brantford for generations to come.

\n\n\n
error: No faq

The Cost of Masonry Fences: What Ontario Homeowners Need to Know

The Cost of Masonry Fences: What Ontario Homeowners Need to Know

Masonry fences are a popular choice for Ontario homeowners looking to enhance their property’s security, privacy, and aesthetic appeal. However, understanding the costs associated with these structures is crucial for making an informed decision. In this comprehensive guide, we’ll break down the factors influencing masonry fence costs, compare different materials, discuss labor considerations, and explore the long-term value these fences can bring to your property.

Factors Influencing Masonry Fence Costs in Ontario

Several key factors contribute to the overall cost of installing a masonry fence in Ontario:

  • Fence length and height
  • Material choice
  • Complexity of design
  • Site preparation requirements
  • Local building codes and permits
  • Labor costs
  • Seasonal factors

Let’s explore each of these factors in more detail:

Fence Length and Height

The size of your fence is a primary cost determinant. Longer and taller fences require more materials and labor, increasing the overall price. On average, masonry fences in Ontario can range from 4 to 8 feet in height, with costs typically calculated per linear foot.

Material Choice

The type of masonry material you choose significantly impacts the cost. Options include:

  • Brick
  • Stone
  • Concrete blocks
  • Stucco

We’ll compare these materials in more detail in the next section.

Complexity of Design

Intricate designs, patterns, or custom features will increase both material and labor costs. Simple, straight fences are generally more cost-effective than those with curves, pillars, or decorative elements.

Site Preparation Requirements

The condition of your property can affect costs. Factors such as slope, soil type, and the need for excavation or tree removal can add to the overall expense.

Local Building Codes and Permits

Ontario municipalities have specific regulations for fence construction. Obtaining necessary permits and ensuring compliance with local codes may add to your project costs.

Labor Costs

Skilled masonry work requires experienced professionals. Labor costs can vary based on the complexity of the project and the current demand for masonry services in your area.

Seasonal Factors

In Ontario, the construction season can impact costs. Projects scheduled during peak summer months may be more expensive due to high demand, while off-season work might offer some savings but could face weather-related challenges.

Price Comparison of Different Masonry Materials

Let’s break down the costs associated with common masonry materials used in Ontario:

Brick

Brick is a classic choice for masonry fences, offering durability and a timeless aesthetic.

  • Cost range: $20 – $35 per square foot
  • Pros: Long-lasting, low maintenance, various color options
  • Cons: Higher initial cost compared to some alternatives

Stone

Natural stone fences provide a luxurious, high-end appearance but come at a premium price.

  • Cost range: $30 – $50 per square foot
  • Pros: Unique appearance, extremely durable, increases property value
  • Cons: Most expensive option, can be challenging to install

Concrete Blocks

Concrete block fences offer a cost-effective solution with various finishing options.

  • Cost range: $15 – $30 per square foot
  • Pros: Affordable, versatile, can be finished to mimic other materials
  • Cons: May not have the same aesthetic appeal as brick or stone

Stucco

Stucco can be applied over concrete blocks or other base materials for a smooth, customizable finish.

  • Cost range: $20 – $40 per square foot (including base material)
  • Pros: Versatile color options, smooth finish, relatively affordable
  • Cons: May require more maintenance than other options

Labor Costs and Timeline Considerations

Labor is a significant component of masonry fence installation costs in Ontario. Here’s what you need to know:

Typical Labor Costs

Labor costs for masonry work in Ontario generally range from $50 to $100 per hour, depending on the complexity of the project and the experience of the masons. For a standard masonry fence project, labor typically accounts for 40-60% of the total cost.

Project Timeline

The duration of your masonry fence project can impact overall costs. Factors affecting the timeline include:

  • Fence length and height
  • Material choice and complexity of design
  • Weather conditions
  • Crew size

On average, a 100-foot masonry fence might take 1-2 weeks to complete, depending on these factors.

Additional Labor Considerations

Keep in mind that specialized tasks may require additional labor costs:

  • Site preparation and excavation
  • Custom design work
  • Integration of gates or lighting features
  • Cleanup and landscaping touch-ups

Long-term Savings and Increased Property Value

While the initial cost of a masonry fence may be higher than alternatives like wood or vinyl, it’s essential to consider the long-term benefits:

Durability and Low Maintenance

Masonry fences can last for decades with minimal maintenance, potentially saving you money on repairs and replacements over time. This longevity is particularly valuable in Ontario’s varied climate.

Energy Efficiency

Masonry fences can act as a windbreak and provide insulation, potentially reducing your home’s energy costs.

Increased Property Value

A well-constructed masonry fence can boost your property’s curb appeal and overall value. Real estate experts estimate that a quality masonry fence can increase property value by 5-10%.

Security and Privacy

The sturdy nature of masonry fences provides enhanced security and privacy, which can be particularly valuable in urban Ontario settings.

Financing Options and ROI for Masonry Fence Projects

Investing in a masonry fence is a significant decision. Here are some financing options and ROI considerations for Ontario homeowners:

Financing Options

  1. Home Equity Line of Credit (HELOC): Allows you to borrow against your home’s equity at a competitive interest rate.
  2. Personal Loans: Unsecured loans based on your creditworthiness, typically with higher interest rates than HELOCs.
  3. Contractor Financing: Some masonry companies offer financing options or payment plans.
  4. Credit Cards: Best for smaller projects or as a short-term solution if you can pay off the balance quickly.

Return on Investment (ROI)

While ROI can vary, many Ontario homeowners find that masonry fences offer a strong return:

  • Immediate property value increase of 5-10%
  • Long-term savings on maintenance and replacements
  • Potential energy cost savings
  • Enhanced curb appeal for faster home sales

Conclusion

Installing a masonry fence is a significant investment for Ontario homeowners, but one that can offer substantial long-term benefits. By understanding the factors that influence costs, comparing material options, and considering the long-term value, you can make an informed decision that enhances your property for years to come.

Remember to obtain multiple quotes from reputable masonry contractors, check local regulations, and consider your specific needs and budget when planning your masonry fence project. With careful planning and execution, your new masonry fence can provide security, privacy, and beauty while adding lasting value to your Ontario home.

\n\n\n

Error: No FAQ

There are currently no FAQs available.

Commercial Masonry Services: The Ultimate Guide for Ontario Businesses

As a business owner in Ontario, you understand the importance of a strong, durable, and attractive commercial property. Whether you’re constructing a new building, renovating an existing structure, or maintaining your current property, commercial masonry services play a crucial role in ensuring your business’s physical foundation is as solid as its economic one. In this comprehensive guide, we’ll explore everything you need to know about commercial masonry services in Ontario, from the types of materials used to the benefits of professional work and how to choose the right contractor for your project. 1. Introduction to Commercial Masonry Services 1.1 Definition and importance Commercial masonry services encompass a wide range of construction and maintenance activities involving the use of brick, stone, concrete blocks, and other materials to create sturdy, long-lasting structures. These services are essential for businesses of all sizes, from small storefronts to large office complexes, as they provide the foundational elements that ensure a building’s stability, safety, and aesthetic appeal. 1.2 Types of commercial masonry projects Commercial masonry projects can vary greatly in scope and complexity. Some common types include: – New building construction – Facade renovations and improvements – Structural repairs and reinforcements – Restoration of historic buildings – Installation of decorative elements – Creation of outdoor spaces like patios or walkways 2. Types of Masonry Used in Commercial Projects 2.1 Brick masonry Brick masonry is one of the most popular choices for commercial buildings due to its versatility, durability, and classic appearance. Bricks come in various colors, sizes, and textures, allowing for a wide range of design possibilities. 2.2 Stone masonry Stone masonry offers a natural, elegant look that can add prestige to any commercial property. It’s often used for facades, accent walls, or landscaping features. Common types of stone used in commercial projects include granite, limestone, and sandstone. 2.3 Concrete block masonry Concrete blocks are a cost-effective and versatile option for commercial construction. They provide excellent structural support and can be used for both interior and exterior walls. Modern concrete blocks come in various finishes and can be designed to mimic the appearance of other materials. 2.4 Pros and cons of each type Each type of masonry material has its own set of advantages and disadvantages: – Brick masonry: – Pros: Durable, low maintenance, fire-resistant, good insulation – Cons: Can be more expensive than some alternatives, limited color options – Stone masonry: – Pros: Extremely durable, unique aesthetic appeal, increases property value – Cons: High cost, requires skilled labor, can be prone to moisture issues if not properly installed – Concrete block masonry: – Pros: Cost-effective, quick installation, good sound insulation – Cons: Less aesthetic appeal than brick or stone, may require additional finishing 3. Common Commercial Masonry Projects 3.1 New construction New construction projects often involve a combination of masonry materials to create structurally sound and visually appealing buildings. This may include load-bearing walls, facades, and decorative elements. Masonry contractors work closely with architects and engineers to ensure that the design meets both aesthetic and functional requirements. 3.2 Restoration and repair Many commercial buildings in Ontario, especially in historic areas, require masonry restoration and repair. This can involve: – Tuckpointing: Repairing mortar joints to prevent water infiltration – Brick replacement: Swapping out damaged or deteriorated bricks – Crack repair: Addressing structural issues in walls or foundations – Waterproofing: Applying sealants to protect against moisture damage 3.3 Facade improvements Updating a building’s facade can dramatically improve its appearance and energy efficiency. This may involve adding new masonry elements, replacing outdated materials, or incorporating modern design features while maintaining the building’s structural integrity. 3.4 Structural reinforcement In some cases, commercial buildings may require structural reinforcement to meet current building codes or to address safety concerns. Masonry contractors can add support to existing structures, reinforce foundations, or integrate new masonry elements to improve overall stability. 4. Benefits of Professional Commercial Masonry Services 4.1 Durability and longevity One of the primary advantages of professional masonry work is the exceptional durability it provides. Well-constructed masonry structures can last for decades or even centuries with proper maintenance, making them an excellent long-term investment for businesses. 4.2 Energy efficiency Masonry materials like brick and stone have excellent thermal mass properties, helping to regulate indoor temperatures and reduce energy costs. Professional masonry services can also incorporate modern insulation techniques to further enhance a building’s energy efficiency. 4.3 Fire resistance Many masonry materials are naturally fire-resistant, providing an added layer of safety for commercial properties. This can be particularly important for businesses that deal with flammable materials or those located in areas prone to wildfires. 4.4 Aesthetic appeal Professional masonry work can significantly enhance the visual appeal of a commercial property. From classic brick facades to intricate stone detailing, masonry offers a wide range of design possibilities to suit any architectural style or brand image. 4.5 Increased property value The durability, energy efficiency, and aesthetic improvements provided by quality masonry work can all contribute to an increase in property value. This can be particularly beneficial for businesses looking to sell or lease their commercial spaces in the future. 5. Choosing the Right Commercial Masonry Contractor 5.1 Qualifications and certifications When selecting a masonry contractor for your commercial project, look for the following qualifications: – Proper licensing and insurance – Membership in professional organizations like the Ontario Masonry Contractors’ Association – Certifications in specific masonry techniques or materials – Compliance with Ontario’s building codes and regulations 5.2 Experience and portfolio Review the contractor’s past projects and ask for references from other commercial clients. Look for experience with projects similar to yours in terms of scale, materials, and complexity. 5.3 Insurance and warranties Ensure that the contractor has adequate liability insurance and offers warranties on their work. This protects your business in case of accidents or defects in the masonry work. 5.4 Questions to ask potential contractors When interviewing masonry contractors, consider asking the following questions: 1. How long have you been in business? 2. Can you provide examples of similar commercial projects you’ve completed? 3. What is your approach to ensuring project timelines and budgets are met? 4. How do you handle unexpected issues or changes during the project? 5. What safety measures do you have in place for your workers and the public? 6. Commercial Masonry Maintenance and Care 6.1 Regular inspections Schedule annual inspections of your masonry to identify potential issues early. Look for signs of wear, cracks, or water damage, particularly after severe weather events. 6.2 Cleaning and sealing Regular cleaning can help maintain the appearance of your masonry and prevent the buildup of dirt and pollutants that can cause damage over time. Applying sealants as recommended by your masonry contractor can provide additional protection against moisture and staining. 6.3 Addressing minor repairs promptly Don’t ignore small issues like cracked mortar or loose bricks. Addressing these problems quickly can prevent them from escalating into more serious and costly repairs down the line. 7. Cost Considerations for Commercial Masonry Services 7.1 Factors affecting pricing The cost of commercial masonry services can vary widely depending on factors such as: – Type and quality of materials used – Size and complexity of the project – Labor costs and project duration – Any necessary permits or special equipment – Location of the property 7.2 Return on investment While quality masonry work can represent a significant upfront investment, it often provides excellent long-term value through increased durability, energy efficiency, and property value. Consider the lifecycle costs of different materials and construction methods when evaluating your options. 8. Conclusion: Investing in Quality Commercial Masonry Services Commercial masonry services play a vital role in the construction, maintenance, and enhancement of business properties across Ontario. By understanding the types of masonry available, the benefits of professional services, and how to choose the right contractor, you can make informed decisions that will benefit your business for years to come. Remember that investing in quality masonry work is not just about building walls – it’s about creating a solid foundation for your business’s future success. Whether you’re planning a new construction project, considering a facade renovation, or simply looking to maintain your existing masonry, taking the time to research and invest in professional services will pay dividends in the long run. By partnering with experienced masonry contractors and implementing proper maintenance practices, you can ensure that your commercial property remains strong, beautiful, and valuable for generations to come.\n\n\n

Error: No FAQ

It seems there are no FAQs available at the moment. Please check back later or contact support for assistance.

The Cost of Masonry Fences: What Ontario Homeowners Need to Know


The Cost of Masonry Fences: What Ontario Homeowners Need to Know

Masonry fences are a popular choice for Ontario homeowners looking to enhance their property’s security, privacy, and aesthetic appeal. However, understanding the costs associated with these structures is crucial for making an informed decision. In this comprehensive guide, we’ll break down the factors influencing masonry fence costs, compare different materials, discuss labor considerations, and explore the long-term value these fences can bring to your property.

Factors Influencing Masonry Fence Costs in Ontario

Several key factors contribute to the overall cost of installing a masonry fence in Ontario:

  • Fence length and height
  • Material choice
  • Complexity of design
  • Site preparation requirements
  • Local building codes and permits
  • Labor costs
  • Seasonal factors

Let’s explore each of these factors in more detail:

Fence Length and Height

The size of your fence is a primary cost determinant. Longer and taller fences require more materials and labor, increasing the overall price. On average, masonry fences in Ontario can range from 4 to 8 feet in height, with costs typically calculated per linear foot.

Material Choice

The type of masonry material you choose significantly impacts the cost. Options include:

  • Brick
  • Stone
  • Concrete blocks
  • Stucco

We’ll compare these materials in more detail in the next section.

Complexity of Design

Intricate designs, patterns, or custom features will increase both material and labor costs. Simple, straight fences are generally more cost-effective than those with curves, pillars, or decorative elements.

Site Preparation Requirements

The condition of your property can affect costs. Factors such as slope, soil type, and the need for excavation or tree removal can add to the overall expense.

Local Building Codes and Permits

Ontario municipalities have specific regulations for fence construction. Obtaining necessary permits and ensuring compliance with local codes may add to your project costs.

Labor Costs

Skilled masonry work requires experienced professionals. Labor costs can vary based on the complexity of the project and the current demand for masonry services in your area.

Seasonal Factors

In Ontario, the construction season can impact costs. Projects scheduled during peak summer months may be more expensive due to high demand, while off-season work might offer some savings but could face weather-related challenges.

Price Comparison of Different Masonry Materials

Let’s break down the costs associated with common masonry materials used in Ontario:

Brick

Brick is a classic choice for masonry fences, offering durability and a timeless aesthetic.

  • Cost range: $20 – $35 per square foot
  • Pros: Long-lasting, low maintenance, various color options
  • Cons: Higher initial cost compared to some alternatives

Stone

Natural stone fences provide a luxurious, high-end appearance but come at a premium price.

  • Cost range: $30 – $50 per square foot
  • Pros: Unique appearance, extremely durable, increases property value
  • Cons: Most expensive option, can be challenging to install

Concrete Blocks

Concrete block fences offer a cost-effective solution with various finishing options.

  • Cost range: $15 – $30 per square foot
  • Pros: Affordable, versatile, can be finished to mimic other materials
  • Cons: May not have the same aesthetic appeal as brick or stone

Stucco

Stucco can be applied over concrete blocks or other base materials for a smooth, customizable finish.

  • Cost range: $20 – $40 per square foot (including base material)
  • Pros: Versatile color options, smooth finish, relatively affordable
  • Cons: May require more maintenance than other options

Labor Costs and Timeline Considerations

Labor is a significant component of masonry fence installation costs in Ontario. Here’s what you need to know:

Typical Labor Costs

Labor costs for masonry work in Ontario generally range from $50 to $100 per hour, depending on the complexity of the project and the experience of the masons. For a standard masonry fence project, labor typically accounts for 40-60% of the total cost.

Project Timeline

The duration of your masonry fence project can impact overall costs. Factors affecting the timeline include:

  • Fence length and height
  • Material choice and complexity of design
  • Weather conditions
  • Crew size

On average, a 100-foot masonry fence might take 1-2 weeks to complete, depending on these factors.

Additional Labor Considerations

Keep in mind that specialized tasks may require additional labor costs:

  • Site preparation and excavation
  • Custom design work
  • Integration of gates or lighting features
  • Cleanup and landscaping touch-ups

Long-term Savings and Increased Property Value

While the initial cost of a masonry fence may be higher than alternatives like wood or vinyl, it’s essential to consider the long-term benefits:

Durability and Low Maintenance

Masonry fences can last for decades with minimal maintenance, potentially saving you money on repairs and replacements over time. This longevity is particularly valuable in Ontario’s varied climate.

Energy Efficiency

Masonry fences can act as a windbreak and provide insulation, potentially reducing your home’s energy costs.

Increased Property Value

A well-constructed masonry fence can boost your property’s curb appeal and overall value. Real estate experts estimate that a quality masonry fence can increase property value by 5-10%.

Security and Privacy

The sturdy nature of masonry fences provides enhanced security and privacy, which can be particularly valuable in urban Ontario settings.

Financing Options and ROI for Masonry Fence Projects

Investing in a masonry fence is a significant decision. Here are some financing options and ROI considerations for Ontario homeowners:

Financing Options

  1. Home Equity Line of Credit (HELOC): Allows you to borrow against your home’s equity at a competitive interest rate.
  2. Personal Loans: Unsecured loans based on your creditworthiness, typically with higher interest rates than HELOCs.
  3. Contractor Financing: Some masonry companies offer financing options or payment plans.
  4. Credit Cards: Best for smaller projects or as a short-term solution if you can pay off the balance quickly.

Return on Investment (ROI)

While ROI can vary, many Ontario homeowners find that masonry fences offer a strong return:

  • Immediate property value increase of 5-10%
  • Long-term savings on maintenance and replacements
  • Potential energy cost savings
  • Enhanced curb appeal for faster home sales

Conclusion

Installing a masonry fence is a significant investment for Ontario homeowners, but one that can offer substantial long-term benefits. By understanding the factors that influence costs, comparing material options, and considering the long-term value, you can make an informed decision that enhances your property for years to come.

Remember to obtain multiple quotes from reputable masonry contractors, check local regulations, and consider your specific needs and budget when planning your masonry fence project. With careful planning and execution, your new masonry fence can provide security, privacy, and beauty while adding lasting value to your Ontario home.

\n\n\n

What are the main factors influencing the cost of masonry fences in Ontario?

The main factors include fence length and height, material choice, design complexity, site preparation needs, local building codes and permits, labor costs, and seasonal factors.

What types of materials are commonly used for masonry fences, and how do their costs compare?

Common materials include brick ($20 – $35/sq ft), stone ($30 – $50/sq ft), concrete blocks ($15 – $30/sq ft), and stucco ($20 – $40/sq ft). Each offers different aesthetics and durability.

How much do labor costs typically range for masonry fence installation in Ontario?

Labor costs in Ontario generally range from $50 to $100 per hour, and they typically account for 40-60% of the total project cost.

What are the long-term benefits of installing a masonry fence?

Masonry fences offer durability, low maintenance, increased property value, energy efficiency, and enhanced security and privacy, providing substantial long-term benefits to homeowners.

What financing options are available for homeowners looking to install a masonry fence?

Financing options include Home Equity Line of Credit (HELOC), personal loans, contractor financing, and credit cards, each suitable for different financial situations.

How can a masonry fence increase property value?

A well-constructed masonry fence can increase property value by 5-10%, enhance the home’s curb appeal, and lead to faster sales due to its strong appeal to buyers.

How long does it typically take to complete a masonry fence project?

A standard 100-foot masonry fence project usually takes about 1-2 weeks, depending on factors like fence length, height, material choice, and weather conditions.

Are there additional costs associated with masonry fence installation?

Yes, additional costs may arise from site preparation, custom design work, integration of features like gates or lighting, and cleanup or landscaping post-installation.

What should homeowners consider before planning a masonry fence project?

Homeowners should consider obtaining multiple quotes, checking local regulations, and evaluating their specific needs and budget when planning a masonry fence project.

The Rich History of Masonry in Brantford, Ontario: From Joseph Brant to Modern Craftsmanship

Brantford, Ontario, a city steeped in history and architectural beauty, owes much of its character to the skilled masons who have shaped its landscape over the centuries. From the early days of Joseph Brant to the modern preservation efforts, masonry has played a pivotal role in defining Brantford’s identity. In this comprehensive exploration, we’ll journey through time to uncover the fascinating story of masonry in Brantford and its enduring impact on the community.

1. Introduction to Masonry in Brantford

Masonry, the art and craft of building structures from individual units of stone, brick, or concrete, has been an integral part of human civilization for thousands of years. In Brantford, this ancient craft has left an indelible mark on the city’s architecture and culture.

Founded in 1784 by Captain Joseph Brant, Brantford has a rich history that intertwines with the development of masonry in the region. The city’s growth from a small settlement to a thriving industrial center is reflected in its diverse array of masonry structures, each telling a story of the era in which it was built.

2. Early Masonry in Brantford (Late 18th – Early 19th Century)

2.1 Joseph Brant and the first recorded masons

Joseph Brant, also known by his Mohawk name Thayendanegea, was not only the founder of Brantford but also one of the first recorded masons in the area. His influence extended beyond leadership and diplomacy to the very foundations of the city’s built environment.

Brant’s involvement in masonry set the stage for the craft’s development in the region. As a Freemason himself, he likely encouraged the spread of masonic principles and practices, which often went hand-in-hand with the physical craft of masonry.

2.2 Influence of Indigenous craftsmanship

The early masonry in Brantford was not solely a European import. Indigenous craftsmanship, particularly that of the Six Nations, played a significant role in shaping the early built environment. Traditional techniques for working with stone and creating sturdy structures influenced the development of masonry in the region.

2.3 Early stone structures and their significance

Some of the earliest masonry structures in Brantford were simple yet sturdy buildings made from locally sourced materials. These early structures, while often modest, laid the groundwork for the more elaborate masonry that would follow. Churches, government buildings, and private residences were among the first to showcase the potential of masonry construction in the area.

3. The Rise of Freemasonry in Brantford (19th Century)

3.1 Establishment of Brant Lodge No. 45

The establishment of Brant Lodge No. 45 in 1820 marked a significant milestone in Brantford’s masonic history. As one of the oldest Masonic lodges in Ontario, it played a crucial role in fostering the growth of both Freemasonry and the masonry craft in the city.

3.2 Notable Freemasons and their contributions to the city

Many prominent Brantford citizens were members of the Masonic lodge, including businessmen, politicians, and craftsmen. These individuals often used their influence and resources to support the development of the city, including the construction of significant masonry buildings.

3.3 The Masonic Temple Building and its history

The Masonic Temple Building, constructed in 1911, stands as a testament to the influence of Freemasonry on Brantford’s architectural landscape. This impressive structure, with its intricate masonry work, served as a hub for the Masonic community until 1945 and remains an important part of Brantford’s architectural heritage.

4. Masonry in Brantford’s Architecture (19th – 20th Century)

4.1 Prominent masonry buildings and landmarks

Brantford’s cityscape is dotted with remarkable masonry structures that showcase the evolution of the craft. Some notable examples include:

  • The Brant County Courthouse (1852)
  • Victoria Park Square (1861)
  • The Carnegie Library (1904)
  • The Bell Telephone Memorial (1917)

Each of these landmarks demonstrates the versatility and durability of masonry construction, as well as the skill of Brantford’s masons throughout history.

4.2 Evolution of masonry techniques and styles

As Brantford grew and prospered, masonry techniques and styles evolved to meet changing tastes and technological advancements. From the simple stone structures of the early 19th century to the ornate Victorian-era buildings and later Art Deco influences, Brantford’s masonry reflects the broader trends in North American architecture.

4.3 The role of stone masons in shaping Brantford’s cityscape

Stone masons played a crucial role in bringing architectural visions to life. Their skill and craftsmanship can be seen in the intricate details of Brantford’s historic buildings, from decorative cornices to precisely laid brickwork. These artisans were instrumental in creating the unique character that defines Brantford’s built heritage.

5. Modern Masonry in Brantford (Late 20th Century – Present)

5.1 Preservation and restoration of historic masonry structures

In recent decades, there has been a growing appreciation for Brantford’s masonry heritage. Preservation and restoration efforts have become a priority, with organizations and skilled professionals working to maintain the city’s historic structures. Companies like Fix My Brick play a vital role in these efforts, employing both traditional techniques and modern technologies to ensure the longevity of Brantford’s masonry buildings.

5.2 Contemporary masonry projects and innovations

While preservation is important, masonry in Brantford continues to evolve. Contemporary projects incorporate new materials and techniques while often paying homage to the city’s rich masonry tradition. Sustainable practices and energy-efficient designs are being integrated into modern masonry construction, demonstrating the adaptability of this ancient craft.

5.3 The importance of masonry in maintaining Brantford’s heritage

Masonry is more than just a construction technique in Brantford; it’s a link to the city’s past and a foundation for its future. The preservation and continued use of masonry in both old and new buildings help maintain Brantford’s unique character and sense of place.

6. The Future of Masonry in Brantford

6.1 Challenges and opportunities for the craft

As Brantford continues to grow and change, masonry faces both challenges and opportunities. The need for skilled masons to maintain historic structures is increasing, while new construction projects offer chances to innovate and adapt the craft for modern needs.

6.2 Training and apprenticeship programs

To ensure the future of masonry in Brantford, training and apprenticeship programs are crucial. Local institutions and organizations are working to pass on traditional skills while also teaching new techniques and technologies relevant to modern masonry practice.

6.3 Sustainable masonry practices

The future of masonry in Brantford is increasingly focused on sustainability. From the use of recycled materials to energy-efficient design principles, masons are finding ways to make this ancient craft environmentally friendly and relevant for the 21st century.

7. Conclusion: The Enduring Legacy of Masonry in Brantford

From the early days of Joseph Brant to the present, masonry has been an integral part of Brantford’s story. The craft has not only shaped the physical landscape of the city but has also contributed to its cultural identity and sense of community. As we look to the future, it’s clear that masonry will continue to play a vital role in preserving Brantford’s heritage while also contributing to its ongoing development.

The rich history of masonry in Brantford is a testament to the skill, creativity, and dedication of generations of craftsmen. As we walk the streets of this historic city, we are surrounded by their legacy – in the sturdy walls of century-old buildings, the intricate details of restored facades, and the innovative designs of new structures.

For those interested in learning more about Brantford’s masonry heritage or seeking expert assistance with masonry restoration and repair, companies like Fix My Brick stand ready to share their knowledge and expertise. Together, we can ensure that the art and craft of masonry continues to thrive in Brantford for generations to come.

\n\n\n

What role has masonry played in shaping Brantford’s identity?

Masonry has significantly influenced the architectural landscape and cultural identity of Brantford, marking the city’s growth from a small settlement to an industrial center through its diverse array of masonry structures.

Who was Joseph Brant and what was his contribution to masonry in Brantford?

Joseph Brant, the founder of Brantford, was one of the first recorded masons in the area and played a crucial role in establishing masonry as a key craft in the region, influenced by his Freemason background.

What significant masonry structures were built in Brantford during the 19th century?

Notable masonry landmarks from the 19th century include the Brant County Courthouse (1852), Victoria Park Square (1861), and the Carnegie Library (1904), each showcasing the craftsmanship and evolution of masonry in the city.

What is the significance of Brant Lodge No. 45?

Established in 1820, Brant Lodge No. 45 is one of Ontario’s oldest Masonic lodges and has been pivotal in supporting the development of both Freemasonry and masonry craft within Brantford.

How has modern masonry in Brantford evolved?

Modern masonry in Brantford has focused on preservation and restoration of historic structures while incorporating contemporary innovations, sustainable practices, and energy-efficient designs in new masonry projects.

What challenges does masonry face in Brantford today?

Masonry in Brantford faces challenges related to the need for skilled masons for maintenance and restoration, as well as opportunities presented by new construction projects that require adaptation of traditional techniques to modern needs.

What training programs are in place to support the future of masonry in Brantford?

Training and apprenticeship programs are being developed by local institutions to ensure that traditional masonry skills are passed down while also teaching modern techniques relevant to the current construction landscape.

What is the importance of preserving masonry heritage in Brantford?

Preserving masonry heritage is vital for maintaining Brantford’s unique character and sense of place, linking the city’s past to its future through continued use and restoration of historic masonry buildings.

How does masonry contribute to Brantford’s community?

Masonry contributes to Brantford’s community by shaping its physical environment and providing a sense of identity, reflecting the skill and creativity of generations of craftsmen.

Where can individuals seek assistance for masonry restoration in Brantford?

Individuals seeking masonry restoration assistance can contact companies like Fix My Brick, which provide expertise in maintaining Brantford’s historic masonry structures.

Maximize The Durability Of Your Brick With Expert Tuckpointing Techniques

What is Tuckpointing?

To understand the importance of tuckpointing for your brick and masonry structures, let’s start with what tuckpointing really is. This involves the removal and replacement of old, deteriorating mortar to maintain the structural integrity of your brickwork. In order to fully grasp this concept, it’s crucial to know the definition of tuckpointing, as well as its history and origins.

Definition of Tuckpointing

Tuckpointing, also known as “re-pointing,” is a process of repairing brick and stone masonry. New mortar is added to the old mortar joints, improving the structure’s look and strength. It’s pointed with a different color than the masonry, creating an authentic finish.

The primary goal? To stop water seeping in, which can damage bricks and stones over time. Tuckpointing isn’t just for historic buildings, it works for any brick or stone structure.

It has a long history. Centuries ago, craftspeople used contrasting colors of pointing to conceal flaws. Now, it’s an important part of preserving heritage buildings.

Who knew that an illusion could become so important in the world of masonry? Discover the history and origins of tuckpointing.

History and Origins of Tuckpointing

Tuckpointing is a process to mend or spruce up masonry constructions, by filling in brick joints with mortar. It began in England in the eighteenth century, for the purpose of making brickwork appear finer and more expensive. Today, it’s popular in many countries, because it raises structural stability and beauty.

Traditionally, craftsmen with skills in masonry and bricklaying were the ones to use tuckpointing. It became fashionable during the Georgian era in England, and spread around the world. Despite modern advances, tuckpointing is still a must-have skill for keeping up brick and stone structures.

Tuckpointing demands exact measurements and an eye for detail. In the old days, craftspeople used special tools to create thin lines in the mortar, to make a consistent fit between brick units.

It’s said that the ancient Egyptians used tuckpointing to make their pyramids look nicer. Later, European masons copied this method on their own constructions.

Building Conservation, a magazine on traditional building materials and techniques, states: “Tuck pointing is picking up again, to give uniformity to old or ruined brickwork, without the need to render. It can also replace repointing when there’s only slight damage.” Don’t skip tuckpointing – it’s like leaving the house without pants – sure, you can do it, but it won’t look good on your brick and masonry.

Why is Tuckpointing Important for Brick and Masonry Structures?

To maintain the quality and longevity of your brick and masonry structures, it’s crucial to understand why tuckpointing is important. Tuckpointing significantly helps to prevent moisture damage, enhances the aesthetics of the building, and increases the durability and longevity of the structure. In this section, we will explore each of these sub-sections briefly, so you can understand the purpose of tuckpointing better and make informed decisions for the maintenance of your property.

Prevents Moisture Damage

Tuckpointing is a process that safeguards brick and masonry structures from moisture damage. It seals the gaps between the bricks or stone, preventing water from getting in and causing damage. Mold growth is also prevented, reducing maintenance costs and preserving the building’s good looks.

Tuckpointing also gives an extra layer of protection against wind-driven rain and other weather issues. To do this, old or damaged mortar joints are removed and replaced with fresh mortar. This keeps the building safe and looking good for years.

It’s special because two different-colored mortars are used; one to match the bricks or stones and one to create a contrast. This makes everything look neat and uniform by hiding any irregularities in joint width.

In the past, plaster objects were made by pouring liquid gypsum into molds. But as time went on, using blocks of stone or brick became more economical. With these materials, masons had to develop techniques like tuckpointing to make sure buildings stood up to the test of time. So, tuckpointing: it’s like Botox for your building!

Enhances Aesthetics of the Building

Tuckpointing gives buildings a unique touch to their aesthetics. It repairs and reinforces fillings between bricks, making them look neat. This procedure helps improve the architectural elements, as well as preventing damage from wind and rain.

History reveals that ancient civilizations like the Greeks, Romans, and Egyptians used tuckpointing to build their famous structures. Today, restoration specialists consider it significant for restoring many historical structures.

Who needs a lifetime warranty when you can have tuckpointing?

Tuckpointed brickwork showcasing their aesthetic appeal.

Increases Durability and Longevity of the Structure

Tuckpointing your brick and masonry structures is essential for their longevity. It involves removing and replacing old, deteriorated mortar. This strengthens the wall’s structure, preventing water from seeping through cracks and causing further damage.

Plus, it can add to the building’s overall aesthetic appeal. Matching the original texture and color of the brickwork can maintain its value over time.

Professional inspections should be done annually to ensure that the work can withstand environmental factors. Proper maintenance can make sure your bricks last for centuries!

When Should Tuckpointing be Done?

To ensure that your brick or masonry structure stays strong and durable, addressing any concerns as early as possible is crucial. That’s why it’s essential to know when tuckpointing is necessary. In this section on “When Should Tuckpointing be Done?” with “Signs that Indicate the Need for Tuckpointing” and “The Importance of Timely Tuckpointing” as the solution, we’ll explore the signs that indicate your structure needs tuckpointing and highlight the importance of timely repair work.

Signs that Indicate the Need for Tuckpointing

Do you need tuckpointing? Tuckpointing is important to protect masonry from moisture, erosion, and damage. Signs you need tuckpointing:

  • Mortar crumbling or loose
  • Water damage or stains
  • Cracks in masonry walls or joints
  • Plant growth
  • Uneven brick coloring
  • Missing mortar or erosion

Also, remember the age of the building. Older buildings need tuckpointing more often because lime mortar deteriorates over time. It’s a good idea to act fast if any of these signs appear. Regular maintenance saves on repair costs in the future. Ignoring tuckpointing is like not fixing a cavity – it’ll only get worse!

Brick wall with signs of erosion.

The Importance of Timely Tuckpointing

Tuckpointing is essential for keeping a building in good shape. Neglecting it could lead to costly repairs or endanger safety. To prevent such problems, tuckpointing must be done quickly.

Look for signs of cracks or gaps in the mortar between bricks. If ignored, this can worsen and weaken a building’s structure. It’s best to inspect the brickwork every five years and address any issues immediately.

Not only does tuckpointing help with structure, it also improves the look of your property. Newly tuckpointed bricks are neat and tidy, giving your home an instant makeover.

Delaying tuckpointing can be costly and risky. Ignoring it can result in considerable damage or more expensive repairs. So, prioritize tuckpointing for your peace of mind and safety.

But why call a professional when you can do it yourself? Uneven mortar lines create a rustic feel for any building.

How is Tuckpointing Done?

To achieve properly done tuckpointing for brick and masonry structures, knowing the necessary tools and materials is critical. Understanding the techniques for tuckpointing can also help produce desirable results. In this section, we will provide you with insights on the tools and materials used in tuckpointing as well as the techniques used to execute the process.

Tools and Materials Used in Tuckpointing

Tuckpointing requires special tools and materials. The correct gear makes the job simpler and better results possible.

  • A trowel must be used for removing old mortar.
  • A chisel cleans the joint before new mortar is added.
  • A masonry hammer cuts bricks to fit the joints.
  • Mortar is a mix of sand, cement, and water.
  • The pointing trowel applies the mortar into cracks and gaps.
  • Gloves, safety glasses, dust mask and long-sleeved shirt are worn for safety.

Be sure to prepare the equipment on-site. Missing an element can cause a poor result.

Don’t forget about a sealant. Apply it after tuckpointing for extra protection.

I once worked on a restoration project in Los Angeles. Every wall needed tuckpointing. All went well until we couldn’t find our masonry hammer! After searching everywhere, we found it under debris near our tools.

Be ready for the wild world of tuckpointing!

Techniques for Tuckpointing

Tuckpointing: Techniques for Perfect Brickwork.

Repointing or tuckpointing is a process of repairing mortar on bricks to make them stronger and more attractive. Professional experts employ advanced techniques to get the best results. Here are five procedures to ace tuckpointing!

  1. Evaluate Damage:
  2. Prep:
  3. Mix Mortar:
  4. Grind & Fill Holes:
  5. Final Touches:

For perfect tuckpointing results, hire professional contractors. They’ll guarantee quality work at a good price. Contact them now!

DIY vs. Professional Tuckpointing

To weigh the choice between DIY and professional tuckpointing for your brick and masonry structure, read on for the pros and cons of DIY tuckpointing and the advantages and benefits that hiring a professional tuckpointing service can bring.

Pros and Cons of DIY Tuckpointing

DIY Tuckpointing: Advantages & Disadvantages

Tuckpointing is a great way to keep brickwork durable & beautiful. It involves replacing old, damaged mortar between bricks with new mortar. Many homeowners opt for DIY tuckpointing to save money, as hiring professionals can be expensive. However, it requires skill, knowledge, patience & time. Here are the pros & cons of DIY tuckpointing.

Advantages:

  • Saving Money: No professional fees.
  • Control over Workmanship: Total control over progress & quality.
  • Scheduling convenience: Schedule at your convenience.

Disadvantages:

  • Time-Consuming: Laborious & time-consuming without experience.
  • Lack of Professional Knowledge: No knowledge of modern tools, techniques or materials.
  • No Insurance Coverage: No insurance coverage in case of accidents.

Be aware of your physical abilities if you choose DIY. Safety measures like gloves & goggles are essential. Traditional masons used straw to texture their work. People have experimented with tools & techniques, leading to advanced motor mixtures available today. Unless you want a disaster, it’s best to leave tuckpointing to the pros!

Advantages and Benefits of Professional Tuckpointing

Professional Tuckpointing: All the Benefits!

Hiring pros is the recommended way to go when it comes to tuckpointing. They have the necessary skills and tools, plus years of experience for delivering quality results.

  • Expertise: Trained and skilled professionals can identify and repair issues effectively.
  • Time-Saving: Pros can quickly finish the job while keeping high standards.
  • Cost-Effective: DIY may seem cost-effective, but it can lead to expensive repairs if done wrong. Hiring pros keeps the job within the budget.

Pros also access better materials, making their work more durable and long-lasting. Plus, they conduct inspections to detect any underlying issues that could affect repairs. This provides a comprehensive solution and prevents future problems.

Fun Fact: According to an IMARC Group survey in 2018-2019, the global masonry repair mortar market was valued at $1.56 billion USD and is projected to reach $2.39 billion USD by 2024.

Tuckpointing may be tedious, but neglecting it will make your brick structures look like crumbly abstract art.

Conclusion: The Importance of Tuckpointing for Brick and Masonry Structures

Tuckpointing is key to preserving brick and masonry structures. It shields them from water damage, reduces wear and tear, and boosts their look.

Plus, cracks in mortar or spaces between bricks must be addressed straight away to stop greater issues.

For successful tuckpointing, recruit experienced masonry experts with the right tools.

Finally, stick to a regular maintenance plan to save funds in the long run.

Frequently Asked Questions

  1. What is tuckpointing?
    • Tuckpointing is the process of repairing or replacing the mortar joints between bricks in order to preserve the structural integrity of masonry or brickwork structures. It involves removing old, deteriorating mortar and replacing it with new mortar to improve the appearance and functionality of the walls.
  2. Why is tuckpointing important for masonry structures?
    • Tuckpointing is important for masonry structures because it helps prevent water damage, structural problems, and deterioration caused by exposure to weather and environmental elements. It also enhances the aesthetic appeal of the building, maintains the structural integrity of the walls, and extends the lifespan of the brickwork.
  3. How do I know whether my masonry or brickwork structure needs tuckpointing?
    • If you notice cracks, crumbling mortar, gaps or holes in the mortar joints, or water damage on the walls of your masonry or brickwork structure, you may need tuckpointing. It is best to consult with a qualified masonry expert who can conduct a thorough inspection of the walls and determine the best course of action.
  4. What are the benefits of tuckpointing?
    • The benefits of tuckpointing include improved structural stability, increased durability, enhanced visual appeal, and better protection against water and environmental damage. Tuckpointing also helps prevent pests and insects from entering the building through gaps in the mortar joints.
  5. How often should I have my masonry or brickwork structure tuckpointed?
    • The frequency of tuckpointing depends on various factors, such as the age of the building, the quality of the original construction, and the level of exposure to weather and environmental elements. Generally, it is recommended to have your masonry or brickwork structure inspected by a qualified masonry contractor every 5-10 years to assess the condition of the mortar and determine if tuckpointing is needed.
  6. Can I perform tuckpointing myself
    • Tuckpointing is a complex and specialized process that requires expertise and experience. It is best to hire a qualified masonry contractor with the necessary skills, tools, and materials to perform tuckpointing safely and effectively.

How To Repair Your Chimney: Essential Tips For Homeowners

Chimney Repair Basics

To understand the chimney repair basics with chimney maintenance, masonry services can help homeowners address common chimney problems. Regular chimney maintenance ensures the proper functioning of a chimney and reduces the need for repairs. In this sub-section, we will discuss the importance of regular chimney maintenance. Additionally, we’ll share some common chimney problems that homeowners should look out for to prevent further damage to their chimney.

Importance of Regular Chimney Maintenance

Maintaining chimneys is a must for proper functioning and to avoid hazardous situations. Regularly inspect the chimney and identify any flaws. This way, creosote buildup can be prevented. It’s flammable, and can lead to chimney fires and carbon monoxide leaks. Maintaining a chimney signals safety, longevity, and functionality.

Keeping chimneys in check also boosts heating appliance efficiency, like fireplaces and wood stoves. Without maintenance, airflows can be blocked, leading to poor ventilation and malfunctioning appliances. Inspecting the chimney often is key. Professional assessment of damages is needed to prevent obstructions and improper ventilation. Homeowners should only hire trustworthy specialists who prioritize safety.

In 2011, over 22,000 chimney fires were reported in the US. These were caused by debris buildup, and spread into house fires, leading to deaths in multiple states. Thus, routine checks by experts are necessary, as risks remain high without it. Don’t let your cozy fireplace become a smoke-filled nightmare – maintain your chimney regularly!

Chimney needing repair.

Common Chimney Problems to Look Out For

If you own a house with a chimney, it’s essential to watch out for signs of potential problems. Look out for:

  • cracks, gaps
  • too much soot, flammable creosote
  • blockages from animals or debris
  • bowing or leaning of the chimney structure
  • Also, check for water damage which can speed up deterioration.

Regular cleaning and inspections by a pro can stop most chimney issues. Failing to maintain your chimney can cause dangerous scenarios like carbon monoxide poisoning, fires, or even structural collapse. Get in touch with a chimney repair professional today – don’t risk your safety and home security! Chimney repair may seem dull, but with all these issues, it’s practically a Netflix series.

Types of Chimney Repair

To easily repair your chimney, you need to know the right type of repair that it needs. This is where understanding the different types of chimney repair comes in handy. In order to help you with this, we will discuss the three most common types of chimney repair: masonry chimney repair, chimney liner repair, and chimney cap repair.

Masonry Chimney Repair

Restoring and maintaining a masonry chimney requires professional expertise. This may include replacing bricks, mortar, or even the entire chimney. Doing so ensures the chimney is structurally sound and can withstand weather extremes. Waterproofing services can also be done to prevent water damage.

The flue is critical for proper ventilation and keeping out dangerous gases and soot. Issues like cracks or blockages must be addressed quickly.

It is important to choose an experienced, licensed company for repair and maintenance. According to Chimney Sweep News, 22,800 fires occur each year due to lack of chimney maintenance. Regular inspections by professionals are necessary to identify problems before they become more serious.

Show your love with a freshly repointed brick chimney!

Repointing Bricks

When repairing a chimney, repointing bricks is a common fix. This means replacing any deteriorated mortar between bricks. Here’s how to do it:

  1. Inspect the chimney to determine how much mortar needs to be replaced. If more than 1/4 inch is missing, it’s time for repointing.
  2. Clean the bricks with a wire brush, getting rid of all debris and dirt.
  3. Mix mortar using Portland cement and sand in the correct ratio. Gradually add water until it’s spreadable.
  4. Using a pointing trowel, fill each joint with the mortar. Make sure there are no gaps.
  5. Smooth out excess mortar with a jointing tool or finger to create a uniform surface.
  6. Keep the newly applied mortar moist for at least three days by spraying water on it periodically.

Cracks or missing bricks require different methods of repair, not just repointing. Cement-based mortars can cause damage in historic buildings due to poor structural performance.

Don’t wait until your roof collapses – call professionals if your chimney needs maintenance. Repointing your chimney is like hitting the reset button for your home’s warming system.

Rebuilding Chimneys

Chimney Rebuilding is key for chimney repair. This includes making new chimney crowns, caps, flue liners, fireboxes and smoke chambers. Severe weather can cause damage that needs rebuilding.

  1. Inspection. Assess the damage to know if you need to rebuild or repair. Thoroughly look for extent and nature of damage.
  2. Demolition. Take the chimney apart to its foundations. Be mindful of dust and debris during this.
  3. Materials Selection. Choose new bricks and materials for the rebuild. Skilled masons needed to lay them perfectly.
  4. Reconstructing. Precision work must be done by professionals. Carefully scrutinize each brick.
  5. Finishing Touches. Add quality dampers, fresh chimney caps and fitted crown for protection.

Never neglect chimney repair. It can be expensive. Cutting corners is bad. It can cost more in the long run. Get a licensed expert for the job. Fixing mortar joints? Get a brick-and-mortar-man!

Tuckpointing Mortar Joints

Tuckpointing for Mortar Joints:

Tuckpointing is a must for improving the structural integrity of your chimney. It involves removing and replacing deteriorated mortar joints with new ones. This will make the bricks and masonry look better and more aligned.

How to Tuckpoint:

  1. Chisel and hammer out old mortar between bricks.
  2. Apply fresh mortar to the joints with a pointed trowel.
  3. Smooth the new joint with a rounded trowel. Let it dry.
  4. Make sure the new mortar matches the original in color and composition.

My Experience:

I hired a tuckpointer, but they used the wrong mortar. It made my chimney look worse. I had to ask them to come back and use the right materials.

Fixing a chimney liner is like giving it a new jacket. But let’s hope it doesn’t cost too much!

Chimney Liner Repair

The innermost layer of a chimney must be kept in good condition. To do this, Chimney Flue Restoration may be needed. This process involves fixing or changing the part that stops smoke and gas entering your living area.

During Chimney Flue Restoration, any cracks, gaps or damage to the flue lining is fixed. This stops hazardous gases from getting into your home. The restoration ensures chimneys work at their best.

Porcelain liners have a key benefit. They hide existing cracks without needing extra repairs. Ceramic liners also cope with extreme temperatures for longer.

Pro Tip: Inspections should be done regularly. This helps find internal problems before they become expensive to fix.

When it comes to chimney liners, it’s time to ‘tear out the old and stuff in the new!’

Installing a new chimney liner.

Replace or Install New Liner

When it comes to fixing your chimney, one key element is replacing or installing a new liner. This keeps your chimney working properly and prevents any damage to the structure. Here’s a simple manual to help you out:

  1. Measure the flue’s size.
  2. Pick an appropriate liner material (stainless steel, cast-in-place, clay tile, etc.)
  3. Clean the chimney and get rid of all the leftovers.
  4. Secure the liner in place with anchor plates or other applicable fasteners.
  5. Attach the top of the liner to a cap or seal at the top of your chimney.
  6. Check that everything is sealed tight and test the chimney.

You should know that different types of chimneys need different liners. Ask an expert for advice before taking action.

In addition, keep inspecting and caring for your chimney to keep it from getting damaged again.

My pal had an issue with their fireplace and called in specialists for repair. After the inspection, they saw their liner was severely damaged due to long-term negligence. They quickly replaced it, which made the fireplace work much better and prevented further damage. Now, you can find your ideal liner on the Tinder of chimney liners!

Types of Chimney Liners

Different types of chimney liners are available for homeowners. Want to know more? Check out the table below!

Chimney Liner TypeMaterial UsedPrice Range
Clay TilesClay$600 – $1,200
Stainless SteelStainless Steel$2,500 – $5,000
AluminumAluminum$1,500 – $3,000

Clay tiles are cheaper, but they may not have enough insulation. Stainless steel is better insulated, but it’s pricier. Aluminum is a good middle option.

In addition, there are cast-in-place liners and hybrid systems that have their own advantages. Sarah used stainless steel, as it was durable, even though it was expensive at first. In the end, she was relieved that her fireplace was safe and well-insulated.

It’s important to choose the right liner, and also to install it properly. Otherwise, you’re playing Russian roulette with your house!

Importance of Proper Chimney Liner Installation

Chimney liner installation is essential for safety and proper functioning. Without it, combustion gases might enter your living space, or create dangerous air pressure imbalances. Insulation also protects your chimney from corrosion and moisture damage.

Select the right size, shape, and material to optimize performance. Depending on the fuel used, a specific style of liner may be needed. Also, alignment and attachment are key for safety.

Good installation offers financial benefits too. It increases home value, and reduces energy costs.

In the past, lack of insulation caused thousands of fires and property damage. The NFPA now requires liners in all new construction homes with heating appliances. A faulty chimney cap is like leaving the front door open – but it’s on your roof!

Chimney Cap Repair

Maintaining the top of your chimney is key to avoid damage to your house and environment. Here’s a quick guide on how to repair Chimney Caps:

  1. Step 1: Clear any debris blocking the Cap.
  2. Step 2: Look for gaps in cement between the Cap and flue tiles, and repair them.
  3. Step 3: Check for rust or bending on steel Chimney Caps, and replace if necessary.
  4. Step 4: Check for mortar that needs repair or replacing on the Chimney Cap.
  5. Step 5: Ensure metal flashing is sealed tightly; patch any leaks.
  6. Step 6: Clean the chimney regularly to prevent severe deterioration.

It’s important to spot loose brickwork early, as it can be fixed quickly with each layer dried properly before continuing.

Don’t wait too long – a damaged Chimney Cap can cause water damage in your home. Get help with any major issues.

Remember: a proper Chimney Cap can make all the difference between warm fires and a soot-filled house!

Importance of Chimney Caps

Chimney caps are essential for keeping your chimney healthy. They keep water, debris, and critters out, and they also stop sparks from flying out and causing fires. Get the right size cap, made of stainless steel or copper, with features like spark arrestors or animal guards. In wet areas, a top-mounted damper cap can help with airflow and keep precipitation out.

It’s important to get annual inspections from professionals. If you see any cracks in your cap, address them quickly—otherwise, repairs can get expensive! Prevention is key for long-term chimney health! But why bother with a cap when you can let the squirrels move in and turn it into a wildlife sanctuary?

A chimney cap.

Reasons for Chimney Cap Damage

Chimney Cap Damage can be caused by lots of factors that are often overlooked. Here are some of the sources that can weaken the cap and need repair:

  • Heavy rains and snow can put extra weight on the cap, leading to cracks and weakening.
  • Branches or other items falling onto the chimney can damage the cap, as can blockages in the chimney.
  • Wild animals like raccoons and birds can shake the cap off due to their movements.
  • Rust on metal fixtures corrodes and weakens them.
  • Frequent chemical cleaning products damage metal components like caps.

Uncapped chimneys also face problems – like moisture buildup or water intrusion. Damage varies in severity, but Chimney Cap Damage is more common if it’s not fixed.

Around 1884, construction workers started using tin caps as a design solution for rooftop concerns like storms or hail damage. Don’t let a faulty chimney cap ruin your day – get it fixed or replaced before your living room floods!

Chimney Cap Replacement or Repair

A chimney cap is important for your chimney system. It stops debris and animals from entering, keeps rain out, and reduces how much wind gets in. If you need to fix or replace it, it’s best to hire a pro. Here are four points to know:

  • Chimney caps come in different sizes, shapes, and materials.
  • Damage or missing caps can cause problems like water damage, blockages, and decreased efficiency.
  • Installation needs an exact fit and attaching the cap using screws or adhesive.
  • Cleaning off debris and checking for damages can make your cap last longer.

DIYers may try to repair their caps themselves. But, getting a pro is better for proper installation, efficient performance, and long life. Get a custom copper cap to fit any size and brand of chimney! Don’t wait for chimney chaos – call for repair today.

Signs Indicating the Need for Chimney Repair

To identify the need for chimney repair with smoke and draft issues, creosote build-up, and water damage as solution. Understanding the signs of chimney repair can help you prevent bigger problems and ensure the safety of your home. We will cover three sub-sections in this section: smoke and draft issues, creosote build-up, and water damage.

Smoke and Draft Issues

Draft and Smoke Levels in Chimneys: Be Careful!

Ensure stable smoke and draft levels in your home. Blocked chimneys can cause harmful gases and fire hazards. Smoke can mean something is blocking the flue or vents, reducing airflow.

It could be birds nesting, debris, or wear and tear. Weather like high winds or rain can also cause issues. If you sense changes in odor/smoke color or it’s harder to light a fire, get professional inspection. Inspections are important even when nothing is wrong.

Don’t get short-term solutions, take steps to repair the chimney before things get worse. Don’t let creosote build-up ruin your home’s style!

Creosote Build-Up

The Chimney Substance Build-Up.

Soot and creosote can build up inside chimneys when left uncleaned. Creosote is a thick, sticky substance that forms from incomplete combustion of gas or wood. It can be ignited by sparks from fires, leading to destructive house fires.

Timely cleaning is needed to prevent creosote build-up. Warning signs include: strong smells, excess smoke, and black smoke from the chimney stack.

Dampness and masonry damage can also affect chimneys. Bad smells come from water seeping in through cracks or missing brickwork or failed seals.

One homeowner ignored a musty odor. But it turned into mold and mildew growth. Water penetration had caused the toxic spores to form!

Looks like your chimney swam too close to the waterworks – time for repairs before it becomes a pool.

Water Damage

Water intrusion can be an indicator of a disrepair chimney. Causes include missing caps, cracked crowns, and damaged flashing material. This can lead to stained walls, rusted accessories, and ceilings. It’s important to take care of this issue quickly to avoid more damage.

Water buildup invites mold, mildew, and weakens the flue lining. Plus, smoke emissions containing dangerous gases like carbon monoxide. If left unattended, the fireplace can be ruined and put your health at risk.

Animals can cause further destruction by hollowing out wood materials and clogging up chimneys. This is nothing new, as cavemen lit fires against rocks and used openings for ventilation. Then homeowners created customized chimney solutions.

If you don’t maintain your chimney, you’ll pay the price. So make sure to schedule regular check-ups and cleanings.

Chimney Repair Cost and Maintenance Tips

To help you reduce the cost and extend the lifespan of your chimney, this section provides maintenance tips and different types of chimney repair with a focus on masonry services. The following sub-sections will guide you in understanding the cost of common chimney repairs, the significance of addressing small chimney problems, and preventive maintenance tips for keeping your chimney in good shape.

Cost of Common Chimney Repairs

When it comes to fixing a chimney, the costs can vary. It depends on the type of repair and how much damage there is. Check out the table for common chimney repair costs:

Common Chimney RepairAverage Cost
Chimney Cleaning$100-$300
Chimney Cap$200-$700
Liner Replacement$2,500-$7,000
Masonry Repairs$350-$1,800

Regular inspections and maintenance are essential for avoiding costly repairs. Cleaning and watching out for signs can help spot issues before they get worse. Waterproofing the chimney is also an option to prevent damage from rain or snow.

One person learnt that ignoring regular maintenance can be costly. He had to pay for major masonry and liner repairs. Ignoring small chimney problems is like skipping the dentist- it will cost you in the end.

Importance of Addressing Small Chimney Issues

Small chimney problems may seem minor, but can lead to huge damage if not addressed in time. Early attention and preventive care are essential to avoid further expenses. Ignoring small issues can even cause severe fire hazards and expensive repairs.

Neglecting issues such as inadequate insulation, creosote buildup, or damaged mortar can reduce the unit’s structural integrity gradually. This can create snowballing costs. Regular maintenance and checking the firebox, flue tiles, damper, and other components can stop perilous scenarios.

Keeping good airflow by removing dirt from grates and having open dampers when not in use prevents creosote buildup and blockages due to debris. Homeowners must pay attention to these areas of their fireplace units before small issues develop into major repair issues.

Don’t wait to seek professional intervention! Homeowners must take active steps to repair problems before it’s too late. Don’t let your chimney become a threat; book an appointment with a certified technician to ensure your safety.

Extend your chimney’s life by following these tips. No one wants a premature chimney collapse!

Preventative Maintenance Tips for Extending Chimney Life Span

Keeping your chimney in proper maintenance is key for extending its lifetime. Preventative measures can save you money and keep you secure. Here are 6 must-dos for prolonging your chimney’s life:

  1. Clean it regularly.
  2. Put on a cap.
  3. Inspect & repair professionally.
  4. Avoid burning green wood or trash.
  5. Keep the area around your chimney tidy.
  6. Be sure proper ventilation is in place.

Using correct fuel helps clean your chimney, reducing creosote. Good airflow is also important to stop negative air pressure in your home. For complex issues, hire certified experts for inspections, cleaning, and repairs.

Chimneys were once put in the centre of homes to keep them warm but now, due to insulation and new heating methods, they are placed on the outer wall.

Frequently Asked Questions

  1. What are the different types of chimney repairs?
    • There are several types of chimney repairs, including masonry repair, chimney crown repair, flashing repair, and chimney liner repair.
  2. When should I call for chimney repair?
    • You should call for chimney repair services if you notice any signs of damage, such as cracked mortar or bricks, loose flashing, rusted flue lining, or water damage.
  3. What is masonry repair?
    • Masonry repair refers to the restoration of damaged bricks, stones, or mortar in your chimney. This is typically done using special materials and techniques to restore the structure back to its original condition.
  4. What is chimney crown repair?
    • A chimney crown is the topmost masonry layer that covers the chimney. It is designed to prevent water from entering the chimney. Chimney crown repair involves fixing any cracks, leaks, or damage in this layer.
  5. What is flashing repair?
    • Flashing is metal strips or sheets that create a waterproof barrier between the roof and the chimney. Flashing repair involves fixing any damaged or missing flashing to prevent water from entering the chimney and causing damage to the roof.
  6. What is chimney liner repair?
    • A chimney liner is a protective layer that lines the inside of the chimney flue. It helps to prevent heat and gases from damaging the chimney structure. Chimney liner repair involves fixing any cracks or damage to the liner to maintain the safety and functionality of the chimney.