The Hidden Benefits of Restoring Your Historic Brick Home

Owning a historic brick home is like possessing a piece of living history. These architectural gems tell stories of bygone eras and add character to our neighborhoods. However, maintaining and restoring an older brick home can seem like a daunting task. Many homeowners might wonder if it’s worth the effort and expense. The truth is, there are numerous hidden benefits to properly restoring and maintaining your historic brickwork. In this post, we’ll explore these advantages, from improved energy efficiency to increased property value, and show you why investing in your brick home’s restoration is a decision you won’t regret.

1. Improved Energy Efficiency Through Proper Restoration

One of the most significant hidden benefits of restoring your historic brick home is the potential for improved energy efficiency. Many people assume that older homes are inherently drafty and inefficient, but this doesn’t have to be the case. Proper restoration can dramatically enhance your home’s ability to regulate temperature and reduce energy consumption.

How Restoration Improves Efficiency

  • Repointing mortar joints: Over time, mortar can deteriorate, creating gaps that allow air to pass through. By repointing these joints, you create a tighter seal that prevents drafts and heat loss.
  • Addressing structural issues: Cracks or shifts in brickwork can create pathways for air infiltration. Fixing these problems helps maintain the integrity of your home’s thermal envelope.
  • Restoring or replacing windows: Many historic homes have single-pane windows. Restoring these or replacing them with energy-efficient alternatives that maintain the home’s character can significantly reduce heat transfer.
  • Proper insulation: While restoring brickwork, you have the opportunity to add or improve insulation in walls, attics, and basements without compromising the home’s historic features.

By addressing these areas during restoration, you can create a more comfortable living environment and potentially see a substantial reduction in your energy bills. This not only benefits your wallet but also reduces your home’s environmental impact.

2. Increased Property Value and Curb Appeal

Investing in the restoration of your historic brick home can significantly boost its market value and enhance its curb appeal. Well-maintained historic homes are often highly sought after by buyers who appreciate their unique character and craftsmanship.

How Restoration Adds Value

  • Authenticity: Properly restored brick homes maintain their historical integrity, which is highly valued in the real estate market.
  • Structural integrity: Addressing issues like crumbling mortar or damaged bricks ensures the home’s longevity, making it more attractive to potential buyers.
  • Visual appeal: Clean, well-maintained brickwork creates a striking first impression, enhancing your home’s curb appeal.
  • Reduced future costs: By addressing issues now, you’re potentially saving future owners from costly repairs, which can be a significant selling point.

Real estate experts often note that historic homes in good condition can command premium prices in many markets. By investing in restoration, you’re not just preserving history; you’re also making a sound financial decision that can pay off when it’s time to sell.

3. Preservation of Local History and Architectural Heritage

Restoring your historic brick home goes beyond personal benefit; it contributes to the preservation of your community’s architectural heritage and local history. Each restored home helps maintain the unique character and story of your neighborhood.

The Importance of Preservation

  • Cultural significance: Historic homes are tangible links to our past, offering insights into architectural styles, building techniques, and ways of life from different eras.
  • Educational value: Preserved historic homes serve as educational resources for future generations, allowing them to experience and learn from the past.
  • Community identity: Historic neighborhoods often have a distinct character that contributes to a sense of place and community pride.
  • Tourism potential: Well-preserved historic districts can attract tourism, benefiting local economies.

By restoring your brick home, you’re playing a crucial role in maintaining this collective heritage. This not only benefits your community but can also provide a sense of personal satisfaction and connection to history.

4. Potential Tax Incentives for Historic Home Restoration

Many homeowners are unaware that restoring a historic brick home can come with financial incentives. Depending on your location and the specifics of your property, you might be eligible for various tax benefits or grants designed to encourage the preservation of historic structures.

Types of Incentives

  • Federal Historic Preservation Tax Incentives: The National Park Service, in partnership with the IRS, offers tax credits for the rehabilitation of historic, income-producing buildings.
  • State-level tax credits: Many states offer their own tax credit programs for historic preservation, which can be used in addition to federal incentives.
  • Local property tax abatements: Some municipalities offer property tax reductions for owners who restore historic properties.
  • Preservation grants: Various organizations and government agencies offer grants to support the restoration of historic structures.

It’s important to note that eligibility for these incentives often depends on factors such as the age of your home, its historic significance, and adherence to specific restoration guidelines. Before beginning any restoration work, research the available incentives in your area and consult with a tax professional or preservation specialist to understand how you might benefit.

5. Personal Satisfaction and Connection to Your Home’s Past

While many benefits of restoring a historic brick home are tangible, one of the most rewarding aspects is the personal satisfaction it brings. There’s a unique joy in preserving and breathing new life into a piece of history.

Emotional and Personal Benefits

  • Sense of accomplishment: Successfully restoring a historic home can be incredibly fulfilling, giving you a tangible sense of achievement.
  • Connection to history: Living in a restored historic home allows you to feel connected to the generations that came before, creating a unique sense of place and belonging.
  • Stewardship: By restoring your home, you become a steward of history, ensuring that future generations can appreciate and learn from the past.
  • Unique living experience: Restored historic homes offer character and details that are often lacking in modern construction, providing a one-of-a-kind living environment.

Many homeowners who undertake restoration projects report a deep sense of pride and connection to their homes. This emotional investment can transform a house into a true home, creating lasting memories and a legacy for future generations.

Conclusion

Restoring a historic brick home is more than just a renovation project; it’s an investment in history, efficiency, and your property’s future. From improved energy efficiency and increased property value to the preservation of architectural heritage and personal satisfaction, the benefits of restoration are numerous and far-reaching.

While the process may seem daunting, the rewards of breathing new life into a historic structure are immeasurable. Not only do you create a more comfortable and efficient living space for yourself, but you also contribute to the preservation of your community’s unique character and history.

If you’re considering restoring your historic brick home, take the time to research local resources, potential incentives, and preservation guidelines. Consult with experts in historic restoration to ensure that your project maintains the integrity of your home while meeting your modern needs. With careful planning and execution, you can unlock the hidden benefits of your historic brick home, creating a space that honors the past while embracing the future.

\n\n\n

What are the benefits of restoring a historic brick home?

Restoring a historic brick home can lead to improved energy efficiency, increased property value, preservation of local history, potential tax incentives, and personal satisfaction from maintaining a piece of history.

How does restoration improve energy efficiency?

Restoration improves energy efficiency through methods such as repointing mortar joints, addressing structural issues, restoring or replacing windows, and adding proper insulation, all of which help to reduce drafts and enhance temperature regulation.

Can restoring a historic home increase its property value?

Yes, well-maintained historic homes often command higher market values due to their authenticity, structural integrity, visual appeal, and the reduced future costs of repairs that they offer to potential buyers.

What role do restored historic homes play in preserving local heritage?

Restoring historic homes contributes to the preservation of community architectural heritage and history, providing cultural significance, educational resources, a sense of community identity, and tourism potential.

Are there financial incentives for restoring historic homes?

Yes, homeowners may be eligible for various financial incentives such as federal and state tax credits, local property tax abatements, and preservation grants, which can help offset restoration costs.

What personal benefits can come from restoring a historic brick home?

Personal benefits include a sense of accomplishment and connection to history, emotional satisfaction from being a steward of the home, and enjoying the unique characteristics that historic homes offer.

How can I ensure that my restoration project stays true to the home’s historic integrity?

To maintain the integrity of your home during restoration, research local resources, consult with preservation specialists, and adhere to historic preservation guidelines while planning your project.

What should homeowners do before starting a restoration project?

Homeowners should research available local resources, potential financial incentives, and consult with experts in historic restoration to ensure proper planning and execution of their project.

Why is it important to address structural issues during restoration?

Addressing structural issues is important to maintain the home’s longevity and prevent air infiltration, which ultimately enhances energy efficiency and the overall integrity of the historic property.

What is the overall conclusion about restoring a historic brick home?

Restoring a historic brick home is a worthwhile investment that benefits homeowners by improving energy efficiency, increasing property value, and contributing to the preservation of our architectural heritage and community identity.

The Rich History of Brick Masonry in Brantford, Ontario: From Early Settlements to Modern Restoration

Brantford, Ontario, a city known for its rich industrial heritage and beautiful architecture, has a fascinating story to tell through its brick masonry. From the early days of settlement to the present, brick has played a crucial role in shaping the city’s landscape and character. In this comprehensive exploration, we’ll delve into the evolution of brick masonry in Brantford, examining its historical significance, notable structures, and the ongoing efforts to preserve this vital aspect of the city’s heritage.

1. Introduction to Brantford’s Brick Masonry Heritage

1.1 The significance of brick in Brantford’s development

Brick has been an integral part of Brantford’s development since the city’s early days. As a durable, fire-resistant, and locally available material, brick quickly became the preferred choice for construction in the growing settlement. The abundance of high-quality clay deposits in the area made brick production a natural industry for the region, fueling both economic growth and architectural advancement.

1.2 Overview of the city’s architectural landscape

Today, Brantford’s architectural landscape is a testament to its brick masonry heritage. From stately Victorian homes to imposing industrial buildings, the city’s streetscapes showcase a diverse array of brick structures that span over two centuries of architectural styles and construction techniques. This rich tapestry of brick buildings not only tells the story of Brantford’s past but also continues to shape its present and future.

2. Early Brick Production in Brantford (1800s-1900s)

2.1 Blacker’s Brickworks and other early brickyards

One of the most significant players in Brantford’s early brick industry was Blacker’s Brickworks. Established in the mid-19th century by Edward Blacker, this brickyard became a cornerstone of the local construction industry. Blacker’s wasn’t alone, however; several other brickyards operated in and around Brantford during this period, each contributing to the city’s growing demand for building materials.

2.2 Brick manufacturing techniques and innovations

Early brick production in Brantford relied on traditional methods, with clay being extracted, molded, and fired in kilns. As demand grew and technology advanced, local brickmakers adopted new techniques and equipment. The introduction of steam-powered machinery in the late 19th century revolutionized production, allowing for greater efficiency and consistency in brick quality.

2.3 Impact on local construction and economy

The thriving brick industry had a profound impact on Brantford’s development. It provided a steady supply of building materials for the city’s rapid growth, enabled the construction of more durable and fire-resistant structures, and created numerous jobs in both manufacturing and construction. The availability of high-quality local brick also influenced architectural styles, encouraging the use of decorative brickwork and elaborate facades.

3. Notable Brick Structures in Brantford

3.1 Masonic Temple Building (1909-1915)

The Masonic Temple Building, constructed between 1909 and 1915, is a prime example of Edwardian Commercial and Masonic architectural styles. Its intricate brickwork, featuring patterns and decorative elements, showcases the skill of Brantford’s masons and the versatility of brick as a building material. The building stands as a testament to the city’s prosperity in the early 20th century and the importance of fraternal organizations in community life.

3.2 Carnegie Library

Brantford’s Carnegie Library, built in 1904, is another significant brick structure in the city. Funded by industrialist Andrew Carnegie, this building exemplifies the Classical Revival style popular for public buildings of the era. Its red brick facade, accented with stone details, creates a striking and dignified appearance that has made it a beloved landmark for over a century.

3.3 Brant Avenue Heritage Conservation District

The Brant Avenue Heritage Conservation District offers a stunning collection of brick homes that span various architectural styles from the 19th and early 20th centuries. This area showcases the evolution of residential brick construction in Brantford, from simple Georgian-style cottages to elaborate Victorian and Edwardian mansions. The district’s well-preserved brick homes provide a visual history of the city’s architectural and social development.

3.4 Other significant brick buildings and their stories

Brantford boasts numerous other noteworthy brick structures, each with its own unique story. These include:

  • The Brantford Expositor Building, a fine example of early 20th-century commercial architecture
  • The former Brantford Post Office, now home to the Brantford Public Library
  • The Bell Telephone Building, commemorating Alexander Graham Bell’s invention of the telephone in Brantford
  • Various churches, schools, and public buildings that showcase different periods of the city’s brick masonry tradition

4. The Role of Brick in Brantford’s Industrial Growth

4.1 Factories and warehouses

Brick played a crucial role in Brantford’s industrial development, providing sturdy and fire-resistant structures for factories and warehouses. The city’s industrial areas are dotted with impressive brick buildings that once housed thriving manufacturing operations. These structures, with their large windows, robust construction, and often ornate detailing, stand as monuments to Brantford’s industrial heritage.

4.2 Residential architecture and brick homes

As Brantford’s economy grew, so did the demand for high-quality housing. Brick became the material of choice for many residential buildings, from modest workers’ cottages to grand mansions. The durability and aesthetic appeal of brick allowed for the creation of homes that have stood the test of time, many of which continue to be cherished residences today.

5. Preservation and Restoration of Brantford’s Brick Heritage

5.1 Challenges in maintaining historical brick structures

Preserving Brantford’s brick heritage presents several challenges. These include:

  • Deterioration of mortar joints due to age and weathering
  • Structural issues caused by settling or inadequate foundations
  • Damage from freeze-thaw cycles in the harsh Ontario climate
  • Inappropriate repairs or modifications made over the years
  • Balancing preservation with modern building codes and energy efficiency standards

5.2 Modern masonry techniques for restoration

To address these challenges, modern restoration techniques have been developed that respect the historical integrity of brick structures while ensuring their longevity. These include:

  • Careful repointing of mortar joints using historically appropriate materials
  • Structural reinforcement methods that preserve original appearances
  • Cleaning techniques that remove dirt and pollutants without damaging the brick surface
  • Application of water-repellent treatments to protect against moisture damage
  • Use of compatible materials for repairs and replacements

5.3 The importance of skilled masons in preservation efforts

Skilled masons play a crucial role in preserving Brantford’s brick heritage. Their expertise in traditional techniques, combined with knowledge of modern restoration methods, ensures that historical structures are properly maintained and restored. These craftspeople are essential in bridging the gap between past and present, keeping the art of brick masonry alive for future generations.

6. Brick Masonry in Modern Brantford

6.1 Contemporary use of brick in new construction

While many of Brantford’s brick buildings are historical, the material continues to be popular in contemporary construction. Modern architects and builders appreciate brick for its durability, energy efficiency, and timeless aesthetic appeal. New brick buildings in Brantford often incorporate innovative designs and construction techniques while paying homage to the city’s rich masonry tradition.

6.2 Blending old and new: Incorporating historical elements in modern designs

Many new developments in Brantford strive to blend contemporary design with historical elements, creating a harmonious urban landscape. This might involve:

  • Using reclaimed bricks from demolished structures in new buildings
  • Incorporating traditional brick patterns or details into modern facades
  • Designing new structures that complement the scale and style of neighboring historical buildings
  • Adaptive reuse of old brick buildings for new purposes, preserving their exterior while updating the interior

7. The Future of Brick Masonry in Brantford

7.1 Sustainable practices in brick production and use

As environmental concerns become increasingly important, the brick industry in and around Brantford is adapting to more sustainable practices. This includes:

  • Using more energy-efficient kilns for brick production
  • Incorporating recycled materials into brick manufacturing
  • Developing bricks with improved insulation properties for energy-efficient buildings
  • Promoting the long lifespan and recyclability of brick as a sustainable building material

7.2 Preserving craftsmanship and traditional techniques

There is a growing recognition of the importance of preserving traditional masonry skills. Efforts are being made to:

  • Establish apprenticeship programs to train new generations of skilled masons
  • Organize workshops and demonstrations to educate the public about brick masonry
  • Collaborate with educational institutions to include traditional masonry techniques in construction and heritage conservation programs

7.3 The role of masonry in maintaining Brantford’s unique character

As Brantford continues to grow and evolve, brick masonry remains a vital element in maintaining the city’s unique character. By preserving historical structures, incorporating brick into new developments, and celebrating the craft of masonry, Brantford ensures that its rich architectural heritage continues to shape its identity for generations to come.

8. Conclusion: The Enduring Legacy of Brick in Brantford

From the early days of settlement to the present, brick has been an integral part of Brantford’s story. The city’s brick buildings stand as testaments to its industrial heritage, architectural beauty, and the skill of generations of masons. As Brantford moves forward, the preservation and continued use of brick in both restoration and new construction ensure that this legacy endures.

The story of brick in Brantford is far from over. With ongoing efforts to preserve historical structures, adapt traditional techniques to modern needs, and incorporate sustainable practices, brick masonry continues to play a vital role in shaping the city’s built environment. As we look to the future, we can be confident that the rich tradition of brick masonry in Brantford will continue to evolve, adapt, and inspire, maintaining the unique character that makes this city truly special.

\n\n\n

What is your return policy?

Our return policy allows items to be returned within 30 days of purchase with a valid receipt.

How long does shipping take?

Shipping typically takes 5-7 business days depending on your location.

Do you offer international shipping?

Yes, we offer international shipping to select countries. Please check our shipping policy for more details.

Can I track my order?

Yes, once your order has shipped, you will receive a tracking number via email.

What payment methods do you accept?

We accept various payment methods including credit cards, PayPal, and bank transfers.

DIY vs. Professional Brick Repair for Your Garage: Making the Right Choice

When it comes to maintaining your home’s exterior, your garage’s brickwork plays a crucial role in both aesthetics and structural integrity. Over time, weathering, settling, and other factors can lead to damage that requires repair. As a homeowner, you may find yourself wondering whether to tackle the brick repair yourself or call in the professionals. In this comprehensive guide, we’ll explore the factors to consider when making this decision, helping you choose the best approach for your garage’s brick repair needs.

Assessing the Extent of Damage

Before deciding between DIY and professional repair, it’s essential to accurately assess the extent of the damage to your garage’s brickwork. Here are some key factors to consider:

Types of Brick Damage

  • Cracking: Small, hairline cracks vs. large, structural cracks
  • Mortar deterioration: Surface-level erosion vs. deep joint damage
  • Efflorescence: White, powdery deposits indicating moisture issues
  • Spalling: Flaking or peeling of the brick surface
  • Bulging or bowing walls: Signs of potential structural issues

Severity of Damage

The severity of the damage will play a significant role in determining whether a DIY approach is feasible:

  • Minor damage: Small cracks, limited mortar erosion, or isolated brick replacement may be suitable for DIY repair
  • Moderate damage: Multiple areas of deterioration or more extensive cracking may require professional assessment
  • Severe damage: Structural issues, large-scale deterioration, or water damage typically necessitate professional intervention

Location of Damage

Consider the location of the damage within your garage structure:

  • Easily accessible areas: Ground-level repairs may be more suitable for DIY attempts
  • High or hard-to-reach areas: Repairs requiring ladders or scaffolding are best left to professionals
  • Load-bearing walls: Any damage to structural elements should always be assessed by a professional

Tools and Skills Required for DIY Repairs

If you’re considering a DIY approach to brick repair, it’s important to understand the tools and skills necessary to complete the job effectively:

Essential Tools for Brick Repair

  • Masonry chisel and hammer
  • Angle grinder with masonry cutting wheel
  • Tuckpointing tools (jointing tools)
  • Mortar mixing tray and hoe
  • Masonry trowel
  • Level and plumb bob
  • Safety equipment (goggles, dust mask, gloves)

Required Skills and Knowledge

Successful DIY brick repair requires more than just the right tools. You’ll need to develop the following skills:

  • Proper mortar mixing techniques
  • Accurate matching of brick and mortar colors
  • Correct application of mortar and proper joint tooling
  • Understanding of brick patterns and bonding techniques
  • Ability to identify and address underlying moisture issues

Time and Patience

DIY brick repair can be time-consuming, especially for those new to masonry work. Be prepared to invest significant time in learning techniques, gathering materials, and carefully executing the repair process.

Risks of Improper DIY Repairs

While DIY brick repair can be tempting, it’s crucial to understand the potential risks associated with improper repairs:

Aesthetic Issues

  • Mismatched brick or mortar colors
  • Uneven or poorly finished mortar joints
  • Visible patches or inconsistent brick patterns

Structural Concerns

  • Inadequate bonding between new and existing brickwork
  • Improper load distribution in repaired areas
  • Failure to address underlying structural issues

Moisture-Related Problems

  • Incorrect mortar composition leading to water penetration
  • Failure to properly seal repaired areas against moisture
  • Overlooking existing water damage or drainage issues

Long-Term Consequences

Improper DIY repairs can lead to more severe problems down the line, including:

  • Accelerated deterioration of surrounding brickwork
  • Increased repair costs due to compounded damage
  • Potential safety hazards from compromised structural integrity

Benefits of Professional Masonry Services

Opting for professional brick repair services offers numerous advantages that can outweigh the initial cost savings of DIY repairs:

Expertise and Experience

  • In-depth knowledge of brick types, mortar compositions, and repair techniques
  • Ability to identify and address underlying issues contributing to brick damage
  • Experience in handling a wide range of repair scenarios

Quality Workmanship

  • Precise color matching for seamless repairs
  • Proper mortar mixing and application techniques
  • Attention to detail in finishing and weatherproofing

Time and Efficiency

  • Quick and accurate assessment of repair needs
  • Efficient execution of repairs, minimizing disruption to your property
  • Access to specialized tools and equipment for complex repairs

Warranties and Guarantees

  • Many professional services offer warranties on their work
  • Peace of mind knowing repairs are backed by expert guarantees
  • Potential for follow-up inspections and maintenance

Long-Term Cost Savings

  • Proper repairs can prevent future damage and extend the life of your brickwork
  • Avoiding the need for costly re-repairs due to DIY mistakes
  • Potential increase in property value through professional-quality maintenance

Cost Comparison: DIY vs. Professional Repairs

When deciding between DIY and professional brick repair, it’s important to consider the true costs associated with each option:

DIY Repair Costs

  1. Materials:
    • Bricks: $0.50 – $3 per brick
    • Mortar mix: $10 – $30 per bag
    • Tools: $100 – $500 for basic masonry tools
  2. Time investment:
    • Research and learning: 5-10 hours
    • Material acquisition: 2-4 hours
    • Actual repair work: 8-20 hours (depending on extent of damage)
  3. Potential additional costs:
    • Correcting mistakes: $50 – $500+
    • Rental equipment (if needed): $50 – $200 per day

Professional Repair Costs

  1. Labor and materials:
    • Minor repairs: $300 – $1,000
    • Moderate repairs: $1,000 – $3,500
    • Major repairs or rebuilding: $3,500 – $10,000+
  2. Additional services:
    • Structural assessment: $300 – $800
    • Waterproofing treatments: $500 – $1,500
  3. Long-term value:
    • Warranty coverage: Often included in service cost
    • Increased property value: Potential return on investment

Factors Influencing Cost

  • Extent and type of damage
  • Accessibility of the repair area
  • Quality of materials used
  • Local labor and material costs
  • Complexity of the repair (e.g., matching historic brickwork)

Making the Right Choice for Your Garage

When deciding between DIY and professional brick repair for your garage, consider the following factors:

  • Severity of damage: Minor repairs may be suitable for DIY, while moderate to severe damage requires professional attention
  • Your skill level and experience: Be honest about your masonry abilities and willingness to learn
  • Time availability: Ensure you have sufficient time to complete the repair properly
  • Budget considerations: Weigh the true costs of DIY vs. professional repair, including potential long-term savings
  • Property value: Consider the impact of repair quality on your home’s overall value
  • Safety concerns: Prioritize structural integrity and personal safety when making your decision

Conclusion

Deciding between DIY and professional brick repair for your garage requires careful consideration of various factors, including the extent of damage, your personal skills and resources, and the potential risks and benefits of each approach. While minor repairs may be suitable for confident DIY enthusiasts, it’s often wise to consult with a professional masonry service for a thorough assessment and expert advice.

Remember that your garage’s brickwork plays a crucial role in both the aesthetics and structural integrity of your home. By making an informed decision about repair methods, you can ensure the longevity and value of your property while maintaining its beautiful brick exterior.

If you’re unsure about the best approach for your garage’s brick repair needs, don’t hesitate to reach out to a reputable masonry professional for guidance. Their expertise can help you make the right choice and achieve lasting results for your home.

\n\n\n

What should I consider before deciding between DIY and professional brick repair for my garage?

Evaluate the extent and severity of the damage, your skills and experience, available time, budget considerations, property value, and safety concerns.

What types of brick damage should I look for?

Key types of brick damage include cracking, mortar deterioration, efflorescence, spalling, and bulging or bowing walls.

What tools do I need for DIY brick repair?

Essential tools include a masonry chisel, angle grinder, tuckpointing tools, mortar mixing tray, masonry trowel, level, and necessary safety equipment.

What skills are necessary for successful DIY brick repair?

You need skills in mortar mixing, color matching, proper application techniques, understanding brick patterns, and identifying moisture issues.

What are the risks of improper DIY brick repairs?

Improper repairs can result in aesthetic issues, structural problems, moisture-related concerns, and long-term consequences like increased repair costs and safety hazards.

What are the benefits of hiring professional masonry services?

Professionals offer expertise, quality workmanship, efficiency, warranties, and long-term cost savings by ensuring proper repairs that extend the life of your brickwork.

How do the costs of DIY repairs compare to professional services?

DIY costs include materials and tools, with potential time and additional expenses for mistakes, while professional repairs typically range from $300 to over $10,000 depending on the severity of damage.

What factors influence the cost of both DIY and professional repairs?

Factors include the extent and type of damage, accessibility, quality of materials, local costs, and the complexity of the repair.

What should I do if I am unsure about my ability to repair brickwork?

If uncertain, it’s advisable to consult a reputable masonry professional for guidance and a thorough assessment of your garage’s brick repair needs.

5 Signs Your Garage’s Brick Needs Immediate Attention

Your garage is more than just a place to park your car or store your tools. It’s an integral part of your home’s structure and curb appeal. However, like any other part of your house, your garage’s brick exterior can suffer wear and tear over time. Identifying and addressing brick damage early can save you from costly repairs down the line. In this comprehensive guide, we’ll explore five critical signs that indicate your garage’s brick needs immediate attention from a professional.

1. Visible Cracks and Their Implications

One of the most obvious signs of brick damage is the presence of visible cracks. However, not all cracks are created equal, and understanding their implications is crucial for proper maintenance.

Types of Cracks and What They Mean

  • Hairline cracks: These thin, barely visible cracks are often caused by natural settling and may not be a cause for immediate concern. However, they should be monitored for potential expansion.
  • Stair-step cracks: These cracks follow the mortar lines in a stair-step pattern and can indicate foundation issues or structural problems.
  • Vertical cracks: Running straight up and down, these cracks might be caused by thermal expansion or foundation settlement.
  • Horizontal cracks: Perhaps the most concerning, horizontal cracks can signify serious structural issues, often related to water damage or soil pressure.

While small cracks might seem insignificant, they can quickly escalate into larger problems if left unaddressed. Cracks provide entry points for moisture, which can lead to further damage, especially in areas with freeze-thaw cycles.

When to Worry About Cracks

As a general rule, any crack wider than 1/8 inch or that appears to be growing should be evaluated by a professional. Additionally, if you notice multiple cracks or cracks accompanied by other signs of damage, it’s time to call in an expert.

2. Moisture-Related Damage Indicators

Water is one of brick’s greatest enemies. Excessive moisture can lead to a host of problems that can compromise the integrity of your garage’s brick structure.

Signs of Moisture Damage

  • Efflorescence: This white, powdery substance on the brick surface is caused by salt deposits left behind as water evaporates. While not harmful in itself, it indicates that water is penetrating the brick.
  • Spalling: When you see flakes or chunks of brick falling off, this is called spalling. It’s often caused by water freezing and expanding within the brick, causing the surface to peel away.
  • Mold or mildew growth: The presence of mold or mildew on brick surfaces, especially in shaded areas, indicates persistent moisture issues.
  • Staining or discoloration: Dark patches or streaks on the brick can be a sign of water damage or improper drainage.

Addressing Moisture Issues

Dealing with moisture-related damage often involves more than just repairing the brick. It’s crucial to identify and address the source of the moisture. This might include:

  1. Improving drainage around the garage foundation
  2. Repairing or replacing damaged gutters and downspouts
  3. Applying appropriate sealants to protect the brick from water infiltration
  4. Addressing any plumbing leaks that might be contributing to the problem

3. Structural Red Flags

While some brick damage is cosmetic, certain signs can indicate more serious structural issues that require immediate attention.

Warning Signs of Structural Problems

  • Bowing or bulging walls: If you notice that sections of your garage’s brick wall are pushing outward, this could indicate serious structural instability.
  • Separation from window or door frames: Gaps between the brick and door or window frames can signify foundation settlement or other structural shifts.
  • Diagonal cracks at corners: These cracks often start at the corners of doors or windows and can indicate foundation problems or uneven settling.
  • Mortar deterioration: If the mortar between bricks is crumbling or missing in large areas, it can compromise the wall’s structural integrity.

The Importance of Professional Assessment

Structural issues with brick can be complex and often require specialized knowledge to diagnose and repair correctly. A professional brick repair expert can:

  • Conduct a thorough inspection to determine the extent of the damage
  • Use specialized tools to assess the structural integrity of the wall
  • Recommend appropriate repair strategies, which might include reinforcement, rebuilding, or underpinning
  • Address underlying issues to prevent future damage

4. Impact of Neglecting Brick Damage

Ignoring signs of brick damage can lead to a cascade of problems that extend far beyond aesthetics. Understanding the potential consequences can help homeowners prioritize necessary repairs.

Short-Term Consequences

  • Decreased curb appeal: Visible brick damage can significantly detract from your home’s appearance and potentially lower its value.
  • Energy inefficiency: Cracks and gaps in brick walls can lead to drafts and increased energy costs for heating and cooling.
  • Water infiltration: Even small cracks can allow water to penetrate, potentially damaging the interior of your garage or leading to mold growth.

Long-Term Consequences

  • Structural instability: Unchecked brick damage can compromise the structural integrity of your garage, potentially leading to collapse in severe cases.
  • Extensive repair costs: What starts as a minor repair can escalate into a major renovation project if left unaddressed.
  • Health hazards: Persistent moisture issues can lead to mold growth, which can pose health risks to you and your family.
  • Property value decline: Significant brick damage can substantially reduce your home’s market value and make it harder to sell.

The Cost of Delay

While it might be tempting to put off brick repairs due to cost concerns, the expense of addressing damage typically increases the longer you wait. Early intervention can often prevent minor issues from becoming major structural problems, saving you money in the long run.

5. When to Seek Professional Help

While some minor brick maintenance tasks can be DIY projects, many brick repair issues require professional expertise. Knowing when to call in the experts is crucial for ensuring the longevity and safety of your garage’s brick structure.

Signs It’s Time to Call a Professional

  • Widespread or growing cracks: If you notice multiple cracks or cracks that seem to be expanding, it’s time for a professional assessment.
  • Structural concerns: Any signs of bowing, bulging, or separation in the brick wall warrant immediate professional attention.
  • Extensive water damage: If you’re dealing with significant efflorescence, spalling, or other moisture-related issues, a professional can help address both the symptoms and the underlying causes.
  • Mortar deterioration: While minor repointing can be a DIY task, extensive mortar damage often requires professional expertise to ensure proper repair.
  • Age-related concerns: If your garage is more than 50 years old and hasn’t had recent brick maintenance, it’s wise to have a professional inspection to catch any developing issues.

Benefits of Professional Brick Repair

Hiring a professional brick repair service offers several advantages:

  1. Expertise and experience: Professionals have the knowledge to accurately diagnose issues and implement effective solutions.
  2. Proper tools and materials: Professional brick repair services have access to specialized equipment and high-quality materials that ensure lasting repairs.
  3. Comprehensive solutions: Experts can address not just the visible damage but also underlying issues to prevent future problems.
  4. Time and cost efficiency: While it might seem more expensive upfront, professional repairs can save you time and money in the long run by preventing more serious damage.
  5. Warranty and guarantees: Many professional services offer warranties on their work, providing peace of mind and protection for your investment.

Conclusion

Your garage’s brick exterior plays a crucial role in both the aesthetics and structural integrity of your home. By being vigilant and recognizing the five key signs of brick damage – visible cracks, moisture-related issues, structural red flags, the impact of neglect, and knowing when to seek professional help – you can protect your property and avoid costly repairs down the line.

Remember, when it comes to brick repair, early intervention is key. If you notice any of these signs or have concerns about your garage’s brick condition, don’t hesitate to consult with a professional brick repair service. With proper care and maintenance, your garage’s brick can continue to provide beauty and protection for years to come.

\n\n\n

What are the primary signs that my garage’s brick needs attention?

The primary signs include visible cracks, moisture-related damage, structural red flags, consequences of neglect, and knowing when to seek professional help.

What types of cracks should I look for in my garage’s brick walls?

You should look for hairline cracks, stair-step cracks, vertical cracks, and horizontal cracks, each indicating different levels of concern regarding structural integrity.

How can I identify moisture-related damage in my garage’s brick?

Moisture-related damage can be identified by signs such as efflorescence (white powdery substance), spalling (flakes or chunks of brick), mold or mildew growth, and discoloration or staining on the brick surface.

What should I do if I notice structural red flags in my garage’s brick walls?

If you notice bowing or bulging walls, separation from window or door frames, diagonal cracks at corners, or mortar deterioration, you should seek immediate professional help to assess and address these issues.

What are the potential consequences of neglecting brick damage?

Neglecting brick damage can lead to decreased curb appeal, energy inefficiency, water infiltration, structural instability, extensive repair costs, health hazards from mold, and a decline in property value.

When is it time to call a professional for brick repair?

You should call a professional if you notice widespread or growing cracks, structural concerns, extensive water damage, significant mortar deterioration, or if your garage is over 50 years old without recent maintenance.

What are the benefits of hiring a professional brick repair service?

Benefits include expertise in diagnosing issues, access to proper tools and materials, comprehensive solutions addressing both visible and hidden problems, time and cost efficiency, and potential warranties on work performed.

How can I prevent moisture damage in my garage’s brick structure?

To prevent moisture damage, improve drainage around the foundation, repair gutters and downspouts, apply sealants, and address any plumbing leaks contributing to the moisture issue.

What types of cracks require immediate professional evaluation?

Any cracks wider than 1/8 inch, cracks that appear to be growing, or multiple cracks appearing alongside other damage should be evaluated by a professional.

What can homeowners do to maintain their garage’s brick exterior?

Homeowners can regularly inspect for cracks and moisture damage, improve drainage, maintain gutters, and perform minor repairs, but should consult professionals for significant issues.

Enhancing Energy Efficiency in Your Historic Brick Home: A Delicate Balance

Owning a historic brick home is a point of pride for many homeowners. These architectural treasures offer unique charm, character, and a connection to the past that modern structures simply can’t replicate. However, when it comes to energy efficiency, older homes often fall short of contemporary standards. The challenge lies in improving energy performance without compromising the historic integrity of your beloved brick abode. In this comprehensive guide, we’ll explore methods to strike that delicate balance, ensuring your home is both efficient and true to its roots.

1. Non-invasive Insulation Options for Brick Structures

One of the most significant factors affecting energy efficiency in historic homes is inadequate insulation. However, adding insulation to a brick structure requires careful consideration to avoid damaging the building’s historic fabric.

Blown-in Insulation

Blown-in insulation is a popular choice for historic brick homes due to its non-invasive nature. This method involves injecting insulation materials into wall cavities through small holes, which can be easily patched afterward.

  • Cellulose: Made from recycled paper products, cellulose is an eco-friendly option that can be blown into wall cavities.
  • Fiberglass: Another common choice, fiberglass can be blown into walls and attics to improve insulation.
  • Mineral Wool: This fire-resistant material is excellent for both thermal and sound insulation.

When considering blown-in insulation, it’s crucial to assess the condition of your brick walls and ensure they are free from moisture issues before proceeding.

Interior Insulation Methods

For homes where external modifications are restricted due to preservation requirements, interior insulation methods can be effective:

  • Rigid Foam Boards: These can be applied to interior walls and covered with drywall.
  • Spray Foam: While more invasive, spray foam can provide excellent insulation in hard-to-reach areas.
  • Radiant Barriers: These can be installed in attics to reflect heat and improve overall energy efficiency.

Remember that adding interior insulation may slightly reduce room dimensions and could affect historic moldings or trim. Always consult with a preservation specialist before making significant changes.

2. Addressing Air Leaks Without Damaging Historic Materials

Air leaks can significantly impact your home’s energy efficiency. In historic brick homes, these leaks often occur around windows, doors, and where different materials meet. Addressing these issues requires a gentle touch to preserve original features.

Identifying Air Leaks

Before you can fix air leaks, you need to find them. Some methods include:

  • Visual Inspection: Look for gaps, cracks, or areas where daylight is visible from inside.
  • Smoke Test: Use incense or a smoke pencil to detect air movement near potential leak areas.
  • Thermal Imaging: Professional energy auditors can use thermal cameras to identify areas of heat loss.

Sealing Techniques for Historic Homes

Once you’ve identified the leaks, use these preservation-friendly sealing methods:

  1. Weatherstripping: Add weatherstripping to doors and windows to create a tighter seal.
  2. Caulking: Use appropriate caulk to seal small gaps around windows, doors, and other openings.
  3. Draft Stoppers: Place fabric draft stoppers at the base of doors to prevent air infiltration.
  4. Chimney Balloons: Install removable chimney balloons to prevent heat loss when fireplaces are not in use.

When sealing, always use materials that are compatible with your home’s historic elements and can be easily removed if necessary.

3. Upgrading Windows and Doors in Historic Homes

Windows and doors are often the weakest points in a home’s thermal envelope. In historic homes, these elements are also frequently key architectural features that contribute to the building’s character.

Window Restoration vs. Replacement

Before considering replacement, explore restoration options for your historic windows:

  • Weather Stripping: Add or replace weather stripping to improve the seal.
  • Storm Windows: Install interior or exterior storm windows for added insulation.
  • Glazing: Re-glaze windows to ensure a proper seal between the glass and frame.
  • Repairs: Address rot, loose joints, or other issues to improve functionality and efficiency.

If replacement is necessary, look for high-quality, energy-efficient windows that match the style and proportions of the originals. Many manufacturers offer historic replicas with modern energy-saving features.

Door Upgrades

Historic doors can often be upgraded to improve energy efficiency:

  • Weather Stripping: Add or replace weather stripping around the door frame.
  • Threshold Seals: Install adjustable threshold seals to close gaps at the bottom of doors.
  • Storm Doors: Add storm doors for an extra layer of insulation.
  • Door Sweeps: Install door sweeps to prevent drafts from entering beneath the door.

If a door is beyond repair, seek out a replacement that matches the original in style and materials while offering improved energy performance.

4. Incorporating Modern HVAC Systems Sensitively

Updating the heating, ventilation, and air conditioning (HVAC) system in a historic home can dramatically improve energy efficiency. However, installation must be done carefully to minimize impact on the building’s historic fabric.

Choosing the Right HVAC System

Consider these energy-efficient options that can be integrated with minimal disruption:

  • Ductless Mini-Split Systems: These require only small wall penetrations and can be zoned for different areas of the home.
  • High-Velocity Systems: These use smaller ducts that can be more easily retrofitted into historic structures.
  • Radiant Floor Heating: This can be installed under new flooring or in some cases, retrofitted beneath existing floors.
  • Geothermal Systems: While more invasive to install, these systems offer excellent efficiency and can be a good long-term investment.

Sensitive Installation Techniques

When installing new HVAC systems, consider these approaches to minimize impact:

  1. Utilize existing chases, closets, or other hidden spaces for running ductwork or piping.
  2. Place outdoor units in inconspicuous locations to maintain the home’s historic appearance.
  3. Use period-appropriate grilles and registers that blend with the home’s aesthetic.
  4. Consider a phased approach to installation to spread out costs and disruption.

5. Balancing Efficiency with Preservation Requirements

When improving energy efficiency in a historic brick home, it’s essential to balance modernization with preservation. This often involves navigating local historic preservation guidelines and regulations.

Understanding Preservation Guidelines

Before undertaking any efficiency upgrades:

  • Research local historic district regulations and guidelines.
  • Consult with your local historic preservation office or commission.
  • Understand which features of your home are considered character-defining and must be preserved.
  • Familiarize yourself with the Secretary of the Interior’s Standards for Rehabilitation, which often inform local guidelines.

Working with Preservation Experts

To ensure your energy efficiency improvements align with preservation best practices:

  1. Engage an architect or contractor experienced in historic preservation.
  2. Consult with energy efficiency specialists who understand the unique challenges of historic structures.
  3. Consider hiring a preservation consultant to help navigate regulations and develop appropriate solutions.
  4. Document all changes and maintain records of original features for future reference.

Conclusion

Enhancing the energy efficiency of your historic brick home is a worthy endeavor that requires careful planning and execution. By focusing on non-invasive insulation methods, addressing air leaks sensitively, upgrading windows and doors thoughtfully, incorporating modern HVAC systems carefully, and balancing efficiency with preservation requirements, you can significantly improve your home’s energy performance while maintaining its historic character.

Remember that every historic home is unique, and what works for one may not be suitable for another. Always consult with professionals experienced in both energy efficiency and historic preservation to develop a tailored approach for your beloved brick home. With the right strategies, you can enjoy the charm of the past combined with the comfort and efficiency of the present, ensuring your historic home remains a treasured part of your community for generations to come.

\n\n\n

What are some energy efficiency challenges of historic brick homes?

Historic brick homes often lack adequate insulation and can have significant air leaks, making them less energy-efficient compared to modern homes.

What non-invasive insulation options are available for brick structures?

Non-invasive insulation options include blown-in insulation (like cellulose, fiberglass, and mineral wool) and interior insulation methods such as rigid foam boards, spray foam, and radiant barriers.

How can homeowners identify air leaks in their historic homes?

Homeowners can identify air leaks through visual inspection, smoke tests, or by using thermal imaging provided by professional energy auditors.

What are some sealing techniques for air leaks in historic homes?

Sealing techniques include using weatherstripping on doors and windows, caulking gaps, installing draft stoppers, and using removable chimney balloons to prevent heat loss.

Should historic windows be restored or replaced for better energy efficiency?

Before replacing, homeowners should consider restoration options like adding weather stripping, installing storm windows, and repairing existing frames to improve energy efficiency while preserving character.

What modern HVAC options are suitable for historic homes?

Energy-efficient HVAC options include ductless mini-split systems, high-velocity systems, radiant floor heating, and geothermal systems, all designed to minimize disruption to historic features.

What should homeowners know about preservation guidelines before making energy upgrades?

Homeowners should research local historic district regulations, consult preservation offices, and understand which features must be preserved according to the Secretary of the Interior’s Standards for Rehabilitation.

How can homeowners ensure proper energy efficiency improvements align with preservation efforts?

It is advisable to work with preservation experts, energy efficiency specialists, and to document all changes made to maintain compliance with historic preservation standards.

What is the overall goal of upgrading energy efficiency in historic brick homes?

The goal is to improve energy performance while maintaining the historic character of the home, allowing for a combination of modern comfort and historical integrity.

The Rich History of Masonry in Brantford, Ontario: From Joseph Brant to Modern Craftsmanship

Brantford, Ontario, a city steeped in history and architectural beauty, owes much of its character to the skilled masons who have shaped its landscape over the centuries. From the early days of Joseph Brant to the modern preservation efforts, masonry has played a pivotal role in defining Brantford’s identity. In this comprehensive exploration, we’ll journey through time to uncover the fascinating story of masonry in Brantford and its enduring impact on the community.

1. Introduction to Masonry in Brantford

Masonry, the art and craft of building structures from individual units of stone, brick, or concrete, has been an integral part of human civilization for thousands of years. In Brantford, this ancient craft has left an indelible mark on the city’s architecture and culture.

Founded in 1784 by Captain Joseph Brant, Brantford has a rich history that intertwines with the development of masonry in the region. The city’s growth from a small settlement to a thriving industrial center is reflected in its diverse array of masonry structures, each telling a story of the era in which it was built.

2. Early Masonry in Brantford (Late 18th – Early 19th Century)

2.1 Joseph Brant and the first recorded masons

Joseph Brant, also known by his Mohawk name Thayendanegea, was not only the founder of Brantford but also one of the first recorded masons in the area. His influence extended beyond leadership and diplomacy to the very foundations of the city’s built environment.

Brant’s involvement in masonry set the stage for the craft’s development in the region. As a Freemason himself, he likely encouraged the spread of masonic principles and practices, which often went hand-in-hand with the physical craft of masonry.

2.2 Influence of Indigenous craftsmanship

The early masonry in Brantford was not solely a European import. Indigenous craftsmanship, particularly that of the Six Nations, played a significant role in shaping the early built environment. Traditional techniques for working with stone and creating sturdy structures influenced the development of masonry in the region.

2.3 Early stone structures and their significance

Some of the earliest masonry structures in Brantford were simple yet sturdy buildings made from locally sourced materials. These early structures, while often modest, laid the groundwork for the more elaborate masonry that would follow. Churches, government buildings, and private residences were among the first to showcase the potential of masonry construction in the area.

3. The Rise of Freemasonry in Brantford (19th Century)

3.1 Establishment of Brant Lodge No. 45

The establishment of Brant Lodge No. 45 in 1820 marked a significant milestone in Brantford’s masonic history. As one of the oldest Masonic lodges in Ontario, it played a crucial role in fostering the growth of both Freemasonry and the masonry craft in the city.

3.2 Notable Freemasons and their contributions to the city

Many prominent Brantford citizens were members of the Masonic lodge, including businessmen, politicians, and craftsmen. These individuals often used their influence and resources to support the development of the city, including the construction of significant masonry buildings.

3.3 The Masonic Temple Building and its history

The Masonic Temple Building, constructed in 1911, stands as a testament to the influence of Freemasonry on Brantford’s architectural landscape. This impressive structure, with its intricate masonry work, served as a hub for the Masonic community until 1945 and remains an important part of Brantford’s architectural heritage.

4. Masonry in Brantford’s Architecture (19th – 20th Century)

4.1 Prominent masonry buildings and landmarks

Brantford’s cityscape is dotted with remarkable masonry structures that showcase the evolution of the craft. Some notable examples include:

  • The Brant County Courthouse (1852)
  • Victoria Park Square (1861)
  • The Carnegie Library (1904)
  • The Bell Telephone Memorial (1917)

Each of these landmarks demonstrates the versatility and durability of masonry construction, as well as the skill of Brantford’s masons throughout history.

4.2 Evolution of masonry techniques and styles

As Brantford grew and prospered, masonry techniques and styles evolved to meet changing tastes and technological advancements. From the simple stone structures of the early 19th century to the ornate Victorian-era buildings and later Art Deco influences, Brantford’s masonry reflects the broader trends in North American architecture.

4.3 The role of stone masons in shaping Brantford’s cityscape

Stone masons played a crucial role in bringing architectural visions to life. Their skill and craftsmanship can be seen in the intricate details of Brantford’s historic buildings, from decorative cornices to precisely laid brickwork. These artisans were instrumental in creating the unique character that defines Brantford’s built heritage.

5. Modern Masonry in Brantford (Late 20th Century – Present)

5.1 Preservation and restoration of historic masonry structures

In recent decades, there has been a growing appreciation for Brantford’s masonry heritage. Preservation and restoration efforts have become a priority, with organizations and skilled professionals working to maintain the city’s historic structures. Companies like Fix My Brick play a vital role in these efforts, employing both traditional techniques and modern technologies to ensure the longevity of Brantford’s masonry buildings.

5.2 Contemporary masonry projects and innovations

While preservation is important, masonry in Brantford continues to evolve. Contemporary projects incorporate new materials and techniques while often paying homage to the city’s rich masonry tradition. Sustainable practices and energy-efficient designs are being integrated into modern masonry construction, demonstrating the adaptability of this ancient craft.

5.3 The importance of masonry in maintaining Brantford’s heritage

Masonry is more than just a construction technique in Brantford; it’s a link to the city’s past and a foundation for its future. The preservation and continued use of masonry in both old and new buildings help maintain Brantford’s unique character and sense of place.

6. The Future of Masonry in Brantford

6.1 Challenges and opportunities for the craft

As Brantford continues to grow and change, masonry faces both challenges and opportunities. The need for skilled masons to maintain historic structures is increasing, while new construction projects offer chances to innovate and adapt the craft for modern needs.

6.2 Training and apprenticeship programs

To ensure the future of masonry in Brantford, training and apprenticeship programs are crucial. Local institutions and organizations are working to pass on traditional skills while also teaching new techniques and technologies relevant to modern masonry practice.

6.3 Sustainable masonry practices

The future of masonry in Brantford is increasingly focused on sustainability. From the use of recycled materials to energy-efficient design principles, masons are finding ways to make this ancient craft environmentally friendly and relevant for the 21st century.

7. Conclusion: The Enduring Legacy of Masonry in Brantford

From the early days of Joseph Brant to the present, masonry has been an integral part of Brantford’s story. The craft has not only shaped the physical landscape of the city but has also contributed to its cultural identity and sense of community. As we look to the future, it’s clear that masonry will continue to play a vital role in preserving Brantford’s heritage while also contributing to its ongoing development.

The rich history of masonry in Brantford is a testament to the skill, creativity, and dedication of generations of craftsmen. As we walk the streets of this historic city, we are surrounded by their legacy – in the sturdy walls of century-old buildings, the intricate details of restored facades, and the innovative designs of new structures.

For those interested in learning more about Brantford’s masonry heritage or seeking expert assistance with masonry restoration and repair, companies like Fix My Brick stand ready to share their knowledge and expertise. Together, we can ensure that the art and craft of masonry continues to thrive in Brantford for generations to come.

\n\n\n

What role has masonry played in shaping Brantford’s identity?

Masonry has significantly influenced the architectural landscape and cultural identity of Brantford, marking the city’s growth from a small settlement to an industrial center through its diverse array of masonry structures.

Who was Joseph Brant and what was his contribution to masonry in Brantford?

Joseph Brant, the founder of Brantford, was one of the first recorded masons in the area and played a crucial role in establishing masonry as a key craft in the region, influenced by his Freemason background.

What significant masonry structures were built in Brantford during the 19th century?

Notable masonry landmarks from the 19th century include the Brant County Courthouse (1852), Victoria Park Square (1861), and the Carnegie Library (1904), each showcasing the craftsmanship and evolution of masonry in the city.

What is the significance of Brant Lodge No. 45?

Established in 1820, Brant Lodge No. 45 is one of Ontario’s oldest Masonic lodges and has been pivotal in supporting the development of both Freemasonry and masonry craft within Brantford.

How has modern masonry in Brantford evolved?

Modern masonry in Brantford has focused on preservation and restoration of historic structures while incorporating contemporary innovations, sustainable practices, and energy-efficient designs in new masonry projects.

What challenges does masonry face in Brantford today?

Masonry in Brantford faces challenges related to the need for skilled masons for maintenance and restoration, as well as opportunities presented by new construction projects that require adaptation of traditional techniques to modern needs.

What training programs are in place to support the future of masonry in Brantford?

Training and apprenticeship programs are being developed by local institutions to ensure that traditional masonry skills are passed down while also teaching modern techniques relevant to the current construction landscape.

What is the importance of preserving masonry heritage in Brantford?

Preserving masonry heritage is vital for maintaining Brantford’s unique character and sense of place, linking the city’s past to its future through continued use and restoration of historic masonry buildings.

How does masonry contribute to Brantford’s community?

Masonry contributes to Brantford’s community by shaping its physical environment and providing a sense of identity, reflecting the skill and creativity of generations of craftsmen.

Where can individuals seek assistance for masonry restoration in Brantford?

Individuals seeking masonry restoration assistance can contact companies like Fix My Brick, which provide expertise in maintaining Brantford’s historic masonry structures.

How to Choose Between DIY and Professional Brick Repair Techniques

DIY Brick Repair and Replacement

To mend your brickwork, you can choose to go the DIY route instead of hiring a professional mason. We present “DIY Brick Repair and Replacement” with “Pros and Cons of DIY Brick Repair, Required Tools for DIY Brick Repair, Basic Steps for DIY Brick Repair, and Common Mistakes in DIY Brick Repair” as solutions. These sub-sections can provide crucial insights into the feasibility of fixing your brickwork independently.

Pros and Cons of DIY Brick Repair

Considering DIY brick repair? Weigh the pros and cons.

  • Pros: Cost-effective & customizable.
  • Cons: No experience could lead to improper repairs & safety hazards.
  • Pros: Sense of accomplishment & learning opps.
  • Cons: Mistakes can create further damage & need for prof. repairs.

Tools & knowledge? Necessary. Failing to address moisture issues? Bad news. Plus, safety first – gloves & eye protection needed. Secure support structures before repairs too.

Pro Tip: Label bricks according to wall location for easy rebuilding. Bob the Builder’s got nothin’ on you with these essential tools for DIY brick repair.

Required Tools for DIY Brick Repair

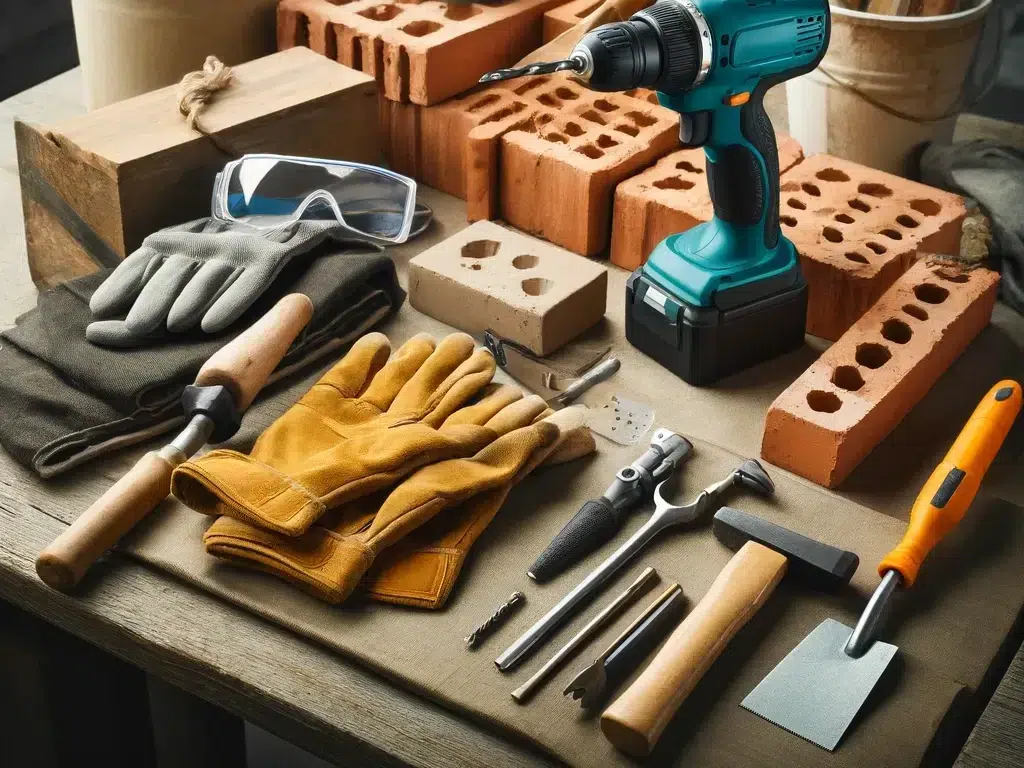
For DIY brick repair and replacement, you’ll need the following tools:

  • Brick chisel and hammer
  • Masonry drill bit and drill
  • Trowel
  • Gloves and safety glasses
  • Mortar mix
  • Water
Some of the tools used for DIY brick repair.

Beginners should start small and check the condition of existing mortar before starting. Work slowly and carefully, matching the style and color of existing bricks.

Fun fact: ox blood was used in medieval mortar to improve durability and strength. However, this isn’t done anymore due to technological advances and animal welfare. So, get your tools ready and start fixing!

Basic Steps for DIY Brick Repair

Brick repair and replacement can be tough, but it’s not impossible! Here are the steps to help you do it yourself.

  1. Examine Damage: Check the damage to see if repair or replacement is needed.
  2. Get Supplies: Buy brick adhesive, mortar mix, tuck-pointing tool, hammer, chisel, sandpaper, and safety gear.
  3. Clean Brick Surface: Use a wire brush to remove any loose debris from the area to fix.
  4. Do Repairs: For minor damage, use adhesive with a caulking gun or fill with mortar using a trowel. For bigger damage, replace entire bricks using a tuck-pointing technique.
  5. Touch Ups: After making repairs/replacements, smooth out rough edges/excess mortar using sandpaper.

Remember, every brick structure is unique and might require different repair/replacement methods. Plus, always wear safety gear when working with bricks to prevent injuries from debris or chemicals. Don’t be that person who uses bubble gum and duct tape – avoid those mistakes!

Common Mistakes in DIY Brick Repair

DIY brick repair can save some cash, but beware of mistakes that could cost more than the repair itself!

Using the wrong mortar mix, overlooking structural issues, skipping the cleaning stage, and neglecting moisture sources are the most common mistakes made by DIY-ers.

Make sure the mortar type matches the brick’s composition and age.

Address underlying problems before repairing, and clean the surface for successful adhesion.

Check for moisture sources to ensure long-term durability.

For optimal results, take care in planning, execution, and attention to detail.

When in doubt, get advice from experts and use proper tools and materials.

Avoid these common mistakes for a successful DIY project!

Professional Brick Repair and Replacement

To ensure the proper repair and replacement of bricks, you need a professional mason. Hiring a professional can bring many benefits, such as quick and efficient work. Different types of professional masonry services are also available, depending on the level of repair needed. Understanding the factors that affect the cost of professional brick repair is vital before starting the project.

Benefits of Hiring a Professional Mason

As a property owner, it is essential to source the right professionals for brick repairs. Hiring a professional mason can bring several benefits, such as:

  • Improved Workmanship – They can precisely analyze the damages and match existing bricks with new replacements.
  • Cost Savings – Professional masons can identify risks and suggest quality materials for long-term solutions.
  • Time-Saving – Outsourcing brick repair services to experts can avoid disruptions due to lack of knowledge.
  • Safety Compliance – Professional masons use proper safety gear and adhere to safety regulations.

Moreover, they provide updates on progress and any necessary changes. Investing in expert brick repair services is recommended for years-long solutions. Make sure to check the credentials of masonry companies before starting any work.

Did you know that the first bricks were made thousands of years ago by Mesopotamians? Despite being made long ago, their foundation helped create modern-day well-engineered bricks. From chimney repairs to patio installations, these masonry services will have your bricks and blocks looking great.

Types of Professional Masonry Services

Professional Masonry Repair and Replacement Services offer lots of enhancements to make brick structures look better, safer, and work better. These services are a must for keeping homes, commercial buildings, and public spaces in tip-top shape.

  • Brick Repair: Fix chipped, cracked, or damaged bricks so they blend in.
  • Brick Replacement: Swap out crumbling or missing bricks for stability.
  • Tuckpointing: Refresh tumbled mortar joints to match the original color.

Expert masons use modern and traditional techniques with high-quality materials. Their work stands the test of time.

Don’t let your property deteriorate – get Professional Masonry Repair and Replacement Services now! Want to save? Pray for sunny weather and no supernatural disturbances!

Factors that Affect the Cost of Professional Brick Repair

Professional Brick Repair and Replacement is a must to maintain a building’s structural integrity. Its cost varies, depending on several factors, such as damage extent, location, and repair needs.

To help understand these factors, we created a table with appropriate columns to show actual data. It shows info on pricing elements, like material costs, labor fees, location-based charges, and other associated costs.

Brick Repair Cost Breakdown:

Pricing ElementDescription
Material CostsCost of materials for repair
Labor FeesCharges for brick masons’ time
Location-Based ChargesAdditional charges based on area
Equipment Rental FeesCosts related to equipment for repair

Besides material costs and labor fees, other factors must be considered when assessing brick repair expenses. These include the need for special equipment or machinery due to challenging access or existing structures nearby.

Pro Tip: Before Choosing a Professional Brick Repair Service Provider, make sure they give you transparent pricing details, including all possible costs associated with the project. High-quality workmanship and total transparency in cost and pricing elements are important.

When it comes to professional brick repair and replacement, you gotta choose between pizza and tacos – both great, but one might just fit your needs better.

Choosing the Right Option for You

To make the right decision between DIY or professional brick repair, you need to evaluate several factors. Before deciding the right option for you, take into account factors such as your DIY skill level, the extent of brick damage, and deadline for repair. Comparing the cost and time between the two options is also essential to ensure you’re making an informed decision. In the following sub-sections, we’ll discuss each factor in detail, ultimately helping you make the final decision about whether to pursue DIY or professional brick repair.

Factors to Consider Before Deciding DIY or Professional Brick Repair

When pondering DIY vs. professional brick repair, numerous factors must be taken into account. These include the extent of damage, prior experience with masonry, equipment/materials availability, budget, timeframe, and safety risks.

Every case is different, so one factor may not work in all cases. Consider long-term viability when making a decision.

Ed, for example, opted for a DIY solution with his first home purchase due to budget constraints. Growing up, he had watched his father mend broken walls with manuals, and now, 3 years later, he has a strong grasp on masonry. His house still stands strong due to his DIY input.

When it comes to DIY brick repair, time may be money, but mistakes are priceless.

Comparing Cost and Time between DIY and Professional Brick Repair

Weigh the costs and time involved between DIY and professional services when considering brick repair. Compare expenses and duration for each option in the table below.

DIYProfessional
Cost ($)100-300500-1500
Duration (hours)8-162-8

DIY repair may save money, but it could result in extended downtime and more costs if not done right. Professional services might be pricey, but they come with experience and knowledge needed to get the job done right the first time.

Each repair job can vary in type and severity. Talk to a professional before deciding which option is best.

Forbes found that hiring pros for home repairs could increase property value by up to 10%. Investing in your property? Consider all possible outcomes before making a decision. Do-it-yourself brick repair? More like do-it-yourself disaster waiting to happen.

Final Decision: DIY or Professional Brick Repair

Choosing right for brick repair needs? Considerations are key! Here’s a few pointers:

  • Evaluate damage. Can you tackle it yourself? Or seek professional help?
  • DIY? Have the skills & tools? This could be cost-effective.
  • Professional Repair? Safer, efficient & no surrounding damages.
  • Costs? Cheaper isn’t always better. Inexpensive repairs can mean bigger problems later.
  • Maintenance & Prevention? After repairs, focus on these – and protect your investments.

When choosing DIY or Professional Brick Repair, think about expertise level, resources & more. One homeowner faced this dilemma when parts of their wall crumbled. After assessing, they realized a pro was best. The repairs were done well & at a good cost. Now they have peace of mind knowing leak repairs were expert certified. Future work is now safely secured.

Frequently Asked Questions

  1. What are the benefits of DIY brick repair and replacement?
    • There are a few benefits to doing the work yourself, including potential cost savings and the satisfaction of completing a project independently. Additionally, you may have more control over the timeline and design choices. However, it’s important to note that masonry work can be difficult and time-consuming, and mistakes can be very costly to fix.
  2. When should I consider hiring a professional mason?
    • If you’re dealing with serious damage, like significant cracks or structural issues, it’s probably best to leave the work to a professional. They’ll have the experience and expertise to evaluate the problem and come up with the best solution. Additionally, if you’re working on a larger project, it may be more efficient to let someone else handle it.
  3. How do I know if I have the necessary skills and tools to do brick repair on my own?
    • Brick repair requires a lot of specialized knowledge and tools, so it’s important to be honest with yourself about your abilities. If you don’t have experience working with masonry, it can be difficult to know where to start. Additionally, you’ll need a range of tools, including a trowel, brick hammer, and jointer. If you’re not sure whether you have what it takes, it’s better to err on the side of caution and hire a professional.
  4. What kind of preparation do I need to do before attempting brick repair or replacement?
    • Before you get started, it’s essential to evaluate the extent of the damage and come up with a plan of attack. You’ll need to gather all the necessary tools and materials, including the bricks themselves, mortar, and other supplies. It’s also important to make sure the work area is clean and free of debris.
  5. What are some common mistakes to avoid when attempting DIY brick repair?
    • One of the most common mistakes people make is failing to properly mix the mortar. This can lead to weak bonds and further damage to the structure. Additionally, it’s important to use the correct amount of mortar, as too much or too little can both cause problems. Other mistakes include using the wrong kind of brick, failing to properly prepare the surface, and not allowing enough time for the mortar to dry.
  6. When should I expect to hire a professional rather than attempt DIY brick repair or replacement?
    • If you’re dealing with a serious structural issue, like a crack in the foundation or significant damage to a load-bearing wall, you should always hire a professional. Additionally, if you don’t have experience working with brick or masonry, it’s usually best to let someone else handle the job. However, if you have some experience and are confident in your abilities, smaller repairs may be doable on your own.

Discover the Best Brick Porch Designs for Every Home Style

Types of Brick Porch Construction

To explore various options for brick porch construction, you can choose among solid brick porch construction, brick veneer porch construction, and combo brick porch construction. Each type has its own benefits and strengths that cater to specific requirements.

Solid Brick Porch Construction

For solid brick construction of porches, careful planning and execution is key. This will ensure the porch withstands different weather and lasts for years. Here is a 3-Step Guide:

  1. Prepare the Foundation: Dig and level the area. Pour concrete or lay large stones to form a durable base.
  2. Brick Laying: Start at the corner and work your way across. Use mortar between each row and make sure it is level.
  3. Finishing Touches: Add steps, railings and other aesthetic features for a beautiful and durable porch.

Solid brick porches are low maintenance and offer value to any property. Plus, they’ve been around since ancient times due to their robustness.[1]

Sources:
[1] Schumann, A., & Stempka, M. (2020). Brick – An Ancient Construction Material That Keeps Its Value Until Today. KGK-Kautschuk Gummi Kunststoffe, 73(12), 40-44.

For an extra touch of class, why not opt for a solid brick construction porch? It’s the perfect way to show off your butler!

Brick porch.

Brick Veneer Porch Construction

Enhance your porch with Brick Veneer! Here’s how:

  1. Prep & clean the porch’s surface.
  2. Add metal lath for support.
  3. Spread scratch coat mortar over the lath.
  4. Add brick veneer with setting bed mortar.
  5. Seal & finish with grout or pointing mortar.
  6. Clean up any excess debris.

You can get creative too! Make sure each brick is aligned & level for best results. Pro Tip: Stock up on supplies like bricks, adhesive, sealer, & pointing materials. Why not combine different types of brick to make your porch unique?

Combo Brick Porch Construction

For building a porch using a combo of bricks, there are several steps that help ensure stability and durability. The steps are as follows:

  1. Excavate and prep the site for the foundation.
  2. Lay and level the foundation with concrete.
  3. Erect pillars/posts to hold the roof.
  4. Brick walls around the pillars/posts, leaving openings for windows/doors.
  5. Mount a roofing system onto the pillars/posts to finish.

It’s key to make sure the whole structure is strong and balanced enough to handle different weather conditions, and it adds value to the property. Owners have the chance to test different designs and use different types of bricks available on the market.

Pro Tip: Talk to an engineer/architect to ensure safety standards and building codes are followed before beginning the project.

Choosing a brick porch construction is like choosing between a secure relationship and a short-term fling – each has its pros and cons.

Advantages and Disadvantages of Each Type

To compare the different brick porch construction types and help homeowners with masonry expertise make an informed decision, discuss the advantages and disadvantages of each type. We will take a closer look at solid brick porch construction, brick veneer porch construction, and combo brick porch construction for a comprehensive understanding of their respective usage and suitability.

Solid Brick Porch Construction

Solid Bricks are a sturdy option for porch construction and have been used for decades. However, they come with their own benefits and drawbacks.

Here’s a 5-Step Guide to construct a Solid Brick Porch:

  1. Design – Draw up the layout plan of your porch, taking measurements and steps to ensure you have the right materials.
  2. Excavate – Dig up the area for your porch, making sure the soil is flat and levelled.
  3. Gravel – Pour in gravel four inches thick, then place steel mesh and pour concrete.
  4. Lay Bricks – Best to hire someone experienced in installing bricks. Ensure they apply mortar to each brick’s side before pressing them into place.
  5. Finish Up – After all bricks are in place, apply two coats of sealer to prevent moisture damage.

Solid Bricks provide durability, though they may need additional maintenance as years go by. Over time, tuck-pointing or replacement may be needed due to weather elements.

Colonial times saw porches as a staple, often made of wood due to their lower cost. Why not have a brick veneer porch and feel like royalty while sitting on your throne?

Brick Veneer Porch Construction

Brick veneer construction uses bricks as an outer wall. Benefits include durability and beauty. But there are also cons to consider. Here’s a step-by-step guide:

  1. Plan out the porch design and location, ensuring it meets local codes.
  2. Set footers at each post.
  3. Build the wooden frame and roof according to plans.
  4. Apply a water-resistant barrier before laying the brick veneer.
  5. Mortar joints between bricks add strength.

Weight-bearing capability may be limited compared to other types of porches.

Pro Tip: Consult with experts in bricklaying and architecture first for successful brick veneer porch construction. Why settle for a brick porch when you can have the combo?

Combo Brick Porch Construction

Constructing a porch with a mix of brick and other materials? It’s called Mixed Material Porch Construction, and has advantages and drawbacks. Here’s our 4-step guide:

  1. Lay the foundation with concrete or stone.
  2. Frame it with wood, metal, or vinyl.
  3. Add brick veneer to the sides and front.
  4. Put in railings and lights.

Durability is a plus, but it’s pricier than other options. To stay cost-effective, use alternative materials that look like brick. Hire an experienced contractor, too, to avoid costly delays.

Mixing materials for a porch can be beneficial. Just remember to follow the steps and keep costs in check!

Factors to Consider

To effectively plan brick porch construction with different types suitable for your house, you need to consider three significant factors: climate, budget, and aesthetics. Weather adjustment is crucial to preventing premature damage, which relates to costs as well. Additionally, the style and design you choose can impact curb appeal.

Climate and Weather Conditions

The climate and atmospheric conditions of a place depend hugely on its location. Relative factors like temperature, humidity, rainfall and wind can differ widely in different areas. Specific phenomena like El Niño and La Niña can also have a great effect, leading to extremes such as heatwaves, heavy rains, etc.

To make the right decisions about living, working or investing in a region, it is wise to understand the historical data of its climate. This will give an idea of the seasonal variations in temperature, rainfall, etc. Moreover, modern weather-forecasting systems can provide short-term predictions which help with outdoor activities or harvest season decisions.

Climate Change has caused major shifts in world weather patterns. Climatologists predict more extreme events such as floods, hurricanes, fires, droughts, etc., due to global warming. Therefore, both public and private entities should take proactive measures to face these events. NASA’s Earth Observatory records show that 2016 was the warmest year since 1880, showing how much Climate Change is impacting us.

Budget and Cost

When it comes to finances, one must consider both money and budgeting. Let’s take a look at the important elements of Budget and Cost.

  • Fixed Costs stay the same regardless of sales or production volume.
  • Variable Costs, on the other hand, change with production or sales activity.
  • Budget Constraints are the financial limits within which decisions must be made- ensuring efficiency and maximum revenue.

It is also essential to monitor indirect costs. To make wise choices, assess each expense against the company’s return on investment. Studies show that good planning and decision-making based on budget analysis can result in better growth, higher profits, and a competitive edge.

Deloitte’s 2020 CFO Signals Survey reveals that 70% of CFOs plan on increasing capital expenditure due to higher demand for products and services. Therefore, it is necessary to have a clear understanding of budget restrictions and cost control techniques when making financial decisions.

Aesthetic Preferences

Design Significance is an important factor when it comes to appealing design. It affects user experience, engagement and usability. Here’s a list of factors to consider when designing a website:

  • Color scheme – Appropriate color usage impacts users’ moods and attention.
  • Typography – Legible typefaces that fit the site’s style.
  • Layout – A structure that results in a coherent flow.
  • Media – Videos, images and icons to supplement text content.
  • Spacing – Using white space to avoid cognitive overload.

When designing a website, accessibility, performance and scalability must also be taken into account. A few tips to consider when creating aesthetically pleasing web designs:

  • Strategic color contrast
  • Consistent typography
  • Minimizing disruptions with white space
  • Ensure readability isn’t hindered
  • Typeface symbols should look uniform across devices
  • Brand recognition with returning customers
  • Keep elements legible across different platforms
  • Ample white space to discourage information clutter.

Remember, to get the best results, you need the right materials!

When to Use Each Type of Construction

To determine which type of brick porch construction is right for your needs, turn to the section “When to Use Each Type of Construction” in the article on “Different Types of Brick Porch Construction and When to Use Them.” The sub-sections, including Solid Brick Porch Construction, Brick Veneer Porch Construction, and Combo Brick Porch Construction, provide recommended usages for each construction type.

Solid Brick Porch Construction – Recommended for…

Solid brick construction is the perfect option for porches. It gives you durability, strength, and classic style. There are many benefits.

  1. A sturdy foundation with concrete footing or piles.
  2. High-quality bricks and mortar to build the brickwork.
  3. Shingles or tiles for roofing.
  4. Finishes like paint or render.

Solid brick porches resist fire and pests. They’re durable and low maintenance. Plus, they increase your property value and lower insurance costs. Pro tip: Ventilate the porch area to avoid heat buildup in summer. Building a brick veneer porch? It looks nice, but it’s still a pig!

Brick Veneer Porch Construction – Recommended for…

Constructing a Brick Veneer Porch is a great choice for those seeking durability and the look of a full brick build without the extra weight. Here’s a step-by-step guide to do it:

  1. Plan & Design your Porch.
  2. Dig the Site.
  3. Install the Foundation.
  4. Add a Moisture Barrier.
  5. Create Structural Framing.
  6. Install the Brick Veneer.

Brick Veneer also provides insulation and is resistant to fire, making it a smart pick for areas with extreme heat or that are prone to wildfires. When it comes to porch building, brick veneer is a great option.

Pro Tip: Make sure to hire an experienced contractor who knows all about brick veneer porch construction for the best results and to stay safe.

Combo Brick Porch Construction – Perfect for those wanting a tough entrance, and to deter any would-be burglars with a build that says ‘don’t mess with me’.

Combo Brick Porch Construction – Recommended for…

Combining brick with another material is a great option for porch construction. It has amazing durability and can handle different weathers, making it the perfect choice for outdoor spaces.

  1. Choose the Right Material to Complement Brick – Consider concrete, wood or stone that will go well with the brick.
  2. Plan and Execute Carefully – Combining materials needs careful planning and execution. It’s best to hire a professional contractor.
  3. Keep the Aesthetic Look Consistent – All elements must look like they belong together in terms of design and color.

It’s worth noting that combining brick with another material often costs more than using one material alone. However, it increases the value of your property and gives you a comfortable outdoor space to relax and entertain.

My family chose a brick-and-another-material porch after our home renovation two years ago. When summer came, we had a pleasant spot to hang out with friends and family while enjoying the outdoors. The robustness also meant it could withstand severe winter conditions, making maintenance much easier.

Maintenance and Repair

To ensure your brick porch construction lasts as long as possible, it’s important to keep up with maintenance and repair. With this in mind, we’ll explore the best ways to maintain and repair your porch in this section titled Maintenance and Repair. We’ll cover some general tips that can be applied to any type of construction, as well as specific maintenance and repair advice for each type of brick porch construction.

General Tips for Maintenance and Repair

It’s essential to keep your items in great shape. Here’s how:

  • Clean and inspect them often for any damage.
  • Store them correctly – away from high/low temperatures or humidity.
  • If something breaks, attempt DIY repair before you call a pro.

Also, some repairs may need special tools or know-how. In such cases, expert help is the best way to go.

Plus, keeping up with maintenance can save you cash and increase the life of your things.

A great idea: Put reminders on your calendar or phone to remember regular maintenance. It’s important to look after your home – don’t leave it too long or it’ll cost you more to fix than if you had kept up with it.

Maintenance for Each Type of Construction

To keep constructions in good shape, maintenance is a must. Making a custom plan based on the type of construction is a must for longevity. Create a table to make sure no maintenance is overlooked.

For residential homes, regular roof and siding check-ups are important to stop leaks and weather damage. Commercial buildings need more frequent maintenance, like HVAC system inspections.

Make sure routine repairs follow industry standards and local codes. Training staff for maintenance can help to spot problems quicker.

We suggest addressing issues right away; this prevents them from becoming bigger, time-consuming, and money-costing repairs.

Bottom line: no matter what kind of construction – we’ve got the repairs covered!

The following table summarizes the maintenance requirements for different types of construction:

Type of ConstructionRecommended Maintenance
Residential HomesRegular roof and siding check-ups to stop leaks and weather damage
Commercial BuildingsMore frequent maintenance, like HVAC system inspections

Repair for Each Type of Construction

Different Repair Techniques for Various Constructions

Repairs of constructions vary depending on the structure. The repair method changes depending on the materials used. Here are listed some methods for each type of construction.

For easy understanding, this info is displayed in a table:

Type of ConstructionRepair Method
Wooden BuildingsReplacing bad wood
Concrete BuildingsPatches / Finishers
Steel BuildingsWelding Cracks / Adding Steel
Brick BuildingsPatchwork / Pointing

Each repair needs special skills and care for long-lasting results.

Also, a few tips to prevent harm to all types of buildings:

  • Regular Maintenance: Checks before, during, and after seasons stop long-term damage.
  • Proper Material Usage: Materials used in normal conditions may not be suitable for extreme weather or residue-inducing environments.
  • Timely Repairs: Quickly detect and fix faults to reduce further harm.

Using these tips will help extend the life of any building structure.

Frequently Asked Questions

  1. What are the different types of brick porch construction?
    • There are several types of brick porch constructions, such as solid brick porch, brick veneer porch, and thin brick porch.
  2. How can I determine the type of brick porch construction to use?
    • The type of brick porch construction to use will depend on various factors such as the intended use of the porch, budget, and the style of the home.
  3. What is a solid brick porch?
    • A solid brick porch is a porch that is constructed entirely from bricks with no void space in between.
  4. What is a brick veneer porch?
    • A brick veneer porch is a porch that comprises an inner structure usually made from concrete or wood and a brick exterior that covers the structure.
  5. What is a thin brick porch?
    • A thin brick porch is a porch that is constructed using thin bricks, usually about half-inch thick. These bricks are attached to an existing surface to give the appearance of a brick porch.
  6. Can I change the type of brick porch construction already in place?
    • Yes, you can change the type of brick porch construction already in place, but this will depend on the current structure, budget, and the type of construction you want to use instead. It is advisable to consult a masonry expert for professional advice.
This image shows a construction worker wearing a red hard hat and red overalls, standing in a partially constructed building. The worker is pushing a wheelbarrow filled with construction materials, likely cement or mortar, across the concrete floor of the unfinished interior. The walls are made of exposed bricks, and there is natural light coming in through openings in the structure. The scene depicts an active construction site where the worker is engaged in the process of building or renovating the structure.

Brick Restoration Explained: How It Can Benefit Your Home and Maintain Its Value

What Is Brick Restoration And What Are Its Benefits

Brick restoration is the process of repairing and restoring brickwork that has been damaged or degraded over time. It’s restoration can involve anything from cleaning and repointing brickwork to completely rebuilding a brick wall or structure. Brick restoration is important not only for the aesthetic appeal of brickwork but also for the strength and stability of the overall structure.

There are many benefits to Brick Restoration which include:

– Improving the overall appearance of your home or business

– Preventing further damage to your property

– Maintaining the value of your property

– Ensuring the safety of your property

If you are considering Brick Restoration for your home or business, it is important to consult with a professional Brick Restoration company. A professional company will be able to assess the damage and advise you on the best course of action. They will also have the necessary experience and equipment to carry out the work safely and effectively.

How To Identify If Your Bricks Need Restoration

If you own a home or building with brick walls, at some point you may need to think about restoration. Brick is a durable material, but it can still be damaged by weathering, insects, and other factors. Here are some signs that your bricks may need to be restored:

Cracks: Small cracks are normal in brick walls and usually don’t require repair. However, large cracks may indicate structural problems that should be addressed by a professional.

Spalling: This is when the surface of the brick starts to flake off. It’s usually caused by moisture getting into the brick, which can happen if there are cracks or gaps in the mortar joints. Spalling can also be caused by freeze/thaw cycles in cold climates.

Efflorescence: This is when a powdery white substance appears on the surface of the brick. It’s caused by water seeping into the brick and dissolving minerals, which are then deposited on the surface as the water evaporates.

Discolouration: Brick can become discoloured over time due to weathering, staining, or simply age. If you want to restore the original colour of your bricks, you may need to have them professionally cleaned.

If you notice any of these signs, it’s a good idea to consult with a professional brick restoration company. They will be able to assess the damage and recommend the best course of action. Brick restoration can be a complex and costly process, so it’s important to make sure it’s done right.


An image shows a person using a pressure washer to clean a brick wall. The individual is wearing a blue shirt and a cap, focusing the high-pressure water stream on the dark brick surface to remove dirt and grime. The spray creates a visible area of lighter brick, indicating the cleaning process's effectiveness.

The Process Of Brick Restoration

Brick restoration is the process of repairing and/or restoring a brick structure that has been damaged or degraded over time. Brick restoration can involve anything from cleaning and repointing to complete rebuilds.

There are many reasons why someone might need to carry out brick restoration work. Brick structures are susceptible to damage from weathering, pollution, vibration, and other factors. Over time, this damage can take its toll, causing bricks to crack, crumble, or fall off completely.

In some cases, brick restoration is simply a matter of aesthetics – the owner may simply want to improve the look of their property. In other cases, it may be necessary to preserve the integrity of the structure and prevent further damage from occurring.

Brick restoration is a complex process that should only be carried out by experienced professionals. The first step is to carry out a thorough assessment of the damage, taking into account the type of bricks used, the age of the structure, and the cause of the damage. This will help to determine the extent of the work required and the best way to approach it.

Once the assessment is complete, the brick restoration process can begin. This will typically involve cleaning the bricks and repairing any damaged ones. In some cases, it may also be necessary to rebuild sections of the structure using new bricks.

Brick restoration is a time-consuming and expensive process, but it is often essential in order to preserve historic buildings and prevent further damage from occurring. If you think your property might need some brick restoration work, it is important to get in touch with a professional contractor who can carry out a full assessment and provide you with a quote.

How Much Does Brick Restoration Cost

Brick restoration typically costs between $500 and $5,000. The price will depend on the size and scope of the project. For example, a small repair job may only cost a few hundred dollars, while a more extensive project could cost several thousand dollars.

Brick House Restoration

Brick restoration is the process of repairing and restoring brickwork. This can include anything from cleaning and sealing bricks to repairing cracks or damage. Brick restoration is often necessary when bricks are damaged by weathering, staining, or other factors.

Brick restoration is a complex process that should be performed by a qualified professional. The exact cost will vary depending on the extent of the damage and the size of the project. If you are considering having your brickwork restored, be sure to get multiple quotes from qualified contractors before making a decision.

Who Should I Hire For Brick Restoration Services

Brick restoration is the process of repairing and/or restoring a brick structure. This can include repairs to cracks, chipping, spalling, and efflorescence. Brick restoration can also involve repointing mortar joints, cleaning bricks, and resetting loose bricks.

There are many companies that offer brick restoration services. However, not all of these companies are created equal. It is important to do your research to find a company that has the experience and a good reputation. You should also make sure that the company you hire is properly licensed and insured.

If you are in need of brick restoration services, then please contact us today. We would be happy to provide you with a free quote.

Frequently Asked Questions

  1. What is brick restoration, and why is it important?
    • Brick restoration is the process of repairing, cleaning, and restoring brickwork that has suffered damage or degradation over time. It’s crucial because it helps maintain the structural integrity of buildings, prevents further damage, and enhances the aesthetic appeal of homes or businesses. Additionally, it can boost property value and ensure safety.
  2. What are the signs that my bricks need restoration?
    • Signs that your bricks may need restoration include large cracks, spalling (flaking or crumbling of brick surfaces), efflorescence (white powdery deposits on the brick), and discoloration. If you notice any of these signs, it’s best to consult a professional brick restoration company to assess the damage and recommend the appropriate repairs.
  3. How does the brick restoration process work?
    • The brick restoration process begins with a thorough assessment of the damage. Afterward, the work may involve cleaning, repointing (replacing mortar joints), repairing or replacing damaged bricks, and, in some cases, rebuilding sections of a structure. The process requires expertise and should be performed by experienced professionals to ensure the best results and safety.
  4. How much does brick restoration cost?
    • The cost of brick restoration varies depending on the size and scope of the project. Generally, it ranges from $500 to $5,000. Smaller repairs might cost a few hundred dollars, while more extensive restoration projects could run into several thousand dollars. Factors such as the type of damage, labor costs, and materials used also play a role in determining the final cost.
  5. Can I perform brick restoration myself, or do I need a professional?
    • While small maintenance tasks like cleaning can be done by homeowners, brick restoration is a complex process that requires specialized knowledge and equipment. Attempting to repair structural issues or significant damage without professional help can lead to further problems and safety risks. It’s recommended to hire a licensed and insured brick restoration company for best results.
  6. How do I choose the right brick restoration company?
    • To choose a reliable brick restoration company, start by researching and reading reviews to gauge their reputation. Make sure the company is licensed, insured, and experienced in brick restoration. Ask for references, check their portfolio, and get multiple quotes to compare pricing and services. Choosing a reputable company ensures quality work and reduces the risk of unexpected issues.
The image shows the hands of a worker, wearing a plaid shirt, as they use a trowel to apply mortar to a brick wall. The worker is carefully spreading the mortar between the bricks, demonstrating the skilled masonry work involved in constructing a brick structure.

How to Fix Brick Mortar: A Detailed 6-Step Guide

Although pointing is an easy job, it requires care and the use of the right tools. Without mortar to hold it together, even the most exquisite brickwork can be just as much rubble.

What is Mortar Repointing?

Repointing is when mortar cracks, recedes or falls out of joints. Although this is an easy job, it requires care. You must use the right tools and materials to prevent brick damage and permanent wall defects. This means we use hand tools and lime mortars that are similar to those used by masons 100 years ago.

Mortar over Old Mortar?

You can repoint bricks older than 50 years with modern portland cement-based mortar. However, the guy who will be repointing your next house may not approve of your choice. If your house was built prior to World War II, it is likely that the mortar contains a mixture of lime putty, and sand, so you will need to match it.

If the mortar is not matched, the bond between the brick and rock-hard mortar will eventually break. The bricks will begin to pop off as moisture gets trapped in the walls. Lime mortar is a traditional cushion that flexes with the brick’s movement and allows moisture to move freely out of the wall.

An experienced restoration mason will analyze your mortar to create a compatible mixture. Or, you can send samples of mortar to the U.S. You can also request a blend that is identical to Heritage. Hydraulic lime comes in bags, hardens with water, and is similar to portland cement. Lime putty mortar comes in buckets, hardens slowly with carbon dioxide in the air, and comes in bags.

Brick mortar repointing

6 Steps to Mortar Bricks

Step 1

Remove the Bed Joints

To remove horizontal joints, scrape them to a depth of at minimum 3/4 inches. Joints that are more than 1/2 inch wide must be dug to a depth of at least 3/4 inch. These 1/4-inch “butter joints” can be cut with a carbide-tipped grout saw. For larger joints, a cold chisel or an engineer’s tool can be used. Avoid electric angle grinders. They can easily cut through bricks if you aren’t skilled in using them.

Step 2

Clear out the Head Joints

Dig out the vertical joints after removing three to four courses of mortar for the bed-joint mortar. Pay attention not to strike the brick edges below or above. This is where the mortar is removed by tapping a 5-in-1 hammer on a painter’s knife.

Step 3

Wash Down The Wall

With a stiff-bristled toothbrush, remove all crumbly material. Next, check that your tuckpointing trowel blade fits into the joint. You can grind the blade down with an abrasive tool if it is too long. Mist the brick with water until it is completely damp. This is important because dry materials can suck moisture from the mortar, preventing it from curing properly. Do not fill the joints until the next day.

Step 4

Mix the Mortar

Again, mist the brick. Follow the instructions on the bag to stir the water into the dry mixture until it becomes a peanut butter-like consistency and sticks to a trowel. Allow the mixture to rest for 15 minutes until it forms a thin layer of water. Mix the water back into the mixture. Now the mortar is ready for use. It will remain usable for eight hours. You can “retemper,” it if it becomes too dry during that time by adding water occasionally.

Laying Bricks

Step 5

Fill the Joints

A dollop of mortar should be poured onto a brick trowel, hawk, or another flat surface. The mortar should be held up with a bed joint and pushed against the back with the tuckpointing trowel. After removing any voids, make a few passes along the trowel’s edge to fill them in. Then add more mortar until you have filled the joint. After you have completed three to four courses of bed joints, fill the head joints. Final step: Smoothen and compact all mortar using the trowel’s flat surface. Finally, remove any mortar from the brick.

Step 6

Brush the Wall

Brush diagonally across the mortar to remove any mortar crumbs. The fresh mortar can be pulled out by brushing in line with joints. Next, carefully remove any mortar residue from the brick faces. Use a tarp to cover the mortar joints against the sun, wind, or rain for the next three days. Give the wall a misting every day to keep it moist.

Frequently Asked Questions

  1. What is Mortar Repointing?
    • Mortar repointing involves repairing and renewing the mortar joints between bricks. This maintenance process is essential for preserving the structural integrity and aesthetic of brick constructions, especially as mortar ages and deteriorates.
  2. Can I Use Modern Mortar on Older Brick Structures?
    • For brick structures older than 50 years, especially those built before World War II, it’s recommended to use a lime putty and sand mixture similar to the original mortar rather than modern portland cement-based mortar. This ensures compatibility and prevents damage to the bricks.
  3. Why Should I Avoid Using Electric Angle Grinders for Repointing?
    • Electric angle grinders can be too aggressive for repointing, potentially damaging the bricks if not handled with precision. Hand tools are preferred for their control and gentleness on the historic masonry.
  4. How Deep Should I Remove the Old Mortar?
    • Generally, old mortar should be removed to a depth of at least 3/4 inch for bed joints, or deeper if the joint width requires. This ensures a sufficient depth for the new mortar to bond effectively and provide structural stability.
  5. What Should I Do if the Tuckpointing Trowel Doesn’t Fit the Joints?
    • If the tuckpointing trowel is too large to fit into the joints, you can grind down the blade with an abrasive tool to reduce its width. This customization allows the trowel to fit properly and aids in effective mortar application.
  6. How Do I Ensure the New Mortar Cures Properly?
    • After repointing, it’s crucial to keep the new mortar moist for several days. Cover the repointed area with a tarp to protect it from sun and wind, and mist the wall daily to maintain adequate moisture levels. This helps the mortar cure slowly and gain strength.