Allow the sealer to dry completely before using the backsplash. Cut the bricks to size using a wet saw. It’s important to use a wet saw so that you don’t crack the bricks.
Apply mortar to the back of each brick using a trowel. Spread it evenly over the entire surface.
Place the bricks onto the wall, pressing them gently into place. You may need to use a level to make sure they’re even.
Use a damp sponge to clean up any excess mortar. Allow the mortar to dry for at least 24 hours before grouting.
Decide If A Brick Backsplash Is A Right Look For Your Kitchen
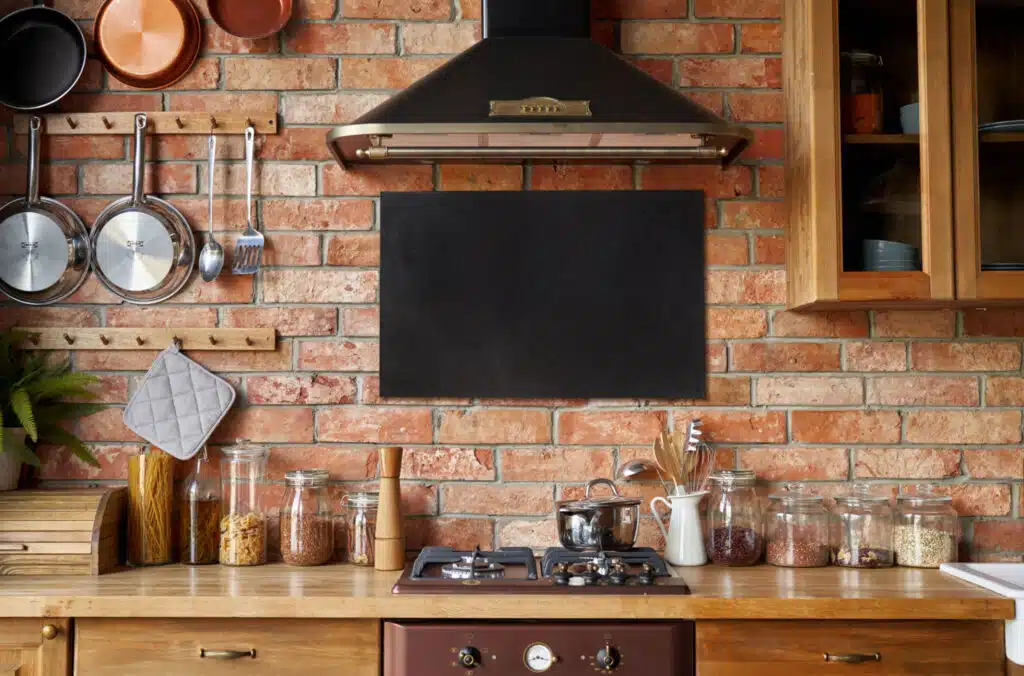
There are many types of backsplashes to choose from when planning a kitchen remodel, but a brick backsplash may not be the first choice that comes to mind. Brick can give your kitchen an industrial feel or a rustic touch, depending on the style of Brick you choose. If you’re considering installing a brick backsplash in your kitchen, here are a few things to keep in mind.
Advantages of a Brick Backsplash
A brick backsplash can add character to your kitchen in a way that other materials cannot. It’s also durable and easy to clean, two important factors to consider when choosing any type of backsplash. Brick is also heat resistant, so it’s a good choice if you often cook with pans that require high heat.
Disadvantages of a Brick Backsplash
One downside to a brick backsplash is that it can be difficult to match the color and style of your cabinets and countertops. If you’re planning on doing a complete kitchen renovation, this may not be an issue, but if you’re just looking to update your backsplash, it’s something to keep in mind. In addition, bricks are porous and can absorb spills and stains, so they will require more maintenance than other backsplash materials.
How to Install a Brick Backsplash
If you’ve decided that a brick backsplash is a right look for your kitchen, the next step is to install it. Brick backsplashes can be installed in one of two ways: with mortar or without. If you choose to install your brick backsplash with mortar, you’ll need to spread a layer of mortar over the area where the bricks will be placed and then set the bricks in place. Without mortar, you’ll simply apply adhesive to the back of each brick and press it into place.
Once your bricks are in place, you’ll need to seal them to protect them from stains and spills. You can use a clear sealer or a sealer that matches the color of your bricks. Be sure to follow the manufacturer’s instructions for application and drying times.
With a little bit of planning and effort, you can install a beautiful and unique brick backsplash in your kitchen. Brick can give your kitchen an industrial feel or a rustic touch, depending on the style of Brick you choose. If you’re considering installing a brick backsplash in your kitchen, keep in mind that Brick is durable and easy to clean, but it’s also porous and will require more maintenance than other materials.
Measure The Area You Want To Cover With Brick
The first step to Brick Backsplash is to measure the area you want to cover with brick. You will need to know the dimensions of the space in order to calculate how much brick and mortar you will need.
Next, you will need to purchase your supplies. You will need bricks, mortar, a trowel, a level, and grout. Make sure to buy enough supplies to complete your project.
Now that you have your supplies, it’s time to get started! Begin by spreading a layer of mortar on the wall with your trowel.
Next, start laying your bricks in the mortar. Be sure to keep them level as you go. Once all of the bricks are in place, allow the mortar to dry for 24 hours.
After the mortar has dried, it’s time to grout the spaces between the bricks. Spread grout over the bricks with a trowel and then use a damp cloth to wipe away any excess.
Allow the grout to dry for 24 hours before using your new Brick Backsplash!
Purchase The Bricks And Mortar You Need
In order to install a brick backsplash in your kitchen, you will need to purchase the bricks and mortar needed for the project. You can find these supplies at your local hardware store or online.
Prepare The Surface
Before you begin, it is important to make sure that the surface you will be working on is clean and free of debris. If you are working on an existing backsplash, you will need to remove any old tile or other materials before proceeding.
Mark The Area
Once the surface is prepared, you will need to mark off the area where the backsplash will go. Use a level to make sure that your lines are straight and then use a pencil or chalk to mark the area.
Cut The Bricks
If you are using whole bricks for your backsplash, you will need to cut them to fit the area you have marked off. You can do this with a wet saw or a handheld Brick Cutter.
Apply The Mortar
Now it is time to apply the mortar to the surface. Begin by spreading a thin layer of mortar over the area where the bricks will go. Then, working one at a time, add the bricks to the mortar, pressing them gently into place.
Fill The Joints
Once all of the bricks are in place, you will need to fill in the joints between them with more mortar. Use a small trowel or putty knife to push the mortar into the joints, being careful not to overfill them.
Allow The Mortar To Dry
Now that the mortar is in place, you will need to allow it to dry completely before proceeding. This can take several hours or even a day, depending on the temperature and humidity of your workspace.
Apply The Grout
Once the mortar is dry, you can apply the grout. Begin by mixing the grout according to the manufacturer’s instructions. Once it is mixed, use a rubber float to spread it over the surface of the backsplash, working it into the joints between the bricks.
Wipe Away The Excess Grout
After the grout has been applied, use a damp sponge or cloth to wipe away any excess. Be sure to rinse the sponge frequently to avoid removing too much grout from the joints.
Apply Mortar To The Wall And Place Bricks In Position
1. Begin by applying a layer of mortar to the wall with a trowel.
2. Starting at the bottom, begin pressing bricks into the mortar.
3. Work your way up, making sure to evenly space out the bricks as you go.
4. Once you reach the top of the wall, use a wet rag to clean off any excess mortar.
5. Allow the mortar to dry for 24 hours before grouting.
Grout The Backsplash
1. Mix together grout according to the manufacturer’s instructions.
2. Use a grout float to apply the grout between the bricks.
3. Work the grout into all of the cracks and crevices, using a back and forth motion.
4. Once all of the grout is in place, use a wet sponge to clean off any excess.
5. Allow the grout to dry for 24 hours before sealing.
Seal The Backsplash
1. Apply a sealer to the Brick backsplash using a paintbrush or roller.
2. Make sure to evenly cover the entire surface.
3. Allow the sealer to dry for 24 hours before using the backsplash.
Allow The Mortar To Dry Completely Before Grouting
Brick backsplashes are a popular choice in kitchens because they add both visual interest and texture. If you’re thinking of adding a brick backsplash to your kitchen, the first thing you need to do is install the bricks. Here’s a step-by-step guide to help you get the job done.
1. Start by spreading a layer of mortar on the wall where you want to install the brick backsplash. Use a notched trowel to spread an even layer of mortar.
2. Next, start laying your bricks in the mortar, working from the bottom up. Make sure to stagger the joints so that they don’t line up with each other.
3. Once all of the bricks are in place, use a damp sponge to clean off any mortar that’s on the face of the bricks.
4. Allow the mortar to dry completely before grouting. Once it’s dry, you can begin filling the joints with grout. Use a rubber float to push the grout into the joints, and then use a damp sponge to remove any excess grout.
5. Allow the grout to cure for 24 hours before sealing. Once it’s cured, you can apply a sealer to help protect it from stains and moisture.
Frequently Asked Questions:
1. What are the benefits of choosing a brick backsplash for my kitchen?
A brick backsplash adds a unique character and charm to your kitchen, providing a rustic or industrial feel depending on the style of the bricks. It’s durable, easy to clean, and heat resistant, making it ideal for kitchens.
2. What are the disadvantages of a brick backsplash?
The main disadvantage is that brick is porous and can absorb stains and spills, requiring more maintenance compared to non-porous materials. Additionally, matching brick with existing kitchen decor can be challenging.
3. What basic tools and materials do I need to install a brick backsplash?
You will need bricks, mortar, a trowel, a level, grout, and a wet saw for cutting bricks to size. A sealer is also necessary to protect the finished backsplash.
4. How do I prepare the surface for a brick backsplash?
Ensure the surface is clean and free of debris. If working over an existing backsplash, remove any old materials. Mark your area with a level and pencil to ensure your brick layout is straight and even.
5. Can I install a brick backsplash without using mortar?
Yes, you can install a brick backsplash using an adhesive instead of mortar. This method involves applying adhesive to the back of each brick and pressing it firmly into place, which can be less messy and simpler for DIY projects.
6. How do I maintain and clean a brick backsplash?
To maintain a brick backsplash, seal it regularly to prevent stains and moisture absorption. For cleaning, use a mild soap and water solution and a brush to remove dirt and grime. Avoid harsh chemicals that can damage the brick and mortar.

