This image is an advertisement for Fix My Brick, a masonry company. The main text states "9 Reasons Why Brick Repair is the Best Choice for Your 2022 Home Improvement Project." The image also shows various hands wearing yellow work gloves and holding various masonry tools such as brushes, a level, pliers, and a hammer. The tools are arranged to draw attention to the text and the Fix My Brick logo at the bottom of the image.

9 Reasons Why Brick Repair is the Best Choice for Your 2022 Home Improvement Project.

When it comes to home renovations, brick repair is often an overlooked option. Many people believe that repairing brick is expensive and difficult, but this is not always the case. In fact, repairing brick can be a cost-effective and easy way to improve the look of your home.

If you are considering a home renovation project, here are nine reasons why you should choose brick repair over other options.

1. Brick is a classic material that will never go out of style.

Brick has a long history of use in construction, and its timeless appearance makes it a popular choice for both traditional and contemporary designs. With its distinctive colour and textured surface, brick can complement any style or aesthetic, adding character and elegance to any space.

Furthermore, as a remarkably durable material, brick can last for centuries with proper care. A well-maintained home built of brick is an investment that will stand the test of time, providing a classic and stylish backdrop to your family’s life events.

Whether you’re building a new house or giving your existing home an update, brick should be high on your list of considerations.

Brick buildings are a timeless design.

2. Brick is durable and long-lasting.

Brick is one of the most durable and long-lasting construction materials available. Properly installed and maintained by trained professionals, brick homes can stand the test of time, remaining beautiful and functional for years to come.

Moreover, brick is resistant to fire, weathering, pests, and other environmental factors, making it a low-maintenance option for homeowners. With regular care and maintenance by a professional team of contractors, brick homes can be a sound and safe choice for your home building needs.

Whether you choose to use brick as an exterior material or incorporate it into your indoor construction plans, this sturdy material will certainly stand the test of time.

3. Brick repair can be completed quickly, with minimal disruption to your daily routine.

Brick repair projects are a great way to maintain the beauty and integrity of your home, whatever your needs may be. Whether you are looking for a fast and easy solution for small aesthetic issues, or you desire a more substantial renovation that will require professional help, brick repair can be completed quickly and with minimal disruption to your daily routine.

Thanks to advanced materials and techniques, installing new bricks or repairing existing ones can be done quickly and efficiently by experienced professionals who understand how best to work with this timeless building material.

And with so many options available in terms of design and colour, you can rest assured that your home will always look its best, no matter what the season or weather conditions. So if you are considering a brick repair project for your home, don’t hesitate! With the help of knowledgeable professionals, you can achieve your dream results in no time.

4. Brick is easy to maintain and clean.

Brick is a low-maintenance material and only requires occasional cleaning to keep it looking its best.

When it comes to choosing a low-maintenance building material, few options can match the ease and convenience of brick. This time-tested material is renowned for its durability and easy upkeep and only requires occasional cleaning to keep it looking its best. When it does need to be cleaned, brick is easy to power wash or scrub with soap and water.

As a result, it is an ideal choice for busy homeowners who want to spend more time enjoying their homes and less time on upkeep. Whether you are building a new home or renovating an existing one, consider using brick as a low-maintenance option that will stand the test of time.

Easy cleaning of brick material.

5. Brick adds value to your home and can increase its resale value.

Brick is an extremely valuable material for home construction and one that can greatly increase the resale value of your house. Because brick is extremely durable and low-maintenance, buyers are often willing to pay more for a brick home than for other types of construction.

This is particularly true in Southern Ontario, which has a long history of using masonry materials like brick in its architecture. As such, if you’re looking to get the most out of your investment, choosing brick for exterior walls is an excellent choice that can drastically increase your home’s resale value down the line.

So whether you’re building a new home or renovating your existing one, consider opting for brick so that you can rest assured knowing that your house will stand the test of time.

6. Brick is energy-efficient and can help reduce your energy bills.

Brick is a highly effective insulator and can be a great way to improve the energy efficiency of your home. In the winter, it helps to keep heat in, preventing your furnace or other heating systems from having to work as hard. And in the summer, it keeps out the heat, helping to keep your home cooler and more comfortable without consuming as much energy.

What’s more, by improving the insulation properties of your home, brick can help you save money on your energy bills all year round. Whether you’re thinking about installing new windows or upgrading your central air system, replacing or adding the bricks of your house may be a cost-effective and quick approach to reduce energy expenses.

With its unique ability to regulate temperature no matter what season it is, brick is an excellent choice for anyone committed to conserving energy and saving money!

7. Brick is environmentally friendly and sustainable.

Brick is a sustainable and environmentally friendly material that can be used in a variety of ways. It is made from natural materials, such as clay and water, and does not produce any harmful emissions during production. In addition, brick is recyclable and can be reused or repurposed in several ways. For example, old bricks can be crushed and used as gravel or landscaping fill. 

Brick is an increasingly popular choice for sustainably-minded builders and homeowners in Ontario, Canada. In fact, the use of brick helps to conserve energy and resources throughout the product’s life cycle. From the extraction of raw materials to the end-of-life recycling of used brick, this durable material sustainably supports our built environment.

8. Brick is non-toxic and safe for children and pets.

Brick is a non-toxic material that is safe for children and pets. Due to its non-toxic nature, it does not off-gas or releases any harmful chemicals into the air when used in homes with young children or indoor pets.

In addition, because brick is fireproof and non-combustible, it does not contribute to indoor air pollution or pose any safety risks for young children or vulnerable family members. Therefore, for families with young children or inside pets, brick is a great choice for flooring and home building materials.

Not only does it provide a non-toxic and secure living environment, but it also helps to strengthen the structural integrity of the home by providing an extra layer of protection from fires and other disasters.

9. Brick can be used in a variety of home improvement projects.

Home improvement projects generally see a significant uptick during the summer months. Homeowners have more free time and the weather is conducive to working outdoors. That being said, you don’t have to wait until summer to start your brick project. Starting now can give you a leg up on the competition come 2022. Here are a few ideas to get you started: 

  • Walkway: A brick walkway is a great way to add curb appeal to your home. It’s also a relatively simple project that can be completed in a weekend. 
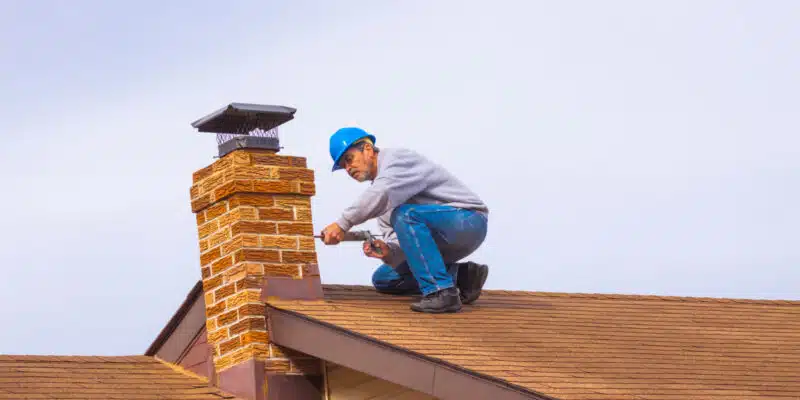
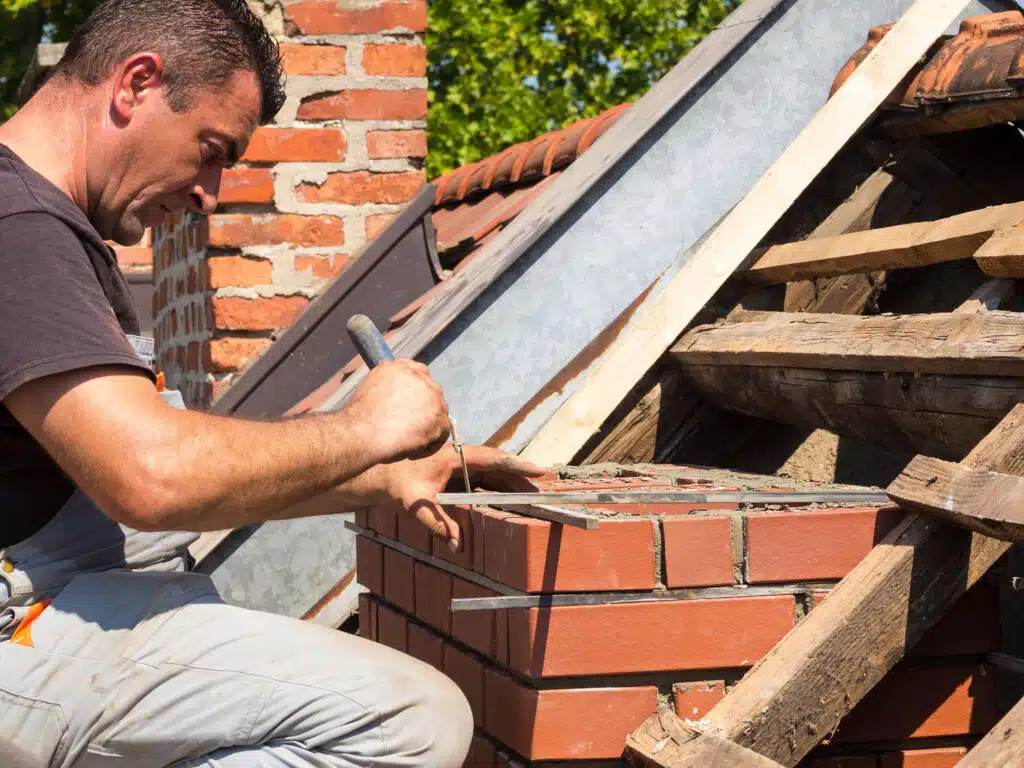
  • Chimney Repair: If your home has a brick chimney, chances are it could use some repair. Winter weather can take its toll on both the bricks and the mortar. Investing in repairs now will help to prevent costly damage down the road. 
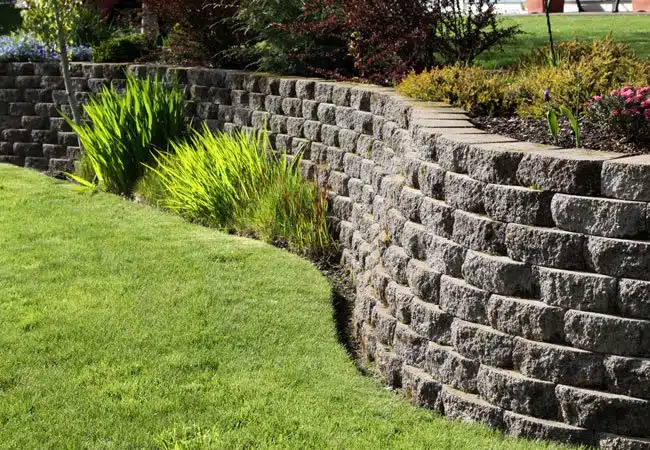
  • Garden Wall: Building a brick wall around your garden is not only functional but also adds an element of beauty. Tall plants or climbing vines would look lovely growing up the sides of the wall. 

There are endless possibilities when it comes to using brick in home improvement projects. Whether you’re looking to add curb appeal, repair damage, or simply add a bit of beauty to your home, brick is a great choice.

Classic and stylish, bricks are a timeless material that can add character and curb appeal to any home. And because they’re so durable, well-maintained bricks can last for centuries.

So if you’re looking for a project that will make a lasting impression, call our team of experienced professionals today. We’ll have your bricks looking good as new in no time.

Frequently Asked Questions:

1. Is brick repair a cost-effective choice for home renovations? Yes, brick repair is often a cost-effective option for home renovations. It can improve the aesthetic appeal of your home without the high cost associated with replacing large sections of masonry. With proper care, repaired brickwork can last for decades, making it a wise investment for homeowners.

2. What makes brick a durable choice for home construction? Brick is one of the most durable building materials available, known for its strength and longevity. It is resistant to fire, pests, and harsh weather conditions, which helps it maintain its structure and appearance over time with minimal maintenance required.

3. How long does it typically take to complete a brick repair project? Brick repair can often be completed quickly, depending on the extent of the damage. Small repairs can typically be done within a day, while larger restoration projects might take a few days. Professional brick masons use efficient techniques that minimize disruption to your daily routine.

4. How does brick contribute to the energy efficiency of a home? Brick has excellent thermal mass properties, helping to regulate indoor temperatures by absorbing heat and releasing it slowly. This can keep your home warmer in the winter and cooler in the summer, potentially reducing your heating and cooling costs significantly.

5. Can old bricks be recycled or repurposed after a repair or renovation project? Yes, bricks are highly recyclable. Old bricks can be crushed and reused as gravel or landscaping fill, or they can be repurposed in other construction projects. Recycling bricks not only reduces waste but also contributes to sustainable building practices.

6. What are some creative ways to use brick in home improvement projects? Brick can be used in a variety of home improvement projects beyond just structural repairs. Some creative uses include building a brick walkway, constructing a garden wall, or creating a new fireplace surround. Each of these projects can enhance the beauty and functionality of your home.

This image shows a construction worker wearing a blue hard hat and working on repairing or maintaining a brick chimney on a roof. The worker is crouched down and appears to be inspecting or making adjustments to the chimney. The roof is made of wooden shingles, and there is a clear sky in the background.

Chimney repair – A complete Guide

Most people don’t give their chimney much thought – until there’s a problem. Then, it’s suddenly very important! If you’re having issues with your chimney, it’s important to get them fixed as soon as possible. Chimney repair can be a big job, but it doesn’t have to be overwhelming. This guide will walk you through everything you need to know about repairing your chimney.

Masonry Chimney 101

A chimney made of masonry can be made out of many materials, including concrete, bricks, mortar, concrete block and concrete block, cast iron and steel, and flue tile.

These materials can be very vulnerable to rainwater damage if they’re not properly installed or maintained.

External factors can cause serious damage to extremely porous chimneys.

Common Chimney Problems

A Chimney is an important part of your home, providing ventilation for your fireplace or stove. It’s also one of the most vulnerable parts of your home, exposed to the elements and subject to wear and tear. Over time, your chimney can develop problems that need to be repaired.

Cracks

Cracks in the crown or firebox can be considered fire hazards under the NFPA.

The reason for this is that smoke from a chimney can contain waste particles from a fire.

The black smoke that comes out of a chimney is

These small particles can build up and accumulate inside cracks in the masonry.

This illustration shows the buildup of a chimney flue. It can cause a fire hazard.

Brick cracks can lead to small areas of carbon buildup and waste particles. Some of these could be flammable.

Creosote (an oily substance) is the real culprit. Creosote (an oily substance) is a very similar substance to soot and can ignite by sparks.

Creosote, a flammable chemical, is formed from smoke and vapors of burning wood.

Please Click Here for a Complete Article about Creosote.

Chimney repair

If creosote buildup is more than 1/4 inch, it’s time to have a chimney cleaned.

Look for cracks in mortar around the chimney and fireplace.

Every day, more than 61 chimney fires are lit in the United States.

Don’t panic if cracks develop in your fireplace or chimney.

Fireplace cracks can be repaired quickly. Fire risk could increase if it is not fixed promptly.

Water Penetration

Water penetration can occur at multiple points.

While water penetration can lead to mold growth, destruction, and other serious consequences,

When water reacts with creosote, it becomes acidic. This accelerates brick and mortar decay in fireplaces and chimneys.

Water can get into the chimney through cracks in the crown or chimney shelf.

This can also happen due to defective flashing at the roof–the to-chimbal junction.

Water damage can occur to exterior mortar and interior walls.

To avoid all these dangers, keep a schedule for chimney inspections. Make sure that there is no water infiltration inside any chimney or fireplace.

These water-repellent treatments (also called “waterproofing”) can keep water from your chimney

Crown of Chimneys Broken

The chimney crown, which is located at the top of a chimney, acts as a shield against a number of dangers.

The crown should have an upward slope that directs water away from the flue edges. This prevents mortar or brick from eroding along the vertical chimney surfaces.

A properly constructed chimney crown should be overhanging, made from Portland cement-based mix.

Faulty Flashing

Flashing is the process of sealing the space between the chimney and the roof to keep rainwater out.

It is basically an expansion joint that’s made from two different materials. It allows the chimney and roof to expand and contract at the right rates, without causing any damage.

Here’s an example of flashing which allows water to enter a house that is under construction.

Incorrect Dimensions

If your Chimney is the incorrect dimensions, it will not function properly. The Chimney should be at least 2 feet taller than anything within a 10-foot radius of it. If it isn’t, you could have serious drafting problems. In addition, the Chimney should have a cap that is at least 3 inches wider than the Chimney opening.

Caps that are too small allow rain and snow to enter the Chimney, which can cause serious damage. If you don’t have a cap, or if yours is the wrong size, call a professional to have one installed.

Chimney Caps

A cap is required to prevent water from entering your chimney. This will prevent birds and squirrels from getting into your chimney opening. This is basically a way to get rid of any clutter in your home, such as leaves.

You can also use a cap to keep your home safe from animals that might enter your chimney and cause a fire. A Chimney cap will also help you save money on your heating bill.

If you live in an area where it snows, you need to make sure that your chimney is clear of any snow or ice. If there is any buildup, it can cause your chimney to collapse.

Chimney Deterioration

Bricks, mortar, and other building materials can be damaged by being left in the elements.

Damage to chimney walls is slowly occurring from external elements

A falling chimney is an indication that it is time to rebuild. Bricks are not viable anymore.

Chimney repair

Leaning Chimneys

Has your chimney been checked by a professional to ensure it is not leaning? A lean chimney can cause serious damage to your property, and even collapse.

This is a list of common problems that can occur with your fireplace or chimney.

It is recommended that chimneys be inspected annually to ensure safety and prevent costly repairs.

Inspect your fireplace and chimney every month to ensure that there are no problems.

A 5-minute annual visual inspection can help you save thousands on chimney and fireplace repairs.

A quick checklist for inspecting chimneys and fireplaces.

Check your fireplace for cracks or loose bricks.

Be sure to check the firebox for cracks or broken bricks.

Make sure the damper is off.

Check the chimney exterior for cracks and damage.

Repair any cracks or damage to your fireplace before you use it again.

Frequently Asked Questions:

1. How often should I have my chimney inspected?

Chimneys should be inspected annually to ensure they are safe and free from obstructions and damage. This regular inspection can help prevent costly repairs.

2. What are the signs of chimney deterioration?

Signs of deterioration include cracks in the mortar or bricks, a leaning structure, and water penetration. If you notice any of these signs, it’s important to consult a professional for repairs.

3. What causes cracks in chimney bricks and mortar?

Cracks can be caused by thermal expansion, moisture penetration, and natural settling of the house. Creosote buildup can also contribute to deterioration if not regularly cleaned.

4. Why is flashing important for my chimney?

Flashing seals the gap between the chimney and roof, preventing water from entering and causing damage. Faulty flashing can lead to water damage in your home.

5. How does the wrong chimney cap affect my chimney?

The wrong size cap can allow rain, snow, and animals into your chimney, leading to blockages and damage. Ensure your cap is appropriately sized to prevent these issues.

6. What should I do if my chimney starts leaning?

A leaning chimney could be a sign of structural failure and poses a serious safety risk. It’s crucial to get a professional evaluation and repair as soon as possible.

This image shows a close-up view of a brick wall undergoing repair or renovation. The wall has areas of damaged and peeling plaster or stucco, revealing the underlying brickwork. A power drill with a drill bit is visible, indicating that the person is likely drilling into the wall, possibly to secure new materials or repair the damaged sections. The image focuses on the textured, weathered surface of the wall and the tools being used to address the issues.

Expert Tips For Successfully Drilling Into Brick: A Step-by-Step Tutorial

Choose The Right Drill Bit

The type of drill bit you’ll need to use will depend on the job you’re planning to do. For most projects, a standard masonry drill bit will suffice. These bits are designed for use with a power drill and will easily bore through brick.

If you’re working with particularly hard bricks or planning to do a lot of drilling, you may want to invest in a carbide-tipped masonry bit. These bits are more expensive than standard masonry bits, but they stay sharper for longer, making them ideal for tougher jobs.

Attach The Drill Bit

Once you’ve selected the right drill bit, it’s time to attach it to your power drill. Make sure the drill is turned off before you begin.

If you’re using a standard masonry bit, simply insert the shank (the un-toothed end) into the drill’s chuck and tighten it until it’s snug. If you’re using a carbide-tipped bit, you’ll need to first insert a pilot drill into the chuck. This is a small drill bit that will create a guide hole for the carbide bit. Once the pilot drill is in place, insert the carbide bit into the pilot drill and tighten both in the chuck.

Prepare The Area

Before you start drilling, take a few moments to prepare the area where you’ll be working. Cover any surfaces nearby that could be damaged by flying debris, and clear away any loose bricks or other obstacles that could get in your way.

Mark The Spot

Once the area is prepared, it’s time to mark the spot where you’ll be drilling. Use a pencil or chalk to draw a dot or X on the brick where you want the hole to be. This will give you a starting point to work from and help ensure that your drill bit doesn’t wander.

Start Drilling

With the drill bit attached and the area prepared, you’re finally ready to start drilling. Put on safety goggles or glasses to protect your eyes, and hold the drill so that the bit is lined up with your mark. Then, switch on the drill and apply steady pressure as you bore into the brick.

If you’re using a standard masonry bit, you shouldn’t have any trouble drilling through the brick. If you’re using a carbide-tipped bit, however, you may need to apply a little more pressure to get started. Once the bit starts biting into the brick, it should drill through relatively easily.

Take Your Time

Drilling through brick isn’t a race, so there’s no need to hurry. Go slowly and steadily, and let the drill do the work. If you push too hard, you risk breaking the drill bit or damaging the bricks.

Drilling through brick can create a lot of dust, so it’s a good idea to wear a dust mask to protect your lungs. If possible, drill outdoors or in a well-ventilated area to minimize the amount of dust you’re exposed to.

How to drill into brick

Monitor The Temperature

Drilling through brick generates a lot of friction, which can cause the drill bit and the bricks themselves to heat up quickly. Keep an eye on the temperature of both, and take a break if either starts to get too hot.

Let The Dust Settles

Once you’ve drilled through the brick, it’s important to let the dust settle before continuing with your project. Wait a few minutes for the dust to settle, then use a vacuum or damp cloth to clean up any remaining debris.

Now that you know how to drill into brick, you can tackle all sorts of projects around your home or office. With the right drill bit and a little patience, you can easily bore through brick to create the perfect hole for your needs.

Use A Level To Keep The Bit Straight

Wearing safety goggles, hold the drill bit at a 90-degree angle to the brick. If necessary, use a hammer to help drive the bit into the brick. Start the drill on low speed and then increase the speed once it has caught. Use a level to keep the drill bit straight as you drill.

Apply Firm, Steady Pressure

As you drill, apply firm, steady pressure. Don’t push too hard or the bit will slip. If the bit starts to slip, reposition it and try again.

Use A Masonry Bit

For best results, use a masonry bit designed for use with brick. These bits have sharp, carbide tips that can cut through brick quickly and easily.

Masonry bits come in a variety of sizes. Choose the size that is appropriate for the job at hand. For example, if you need to drill a large hole, you will need a larger bit than if you only need to make a small hole.

How to drill into brick

Keep Your Hands Clear Of The Drill While It’s In Use

.If you’re not using a drill press, make sure to keep your hands clean of the area where the bit will be exiting the brick.

Wear Protective Gear. You should always wear gloves and safety glasses when working with power tools.

Choose The Right Drill Bit. To drill into brick, you’ll need to use a masonry bit. These bits are made of carbide or diamond and are much harder than standard metal or wood bits.

Mark The Location Of The Hole With A Chalk Line Or Pencil. Use a level to make sure your home is straight, then mark the spot with a chalk line or pencil.

Start Drilling Slowly And Increase Speed Gradually. Apply firm, even pressure as you start drilling. Once the bit has penetrated the surface of the brick, you can increase speed.

Let The Bit Do The Work. Don’t apply too much pressure, as this can cause the bit to slip or break.

Cool, The Bit Frequently. To extend the life of your drill bit, it’s important to keep it cool while you’re working. Every few minutes, stop drilling and allow the bit to cool in a cup of water.

Remove The Dust Regularly. Drilling into brick creates a lot of dust. To avoid breathing in this dust, which can be harmful, make sure to remove it regularly with a vacuum or brush attachment.

Frequently Asked Questions:

  1. What type of drill bit is best for drilling into brick?
    • For drilling into brick, use a masonry drill bit. Carbide-tipped masonry bits are ideal for harder bricks and more frequent drilling.
  2. How do I attach the drill bit to my power drill?
    • Insert the shank of the drill bit into the drill’s chuck and tighten it securely. For carbide-tipped bits, insert a pilot drill first, followed by the carbide bit.
  3. What safety equipment should I wear when drilling into brick?
    • Always wear safety goggles to protect your eyes from debris. Using gloves and a dust mask is also recommended to protect your hands and lungs from brick dust.
  4. How do I ensure the drill bit remains straight during drilling?
    • Start drilling at a low speed to establish the hole, then increase speed. Use a level to maintain the drill bit at a 90-degree angle to the brick surface.
  5. How do I prepare the area before drilling into brick?
    • Clean and clear the area of debris. Mark the drilling spot with chalk or a pencil, and cover nearby surfaces to protect them from dust and debris.
  6. What should I do if the drill bit gets too hot?
    • If the drill bit gets too hot, stop drilling and allow it to cool down. You can dip the bit in water periodically to prevent overheating.
This image depicts an ancient stone wall structure surrounded by a lush, forested landscape. The wall is constructed from large, weathered stone blocks that have a mossy, aged appearance. A small shrub or tree can be seen growing atop the wall, adding a touch of greenery to the scene. The landscape behind the wall is filled with dense foliage, including various shades of green trees and bushes, creating a picturesque, natural setting. The overall image conveys a sense of history and the enduring presence of this stone structure amidst the thriving natural environment.

Everything You Need to Know About Retaining Walls

If you ever walk past a house that seems to have come right out of Jane Austen or imagine yourself strolling through a countryside lane in Middle Earth, chances are that there might be a stone wall somewhere in there; perhaps pushed up against the side of a hill. This is called a retaining wall.

Like the best things in life, a retaining wall is both pretty and functional. If you have a need or a desire for one in your own landscaping to up the quality of your outdoor aesthetic, knowing more information will always help you to make the best decisions. This guide will help you know exactly what a retaining wall is and how it works, how much a retaining wall will cost, tips and tricks about retaining walls, how a retaining wall will add to your yard, and even some of the best and most creative retaining wall ideas out there!

What is a Retaining Wall and How Does it Work?

retaining walls
Image Source – https://www.bobvila.com/articles/retaining-walls/

A retaining wall is a wall built of a material solid enough to “retain” (hold in place) dirt and soil behind it. These might be used in a front or back garden, flowerbeds, or any other landscaping structures to ensure that rain, erosion, and other natural issues don’t cause shifts in the soil and a spread or collapse of whatever it is you were trying to keep together.

There are four primary types of retaining walls: gravity retaining walls, reinforced retaining walls, sheet piling retaining walls, and anchored retaining walls.

Gravity Retaining Walls

Gravity retaining walls

Gravity retaining walls tend to be a little bit shorter in height and rely solely on their own mass (and, ergo, the laws of gravity working with their weight) to keep soil in check. This allows versatility with the materials that can be used when building a gravity wall, and in general, they are a simpler structure to build, with the wall and perhaps a trench or concrete seal at the bottom being the only necessary ingredients.

Reinforced Retaining Walls

Reinforced retaining walls
Image Source – https://www.hcgeosynthetics.com/geogrid/pp-biaxial-geogrid/geogrid-reinorced-retaining-wall.html

Also known as cantilevered retaining walls, reinforced walls are one of the stronger models because of the foundational support that they exhibit. The wall runs in an L-shape, with the main part being above ground and holding the soil in place, while the shorter part in the form of a slab goes beneath the bed. The weight of the dirt on top of this slab is what keeps it from falling forward. Some reinforced retaining walls have additional structural help in the foundation.

Sheet Piling Retaining Walls

Sheet piling retaining walls
Image Source – https://surfcivil.blogspot.com/2012/11/sheet-pile.html

If you have soft soil and are tight on space, a sheet piling wall might be your best bet. Sheet piling walls are just a thin piece of material (usually steel, wood, or vinyl) that is driven into the ground by the soil. Sometimes there is additional support offered with a vertical corrugated structure.

Anchored Retaining Walls

Anchored retaining walls
Image Source – https://vincivilworld.com/tag/anchored-retaining-wall-advantages-and-disadvantages/

An anchored retaining wall is when anchors are driven into the ground to support the wall, and then they expand while below ground through mechanical or pressurized means from above. Anchored walls can help support any of the other three types of walls, though are most typically used for either large sheet piling walls or a higher load.

Geogrid

Geogrid isn’t a type of retaining wall, but rather a type of material that is helpful for adding to the strength of the wall. It’s a mesh of sorts that acts as a support to the soil that is being kept inside the boundaries. The soil grabs for the geogrid rather than pushing on the wall, and so it alleviates much of the pressure on the stones. Geogrid can be so strong that even sand castles can support concrete when using it!

How Does a Retaining Wall Work?

Essentially, a retaining wall will take a sloping property and help make it functional and beautiful, leveling out certain areas for texture and aesthetic and protecting the yard from the damages of erosion.

Using a variety of materials (stone, brick, wood, concrete, etc.), a retaining wall can even be practical outside of keeping soil in, as it can provide things like outdoor seating or even some privacy if placed correctly.

The materials are stacked or pushed into the ground to create a barrier around the soil bed that they are hemming in, and the soil cannot escape due to the strength of the structure. It makes dangerous land safe (and also makes them ideal for flower beds and gardens!).

It depends primarily on the material that you decide to use (plus labor and parts), but it can cost thousands of dollars to build even one retaining wall. But don’t let that deter you! They have a purpose beyond their beauty, but the fact that they have such an additional aesthetic appeal will add value to your life, and to your home.

Ask your engineer for a price per square foot; on average it is:

  • Can $19-$38 for basic concrete blocks.
  • Can $18 for brick.
  • Up to Can $32 for wood.
  • Up to Can $50 for stone or poured concrete.

So now, if you’ve decided that a retaining wall is right for you and your yard, let’s look at some practical tips for what to do – and what not to do – when adding one into your landscaping.

The Do’s and Don’ts of Building a Retaining Wall

It can be exciting to add a new structure to your home! But keep in mind that retaining walls are not only meant to be beautiful but meant to be functional. Here are some tips to keep in mind while making decisions for your retaining wall.

Do Get Help from an Engineer

It might be expensive, but it will be worth it in the long run to have a retaining wall that works. It’s not that you can’t DIY, but installing a retaining wall is more complicated than you might think (especially one taller than four feet) and checking over your plans with a professional could make things much easier.

Do Check Your Materials

Is that geogrid, or snow fence? Are you sure that’s the material you want for your wall? Have you double-checked your measurements? It can save a lot of work, in the long run, to check everything before you make decisions that you can’t go back on.

Do Confirm With Your Local Authorities

You might need permission and permits to build your retaining wall, so know of any potential problems before you begin construction! And don’t start digging before you have checked if there is a pipe or line where you’re planning to make a trench! Call DigSafe for your state to make sure that you don’t have any dangerous complications.

Do Lay Materials Evenly

If you use, say, cinder blocks to make your wall and put the first row on a slope that goes down to the side, you will find yourself laying an entire wall that goes the same direction, which looks messy. If you need to, build tiers of walls rather than one large one, but make sure that the bottom layer of each wall is on even ground!

Your wall should be sloping from top to bottom in a way that leans into the soil it is retaining! Just not from side to side.

Don’t Put Your Wall Near Problematic Roots

The last thing you want is tree roots ruining the structure you’ve just built! A quality foundation is imperative to a good retaining wall, but Mother Nature can disrupt that if you don’t choose a good location to build.

Don’t Forget About Water!

Water is the enemy of all structures. Groundwater can begin to make your wall unstable if you don’t plan for it ahead of time, so it is extremely important to build a drainpipe and gravel or another draining mechanism into your design to account for the flow.

How Installing a Retaining Wall Will Add Beauty to Your Backyard

Retaining walls can be some of the most beautiful pieces in your landscaping if you design it right. Here are some of the primary things to consider when you are thinking aesthetically about your wall.

Materials

The materials you choose should compliment your home, the rest of your yard, and whatever the retaining wall is supporting (garden, flowers, etc.). Below are the most common materials.

Stone is timeless and popular for retaining walls as it adds a more grounded feel to them. Plus, they are lower maintenance than some other materials!

Brick is low maintenance, too, and punctuates a lawn with a very intentional accent. Brick is cozy, clean, and clear – great for bringing attention to your walls!

Concrete is heavy and durable, and while its aesthetic doesn’t fit everywhere, it gives a clean and urban vibe that invites imagination to collaborate with its blank slate.

Finally, wood is a great choice for adding a natural feel to your yard and has a wide variety of options that can match many locations.

In the Soil

Growing something inside your retaining wall will automatically elevate the elegance of your yard. Flowers of any sort will evoke Versailles when you see them peeping over tiers of block stone walls, and even just greenery will be sure to let people know that you are intentional with your choice of decoration.

You can even plant small trees (with non-invasive roots, of course) near (not on) your retaining wall! To have an inviting yard is to tell people that you respect them and yourself, and the land that you live on.

Twenty Cool Ideas for your Retaining Wall

  1. A brown wood-tiered wall that only grows grass gives a sleek, modern look that almost turns your yard into gigantic steps of a giant. Another great idea for grass retaining walls involves grass-covered steps and gives the impression of a naturally occurring staircase!
  2. Building a retaining wall around a centerpiece, like a fountain in a courtyard, takes the level of architecture from “pretty” to “dancing-in-Europe-at-sunset-gorgeous.”
  3. Untreated steel, while not a conventional material, gives almost a post-apocalyptic vibe that can go well with desert homes or a rustic farmhouse. Or try marble for a grandiose display!
  4. Using huge boulders as your material easily gives the impression of a wall built long ago that has remained standing for centuries. It’s whimsical and impressive at the same time.
  5. Building benches into your retaining wall gives a romantic feel to the landscape, no matter what material you use!
  6. Putting a matching in-ground pool into the center of your retaining wall can look and feel like a garden oasis; who wouldn’t love that?
  7. Making tiers of steps that lead up your wall into a walkway or entrance to your home gives your house the feel of a castle, and gives your guests the experience of walking up to one!
  8. An intentionally uneven wall with carefully placed plants is the perfect opportunity to have a waterfall running down your retaining wall. Just be sure to have carefully placed pipes to handle it!
  9. Basic concrete can sound boring, but hand your kid a box of sidewalk chalk and let them get to work changing that blank slate into mural after mural of colorful artwork!
  10. Draping plants lend a mysterious, Victorian appeal to a retaining wall – especially if it is so concealed by leaves that it looks more like a hedge than rocks!
  11. Large, flat rocks built as steps into a garden retaining wall are like building stepping stones across a magical pond. In other words, beautiful and desirable.
  12. You can use shaped stones to create patterns on your wall, like rows of diamonds! It’s eye-catching and eye-keeping.
  13. A latticed retaining wall, especially a tall one, has the opportunity for many different plants to grow out of it and show a vast vertical garden to your guests!
  14. If you live in a place with gorgeous natural rock landscaping then you can consider using that to build your retaining wall and blend in with your natural habitat, making it look almost as though your home was raised upright from the ground.
  15. Multiple high retaining walls can make little pockets of privacy – almost like house rooms in your backyard.
  16. Multicolored materials make for a vibrant wall that pops out to the eye and brings charm to any yard. You can try making a mosaic with flat stones and lines in between – beautiful!
  17. Textured material walls – interlocking blocks, overlaying blocks, even using garden planters as part of the wall – are a great choice for anyone looking for an artistic aesthetic that delights the eye!
  18. Using different materials for one wall (like stone and wood) is a cool way to mix vibes and give a unique flavor to your home.
  19. Sleepers are materials that are used to keep a structure in place, like the flat railroad tie that supports the other two. Using vertical sleepers can add a very smooth look to your retaining wall, almost as if using a cookie-cutter on your grass!
  20. Lights. You can add lights to your retaining wall and give it a warm, adventurous look that is great for summer evenings around a grill or fire pit (which you can also build into your retaining wall!)

Retaining walls are beautiful, practical additions to any home, and elevate the quality of life to anyone who experiences them. There is something beautiful about walls, grass, greenery, and flowers all mixed together to preserve soil and preserve elegance. Call your local engineers and landscapers and tell them about your dream retaining wall! They want to help you as much as you want to build it.

Frequently Asked Questions:

  1. What is a retaining wall?
    • A retaining wall is a structure designed to hold back soil and prevent erosion, often used in landscaping to create stable, usable spaces on sloped ground.
  2. What materials can be used to build a retaining wall?
    • Common materials for retaining walls include stone, brick, concrete, wood, and reinforced plastic materials like geogrids.
  3. How does a retaining wall work?
    • Retaining walls counteract the force of gravity, effectively holding back soil and maintaining stability in sloped areas by distributing pressure evenly across the wall.
  4. What are the different types of retaining walls?
    • The primary types include gravity walls, cantilevered walls, sheet piling walls, and anchored walls, each serving different structural needs and environments.
  5. How much does it cost to build a retaining wall?
    • Costs can vary widely, generally ranging from $19 to $50 per square foot, depending on materials and the complexity of the construction.
  6. Do I need a professional to build a retaining wall?
    • For walls over four feet or those requiring significant structural support, it’s advisable to consult with an engineer or a professional landscaper to ensure safety and effectiveness.