Architectural Styles Through Time: A Guide to Mississauga’s Historic Homes

Mississauga, a city rich in history and architectural diversity, boasts a stunning array of historic homes that tell the story of its development over time. From the early settlers’ modest dwellings to the grand estates of the 20th century, each architectural style reflects the era in which it was built, the materials available, and the prevailing tastes of the time. In this comprehensive guide, we’ll explore the various architectural styles found in Mississauga’s oldest neighbourhoods, with a particular focus on their masonry features and construction techniques. 1. Overview of Common Architectural Styles in Mississauga’s Historic Areas Mississauga’s historic neighbourhoods showcase a variety of architectural styles, each with its unique characteristics and charm. Let’s take a closer look at some of the most prevalent styles: Georgian (1750-1850) Georgian architecture, named after the four King Georges of England, is characterized by its symmetry, proportion, and classical details. These homes typically feature: – Symmetrical façades with centered front doors – Multi-paned sash windows arranged in strict horizontal and vertical lines – Simple, unadorned brick or stone exteriors – Low-pitched roofs with little overhang Victorian (1850-1900) Victorian architecture encompasses several sub-styles, including Gothic Revival, Italianate, and Queen Anne. Common features include: – Asymmetrical designs with complex rooflines – Decorative trim, often referred to as “gingerbread” – Bay windows and wrap-around porches – Vibrant colour schemes Edwardian (1900-1920) Edwardian homes, popular during the reign of King Edward VII, are known for their elegance and simplicity. Key features include: – Less ornate than Victorian styles – Larger windows and brighter interiors – Simpler rooflines with fewer embellishments – Red brick exteriors, often with contrasting stone details Arts and Crafts (1900-1930) The Arts and Crafts movement emphasized handcrafted details and natural materials. Homes in this style typically feature: – Low-pitched roofs with wide eaves – Exposed rafters and decorative brackets – Large front porches with tapered columns – Use of natural materials like wood, stone, and brick 2. Characteristic Masonry Features of Each Style Masonry plays a crucial role in defining the character of Mississauga’s historic homes. Let’s examine the distinctive masonry features of each architectural style: Georgian Masonry Georgian homes often feature: – Solid brick construction with precise, uniform brickwork – Simple, unadorned façades with little ornamentation – Stone quoins (corner blocks) for added strength and visual interest – Flat brick arches above windows and doors Victorian Masonry Victorian-era homes showcase more elaborate masonry work: – Polychromatic brickwork, using contrasting colours for decorative effect – Intricate patterns and designs in brick or stonework – Ornate chimneys with decorative brickwork – Stone or terracotta details, such as window surrounds and cornices Edwardian Masonry Edwardian homes typically feature: – Red brick exteriors with contrasting stone or terracotta details – Simpler brickwork patterns compared to Victorian styles – Decorative brick corbelling under eaves – Stone lintels and sills on windows Arts and Crafts Masonry Arts and Crafts homes often incorporate: – Mixed materials, such as brick lower levels with stucco or wood upper stories – Rough-hewn stone foundations and chimneys – Clinker bricks with irregular shapes and colours for a handcrafted look – Decorative brick or stone porch pillars 3. Evolution of Building Materials and Techniques Over Time The construction of Mississauga’s historic homes reflects the evolution of building materials and techniques from the 18th to the early 20th century: Early Settlement Period (Late 18th – Early 19th Century) – Local materials such as fieldstone and timber were commonly used – Hand-moulded bricks produced in small, local brickyards – Lime mortar made from locally burned limestone – Simple construction techniques relying on manual labour Industrial Revolution (Mid-19th Century) – Introduction of mass-produced, machine-made bricks – Improved transportation allowed for wider variety of building materials – Development of stronger Portland cement mortar – Advent of cast iron for decorative elements Turn of the 20th Century – Increased use of steel for structural support – Introduction of concrete as a building material – Improved brick-making techniques resulting in more uniform products – Development of cavity wall construction for better insulation 4. Notable Examples of Each Style in Different Neighbourhoods Mississauga’s historic neighbourhoods offer excellent examples of these architectural styles: Georgian The Bradley Museum in Clarkson features a restored Georgian-style farmhouse from the early 19th century, showcasing typical brick and stone masonry of the period. Victorian The Adamson Estate in Port Credit boasts a beautiful example of Victorian Gothic Revival architecture, with its intricate brickwork and decorative stone details. Edwardian The historic Streetsville area features several well-preserved Edwardian homes, characterized by their red brick exteriors and simpler decorative elements. Arts and Crafts The Erindale Village area contains excellent examples of Arts and Crafts style homes, showcasing the use of natural materials and handcrafted details. 5. Tips for Homeowners on Maintaining the Integrity of Their Home’s Architectural Style If you’re fortunate enough to own a historic home in Mississauga, here are some tips to help maintain its architectural integrity: – Research your home’s history: Understanding your home’s original design and materials will guide your maintenance and restoration efforts. – Preserve original features: Whenever possible, repair rather than replace original elements such as windows, doors, and decorative trim. – Use appropriate materials: When repairs are necessary, use materials that match the original as closely as possible. For masonry work, this means matching brick type, mortar composition, and joint profiles. – Maintain proper drainage: Ensure gutters and downspouts are functioning correctly to prevent water damage to masonry and foundations. – Address issues promptly: Don’t delay repairs, especially when it comes to masonry. Small problems can quickly escalate if left unattended. – Consult experts: When undertaking major repairs or renovations, consult with heritage conservation specialists and experienced masonry contractors who understand historic building techniques. – Respect the original design: If making additions or alterations, ensure they complement the original architectural style rather than overshadowing or conflicting with it. – Regular maintenance: Implement a regular maintenance schedule, including cleaning gutters, inspecting roofs, and checking for masonry damage or deterioration. Conclusion Mississauga’s historic homes are a testament to the city’s rich architectural heritage. From the symmetrical elegance of Georgian homes to the handcrafted charm of Arts and Crafts dwellings, each style tells a unique story through its design and masonry features. By understanding and appreciating these architectural styles, homeowners and residents alike can play a crucial role in preserving Mississauga’s built heritage for future generations. Whether you’re a proud owner of a historic home or simply an admirer of architectural beauty, taking the time to explore Mississauga’s historic neighbourhoods can be a rewarding experience. As you walk through these areas, pay attention to the intricate brickwork, stone details, and unique features that define each architectural style. And remember, if your historic home needs masonry repairs or restoration, it’s essential to work with experienced professionals who understand the importance of maintaining its architectural integrity. At Fix My Brick, we specialize in the restoration and repair of historic masonry, ensuring that Mississauga’s architectural gems continue to shine for years to come. Contact us to learn more about how we can help preserve the beauty and integrity of your historic home.\n\n\n

What is the return policy?

You can return items within 30 days of receipt for a full refund.

How long does shipping take?

Shipping typically takes 5-7 business days.

Do you offer international shipping?

Yes, we offer international shipping to select countries.

Can I track my order?

Yes, once your order has shipped, you will receive a tracking number via email.

What payment methods do you accept?

We accept credit cards, PayPal, and other major payment methods.

The Masonic Temple Building: A Cornerstone of Brantford’s Masonry Heritage

Nestled in the heart of Brantford, Ontario, stands a testament to the city’s rich masonry heritage and the enduring legacy of Freemasonry. The Masonic Temple Building, with its imposing presence and intricate architectural details, has been a focal point of the community for over a century. In this comprehensive exploration, we’ll delve into the fascinating history of this iconic structure, from its construction to its role in the local Masonic community, and examine the architectural features that make it a true gem of masonry craftsmanship.

The Construction and Design of the Masonic Temple Building

The story of the Masonic Temple Building begins in the early 20th century when Brantford’s Masonic community decided to create a dedicated space for their activities and gatherings. Construction commenced in 1909, with the building officially opening its doors in 1911.

Architectural Vision

The building was designed by prominent local architect Frederick C. Bodley, known for his work on several notable structures in Brantford and the surrounding area. Bodley’s vision for the Masonic Temple was to create a structure that embodied the principles and symbolism of Freemasonry while also serving as a practical meeting place for the fraternity.

Construction Process

The construction of the Masonic Temple Building was a testament to the skill and dedication of local craftsmen. Some key aspects of the construction process included:

  • Sourcing high-quality local materials, including limestone and brick
  • Employing skilled stonemasons and bricklayers to ensure precision in the building’s construction
  • Incorporating symbolic Masonic elements into the design and ornamentation
  • Utilizing advanced construction techniques of the time to create a sturdy and enduring structure

Use by the Masonic Community from 1911 to 1945

For over three decades, the Masonic Temple Building served as the heart of Brantford’s Masonic community. During this period, the building played a crucial role in the fraternity’s activities and the broader community.

Masonic Lodges and Activities

The Masonic Temple Building housed several Masonic lodges, including:

  • Brant Lodge No. 45
  • Doric Lodge No. 121
  • Ozias Lodge No. 508

These lodges held regular meetings, conducted rituals, and initiated new members within the building’s walls. The Temple also hosted various Masonic events, such as banquets, lectures, and charitable functions.

Community Involvement

Beyond its role in Masonic activities, the building also served the wider Brantford community. During World War I and World War II, the Masonic Temple Building was used for various war effort activities, including:

  • Fundraising events for troops and their families
  • Meetings of support groups for veterans
  • Storage and distribution of supplies for the war effort

Architectural Features and Masonry Techniques Used in the Building

The Masonic Temple Building is a prime example of early 20th-century masonry craftsmanship, showcasing a variety of architectural features and construction techniques that have stood the test of time.

Exterior Features

The building’s exterior is characterized by its imposing facade and intricate detailing:

  • Limestone foundation and accents, providing a sturdy base and visual contrast
  • Red brick walls laid in a Flemish bond pattern, showcasing the skill of the bricklayers
  • Ornate cornices and pediments adorned with Masonic symbols
  • Large arched windows with decorative stonework
  • Grand entrance portal with carved stone details

Interior Design

The interior of the Masonic Temple Building is equally impressive, featuring:

  • A grand staircase leading to the upper floors
  • High ceilings with intricate plasterwork
  • Wooden wainscoting and trim throughout
  • Large meeting rooms with raised platforms for officers
  • Secret passages and rooms used for Masonic rituals

Masonry Techniques

Several advanced masonry techniques were employed in the construction of the Masonic Temple Building, including:

  1. Flemish bond brickwork: This pattern, featuring alternating headers and stretchers, provides both aesthetic appeal and structural strength.
  2. Cut stone detailing: Intricate stonework around windows, doors, and cornices demonstrates the skill of the stonemasons.
  3. Structural arches: Used over windows and doorways to distribute weight and add visual interest.
  4. Corbelling: Projecting brickwork used to create decorative elements and support upper levels.
  5. Tuckpointing: A technique used to create the illusion of fine mortar joints, enhancing the building’s appearance.

The Building’s Current Status and Preservation Efforts

As with many historic buildings, the Masonic Temple Building has faced challenges in recent years. However, efforts are underway to preserve this important piece of Brantford’s architectural and cultural heritage.

Current Status

The Masonic Temple Building is currently:

  • No longer used for Masonic activities, as the local lodges have relocated
  • Partially occupied by various businesses and organizations
  • In need of restoration and repairs to maintain its structural integrity and historical character

Preservation Efforts

Several initiatives are underway to ensure the Masonic Temple Building’s future:

  1. Heritage designation: The building has been designated as a heritage property, providing legal protection and recognition of its historical significance.
  2. Restoration projects: Local preservation groups are working to secure funding for necessary repairs and restoration work.
  3. Community engagement: Efforts to raise awareness about the building’s importance and encourage public support for its preservation.
  4. Adaptive reuse proposals: Plans to repurpose the building while maintaining its historical integrity, potentially as a community center or mixed-use space.

Conclusion

The Masonic Temple Building stands as a proud testament to Brantford’s masonry heritage and the enduring legacy of Freemasonry in the community. Its impressive architecture, rich history, and the ongoing efforts to preserve it demonstrate the importance of maintaining our architectural treasures for future generations.

As we look to the future, the Masonic Temple Building serves as a reminder of the skill and craftsmanship of early 20th-century masons and the enduring power of community landmarks. By supporting preservation efforts and celebrating structures like this, we ensure that Brantford’s masonry heritage continues to inspire and educate for years to come.

\n\n\n

What is the return policy?

Our return policy allows you to return items within 30 days of receipt for a full refund, provided the items are in their original condition.

How long does shipping take?

Shipping typically takes 5-7 business days, depending on your location and the shipping method selected at checkout.

Do you offer international shipping?

Yes, we offer international shipping to select countries. Please check our shipping policy for more details.

What payment methods are accepted?

We accept all major credit cards, PayPal, and Apple Pay for your convenience.

How can I contact customer service?

You can contact our customer service team via email at [email protected] or by calling our toll-free number at 1-800-555-0199.

Sustainable Commercial Masonry: Green Building Practices for Ontario Businesses

As the push for sustainable construction practices continues to grow, Ontario businesses are increasingly looking for ways to reduce their environmental impact without compromising on structural integrity. Sustainable commercial masonry offers an excellent solution, combining time-tested building techniques with modern eco-friendly innovations. In this comprehensive guide, we’ll explore how Ontario businesses can incorporate green building practices into their masonry projects, creating structures that are both durable and environmentally responsible.

1. Sustainable Masonry Materials and Their Properties

The foundation of sustainable commercial masonry lies in the materials used. By choosing eco-friendly options, businesses can significantly reduce their carbon footprint while still maintaining the strength and longevity associated with traditional masonry construction.

Recycled and Reclaimed Materials

One of the most effective ways to create sustainable masonry is by using recycled or reclaimed materials. These can include:

  • Reclaimed bricks from demolished buildings
  • Recycled concrete aggregates
  • Salvaged stone

Using these materials not only reduces waste but also adds character to buildings, often resulting in unique and attractive facades.

Low-Carbon Cement Alternatives

Traditional Portland cement production is a significant contributor to global CO2 emissions. Fortunately, there are several low-carbon alternatives available:

  • Geopolymer cement: Made from industrial waste products like fly ash
  • Limestone calcined clay cement (LC3): Reduces CO2 emissions by up to 40%
  • Magnesium-based cements: Can actually absorb CO2 during the curing process

Locally-Sourced Materials

Using materials sourced from within Ontario or nearby regions can significantly reduce transportation-related emissions. Look for:

  • Local quarries for stone
  • Regional brick manufacturers
  • Nearby suppliers of recycled materials

2. Energy-Efficient Masonry Design Strategies

Sustainable masonry isn’t just about the materials used; it’s also about how those materials are incorporated into the building design to maximize energy efficiency.

Thermal Mass for Temperature Regulation

Masonry’s natural thermal mass properties can be leveraged to create more energy-efficient buildings:

  • Absorbs heat during the day and releases it at night, reducing HVAC loads
  • Helps maintain stable indoor temperatures, improving comfort
  • Can be combined with passive solar design for optimal efficiency

Insulated Concrete Forms (ICFs)

ICFs combine the strength of concrete with the insulating properties of foam:

  • Provides excellent thermal insulation
  • Reduces air infiltration
  • Can result in up to 70% energy savings compared to traditional construction

Green Roofs and Living Walls

Integrating vegetation into masonry structures can provide multiple benefits:

  • Improves insulation and reduces urban heat island effect
  • Absorbs rainwater, reducing stormwater runoff
  • Enhances biodiversity in urban areas

3. Water Management and Conservation in Masonry Construction

Effective water management is crucial for both the longevity of masonry structures and overall environmental sustainability.

Rainwater Harvesting Systems

Integrating rainwater collection into masonry designs can significantly reduce water consumption:

  • Use collected rainwater for irrigation or non-potable applications
  • Design attractive water features that double as storage systems
  • Incorporate permeable paving to reduce runoff and recharge groundwater

Proper Drainage and Waterproofing

Ensuring proper water management protects the structure and reduces maintenance needs:

  • Install appropriate flashing and weep holes
  • Use high-quality, eco-friendly sealants and waterproofing materials
  • Design efficient drainage systems to direct water away from the building

4. Recycling and Reuse of Masonry Materials

Implementing a circular economy approach to masonry can significantly reduce waste and resource consumption.

On-Site Recycling

When renovating or demolishing existing structures:

  • Crush and reuse concrete as aggregate for new construction
  • Clean and repurpose bricks for new projects or landscaping
  • Use stone remnants for decorative elements or hardscaping

Design for Disassembly

Consider future reuse when designing new structures:

  • Use modular designs that can be easily taken apart
  • Choose mortars that allow for easier separation of materials
  • Document material types and locations for future reference

5. LEED Certification and Masonry’s Role in Green Building

Leadership in Energy and Environmental Design (LEED) certification is a globally recognized symbol of sustainability achievement. Masonry can play a significant role in achieving LEED points.

Materials and Resources

Sustainable masonry can contribute to LEED points through:

  • Use of recycled content
  • Regional materials sourcing
  • Construction waste management

Energy and Atmosphere

Energy-efficient masonry design contributes to:

  • Optimized energy performance
  • Reduced heat island effect

Indoor Environmental Quality

Masonry can improve indoor environments by:

  • Providing thermal comfort
  • Reducing noise transmission
  • Using low-emitting materials

Conclusion

Sustainable commercial masonry offers Ontario businesses a powerful way to reduce their environmental impact while creating durable, attractive structures. By incorporating eco-friendly materials, energy-efficient designs, and water conservation strategies, businesses can construct buildings that not only meet their needs but also contribute to a greener future.

As we continue to face environmental challenges, the masonry industry is evolving to meet the demand for more sustainable practices. By embracing these green building techniques, Ontario businesses can lead the way in sustainable construction, setting an example for others to follow.

Whether you’re planning a new construction project or looking to renovate an existing structure, consider how sustainable masonry practices can benefit your business and the environment. With the right approach, you can create a building that’s not just built to last, but built to sustain our planet for generations to come.

\n\n\n

What is sustainable commercial masonry?

Sustainable commercial masonry combines traditional building techniques with eco-friendly innovations, allowing Ontario businesses to reduce their environmental impact while maintaining structural integrity.

What materials can be used in sustainable masonry?

Eco-friendly materials include recycled and reclaimed options such as bricks from demolished buildings, recycled concrete aggregates, low-carbon cement alternatives like geopolymer cement, and locally-sourced materials.

How can energy efficiency be maximized in masonry design?

Energy-efficient masonry design can utilize thermal mass for temperature regulation, use Insulated Concrete Forms (ICFs) for better insulation, and integrate green roofs or living walls to enhance energy performance.

What role does water management play in sustainable masonry?

Effective water management involves rainwater harvesting systems and proper drainage and waterproofing, both essential for the durability of structures and reducing environmental impact.

How can masonry materials be recycled or reused?

Masonry materials can be recycled on-site during renovations or demolitions by crushing concrete for aggregates, repurposing bricks, or using stone remnants for decorative uses, promoting a circular economy approach.

What is LEED certification, and how does masonry contribute to it?

LEED certification is a symbol of sustainability achievement. Sustainable masonry contributes to LEED points through the use of recycled content, regional materials sourcing, and energy-efficient design strategies.

What benefits do green roofs and living walls provide?

Green roofs and living walls improve insulation, reduce the urban heat island effect, absorb rainwater, and enhance biodiversity in urban areas.

Why should businesses consider sustainable masonry practices?

Sustainable masonry practices allow businesses to create durable and attractive structures that reduce environmental impacts, ultimately contributing to a greener future while meeting their construction needs.

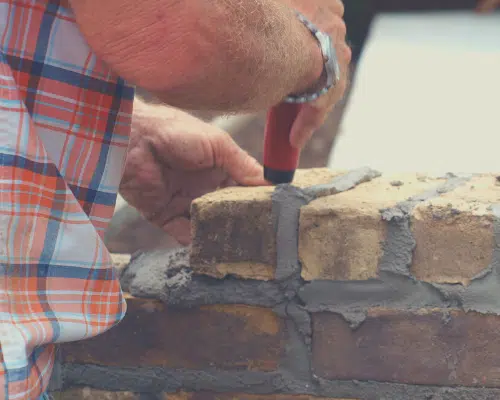
The image shows the hands of a worker, wearing a plaid shirt, as they use a trowel to apply mortar to a brick wall. The worker is carefully spreading the mortar between the bricks, demonstrating the skilled masonry work involved in constructing a brick structure.

How to Fix Brick Mortar: A Detailed 6-Step Guide

Although pointing is an easy job, it requires care and the use of the right tools. Without mortar to hold it together, even the most exquisite brickwork can be just as much rubble.

What is Mortar Repointing?

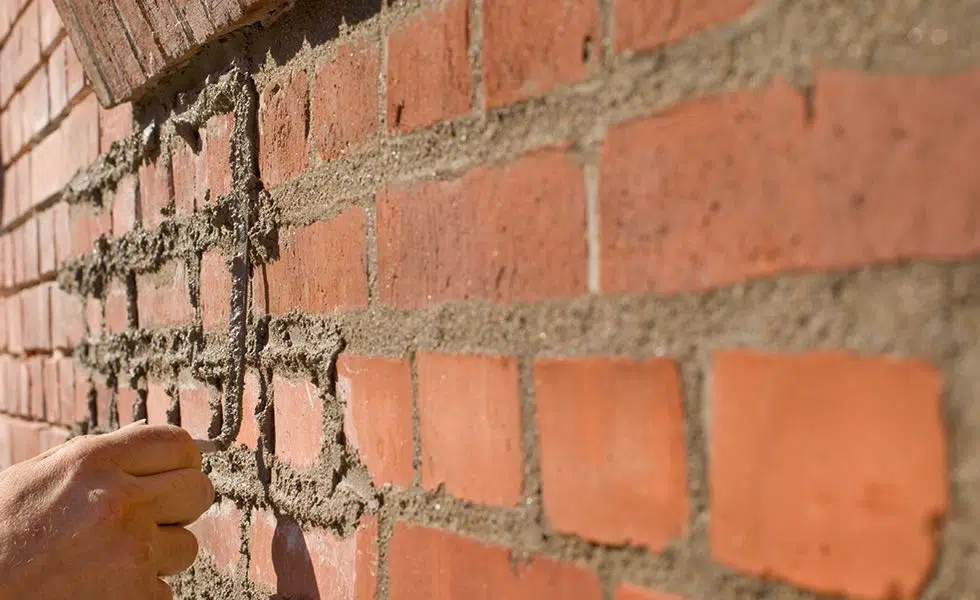
Repointing is when mortar cracks, recedes or falls out of joints. Although this is an easy job, it requires care. You must use the right tools and materials to prevent brick damage and permanent wall defects. This means we use hand tools and lime mortars that are similar to those used by masons 100 years ago.

Mortar over Old Mortar?

You can repoint bricks older than 50 years with modern portland cement-based mortar. However, the guy who will be repointing your next house may not approve of your choice. If your house was built prior to World War II, it is likely that the mortar contains a mixture of lime putty, and sand, so you will need to match it.

If the mortar is not matched, the bond between the brick and rock-hard mortar will eventually break. The bricks will begin to pop off as moisture gets trapped in the walls. Lime mortar is a traditional cushion that flexes with the brick’s movement and allows moisture to move freely out of the wall.

An experienced restoration mason will analyze your mortar to create a compatible mixture. Or, you can send samples of mortar to the U.S. You can also request a blend that is identical to Heritage. Hydraulic lime comes in bags, hardens with water, and is similar to portland cement. Lime putty mortar comes in buckets, hardens slowly with carbon dioxide in the air, and comes in bags.

Brick mortar repointing

6 Steps to Mortar Bricks

Step 1

Remove the Bed Joints

To remove horizontal joints, scrape them to a depth of at minimum 3/4 inches. Joints that are more than 1/2 inch wide must be dug to a depth of at least 3/4 inch. These 1/4-inch “butter joints” can be cut with a carbide-tipped grout saw. For larger joints, a cold chisel or an engineer’s tool can be used. Avoid electric angle grinders. They can easily cut through bricks if you aren’t skilled in using them.

Step 2

Clear out the Head Joints

Dig out the vertical joints after removing three to four courses of mortar for the bed-joint mortar. Pay attention not to strike the brick edges below or above. This is where the mortar is removed by tapping a 5-in-1 hammer on a painter’s knife.

Step 3

Wash Down The Wall

With a stiff-bristled toothbrush, remove all crumbly material. Next, check that your tuckpointing trowel blade fits into the joint. You can grind the blade down with an abrasive tool if it is too long. Mist the brick with water until it is completely damp. This is important because dry materials can suck moisture from the mortar, preventing it from curing properly. Do not fill the joints until the next day.

Step 4

Mix the Mortar

Again, mist the brick. Follow the instructions on the bag to stir the water into the dry mixture until it becomes a peanut butter-like consistency and sticks to a trowel. Allow the mixture to rest for 15 minutes until it forms a thin layer of water. Mix the water back into the mixture. Now the mortar is ready for use. It will remain usable for eight hours. You can “retemper,” it if it becomes too dry during that time by adding water occasionally.

Laying Bricks

Step 5

Fill the Joints

A dollop of mortar should be poured onto a brick trowel, hawk, or another flat surface. The mortar should be held up with a bed joint and pushed against the back with the tuckpointing trowel. After removing any voids, make a few passes along the trowel’s edge to fill them in. Then add more mortar until you have filled the joint. After you have completed three to four courses of bed joints, fill the head joints. Final step: Smoothen and compact all mortar using the trowel’s flat surface. Finally, remove any mortar from the brick.

Step 6

Brush the Wall

Brush diagonally across the mortar to remove any mortar crumbs. The fresh mortar can be pulled out by brushing in line with joints. Next, carefully remove any mortar residue from the brick faces. Use a tarp to cover the mortar joints against the sun, wind, or rain for the next three days. Give the wall a misting every day to keep it moist.

Frequently Asked Questions

  1. What is Mortar Repointing?
    • Mortar repointing involves repairing and renewing the mortar joints between bricks. This maintenance process is essential for preserving the structural integrity and aesthetic of brick constructions, especially as mortar ages and deteriorates.
  2. Can I Use Modern Mortar on Older Brick Structures?
    • For brick structures older than 50 years, especially those built before World War II, it’s recommended to use a lime putty and sand mixture similar to the original mortar rather than modern portland cement-based mortar. This ensures compatibility and prevents damage to the bricks.
  3. Why Should I Avoid Using Electric Angle Grinders for Repointing?
    • Electric angle grinders can be too aggressive for repointing, potentially damaging the bricks if not handled with precision. Hand tools are preferred for their control and gentleness on the historic masonry.
  4. How Deep Should I Remove the Old Mortar?
    • Generally, old mortar should be removed to a depth of at least 3/4 inch for bed joints, or deeper if the joint width requires. This ensures a sufficient depth for the new mortar to bond effectively and provide structural stability.
  5. What Should I Do if the Tuckpointing Trowel Doesn’t Fit the Joints?
    • If the tuckpointing trowel is too large to fit into the joints, you can grind down the blade with an abrasive tool to reduce its width. This customization allows the trowel to fit properly and aids in effective mortar application.
  6. How Do I Ensure the New Mortar Cures Properly?
    • After repointing, it’s crucial to keep the new mortar moist for several days. Cover the repointed area with a tarp to protect it from sun and wind, and mist the wall daily to maintain adequate moisture levels. This helps the mortar cure slowly and gain strength.
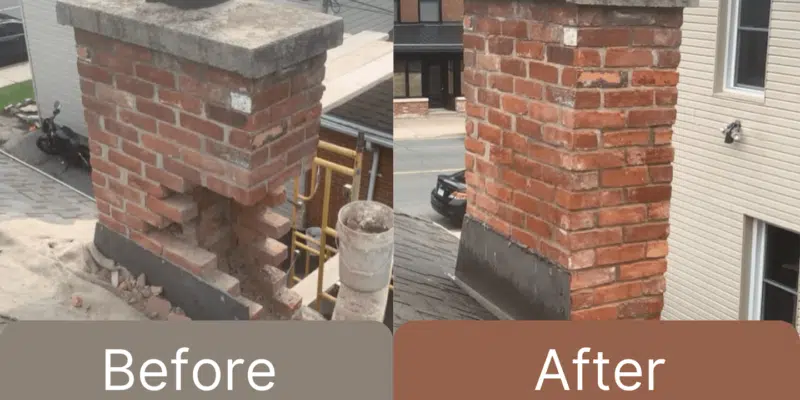
This image shows the before and after of a masonry repair project. The "Before" image shows a brick chimney or structure that appears to be in disrepair, with loose bricks and mortar. The "After" image shows the same structure after it has been repaired, with the brickwork looking clean and well-maintained. The images demonstrate the kind of masonry work that Fix My Brick, the masonry company, can perform to restore and improve the appearance of brick structures.

Expert Tips On Understanding Brick Damage And Preserving Structural Integrity

Brick structures are often thought to be indestructible, but they are not immune to the effects of nature and time. In fact, various factors can compromise their durability, leading to damage that ranges from minor cosmetic concerns to serious structural issues. But don’t worry, identifying and understanding the types of brick damage is an important step in preserving the beauty and functionality of these structures. In this section, we’ll take a closer look at the common forms of brick damage and what they mean for the structure’s integrity. So, grab a cup of coffee and let’s dive in!

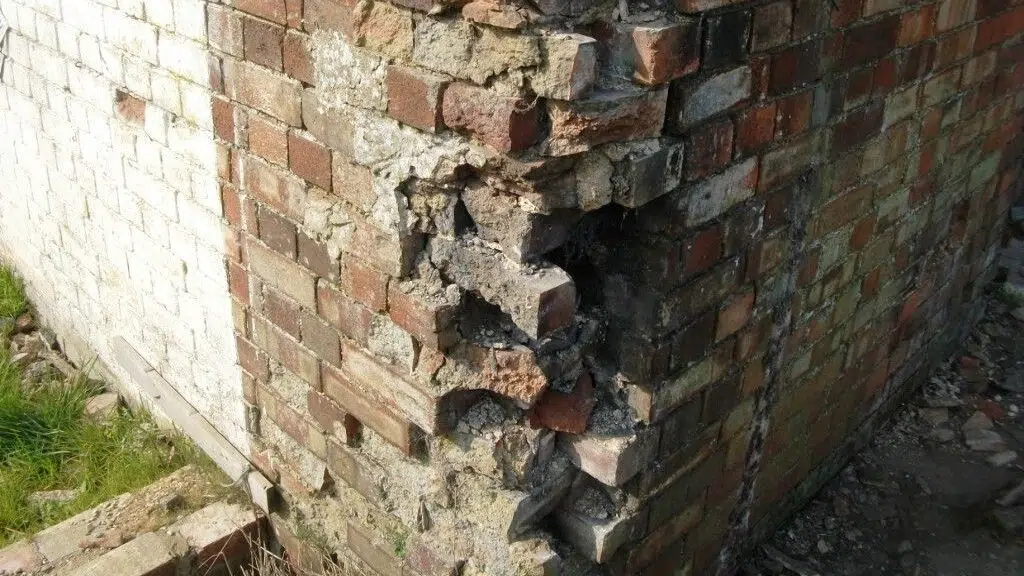
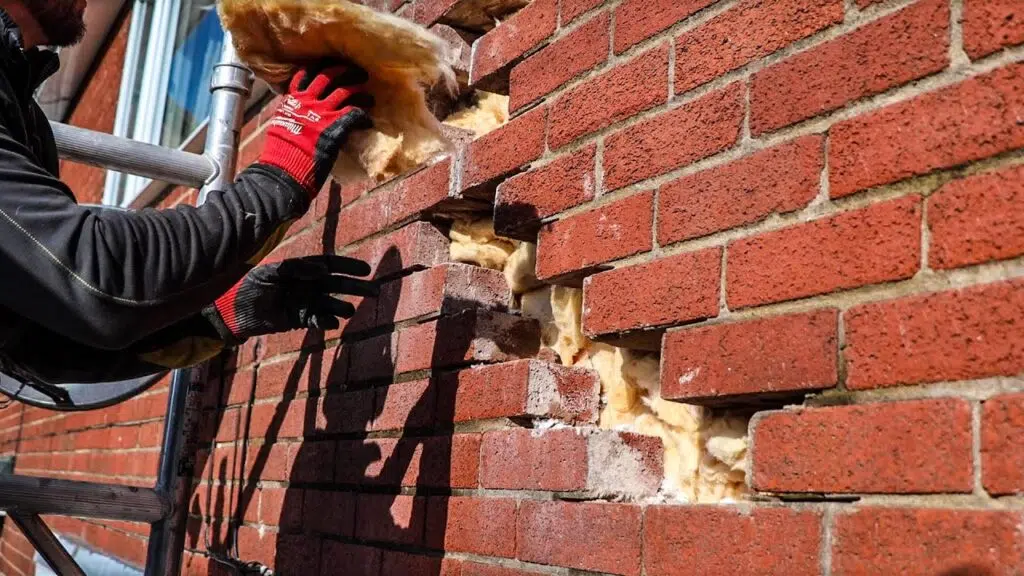
Damaged section of a brick wall

Weathering

Weathering is a natural process that affects all materials exposed to the elements, and brickwork is no exception. Over time, exposure to wind, rain, sun, and freezing temperatures can erode the surface of bricks and degrade mortar joints. This gradual wear can lead to a loss of the brick’s aesthetic appeal and, more importantly, its protective capabilities. Weathering is often characterized by surface flaking (spalling), fading colours, and the softening of the mortar.

Effects on Integrity: While weathering is typically slow, its long-term effects can undermine the structural stability of a wall by reducing its load-bearing capacity and increasing susceptibility to water infiltration.

Impact Damage

Impact damage results from direct physical force, such as accidental collisions with vehicles, falling tree limbs, or construction mishaps. This type of damage is usually localized but can range from minor chips and cracks to significant breaches in the wall.

Impact on Integrity: Besides the immediate visual blemish, impact damage can compromise the structural integrity of a wall if it disrupts the load distribution or creates entry points for water and pests.

Water Infiltration

Water infiltration is among the most detrimental issues faced by brick structures. It can occur through various means, including faulty drainage, capillary action, or exposure to driving rain. Water in the brickwork can lead to frost damage, efflorescence (the deposit of salt crystals), and deterioration of the mortar joints.

Impact on Integrity: Water infiltration not only damages the aesthetic of brickwork but also can lead to structural failure. Freezing temperatures cause water to expand, leading to cracking, while prolonged moisture exposure can weaken mortar joints, compromising the wall’s stability.

Structural Issues

Structural issues in brickwork can arise from foundation settlement, inadequate construction, or the removal of load-bearing walls during renovation. These problems manifest as cracks that follow the mortar joints (step cracking), bulging walls, or leaning structures.

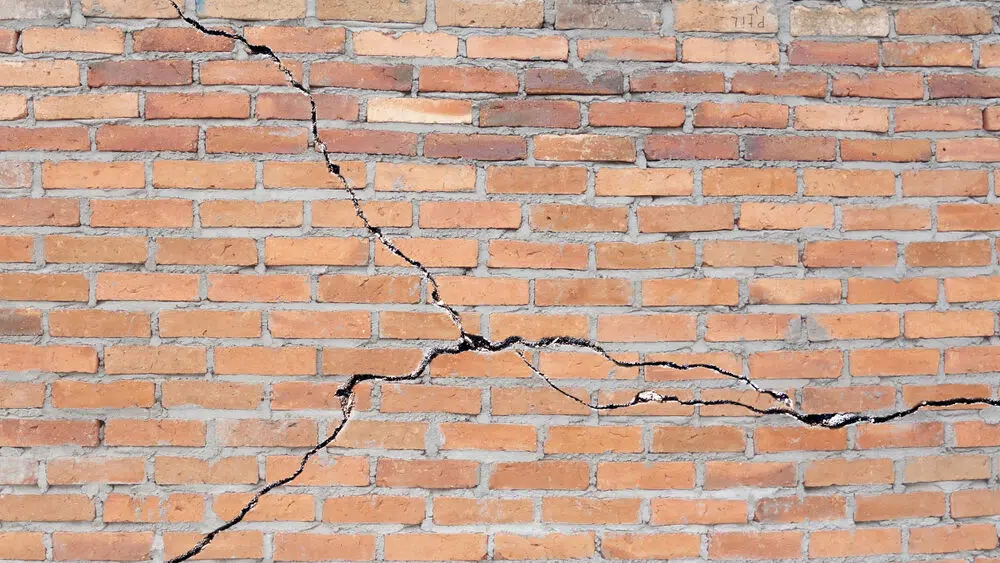
Cracked section of bricks

Impact on Integrity: Structural damage is a significant concern as it directly affects the safety and stability of the building. It can lead to partial or total collapse if not addressed promptly and adequately.

Final Thoughts

Understanding the types of brick damage is essential for timely intervention and repair. Each form of damage, from the slow deterioration caused by weathering to the immediate risks posed by structural issues, requires a tailored approach to restoration. By recognizing these signs early, homeowners and professionals can take steps to preserve the integrity and beauty of brick structures, ensuring they stand the test of time.

Frequently Asked Questions:

  1. What are the most common types of brick damage?
    • The most common types of brick damage include weathering, impact damage, water infiltration, and structural issues. Each type affects the brick’s appearance and structural integrity differently.
  2. How does weathering affect brick structures?
    • Weathering gradually erodes the surface of bricks and degrades mortar joints due to exposure to elements like wind, rain, sun, and freezing temperatures. This can lead to surface flaking, color fading, and a decrease in the wall’s protective capabilities.
  3. What immediate actions should be taken if impact damage occurs?
    • If impact damage occurs, it’s important to assess the extent of the damage promptly. Minor chips and cracks might require simple repairs, while significant damage may need professional evaluation to ensure structural safety.
  4. How can water infiltration be prevented in brick structures?
    • Preventing water infiltration involves ensuring proper drainage systems are in place, sealing cracks and gaps in mortar joints, and applying water-repellent coatings to exposed brick surfaces to minimize absorption during heavy rainfall or melting snow.
  5. What are the signs of structural issues in brickwork?
    • Signs of structural issues in brickwork include cracks following mortar joints (step cracking), bulging walls, and leaning structures. These signs indicate foundational or load-bearing problems that might compromise building safety.
  6. Can brick damage be fully repaired, or will some signs of damage always remain?
    • Many types of brick damage can be effectively repaired, restoring both aesthetics and structural integrity. However, the visibility of repairs can vary based on the extent of damage and the match of replacement materials. In some cases, slight differences might remain visible.
This image depicts a large, ornate stone and brick house with a steeply pitched roof. The house has an arched window and a balcony with decorative iron railings on the second floor. The exterior is surrounded by well-manicured landscaping, including tall evergreen trees, neatly trimmed hedges, and a stone retaining wall. The overall style and architecture of the house suggest it is a high-end, historic or traditional-style residential property.

Expert Guide To Brick Repair: Enhancing Your Home’s Integrity And Aesthetics

Brick, a durable and aesthetically pleasing building material, has been used for centuries in constructing everything from historic landmarks to contemporary homes. Despite its resilience, brickwork requires maintenance and, occasionally, repair to preserve its structural integrity and visual appeal. Understanding brick repair is crucial for homeowners, property managers, and preservationists alike, as it ensures that buildings not only stand the test of time but also continue to look their best.

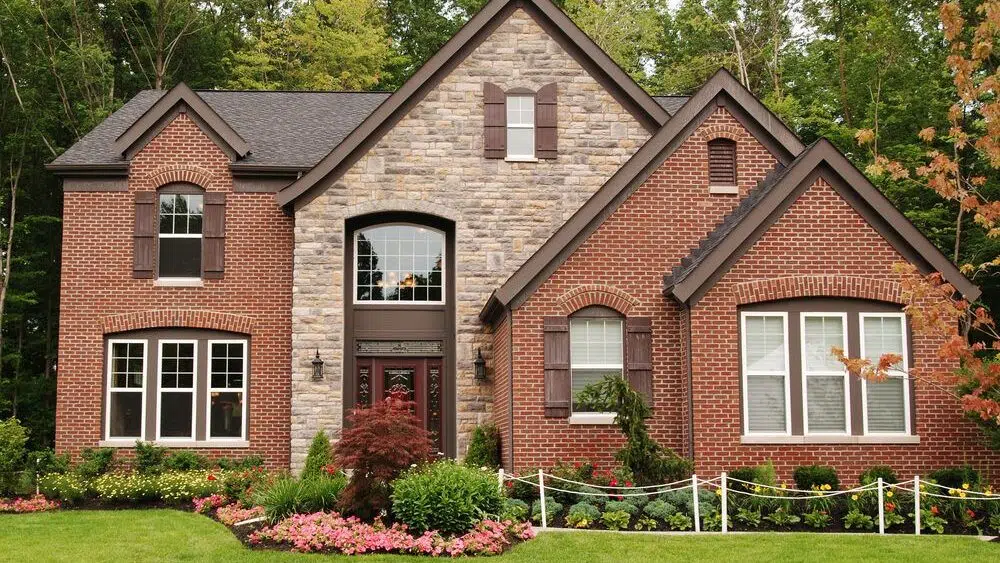
A well preserved brick home retains its beauty through time

The Importance of Brick Repair

Brick repair goes beyond mere aesthetics. It’s an essential practice that addresses the natural wear and tear buildings face over time. Environmental factors, such as weather extremes, moisture, and temperature fluctuations, can cause bricks and mortar to crack, crumble, or erode. Left unaddressed, these issues can lead to water infiltration, thermal inefficiency, and structural instability, posing risks to the building’s occupants and potentially leading to costly repairs down the line.

Common Signs That Indicate the Need for Brick Repair

Detecting early signs of brick damage can save homeowners time and money. Here are some indicators that your brickwork may need attention:

  • Cracked Bricks: Cracks can develop due to settling, thermal expansion, or impact damage. They can vary in severity from hairline cracks to complete breaks.
  • Crumbling Mortar: Mortar acts as the glue holding bricks together. Over time, it can deteriorate, leading to loose bricks and gaps in the wall.
  • Efflorescence: A white, powdery substance on bricks, efflorescence is a sign of moisture penetration and can indicate more severe issues like water damage.
  • Spalling: This occurs when the surface of the brick begins to flake off or crumble, often due to moisture penetration and freeze-thaw cycles.
  • Leaning Structures: Any sign of a wall or chimney leaning or bulging is a clear indicator of structural issues requiring immediate attention.

Initial Considerations for Brick Repair

Understanding the scope and nature of brick damage is the first step toward effective repair. Here are initial considerations to guide homeowners:

  • Assessment: Conducting a thorough assessment of the damage will help determine the extent of repairs needed. This can involve visual inspection and, if necessary, consultation with a professional.
  • Technique Selection: Various repair techniques, such as repointing, brick replacement, or stabilization, can be employed depending on the damage type.
  • Material Matching: For aesthetic and structural reasons, it’s important to match the new bricks and mortar to the existing ones in colour, texture, and strength.
  • DIY vs. Professional Repair: While some minor repairs can be handled by a DIY enthusiast, significant or structural damage should be addressed by professional masons to ensure safety and longevity.

The Path Forward

Brick repair is an investment in your property’s future, enhancing its beauty, functionality, and value. By recognizing the signs of damage early and understanding the basics of brick repair, homeowners can take proactive steps to maintain their buildings’ integrity. However, the journey from identifying damage to completing repairs encompasses a range of techniques, materials, and decisions that require a deeper dive into the world of masonry.

In the following sections of our comprehensive guide, we’ll explore each aspect of brick repair in detail. From choosing the right repair technique to understanding the intricacies of material selection and deciding when to call in the experts, we’ll equip you with the knowledge you need to ensure your brickwork remains a testament to durability and craftsmanship.

Frequently Asked Questions:

  1. What are the most common signs that my brickwork needs repairs?
    • Common indicators include cracked bricks, crumbling mortar, efflorescence (a white, powdery residue), spalling surfaces, and any signs of leaning or bulging structures.
  2. Why is it important to repair damaged bricks and mortar?
    • Repairing brickwork is crucial to prevent water infiltration, maintain thermal efficiency, and ensure structural stability. This preserves both the aesthetic appeal and the safety of the building.
  3. Can I perform brick repairs myself, or should I hire a professional?
    • While minor repairs like simple repointing can be a DIY project, significant or structural damage should always be handled by professional masons to ensure the work is done safely and effectively.
  4. How do I choose the right materials for brick repair?
    • It is important to match new bricks and mortar to the existing ones in terms of color, texture, and strength. This ensures not only visual continuity but also structural integrity.
  5. What does repointing mean, and when is it necessary?
    • Repointing is the process of renewing the pointing (the external part of mortar joints) in masonry construction. This is necessary when the mortar has deteriorated due to age or weather exposure, which can lead to water entry and structural damage.
  6. How does weather affect brick durability and repair processes?
    • Extreme weather conditions, such as freezing temperatures or excessive moisture, can accelerate the deterioration of brick and mortar. Understanding local climate conditions is crucial when planning repairs to ensure that the chosen materials and methods will withstand environmental stresses.
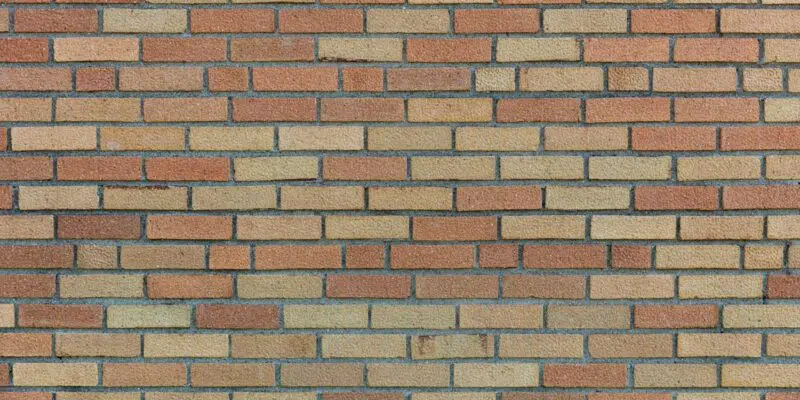
This image shows a brick wall with a repeating pattern of rectangular bricks in various shades of beige, tan, and brown. The bricks are arranged in rows, with some variation in the color and texture of the individual bricks. The overall appearance of the wall is uniform and structured, creating a visually appealing texture.

The Ultimate Guide to Brick Repair: Essential Tips for Homeowners

Welcome to the Ultimate Guide to Brick Repair

Your home is more than just a place to live; it’s a reflection of your history, your style, and your care for the details that make it uniquely yours. Brickwork plays a pivotal role in both the aesthetic charm and structural integrity of your property. Whether you’re dealing with the timeless beauty of a historic home or the modern elegance of a contemporary build, maintaining your brickwork is essential.

That’s why we’ve created the Essential Guide to Brick Repair—a comprehensive resource designed to navigate you through the nuances of brick maintenance, repair techniques, and preservation strategies. Our guide is crafted for homeowners, DIY enthusiasts, and professionals alike, providing valuable insights to ensure your brickwork remains in pristine condition for generations to come.

Worker repairing a brick wall

What You Will Learn:

  1. Understanding Brick Repair: Dive into the fundamentals of brick repair, why it’s crucial, and the signs that signal the need for attention.
  2. Types of Brick Damage: Explore the various forms of brick damage and understand their implications on your property’s integrity.
  3. Brick Repair Techniques: Uncover the techniques professionals use to restore brickwork to its original glory, including repointing, replacement, and more.
  4. Materials and Tools: Get acquainted with the materials and tools of the trade, ensuring you’re prepared for either DIY projects or informed discussions with contractors.
  5. DIY vs. Professional Services: Weigh the pros and cons of tackling brick repair yourself versus enlisting the expertise of seasoned professionals.
  6. Choosing a Brick Repair Service: Learn how to select a reputable service provider, ensuring quality, reliability, and peace of mind.
  7. Cost Considerations: Navigate the financial aspects of brick repair projects, from budgeting basics to understanding quotes.
  8. Maintenance Tips: Discover preventative strategies to safeguard your brickwork against future damage.
  9. Historical and Aesthetic Value: Appreciate the significance of matching repair work to preserve the historical integrity and aesthetic appeal of your property.
  10. Legal and Safety Considerations: Familiarize yourself with the legalities and safety protocols essential to any brick repair project.

Your Path to Preserving Beauty and Integrity:

Embarking on this journey will not only arm you with the knowledge to protect and enhance your property but also connect you with the resources and professionals who can help realize your vision. Each section of our guide delves into the critical aspects of brick repair, supported by expert advice, step-by-step tutorials, and insider tips to navigate the complexities of masonry work.

Start Exploring Today:

Begin your journey by exploring “Understanding Brick Repair,” the foundational piece that sets the stage for all that follows. Click through to each subsequent section for in-depth insights, ensuring your brickwork receives the care and attention it deserves.

Welcome to the Essential Guide to Brick Repair—your comprehensive resource for everything brick. Let’s preserve the legacy of your home together.

Frequently Asked Questions:

  1. What are the signs that my brickwork needs repair?
    • Key signs include visible cracks, crumbling mortar, efflorescence (white powdery substance), spalling (flaking or peeling of the surface), and any evidence of moisture inside your home near brick walls.
  2. Why is it important to repair damaged bricks?
    • Repairing damaged bricks is crucial to prevent further structural damage, avoid water infiltration, maintain thermal efficiency, and preserve the aesthetic value of your property.
  3. Can I repair my brickwork on my own, or should I hire a professional?
    • Minor repairs like simple repointing can be a DIY project if you are comfortable with basic masonry tools. However, for extensive damage, structural issues, or historic homes, it’s advisable to hire a professional to ensure the repairs are done safely and correctly.
  4. What are the common methods for repairing bricks?
    • Common brick repair methods include repointing deteriorated mortar, replacing damaged bricks, and applying sealants. Techniques vary based on the extent and type of damage.
  5. How do I choose the right materials for brick repair?
    • Select materials that match the existing brickwork in color, texture, and composition to maintain the uniformity and integrity of your wall. This includes choosing the correct type of mortar and bricks.
  6. What should I consider when selecting a brick repair contractor?
    • Look for contractors with experience in brick repair, especially with properties similar to yours. Check their credentials, reviews, and portfolio of past work. It’s also important to ensure they provide detailed quotes and warranties for their services.
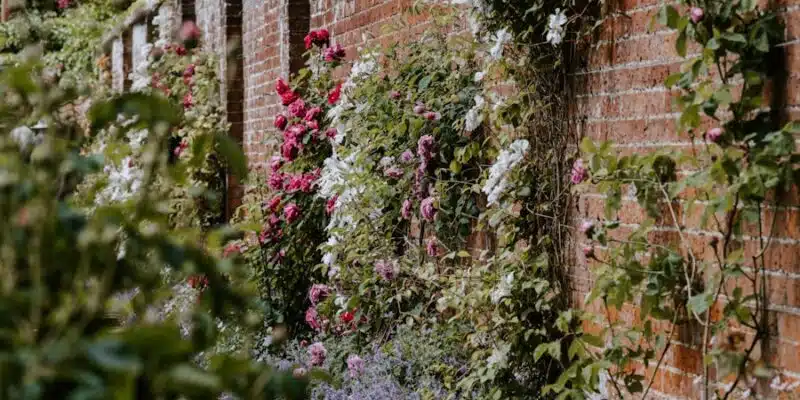
This image depicts a lush, overgrown garden wall. The brick wall is covered in a variety of climbing vines and flowers, including white blossoms and vibrant pink flowers. The greenery cascades down the wall, creating a beautiful, natural aesthetic. The surrounding foliage, including trees and other plants, adds to the serene, garden-like atmosphere. The overall impression is one of a charming, well-tended outdoor space.

How To Select The Perfect Retaining Wall Type For Your Project

Introduction to Retaining Walls

Retaining Walls – An Overview

Retaining walls are used in landscaping and construction projects. They keep soil in place and prevent erosion. Plus, they add depth and beauty to outdoor spaces.

Types of Retaining Walls

Gravity walls, cantilevered walls, sheet pile walls, and anchored walls are all types of retaining walls. Gravity walls use their weight. Cantilevered walls rely on the weight of the wall and foundation. Sheet pile walls use interlocking steel sheets driven into the ground. Anchored walls have cables or other tiebacks attached to the structure.

When to Use Them?

The type of retaining wall you need depends on your landscaping requirements, budget, and aesthetics. Gravity walls are inexpensive but only suitable for low heights. Anchor walls are more expensive but better for taller requirements.

Interesting Historical Fact

The Romans used gravity retaining walls with stacked stones held together by mortar. This helped them build on sloping terrain. Today’s designs have customised textures, colours, and shapes that make modern landscapes unique. Gravity walls keep their ground!

Gravity Retaining Walls

To learn about gravity retaining walls and their usage in masonry, read on. Here are the advantages and disadvantages of using gravity retaining walls along with the specific situations when this type of retaining wall becomes necessary.

Advantages of Gravity Retaining Walls

Gravity Retaining Walls are structures used to keep soil in a vertical position. Their benefits make them a preferred choice. They have structural stability, are cost-effective, easy to build, and can provide an aesthetically pleasing look.

Unique features of Gravity Retaining Walls include durability, resistance to erosion, and flexibility in design. Ancient civilizations used them for floor reclamation from water bodies. France introduced modern designs in the 1800s, and American designers popularized them.

But, beware! These walls can come down quickly in a windstorm. Avoid them if you want your property to stay in place.

Disadvantages of Gravity Retaining Walls

Gravity Retaining Walls: When you want to hold back the earth without breaking the bank. But beware – there’re drawbacks and limitations! Here’s a few:

  • Height is limited to 15 m, so this won’t work for higher walls.
  • Expertise and special machinery adds to the cost.
  • Gravity walls take up a lot of space for stability.
  • No decorative surfaces with plain concrete or unadorned stones.

Also, architectural restrictions may be an issue. If you have lots of manpower, you may need to use an excavator. We once transported one miles away for a backyard project!

When to Use Gravity Retaining Walls

Gravity retaining walls can be a great choice for soil stability. They rely on their weight alone, not needing anchoring or reinforcement. This makes them special in many cases.

  • When cost and efficiency are needed, gravity walls are the answer.
  • If aesthetics matter, these walls can offer variety of designs and materials.
  • In tight spaces or with limited access, they can be built without extensive excavation.
  • When construction speed is needed, these walls can go up quickly.

Sometimes, existing walls need to be replaced. In these cases, gravity walls can be dismantled and reused in reinforced structures or new retaining systems.

Pro Tip: Have qualified professionals check the design of your gravity wall. Without proper design, foundation settlement from the added weight of the wall may cause structural damage.

Cantilever retaining walls are an alternative to foundations – hang your wall off a cliff!

Cantilever Retaining Walls

To build a strong and reliable retaining wall, Cantilever Retaining Walls can be an excellent solution. The Cantilever Retaining Wall method offers a variety of advantages and disadvantages that you should know before constructing your wall. In this section, we’ll explore each of these benefits and drawbacks in detail and discuss when exactly you should use this method based on your requirements.

Advantages of Cantilever Retaining Walls

Cantilever Retaining Walls are an excellent option for retaining soil. They have many benefits that make them an ideal choice for many construction projects.

  • For instance, they are cost-effective as they require less material than other walls. Plus, they are incredibly stable, capable of handling heavy loads and high stresses.
  • Maintenance is also minimal due to their strength and durability.
  • These walls can be used on various types of terrain, like steep hillsides or even water sources.
  • They are also quite sustainable, as the materials used can be recycled and reused multiple times.

One example is the Ancient Walls of Petra, Jordan. Built thousands of years ago, they are still standing today due to their strength and durability over time.

Building a cantilever retaining wall may take more effort, but it’s worth it – you won’t have to worry about landslides ruining your party.

Disadvantages of Cantilever Retaining Walls

Cantilever Retaining Walls – 5 Drawbacks

Cantilever retaining walls are popular for their stability, but have some limitations. Here are five things to consider:

  • Construction Costs: More materials are needed for cantilever walls, increasing costs.
  • Maintenance: They can be hard to repair or maintain.
  • Soil Movements: Shifting soil can cause instability and collapse.
  • Design Limitations: There are restrictions on height, width, and reinforcement.
  • Drainage: Proper drainage is essential or water damage may occur.

Remember these factors when designing such a structure. Ancient civilizations, like the Babylonians, used similar methods. If soil is on the move, try a cantilever wall!

When to Use Cantilever Retaining Walls

Cantilever retaining walls are the preferred choice for earth retention systems. They use reinforcement and a horizontal base slab to maintain soil stability.

This type of wall can go up to 25 feet, depending on soil characteristics. Plus, it uses less concrete and requires less excavation than other wall types. However, special care must be taken to ensure structural integrity.

Did you know that cantilever retaining walls were first introduced by French engineer Henri Vidal in the early 1950s? A sheet pile retaining wall is like upgrading from a cardboard box to a bunker.

Sheet Pile Retaining Walls

To gain an understanding of sheet pile retaining walls, turn to this section in the article ‘Different Types of Retaining Walls and When to Use Them’. Discover the advantages and disadvantages of this type of retaining wall and learn when it is the appropriate choice for your project without any confusion.

Advantages of Sheet Pile Retaining Walls

Sheet pile retention walls offer a reliable and efficient solution for retaining materials in tight spaces. Interlocking steel sheets are placed vertically in the ground and help keep soil stable and prevent erosion.

  • They require less labor to install than other types of walls.
  • Their small footprint makes them perfect for limited space projects.
  • They can be used in both water-filled and dry environments.

Another great feature of these walls is that they can fit into narrow areas where other structures won’t fit. Plus, they can be made from various materials, such as steel or vinyl.

The benefits of sheet pile retention walls are clear: reduced maintenance, improved stability, and less environmental impact. So don’t miss out; consider them for your next project! And if nothing else, they won’t judge you for leaning on them after a long day.

Disadvantages of Sheet Pile Retaining Walls

Sheet Pile Retaining Wall Hazards – Sheet pile retaining walls have become popular in construction. But, there are potential risks!

  • Specialized equipment and expertise is needed for installation.
  • Noise levels during construction may disturb those nearby.
  • The cost of sheet pile walls can be higher than other wall types.
  • They may not be suitable for sites with lots of groundwater.
  • Inadequate design or installation can lead to structural problems.
  • Maintenance is needed to prevent corrosion and extend its life.

Evaluating the site is key for safety and stability. But, tragedy can happen. A below-grade parking garage was excavated with sheet pile walls. An accident occurred when part of the sheet piling gave way, injuring workers. The investigation revealed soil conditions were different from what was predicted. This should have been taken into account before construction. So, when it comes to sheet pile walls – watch out for soil that’s ready to slide!

When to Use Sheet Pile Retaining Walls

Sheet pile retaining walls are ideal for stabilizing soils in irregular geological conditions. They’re cost-effective and durable, perfect for soft soils, deep excavations, and waterfront areas. Plus, minimal excavation is required for installation, making them eco-friendly.

They can be used for various purposes such as flood protection, earth retention, and basement construction. Design depends on factors like water table level, soil type, and slope angle.

The National Association of Steel Pipe Distributors (NASPD) confirms that sheet piles are typically used in static sheetpile walls. So, anchor away! These walls are reliable and won’t move.

Anchored Retaining Walls

To understand anchored retaining walls better, with its advantages, disadvantages, and when to use, consider these sub-sections as solutions for your masonry concerns. Anchoring walls is particularly advantageous when you need to hold back tons of soil. However, it also carries disadvantages that you should take into account when considering this type of retaining wall. Knowing when to use anchored retaining walls is also vital for its success.

Advantages of Anchored Retaining Walls

Anchored Retaining Walls are a boon in civil engineering. They are fixed into soil and reinforced with cables or rods to make them sturdier. This is an alternative to the traditional gravity-based approach that prevents soil erosion.

The pros:

  • They are stronger than other walls.
  • They can be constructed in tight places.
  • Installation is quick and inexpensive.
  • These walls work well on steep gradients where conventional walls fail.
  • They are flexible and can withstand seismic activity.

Something to keep in mind: Anchored walls may sway during harsh conditions, but the anchors stay intact. An annual inspection is advised to check stability.

Pro-Tip: These walls are great for roadways, bridge abutments and even building foundations as they are cost-effective. Anchored walls may have some cons but they won’t cost you an arm and a leg to repair.

Disadvantages of Anchored Retaining Walls

Anchored retaining walls have flaws. These structures have shortcomings that affect their performance.

Some of these drawbacks include:

  • Expensive to make due to extra materials and labor.
  • Complicated engineering for designs.
  • Safety hazards if not installed or maintained properly.
  • Damage to nearby objects or utilities if deep anchors are needed.

Maybe anchored retaining walls aren’t the best option for a project. Each should be considered separately.

To reduce risks, designs must be planned and done by qualified professionals. Inspections and maintenance can help spot problems. Taking these steps can minimize risks and ensure successful construction with anchored retaining walls.

When to Use Anchored Retaining Walls

Anchored retaining walls are the go-to choice when extra soil reinforcement is needed. They work in high water tables, soft soil, and areas with difficult access. These walls are awesome when traditional gravity walls don’t provide enough support.

Anchored retaining walls are perfect for structures with heavy loads or tight spaces. Highways, railways, and other infrastructures can benefit from them. Unlike gravity walls, anchored retaining walls use anchors that go deep into the ground. These anchors add an external force to hold back the earth’s weight.

Anchored retaining walls have an extra advantage – they can handle seismic activity! Their flexibility lets them move with soil during an earthquake without losing their strength.

When you need a retaining wall, don’t hesitate to choose an anchored one. They are reliable and can stand up to different soil conditions and earthquakes. Invest in anchored retaining walls for your project’s long-term success and safety!

Hybrid Retaining Walls

To optimize the functionality and aesthetics of your retaining wall, consider using hybrid retaining walls. They combine the best features of different types of retaining walls, and can provide several advantages as a result. However, there are also potential downsides to using hybrid retaining walls that you should be aware of. In order to make the most informed decision, it is important to know when to use hybrid retaining walls in your particular landscaping project.

Advantages of Hybrid Retaining Walls

Hybrid Retaining Walls – A Blessing for Engineers!

Hybrid retaining walls are a must-have for engineers. Here are some of their awesome benefits:

  • Cheaper than traditional retaining walls
  • More strength and stability
  • Eco-friendly construction materials
  • Flexible design and construction
  • Reduced build time with precast systems

Know this too – Hybrid retaining walls have a reduced carbon footprint! They use fewer resources and make less waste.

Super cool fact – The International Journal of Sustainable Built Environment reports that hybrid retaining walls reduce carbon emissions by up to 50%, compared to other construction methods.

Hybrid Retaining Walls: a mix of power and fragility, just like your ex!

Disadvantages of Hybrid Retaining Walls

Hybrid Retaining Walls – Pitfalls and Risks

Hybrid retaining walls are a creative solution for slope stability issues, however, they can also come with their own set of troubles. These problems often come from combining distinct wall types in order to fit the particular site conditions.

Here are six key risks and pitfalls that may come with hybrid retaining walls:

  • Complicated Design and Construction Process
  • Higher Cost due to Uniqueness of Solution
  • Durability may be Compromised in harsh weather
  • Maintenance can be expensive in the long run
  • Engineers may not have expertise in Hybrid Wall designs
  • The Potential to Worsen Drainage Issues if not installed properly

It’s important to note that the complexity of the design process can cause delays in construction and reduce overall safety levels. This can lead to higher costs than what was planned.

Additionally, some of the distinct features may result in high hauling costs during construction due to various materials, bulky equipment, and hard-to-reach areas.

Still, despite all these challenges, Hybrid walls remain an effective solution for addressing slope failure issues when traditional designs are not enough.

It’s noteworthy that the roots of hybrid retaining wall technology can be traced back to piled foundation techniques from Ancient Greece and Rome. Pioneering engineers and builders used a method known as piling behind their regular gravitationally stabilized walls which worked well then too!

Hybrid retaining walls: You can’t choose between a rock and a hard place? Get both!

When to Use Hybrid Retaining Walls

When thinking of hybrid retaining walls, important factors to consider are site topography, soil, and water conditions. Combining different materials and designs can provide greater stability and a better look.

The table below explains when hybrid retaining walls are suitable:

Scenario Reason
Sloped terrain Hybrid walls combat soil erosion and water drainage.
High-load applications Reinforced concrete or steel panels in a hybrid wall can handle heavier loads.
Aesthetics Hybrid walls offer versatility in design & materials to fit surroundings.

Sometimes, a combination of different wall types is needed for one project.

Thanks to modern technology, experimenting with materials led to the development of hybrid retaining walls. This has helped many industries such as construction, civil engineering, and infrastructure.

Choosing the right retaining wall is like finding a good spouse – it’s all about finding the perfect match that will last.

Key Factors to Consider While Selecting a Retaining Wall

To choose the right retaining wall for your property, you need to consider site conditions, aesthetic value, cost, and maintenance. In this section, we’ll guide you on how to weigh these factors with the title ‘Key Factors to Consider While Selecting a Retaining Wall’. You’ll get an understanding of how each sub-section plays into choosing the right type of retaining wall for your needs.

Site Conditions

For the structural integrity of your retention wall, it is essential to conduct a comprehensive assessment of the site parameters. The selection of the retaining wall depends on various factors related to its location and conditions.

To ensure suitability, one must consider resistive forces, angle of wall inclination, land contouring requirements, soil type, drainage, and seismic forces. Refer to Table 1 for site condition considerations. Additionally, walls on hills must account for variations in soil characteristics. Areas with seismic activity require specialty walls designed with these forces in mind.

In one project, precipitation caused excess rainwater runoff on a hillside made up of expansive soils. Traditional retaining walls were not feasible, so we used block work reinforced with earthy cast-on-site cement grout coat and coating reinforcement coils. This provided uniform resistance and stability against lateral loads.

Retaining walls can be aesthetically pleasing too! Build one so beautiful your guests won’t even remember it’s holding up a small mountain.

Aesthetic Value

When selecting a retaining wall for your property, the visual appeal is key. Pick a design that suits your taste and preferences and consider the color, pattern, and texture of the wall in relation to the surrounding elements like plants, rocks, and structures. This could add interest and depth to a flat landscape.

Furthermore, an attractive retaining wall can be a focal point in your landscaping design, making it stand out amongst the neighbors. It can also enhance the overall curb appeal of your property, boosting its beauty and value.

So don’t forget to factor in the aesthetic value when selecting a retaining wall. Make a wise decision and your landscaping design will reach new heights! Just remember, building a retaining wall can be pricey, so hold onto your wallet!

Cost

It’s essential to think about the money you’ll spend when selecting a retaining wall. The cost may differ depending on size, type of materials, and labor.

Moreover, ongoing maintenance costs should be contemplated. For instance, untreated wood might need to be fixed or replaced often.

To save cash without sacrificing quality, think about using recycled materials or getting a modular design that can be quickly installed with no deep excavation.

As per Consumer Reports, homeowners who got higher-quality retaining walls got an average return of 80%. Parenting a retaining wall is similar – it necessitates constant attention and plenty of endurance.

Maintenance

Regular inspections must be done yearly to maintain the integrity of your retaining wall. Check for cracks, bulges, or tilting, which could mean it’s failing.

Ensure drainage systems work well and clear obstructions from water outlets. Stagnant water can cause damage. Remove debris like leaves, sticks, and dirt from the base.

For aesthetics, give it a fresh coat of paint and it’ll provide a protective layer. Address any flaws immediately before they worsen.

When selecting a type of retaining wall, follow installation procedures carefully. Get experts to install it and follow their instructions.

For maintenance, seek professional help. This will ensure better outcomes and prolonged structure longevity.

Conclusion: Choosing the Right Retaining Wall

Analyze the various types of retaining walls and their uses to make an informed decision. Factors such as cost, material, size, location and height must be considered. Refer to the Table below; it outlines the four main types of retaining walls – Gravity Walls, Cantilevered Walls, Sheet Piling and Anchored Walls. It also explains their benefits, downsides, and suitable applications according to situations.

Type of Retaining Wall Benefits Downsides Suitable Applications
Gravity Walls Affordability and easy installation Limited height capacity Suitable for low-lying areas with gradual slopes
Cantilevered Walls Can support taller heights than Gravity Walls Requires extra reinforcement and expertise for stability Suitable for medium to high slopes in limited spaces
Sheet Piling Ideal for tight spaces Limited soil stabilization capability Suitable for areas with water, like marshlands or beaches
Anchored Walls Supports significant loads and higher heights than other wall types Expensive due to steel cables used Suitable for high slopes or locations with heavy loads

Remember geological stability, drainage capabilities, soil condition and environmental regulations when choosing a retaining wall. Some regions may require permits before building a retaining wall. Check with your local authorities.

Did you know? The Great Wall of China was made for military defense against invaders over two thousand years ago and is still standing today, although its purpose is no longer necessary.

Frequently Asked Questions

Q: What are the different types of retaining walls?

A: There are several types of retaining walls, including gravity walls, cantilever walls, anchored walls, sheet pile walls, and gabion walls.

Q: What is a gravity retaining wall?

A: A gravity retaining wall relies on its mass to hold back soil and can be constructed using materials like stone, concrete blocks, or timber.

Q: When should I use a cantilever retaining wall?

A: A cantilever retaining wall is useful where a significant load is present, and there is limited space for the installation of a gravity retaining wall. It is typically more suitable for larger retaining walls.

Q: What is an anchored retaining wall?

A: An anchored retaining wall uses cables or rods that are anchored in the soil to hold back the earth, making it a suitable option for retaining walls with high loads or those in unstable soils.

Q: When should I use a sheet pile retaining wall?

A: Sheet pile retaining walls are ideal for areas with soft soil where you need to retain a small amount of earth. They can be used as temporary or permanent solutions depending on the need.

Q: What is a gabion retaining wall?

A: A gabion retaining wall is made of steel mesh wire baskets filled with rocks, concrete, or other materials. They are an eco-friendly and cost-effective option for retaining walls of various heights.

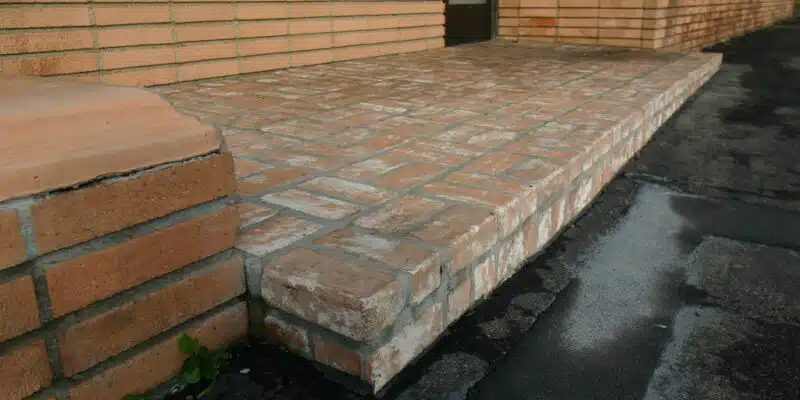
This image shows a brick walkway or patio leading up to a brick building. The walkway is made of rectangular brick pavers arranged in a pattern, with some gaps between the bricks. The bricks have a reddish-brown color and appear to be weathered, with some discoloration and texture visible. The walkway leads up to a set of brick steps that provide access to the building's entrance. Overall, the image depicts a well-constructed masonry feature that is part of the building's exterior design.

Expert Porch Construction: Save Money, Enhance Safety

The Importance of Professional Brick Porch Construction

To ensure the longevity and safety of your home, it is essential to consider professional brick porch construction. With the expertise of professional masonry services, you can ensure the safety of your home, avoid future costly repairs, and guarantee the highest quality of work. In this section, we will explore the benefits of hiring professional brick porch construction services, the expertise of professional masonry services for brick porch construction, and the quality of work you can expect from professional masonry services.

Benefits of Hiring Professional Brick Porch Construction Services

Why Professional Brick Porch Construction is the Wise Move!

Seeking professional help for porch construction brings many benefits. This includes:

  • Expertise and Skills: Pros have the expertise and skill set needed for quality and durable work.
  • Safety: They have safety measures, equipment and tools to avoid accidents.
  • Project Management: They deliver timely and communicate effectively with clients.

In addition to this, pros will finish the project on time, provide cost-effective ideas, and give advice on maintenance. Homeownership is made even more enjoyable!

DIY projects are not recommended when it comes to porch construction. Don’t look back later wishing you had done it right!

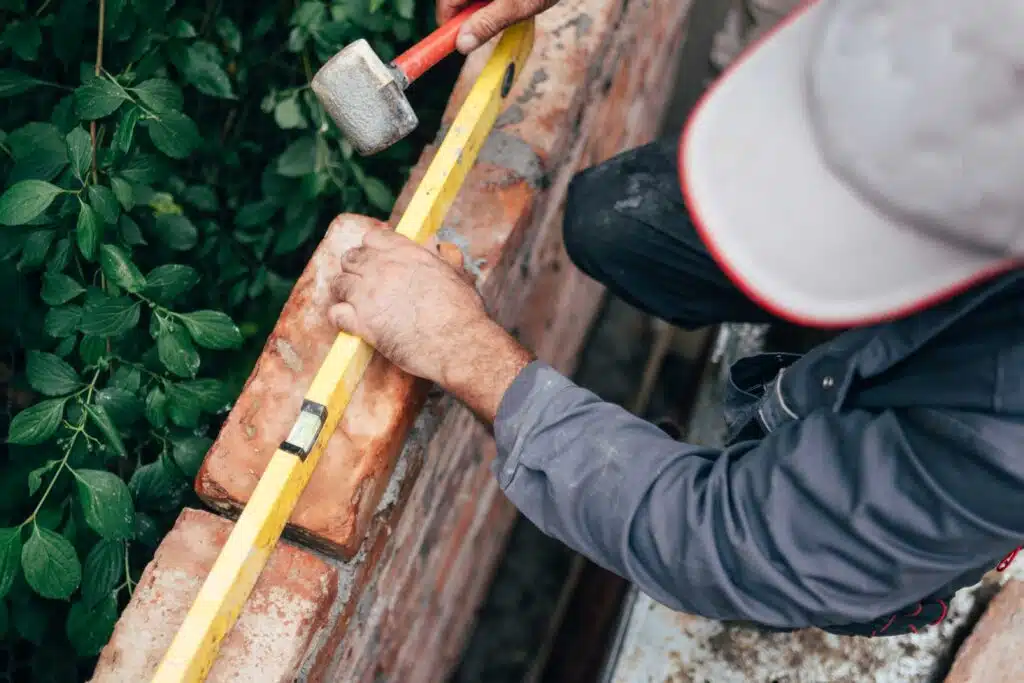
A person using a yellow spirit level to check the level of the bricks on a red brick wall. The person is wearing a grey jacket, blue jeans and a white hard hat. The mortar is white and there is a green plant in the background

Expertise of Professional Masonry Services for Brick Porch Construction

Professionals are essential for building durable and robust brick porches. They have the knowledge and skills to handle all types of bricklaying techniques and materials. Hiring these experts saves time and resources while guaranteeing quality.

Plus, they have access to modern equipment and tools that streamline the construction process. This ensures that the bricks are correctly laid out, aligned, and spaced. Also, weatherproofing techniques are implemented to protect the porch from the elements.

A professional brick porch adds more than just visual appeal; it increases your home’s aesthetic value. You can also enjoy extra outdoor space for leisure or entertaining family and friends.

The National Association of Home Builders (NAHB) conducted a survey which revealed that investing in professional masonry services for your brick porch increases its resale value.

If you want a porch that stands the test of time, go with professional masonry services for your brick construction.

Quality of Work from Professional Masonry Services for Brick Porch Construction

Professional masonry services are key for constructing a high-quality brick porch. Experienced pros have the skill and know-how to do the job with ease. Their work guarantees both stability and style. They pay attention to detail and pick quality materials. Plus, pros have the right tools to avoid costly mistakes.

A homeowner learnt the hard way! They hired an amateur contractor who made a dangerous, unstable porch. It had to be demolished, costing more money. So, when it comes to masonry services, cutting corners comes at a cost. You need professional brick porch repair to save money.

Brick Porch Repair Services

To address brick porch repair concerns with professional solutions, consider hiring professional services with masonry expertise. Enjoy the benefits of hiring pros, such as durability, safety, and cost-efficiency. Furthermore, professional masonry services can offer durable repairs that can withstand any weather condition, ensuring an improved outdoor experience for you and your family.

Benefits of Hiring Professional Brick Porch Repair Services

Why Hire Professional Brick Porch Repair Services?

There are several advantages to hiring professionals for your porch repair. Here are a few reasons why:

  • Knowledge & Expertise: Pro repair services employ experts with the necessary skills to fix your porch quickly and efficiently.
  • Quality Workmanship: Pros use advanced techniques and the latest equipment to guarantee high-quality workmanship.
  • Effective Problem Solving: Professionals have years of experience and can easily tackle any issues that may arise during the repair process.

Additionally, pros have efficient techniques that reduce material waste, saving you money. DIY solutions can take longer, leading to time wastage and extended downtime. Plus, you risk making things worse by accident during self-repairs.

Recently, we worked on a client’s front porch who tried to do their own repairs but ended up causing severe damage. Hiring pros for crucial structural aspects like porches or foundations is crucial.

Put your trust in professional masonry services – they’ll have your porch looking as good as new!

Ready to Repair Your Porch?

Trust Fix My Brick for all your masonry needs.

Contact Us

Expertise of Professional Masonry Services for Brick Porch Repair

Expert masonry services are skilled in repairing brick porches. They assess the damages and use top materials and tools for reliable, lasting repairs. Colour matching, intricate designs, and restoring details are some of their special services. These pros prepare the site and follow safety protocols. Furthermore, they restore old porches, such as 19th-century tile murals, to their former glory. Get your brick porch fixed by professionals to ensure it lasts longer than your last Tinder relationship!

Durability of Repairs from Professional Masonry Services for Brick Porch Repair

Professional masonry services offer reliable repairs for brick porches. High-quality materials and precise application techniques ensure long-lasting results. Plus, they offer regular maintenance schedules to keep the porch in top condition.

Skilled technicians have extensive experience working with brick porches. They can identify issues and take preventive steps. Specialized machinery and tools are used, such as diamond saws, grinders, and cutting blades.

Masonry contractors prioritize safety during repair. This means clients don’t have to worry about unexpected costs. According to Angie’s List, 3 out of 4 users found masonry services satisfactory.

Build a strong brick porch now and save money on chiropractor bills later!

Cost-Effective Solutions for Brick Porch Construction and Repair

To understand the cost-effective solution for your brick porch construction and repair needs, turn to professional services that specialize in masonry. With professional brick porch construction and repair, you can end up saving in the long run although it may cost more in the short term. In this section of the article “Cost-Effective Solutions for Brick Porch Construction and Repair”, we will compare the costs of DIY vs. professional brick porch construction and repair. Additionally, we will examine the long-term cost savings with professional brick porch construction and repair and the value of investing in professional brick porch construction and repair for homeowners.

Comparing Costs of DIY vs. Professional Brick Porch Construction and Repair

While DIY brick porch repair may initially appear cost-effective, a deeper look at the expenses involved may reveal a different story. Here’s a comparison table of DIY vs. professional:

DIYProfessional
Material Costs$500-$1,000$1,000-$2,000
Tool Costs$100-$200Included in labor costs
Included in labour costs$0$2,000-$3,000
Time to Completion1-2 weeks1 week

DIY may look cheaper on paper, but investing in a professional could save money in the long run. Professionals can spot underlying issues that DIYers may miss. They use high-quality materials and special tools, while DIYers may choose cheaper materials, which could require more frequent maintenance or replacement.

One homeowner attempted a DIY repair, but they had to call in a professional after several failed attempts. This was more expensive than if they had hired a professional from the start. Not only was money wasted, but time and effort were also lost.

Overall, while DIY can be fun and rewarding, it’s often best left to the professionals when it comes to brick porch construction and repair. A sturdy, professionally-built brick porch can save you from costly repairs and replacements in the future.

Long-Term Cost Savings with Professional Brick Porch Construction and Repair

Investing in professional brick porch construction and repair can lead to long-term savings. Let’s take a look at the cost-effective solutions available!

The following table shows the Long-Term Cost Savings with Professional Brick Porch Construction and Repair:

SolutionDetailsCost
Proper FoundationQuality work ensures long-lasting results$5,000-$10,000
Bricks and MortarInvest in quality materials for longevity$800-$1,500
Regular MaintenanceUpkeep prevents costly repairs later$200-$500 yearly

Investing in professional brick porch construction and repair is a cost-effective solution for porch maintenance in the long run.

For more detailed information, you can refer to the following sources:

Value of Investing in Professional Brick Porch Construction and Repair for Homeowners

Investing in brick porch construction and repair can be beneficial to homeowners. Professional services provide quality, durability and save money. Cost-effective solutions add value and protect the bricks. Inexperienced DIY attempts can lead to expensive future repairs.

Factors like brick type, design and damage extent affect cost. Homeowners should discuss options with professionals before deciding. Patching up minor damages or repairing mortar joints can be cost-effective.

Porches began in ancient Greece for social gatherings. Modern construction allows individuals to integrate stylistic elements while maintaining structural integrity with professional help. This increases a home’s curb appeal and property value while providing safety and longevity. Building a brick porch is like playing Jenga – one false move and you could be in trouble!

Safety and Liability Concerns with Brick Porch Construction and Repair

To address safety and liability concerns in professional brick porch construction and repair with a reliable solution, consider opting for professional services. Professional brick porch construction and repair ensures safety by avoiding injuries and liability issues. Compliance with building codes and regulations also helps ensure safety and liability. Lastly, professional services protect property and investments, that’s why they are highly recommended.

Avoiding Injuries and Liability Through Professional Brick Porch Construction and Repair

Elegant brick porches are a great addition to any home. Though, if not built or repaired correctly, they can lead to injuries and legal liabilities. That’s why it’s so important to hire experienced professionals to do the job! Here’s a 5-step guide for safety and liability prevention:

  1. Look for licensed professionals with experience in brick porch construction/repair.
  2. Check if they have the necessary permits.
  3. Ask for proof of insurance.
  4. Read the contract terms and conditions before signing.
  5. Request a local government inspection for safety compliance after completion.

Never sacrifice quality for cost-saving. It might end up costing you more in the long run. Make sure safety standards are met in order to keep yourself and those around you safe. Professional contractors should be hired to get the measurements right – just like when following a recipe.

Ensuring Compliance with Building Codes and Regulations Through Professional Brick Porch Construction and Repair

It’s vital to comply with building codes and regulations for professional brick porch construction and repair. Doing so makes your property safer and reduces liability risks. Making sure each stage of the build follows these codes provides a solid, lasting porch. Professional brick porch builders create designs that not only meet regulations, but look great too! They also make sure there are no trip hazards or structural defects.

Ignoring regulations can be dangerous – like when someone tripped over an unstable step and broke their leg. This led to costly litigation! By working with experts, you’ll know all the legal permits and compliance requirements to have a successful project. Paying attention to this process is essential for peace of mind and wallet protection. Don’t let a shoddy brick porch cost you more than just a broken leg!

Protecting Property and Investments Through Professional Brick Porch Construction and Repair

When constructing or repairing brick porches, safety and liability come first! Professional services are essential to ensure the porch is sturdy and safe, while also extending its lifespan and increasing its value. High-quality materials and expert craftsmanship can defend against weather damage and costly repairs.

But, if you take the DIY route, you could be left with an unsafe porch – even collapse, injury, or a lawsuit! Don’t let this happen to you – get professional help for your brick porch construction and repair needs. One homeowner learned the hard way when their porch collapsed shortly after hiring an unprofessional contractor – resulting in major financial loss. Invest in professionals for long-lasting peace of mind.

Remember: DIYing your brick porch is like building a Jenga tower – you don’t want it collapsing on you!

Finding Reliable Professional Masonry Services for Brick Porch Construction and Repair

To find reliable professional masonry services for your brick porch construction and repair, you need to take necessary measures. This can be achieved by researching and hiring qualified masonry services, choosing the right professional based on experience and expertise and reading reviews and testimonials for reliable brick porch construction and repair services.

Researching and Hiring Qualified Masonry Services for Brick Porch Construction and Repair

Finding reliable masonry services for brick porch construction and repair is essential. Research and hire a company that is experienced in this field. Make sure they have the necessary licenses and insurance policies too. Plus, they should employ trained professionals. Also, ensure that the company uses high-quality materials for lasting results.

Don’t skip the research when choosing a masonry services provider. Look into online reviews, ratings, and client testimonials. You can also get referrals from friends, family, and colleagues.

Also, don’t forget to sign a contract before the work begins. Check it carefully for payment terms, warranties, and dispute resolutions.

A friend learned a hard lesson when she chose an unqualified service provider. The poor workmanship and substandard materials caused her losses. She had to spend more money on repairs after just two years. After that, she started researching licensed, insured professionals with customer references. That gave her peace of mind and no extra expenses.

If you want successful brick porch construction and repair, find a masonry services provider with experience and expertise – like the Holy Grail of this industry.

Choosing the Right Professional for Brick Porch Construction and Repair Based on Experience and Expertise

If you want to find trustworthy professionals for constructing and repairing brick porches, look for contractors with experience and skill in the field. You need someone who can deliver quality workmanship.

Consider the following factors to pick the right pro:

  1. Experience: Look for those with many years of experience using brick masonry.
  2. Expertise: Pick ones who know about bricks, mortar, and other materials used in porch building.
  3. Legal Documentation: Make sure the contractor has valid insurance, permits, licenses, and certifications.
  4. Portfolio: Check out their portfolio from past projects to see if their style aligns with yours.
  5. References: Get references from past clients to verify their work quality and customer satisfaction.

You can also ask friends or colleagues who had porches recently renovated. One client said she got several quotes before finding a masonry professional within her budget and schedule, and who was compliant with environmental codes.

So, research reputable contractors: it’s worth investing time and money into the longevity of your porch. After all, trusting strangers on the internet is more reliable than trusting your cousin Vinny!

Reading Reviews and Testimonials for Reliable Brick Porch Construction and Repair Services.

Need dependable brick porch construction and repair? Read reviews and testimonials. Here’s what to know:

  1. Previous clients can tell you the quality of workmanship and service.
  2. Ratings, feedback and user experiences help you judge if they are reliable.
  3. Check reviews explain how problems are solved, not just general praise/criticism.
  4. Pictures of completed jobs from reviews or company sites show quality.
  5. Ask people for recommendations on reliable repair and constructions.

Focus on truthful info when reading reviews. Mitigate risks of underwhelming craftsmanship. Ready to improve home value with strong foundations? Don’t hesitate – start browsing masonry sites and begin building durable homes that make special memories with loved ones.

Frequently Asked Questions

  1. Why should I hire a professional for brick porch construction and repairs?
    • Professional masons have the expertise and experience to properly construct and repair brick porches, ensuring they are safe, durable, and aesthetically pleasing.
  2. What are the benefits of professional brick porch construction and repair services?
    • Benefits include improved curb appeal, enhanced home value, increased safety, and reduced risk of future damage or repairs.
  3. How do I choose a reputable masonry company for my brick porch needs?
    • Look for companies with a proven track record of quality work, positive customer reviews, and proper licensing and insurance.
  4. Can a professional repair a severely damaged brick porch or does it need to be completely rebuilt?
    • This depends on the extent of the damage. A professional mason can assess the situation and determine the best course of action, which may include repairs or a complete rebuild.
  5. How long does brick porch construction or repair take?
    • The timeframe varies based on the scope of the project, but a professional mason should provide a timeline for completion at the beginning of the project.
  6. Are professional brick porch construction and repair services expensive?
    • The cost depends on factors such as the size of the porch, the extent of damage, and materials used. However, investing in professional services can save homeowners money in the long run by preventing further damage and repairs.

The Ultimate Guide To DIY Masonry Restoration: Achieve Amazing Results

Introduction to DIY Masonry Repair and Restoration

Gaining an in-depth understanding of DIY Masonry Repair and Restoration is essential. Here’s a six-step guide to get you started:

  1. Identify the type of damage.
  2. Gather necessary tools and materials.
  3. Clean the damaged area.
  4. Prepare the masonry mixture.
  5. Fill gaps or cracks carefully.
  6. Cure restoration for optimal results.

It’s important to follow the steps precisely. Safety precautions are a must. Wear proper clothing and eye protection when handling equipment and materials. Opt for high-quality materials – they’ll make your repairs last longer. Now you have the knowledge to tackle minor repairs yourself. Don’t miss out on adding value to your home with regular maintenance of your masonry structures.

Preparation for Masonry Repair and Restoration

Before Proceeding with Masonry Repair and Restoration, Make Sure that You Have Completed Efficient Preparation

The key to executing successful masonry repair and restoration lies in meaningful preparation. This includes carefully examining your structure, identifying the underlying cause of the damage, and sourcing the correct materials and tools. By completing these crucial preparatory steps, you can avoid further damage to your masonry and maintain its overall integrity.

Conducting a Thorough Inspection of Your Masonry before Starting Repair and Restoration

Before beginning any work, ensure that you have assessed the extent of the damage to your masonry. Conduct a thorough inspection of your structure, identifying any cracks, gaps, or weakened areas. This will enable you to tailor your repair and restoration efforts to meet the specific needs of your masonry, delivering the most effective results.

Homeowner inspecting his masonry damage.

The Importance of Sourcing High-Quality Materials and Tools for Your Masonry Restoration Project

When sourcing materials and tools for your masonry restoration project, ensure that you choose high-quality products that are specifically designed for the job. Using inferior materials can reduce the overall effectiveness of your repair process, resulting in further damage to your structure. Additionally, using the appropriate tools for the job can significantly improve the efficiency and accuracy of your work.

Don’t Risk Further Damage – Start Your Masonry Repair and Restoration Journey Today!

By taking the time to thoroughly prepare for your masonry repair and restoration project, you can ensure the best possible outcome. Don’t wait until your masonry is beyond repair – take action now to protect and preserve your structure for years to come. With patience, diligence, and the right materials and tools, you can embark on a successful masonry repair and restoration journey today!

If you think a crack in your masonry structure is just a minor issue, it’s time to cement your understanding of proper inspection techniques.

Inspection of Masonry Structure

Before repairing or restoring masonry, assessing the condition is essential. An inspection can help spot defects, damages, and deterioration that require urgent attention. This assists in deciding the best approach and methods for repair and restoration.

Attention must be paid to walls, chimneys, archways, etc., for cracks, bulges, and signs of distress. Missing mortar joints and bowing walls are indicators of major structural damage.

The inspection includes:

  • Mortar quality
  • Presence of moisture
  • Cracks in bricks
  • Lintel and arch inspection
  • Drainage systems
  • Corrosion in steel reinforcements
  • Staining due to salt buildup

Regular inspections ensure structural stability, prolong lifespan, and prevent future costs. Small irregularities can become costly problems. Scheduled inspections every few years optimize time management for repair projects. Knowing your materials is key.

Identify the Type of Material

Understanding Material Composition:

To repair and restore masonry, it is important to know the material composition. Whether concrete, brick, or stone, the type of material influences the bond strength and durability of restorative products used.

Conducting a lab test can help determine the physical properties, like compression strength and moisture content. This plays a vital role in choosing suitable repair methods.

It is essential to identify any unique features that have been added after the initial construction. This includes cornices or carvings that may have been missed during an initial survey. Assessing these correctly helps select appropriate conservation techniques without changing historical markers.

Studying the composition of materials can reveal how architecture varies from region to region. It can also uncover innovation in architectural styles that can’t be replicated with modern methods.

Before starting masonry repair, make sure you have the right tools! Toothpicks won’t do the job.

Tools Required for Masonry Repair and Restoration

Masonry repair and restoration require key tools for successful and secure results. These include:

  • masonry trowels for mixing, spreading, and forming mortar
  • chisels to fit desired patterns and sizes
  • buckets for mixing mortars
  • mason’s hammer for stonecutting
  • masonry saws to cut and shape brick/tile/stone
  • a caulking gun for filling gaps between materials like concrete blocks.

Protective gear such as gloves, safety glasses, dust masks, and hard hats should also be worn, as this kind of repair exposes workers to falling debris.

Power drills with diamond-tipped bits are useful for drilling holes into brick walls. Investing in good quality masonry repair tools is essential for preventing costly and lengthy damage repairs.

Make sure to have the right equipment ready before starting restoration. The right tools and techniques will guarantee a long-lasting structural integrity. Cleaning up after a party is tough – imagine fixing centuries-old masonry!

Cleaning and Removal of Damage in Masonry

To achieve a professional finish in masonry repair and restoration, it is vital to understand the process of cleaning and removing damage from masonry surfaces. This involves utilizing specific techniques to eliminate any existing damage or debris on the surface.

Here is a 5-step guide to follow when cleaning and removing damage from masonry surfaces:

  1. Begin by assessing the damage to determine the extent of repair required
  2. Protect surrounding areas and cover any delicate elements with tape or plastic sheets
  3. Use a pressure washer or chemical cleaner to remove dirt, grime, and stains from the masonry surface
  4. For deeper damage, use a chisel or grinder to remove damaged sections of masonry
  5. Dispose of debris and allow the masonry surface to dry completely before proceeding with any restoration work

For more delicate or intricate masonry surfaces, it is important to use a gentler cleaning approach. Consider using a soft-bristled brush or low-pressure washer, to avoid causing any further damage. Always test any cleaning solutions on a small, inconspicuous area before applying it to the entire surface.

Recently, a historic building underwent major restoration work that included cleaning and repairing the damaged masonry. With the help of expert masons and specialized cleaning equipment, the building’s facade was restored to its former glory. The resulting transformation was stunning and highlighted the importance of proper masonry repair and restoration techniques. Don’t be fooled by the term ‘loose debris’, it’s not like it’s going to blow away on its own – it needs some serious attention.

Careful removal of damaged bricks from a masonry wall.

Removing Loose Debris and Grime

To have a clean and safe masonry surface, it is important to get rid of any debris and grime on it. This is essential for a successful restoration project. Removing these elements prepares the surface for further cleaning and repair work. Here’s a 6-Step Guide to effectively remove Loose Debris and Grime from masonry:

  1. Put on gloves and clear away big debris such as fallen bricks, mortar, or rocks.
  2. Use a soft-bristled brush or broom for small dirt particles stuck on the surface.
  3. If needed, use a pressure washer set at low pressure to clean, without damage.
  4. Mix detergent with warm water and use in a pressure washer if the brick surfaces are stained or neglected.
  5. Scrub the affected areas with a soft-bristled brush after applying the solution. Allow time for soaking then rinse with high-pressure water.
  6. Don’t use harsh chemicals when there’s vegetation around, as they can harm plants and animals.

Keep in mind that you may need extra steps, depending on how long the debris has been there. Speak to a professional about extra measures, so you don’t cause more damage to your property.

Pro Tip: Start with minimal pressure when using high-pressure washers. Increase pressure gradually until you get satisfactory results, while preventing damage to your masonry surfaces. Fixing cracks in masonry is like filling in the gaps in a relationship. Do it right, or it will keep crumbling apart.

Repairing and Sealing Cracks and Holes

Masonry damage? Time to fix up those cracks and holes! Repairing and sealing them stops further damage and keeps the structure standing. Follow these 3 simple steps:

  1. Clean the area – remove any dust, debris, or residue.
  2. Fill the gap – use a masonry repair filler.
  3. Seal the area – apply a masonry sealer over the filler.

Larger gaps might need metal reinforcement rods for stability.

Pro Tip: Use high-quality materials for long-lasting results!

Rebuilding and Replacing Damaged Masonry

To restore the structural integrity of damaged masonry, it is necessary to undertake rebuilding and replacement procedures. This involves the proper identification of the damaged areas and the use of appropriate materials and tools to repair or replace them.

Here is a 3-step guide to help you with rebuilding and replacing damaged masonry:

  1. Assessment – Inspect the entire structure to identify the nature and extent of the damage. Focus on the mortar joints, as these are the most vulnerable points. Remove any damaged areas and clean the surface properly.
  2. Preparation – Prepare the replacement material and create a bond that mimics the surrounding masonry. Mix the mortar according to the specifications provided by the manufacturer and apply it on the replacement section before carefully fitting it in place. Level and pack it properly and leave it to dry for the recommended time.
  3. Finishing – Once the replacement material has dried, clean it properly to remove any residual material. Remove any unsightly marks or stains that might appear on the surface. Finally, apply a coat of waterproofing agent to protect against weathering.

While rebuilding and replacing damaged masonry is a strenuous process, it is crucial to use proper safety equipment, follow specific instructions, and pay attention to the condition of the masonry structure. Failure to do so can compromise the structural integrity of the building.

To ensure a professional finish, consider hiring a trained masonry professional who can handle the intricate details and deliver quality workmanship.

Remember, the key to a professional and long-lasting finish is attention to detail and the use of appropriate materials and tools. By following these steps, you can repair and restore damaged masonry to its former glory.

When it comes to replacing individual bricks or stones, remember: it’s like playing a game of Jenga, but with bigger consequences.

Replacing Individual Bricks or Stones

Rebuilding a damaged masonry wall requires precision and accuracy. Here’s what to do:

  1. Take a cold chisel and hammer, and remove the mortar around the broken brick or stone.
  2. Use a flat bar to remove the old brick or stone.
  3. Clean out any debris from the cavity. Use a wire brush to clean off loose mortar from other bricks or stones.
  4. Put fresh mortar on the cavity with a pointing trowel. Make sure it fills all gaps before placing the new brick or stone.
  5. Carefully insert the new brick or stone and press down until it’s snug in the spot.
  6. Use a pointing tool to smooth and level excess mortar around the joint.

Remember to select replacement bricks or stones that match existing ones in size, color, texture, etc.
Also, wear gloves and safety glasses to protect yourself from any potential injury.
Ah, if only rebuilding life was as simple as rebuilding a wall!

Rebuilding Sections of the Wall or Structure

If a masonry wall or structure is damaged, sometimes it’s necessary to rebuild sections of it. Here’s a 5-step guide to do this efficiently:

  1. Find out how much of the wall or structure needs rebuilding and what materials are needed.
  2. Demolish the damaged section while taking care of other nearby structures.
  3. Get bricks, blocks, stones, mortar mixers, chisels, hammers, cutting blades, and utility knives.
  4. Rebuild from the base up using mortar mix between layers.
  5. Clean and seal the surfaces 24 hours after finishing.

Remember to follow safety regulations and consider an expert’s opinion before repairing work. If unsure, consider hiring a professional bricklayer with special tools and knowledge. Don’t let damages go unattended! Start rebuilding today for a secure future.

Finishing Techniques for Professional Results

Achieving a Professional Masonry Finish

To achieve the desired professional finish for masonry repair and restoration, it is essential to know the proper finishing techniques. These techniques can make a significant difference in the final outcomes of your DIY masonry projects. Following the guidelines below will deliver a pleasing and long-lasting finish that will enhance the aesthetic appeal of your home or building.

5-Step Guide for a Professional Masonry Finish

  1. Clean the surface: Use a high-pressure washer, a wire brush, or a stiff bristle brush to clean the surface. Pay attention to every crack and crevice to remove all dirt, grime, loose mortar, and other debris.
  2. Repair and Patch: Use a suitable patching compound to fill any gaps, cracks, or missing mortar. Allow it to cure as recommended by the manufacturer.
  3. Sand and Smooth: Sand the repaired surface once the patch has dried, using a sandpaper with 180-grit or higher. This will level any unevenness and create a smooth surface.
  4. Apply Finish Coats: For a natural finish, use a mortar-based mix for the final coats. For painted finishes, use a suitable paint or coating. Apply the finish coats with a hawk and trowel, following the original pattern.
  5. Cure and Seal: Allow the surface to cure completely before sealing it. Use a sealant that matches the finish to protect it from water and other elements.

Essential Tips for Professional Masonry Finishing

Applying a final coat to the repaired surface while wet will lead to bulges and bumps on your masonry surface. This can make your masonry patch look unsightly and unprofessional. Therefore, be patient and allow each coat to cure completely before moving to the next one.

A True Story of Masonry Restoration

John, a DIY enthusiast, attempted to repair his home’s masonry wall to save money. He patched the holes with mortar and painted over them. However, within a few months, the paint flaked, and the patched areas began to crumble. Disappointed with the results, he hired a professional masonry repair service who had to strip the paint, redo the patching, and apply a new finish. John learned that proper preparation, patching, and finishing were crucial for a long-lasting and professional look.

Remember, the right mortar mix can make or break your DIY masonry project, so choose wisely and mix thoroughly.

Applying the Appropriate Mortar Mix

When selecting the right mortar mix for your finishing techniques, there are several factors to keep in mind. These include types of bricks or blocks, location, weather conditions, and the required finish.

Table 1 below provides some common mortar mixes for various conditions and finishes. Each column is labeled with a factor to consider when picking the right mix.

Mix typeBrick/Block typeLocationWeather ConditionsFinish
Type N mortar mixStandard brick, BlockIndoor & outdoorModerate weatherGeneral purpose tuckpointing
Type S mortar mixStone, interlocking bricksOutdoor, below-gradeCold weatherStructural masonry
Type M mortar mixStone, concrete blocksOutdoor, above-gradeHigh wind, earthquake-prone areasHeavy loads and foundation walls

It’s important to follow manufacturer instructions for mixing and application carefully. And remember: safety first!

Mortar mix has been used since Roman times, when lime, sand, and water were the most prevalent building materials. Nowadays, cement-based mixes are more popular, as they reduce construction time and provide greater strength.

For perfect color and texture matching, use these tips!

Matching Colors and Textures to Blend Masonry

Creating a unified look with masonry takes careful attention to matching colors and textures. Consider the structures and materials surrounding your project when selecting a blend. A seasoned mason can help blend new masonry with existing structures for a smooth finish.

Picking the right materials is key when doing a project with different surfaces, for example, brick and stone. Uncover similarities between the surfaces to make it easier to match shades and textures. Use samples of existing materials to get exact color matches.

Don’t forget about elements such as sunlight, shadows, and angles when blending masonry finishes. These things affect how colors look in different settings. Analyze these factors in relation to your desired result before beginning the project.

Our Masonry Pros suggest looking into all elements of matching colors and textures for blending masonry, including surrounding structures and hidden elements that could impact your project’s end result. Keep brickwork looking neat with proper care and maintenance, because crumbled masonry is a disaster for any professional.

Maintenance and Care for Masonry

Masonry Upkeep and Maintenance: Regular masonry maintenance goes a long way in preserving the strength and longevity of your structure. Keep an eye out for signs of wear and tear, such as cracks, leaks, and loose mortar.

To maintain the health of your masonry, ensure that it is free of water damage and moisture, as this can lead to structural issues over time. Additionally, regularly clean the surface to prevent dirt and grime buildup, which can cause discoloration.

It is essential to check for any vegetation growth on the masonry, as this can cause cracking and damage to the structure. Furthermore, ensure that any repairs or restorations to the masonry are done by a professional to ensure the best results.

There have been cases where improper maintenance and care of masonry structures has led to severe damage and costly repairs. For example, neglecting to address water damage on a structure can result in crumbling bricks and weakened foundation. Don’t neglect your masonry or it might crumble faster than your sense of humor at a dad joke convention.

Importance of Regular Maintenance

Maintaining masonry is essential to keep it strong and looking good. It can save you money on repairs and replacements, and keep you safe from hazardous conditions. If neglected, it’ll only deteriorate further, making it hard to repair.

To keep your masonry in tip-top shape, do periodic inspections for cracks, erosion and weather damage. Also, get rid of vegetation near it as it can cause harm over time. Use proper cleaning methods during regular cleaning to avoid any risk.

If needed, hire a professional for better quality care or for fixing structural issues. Doing this regularly will help your property stay structurally sound and attractive.

Maintaining masonry the right way and consistently will make sure it stays in good condition for years. So don’t let it crumble like your self-esteem after a break-up!

Tips for Keeping Your Masonry in Good Condition

Safeguarding your masonry’s quality is essential for its duration and looks. Here are a few tricks to make sure your masonry stands the test of time:

  • Check your masonry regularly for any wear or damage.
  • Make sure downspouts, gutters and drainage systems are working correctly to avoid water damage.
  • Use suitable cleaning techniques and substances to get rid of dirt, stains and pollutants.
  • Fix any splits or breaks immediately to prevent further damage.
  • Contact professional services each year for a more thorough inspection and maintenance.

Apply waterproofing compounds on your masonry to guard it from the elements. This will stop moisture infiltration while still letting it breathe. Plus, be conscious of any nearby trees or plants that could cause obstruction or other kinds of destruction.

Recall that proper upkeep is the key to stretching the life of your masonry. By taking proactive measures now, you can save yourself from costly repairs in the future.

Start today by arranging a meeting with a professional mason who can give you personalized advice for maintaining and caring for your special type of masonry. Don’t wait until it’s too late!

Remember, overlooking your masonry is like overlooking your ex – it may seem like a great idea at the time, but in the end, you’ll wish you hadn’t.

Conclusion

Confidently tackle masonry repair and restoration projects after considering various tips and techniques. Have the correct tools to get a professional finish. Take note of the mortar type – it’s essential to preserve your masonry. Inspect your masonry regularly for detecting damage early.

Prior to undertaking major repairs or restorations, always ask an expert for professional advice. Safety must be a priority – wear protective gear while working.

Beware! Improper use of cleaning agents can damage your masonry. Certain acidic cleaners can corrode stone or brickwork if not used correctly. Before using on the entire surface, read manufacturer instructions carefully and test the cleaner on a small area.

Frequently Asked Questions

  1. Can I repair my own masonry without professional help?
    • Yes, with the right tools, materials, and knowledge, it is possible to repair and restore your own masonry. However, it is important to have a good understanding of the process and safety precautions to take before starting any projects.
  2. What are some common types of masonry damage and how can I fix them?
    • Common types of masonry damage include cracks, chips, and spalling. To fix cracks, you will need to use a masonry crack filler and follow the manufacturer’s instructions. For chips and spalling, you will need to mix and apply a patching compound to the damaged area.
  3. What materials and tools do I need for masonry repair?
    • You will need materials such as masonry cement, patching compound, and a waterproofer. Tools necessary may include a trowel, hammer, chisel, wire brush, and safety equipment such as goggles and gloves.
  4. Can I restore the color and texture of my masonry?
    • Yes, there are special products available for restoring the color and texture of masonry. You will need to choose a product that matches the existing color and texture of your masonry to achieve a professional finish.
  5. What safety precautions should I take when doing masonry repair?
    • Before starting any masonry repair projects, it is important to wear safety equipment such as goggles and gloves to protect your eyes and hands. You should also work in a well-ventilated area and be mindful of any potential hazards such as uneven surfaces or loose debris.
  6. How do I maintain my newly repaired masonry?
    • To maintain your newly repaired masonry, it is important to regularly clean it using a pressure washer and mild detergent. You may also want to apply a waterproofer to help protect it from future damage.