Navigating Historic Preservation Guidelines: What Ontario Homeowners Need to Know

Owning a historic brick home in Ontario is a privilege that comes with unique responsibilities. As stewards of our province’s architectural heritage, homeowners must navigate a complex web of regulations and guidelines designed to preserve the character and integrity of these valuable structures. This comprehensive guide will walk you through the essential aspects of historic preservation in Ontario, helping you understand your obligations and opportunities when it comes to restoring and maintaining your historic brick home. 1. Overview of Ontario’s Historic Preservation Laws Ontario’s commitment to preserving its rich architectural heritage is reflected in its robust legal framework. The cornerstone of this framework is the Ontario Heritage Act, first enacted in 1975 and subsequently amended to strengthen protection measures. Key Aspects of the Ontario Heritage Act: – Empowers municipalities to designate properties of cultural heritage value or interest – Establishes the Ontario Heritage Trust to identify, protect, and promote Ontario’s heritage – Provides for the conservation of properties of cultural heritage value owned by the provincial government – Sets out processes for altering or demolishing designated heritage properties In addition to the Ontario Heritage Act, homeowners should be aware of the Provincial Policy Statement, which provides policy direction on matters of provincial interest related to land use planning and development, including the conservation of significant built heritage resources. 2. Working with Local Heritage Committees Most Ontario municipalities have established Municipal Heritage Committees (MHCs) to advise local councils on matters related to the Ontario Heritage Act. As a homeowner of a historic brick property, you’ll likely interact with your local MHC at some point. Roles of Municipal Heritage Committees: – Identify and evaluate properties of cultural heritage value or interest – Advise council on designation of individual properties or heritage conservation districts – Review applications for alterations to designated properties – Provide advice on heritage conservation and promotion When planning any restoration or alteration work on your historic brick home, it’s advisable to consult with your local MHC early in the process. They can provide valuable guidance on appropriate conservation techniques and help you navigate the approval process. 3. Obtaining Permits for Restoration Work If your historic brick home is designated under the Ontario Heritage Act, you’ll need to obtain a heritage permit before making any significant alterations. This process ensures that changes are sympathetic to the property’s heritage value. Steps to Obtain a Heritage Permit: 1. Contact your local heritage planner or MHC to discuss your proposed work 2. Submit a heritage permit application, including detailed plans and specifications 3. The MHC will review your application and make recommendations to the municipal council 4. Council will decide whether to grant the permit, with or without conditions 5. If approved, you can proceed with the work, ensuring compliance with any conditions Remember that even if your property isn’t designated, it may still be listed on the municipal heritage register, which could require additional review before obtaining standard building permits. 4. Balancing Preservation with Modern Living Needs One of the biggest challenges facing owners of historic brick homes is balancing preservation requirements with the need for modern amenities and energy efficiency. However, with careful planning and expert guidance, it’s possible to achieve both objectives. Strategies for Modernizing Historic Homes: – Focus on reversible changes that don’t permanently alter original features – Use period-appropriate materials and techniques for visible repairs – Consider energy-efficient upgrades that don’t compromise historic character, such as interior storm windows or discreet weatherstripping – Explore innovative solutions for integrating modern systems, like mini-split HVAC units or hidden wiring When undertaking any modernization project, it’s crucial to work with contractors and architects experienced in historic preservation. They can help you find creative solutions that respect your home’s heritage while meeting your contemporary needs. 5. Resources for Historic Homeowners in Ontario Fortunately, there are numerous resources available to help Ontario homeowners navigate the complexities of owning and maintaining a historic brick home. Key Resources: – Ontario Heritage Trust: Offers guidance, educational resources, and potential funding opportunities for heritage conservation projects – Architectural Conservancy Ontario: Provides advocacy, education, and networking opportunities for heritage enthusiasts – Local Historical Societies: Can offer valuable information about your home’s history and architectural significance – Heritage Canada Foundation: National organization with resources on heritage preservation and restoration techniques – Canada’s Historic Places: Comprehensive database of historic places in Canada, including many Ontario properties Additionally, many municipalities offer heritage property tax relief programs to offset the costs of maintaining a designated heritage property. Check with your local heritage planner to see if such programs are available in your area. Conclusion Owning a historic brick home in Ontario is a rewarding experience that allows you to play a vital role in preserving our province’s architectural heritage. By understanding the legal framework, working closely with local heritage committees, obtaining necessary permits, balancing preservation with modern needs, and utilizing available resources, you can successfully navigate the challenges of historic home ownership. Remember that each historic property is unique, and what works for one may not be appropriate for another. Always consult with heritage professionals and local authorities when planning any significant work on your historic brick home. With patience, care, and respect for the past, you can ensure that your piece of Ontario’s history continues to stand proud for generations to come.\n\n\n

What is the return policy?

You can return items within 30 days of purchase for a full refund, provided they are in original condition.

How long will delivery take?

Delivery typically takes between 5-7 business days, depending on your location.

Do you offer international shipping?

Yes, we offer international shipping to select countries. Please check our shipping policy for more details.

How can I track my order?

You can track your order by using the tracking link provided in your confirmation email.

What payment methods do you accept?

We accept various payment methods including credit cards, debit cards, and PayPal.

5 DIY Methods to Repair Minor Brick Damage on Your Garage

Your garage is more than just a place to park your car; it’s an integral part of your home’s structure and appearance. Over time, the brick exterior of your garage may suffer minor damage due to weather, age, or accidents. While major repairs should always be left to professionals, there are several DIY methods you can use to address small-scale brick damage and keep your garage looking its best. In this comprehensive guide, we’ll explore five practical techniques for repairing minor brick damage, along with tips on when it’s time to call in the experts.

1. Patching Small Cracks and Holes in Bricks

Small cracks and holes in bricks are not only unsightly but can also lead to more significant damage if left unaddressed. Fortunately, these minor imperfections can often be repaired with a bit of patience and the right materials.

Materials needed:

  • Brick filler or patching compound
  • Putty knife or trowel
  • Wire brush
  • Water
  • Sponge

Steps:

  1. Clean the damaged area thoroughly using a wire brush to remove any loose debris or dust.
  2. Dampen the area slightly with water using a sponge. This will help the patching compound adhere better.
  3. Mix the brick filler or patching compound according to the manufacturer’s instructions.
  4. Using a putty knife or small trowel, apply the compound to the crack or hole, pressing firmly to ensure it fills the entire space.
  5. Smooth the surface of the patch to match the surrounding brick texture.
  6. Allow the compound to dry completely according to the product instructions.
  7. Once dry, use fine-grit sandpaper to blend the patch with the surrounding brick if necessary.

For best results, choose a patching compound that closely matches the color of your existing bricks. Some products allow you to add pigments to achieve a more accurate color match.

2. Repointing Mortar Joints

Over time, the mortar between bricks can deteriorate, leading to loose bricks and potential water infiltration. Repointing is the process of removing damaged mortar and replacing it with fresh mortar to restore the integrity of the brick structure.

Materials needed:

  • Mortar mix
  • Pointing trowel
  • Jointing tool
  • Chisel
  • Hammer
  • Wire brush
  • Bucket
  • Water

Steps:

  1. Use a chisel and hammer to carefully remove the damaged mortar to a depth of about 1/2 to 3/4 inch. Be careful not to damage the surrounding bricks.
  2. Clean out the joints using a wire brush to remove any loose debris.
  3. Dampen the joints with water to prevent the bricks from absorbing moisture from the new mortar too quickly.
  4. Mix the mortar according to the manufacturer’s instructions.
  5. Using a pointing trowel, pack the new mortar into the joints, ensuring it’s fully compressed and fills the entire space.
  6. Once the mortar begins to set (typically after about 30 minutes), use a jointing tool to smooth and shape the mortar to match the existing joint profile.
  7. Allow the mortar to cure for at least 24 hours, keeping it slightly damp during this time to prevent cracking.

When repointing, it’s essential to match the color and composition of the existing mortar as closely as possible to maintain a cohesive appearance.

3. Cleaning and Treating Efflorescence

Efflorescence is a white, powdery substance that can appear on brick surfaces due to salt deposits left behind when water evaporates. While it’s not structurally damaging, it can be unsightly and may indicate underlying moisture issues.

Materials needed:

  • Stiff brush
  • Water
  • White vinegar or specialized efflorescence cleaner
  • Spray bottle
  • Protective gloves and eyewear

Steps:

  1. Start by dry brushing the affected area with a stiff brush to remove as much of the efflorescence as possible.
  2. Mix equal parts water and white vinegar in a spray bottle, or prepare a specialized efflorescence cleaner according to the product instructions.
  3. Apply the cleaning solution to the affected areas and let it sit for 5-10 minutes.
  4. Scrub the area gently with a stiff brush.
  5. Rinse thoroughly with clean water.
  6. Repeat the process if necessary.

To prevent future efflorescence, address any underlying moisture issues and consider applying a water-repellent sealer to the brick surface.

4. Applying Water-Repellent Sealers

Applying a water-repellent sealer to your garage’s brick exterior can help prevent moisture infiltration, reduce efflorescence, and protect against freeze-thaw damage. This is particularly important in areas with harsh weather conditions.

Materials needed:

  • Water-repellent brick sealer
  • Paint roller or sprayer
  • Paintbrush for detail work
  • Drop cloths
  • Protective gear (gloves, goggles, respirator)

Steps:

  1. Clean the brick surface thoroughly and allow it to dry completely.
  2. Cover any areas you don’t want to be sealed (e.g., windows, doors) with drop cloths or plastic sheeting.
  3. Choose a day with mild temperatures and low humidity for application.
  4. Apply the sealer using a roller, sprayer, or brush, following the manufacturer’s instructions for application technique and number of coats.
  5. Pay special attention to mortar joints and any areas prone to water exposure.
  6. Allow the sealer to dry completely between coats and after the final application.

Remember that water-repellent sealers typically need to be reapplied every few years to maintain their effectiveness. Always follow the manufacturer’s recommendations for reapplication intervals.

5. Recognizing When Damage is Beyond DIY Repair

While many minor brick repairs can be handled as DIY projects, it’s crucial to recognize when the damage requires professional attention. Here are some signs that indicate it’s time to call in an expert:

  • Large cracks (wider than 1/4 inch) or cracks that appear to be growing
  • Bulging or bowing of the brick wall
  • Significant water damage or persistent moisture issues
  • Crumbling or severely deteriorated bricks
  • Structural issues, such as a leaning wall or foundation problems
  • Extensive mortar joint deterioration affecting a large area

If you encounter any of these issues, it’s best to consult with a professional mason or structural engineer to assess the damage and recommend appropriate repairs. Attempting to fix serious structural problems without proper expertise can lead to further damage and potentially dangerous situations.

Conclusion

Maintaining the brick exterior of your garage is an important part of home maintenance. By addressing minor damage promptly using these DIY methods, you can keep your garage looking great and prevent small issues from becoming major problems. Remember to always prioritize safety, use appropriate protective gear, and know your limits when it comes to DIY repairs.

Regular inspections of your garage’s brick exterior can help you catch and address issues early. By combining these DIY techniques with professional assistance when needed, you can ensure that your garage remains a sturdy, attractive part of your home for years to come.

\n\n\n

What are some common types of minor brick damage in garages?

Common types of minor brick damage include small cracks and holes, deteriorating mortar joints, and efflorescence, which is a white powdery substance caused by salt deposits.

What materials are needed to patch small cracks and holes in bricks?

You will need brick filler or patching compound, a putty knife or trowel, a wire brush, water, and a sponge for patching small cracks and holes.

What is the process for repointing mortar joints?

The process includes removing damaged mortar with a chisel, cleaning out joints, applying new mortar, and then shaping it with a jointing tool to match existing profiles.

How can I clean and treat efflorescence on brick surfaces?

To treat efflorescence, first dry brush the area, then apply a mixture of water and vinegar (or a specialized cleaner), scrub the area, and rinse thoroughly with clean water.

What steps should I take when applying a water-repellent sealer to brick?

First, clean the brick, cover areas not to be sealed, apply the sealer according to instructions, and allow it to dry completely between coats.

When should I consider hiring a professional for brick repairs?

You should seek professional help if you notice large cracks, bulging walls, significant water damage, or any structural issues that might indicate serious damage.

What precautions should I take while performing DIY brick repairs?

It’s important to prioritize safety by using appropriate protective gear, knowing your limits, and seeking professional assistance for extensive repairs.

Why is it essential to maintain the brick exterior of my garage?

Regular maintenance helps prevent minor issues from becoming major problems, enhances the appearance of your garage, and ensures the structural integrity of your home.

How often should I inspect my garage’s brick exterior?

Regular inspections are recommended to catch and address any issues early, contributing to the long-term maintenance of the garage’s brick exterior.

Enhancing Your Masonry Fence: Landscaping and Lighting Ideas


Enhancing Your Masonry Fence: Landscaping and Lighting Ideas

A masonry fence is more than just a boundary marker for your property; it’s an opportunity to create a stunning visual statement that enhances your home’s curb appeal. By integrating thoughtful landscaping and innovative lighting techniques, you can transform your masonry fence into a captivating focal point of your outdoor space. In this comprehensive guide, we’ll explore creative ways to seamlessly blend your masonry fence with your property’s landscaping and outdoor lighting, resulting in a harmonious and eye-catching exterior design.

1. Complementary Plant Selections for Masonry Fences

Choosing the right plants to complement your masonry fence can dramatically enhance its appearance and create a cohesive look for your outdoor space. Consider the following factors when selecting plants:

  • Fence material and color
  • Your climate and plant hardiness zone
  • Maintenance requirements
  • Desired aesthetic (formal, cottage-style, modern, etc.)

Here are some plant ideas that work well with masonry fences:

Evergreen Shrubs

Evergreen shrubs provide year-round color and structure, making them excellent choices for masonry fence landscaping. Some popular options include:

  • Boxwood (Buxus)
  • Yew (Taxus)
  • Holly (Ilex)
  • Juniper (Juniperus)

These shrubs can be pruned into formal shapes or left to grow naturally, depending on your preferred style.

Flowering Perennials

Add pops of color and seasonal interest with flowering perennials. Some beautiful choices include:

  • Lavender (Lavandula)
  • Russian Sage (Perovskia atriplicifolia)
  • Daylilies (Hemerocallis)
  • Coneflowers (Echinacea)

Plant these in groups or drifts along your masonry fence for maximum impact.

Ornamental Grasses

Ornamental grasses add texture, movement, and height to your fence landscaping. Consider these varieties:

  • Fountain Grass (Pennisetum)
  • Feather Reed Grass (Calamagrostis)
  • Blue Fescue (Festuca glauca)
  • Japanese Forest Grass (Hakonechloa macra)

These grasses can soften the hard lines of a masonry fence and create an attractive contrast.

2. Incorporating Climbing Vines and Trellises

Climbing vines and trellises can add vertical interest and soften the appearance of a masonry fence. Here’s how to incorporate them effectively:

Choosing the Right Vines

Select vines that are appropriate for your climate and the amount of sunlight your fence receives. Some popular options include:

  • Climbing Roses
  • Clematis
  • Jasmine
  • Virginia Creeper
  • Wisteria (use caution, as it can be aggressive)

Installing Trellises

When installing trellises on your masonry fence, consider the following tips:

  1. Choose a trellis material that complements your fence (e.g., wood, metal, or vinyl).
  2. Ensure the trellis is securely attached to the fence without damaging the masonry.
  3. Space trellises evenly along the fence for a balanced look.
  4. Consider using decorative brackets or mounting hardware for added visual interest.

Training and Maintaining Vines

Properly training and maintaining your climbing vines is essential for achieving the desired look:

  • Guide young vines onto the trellis using soft plant ties.
  • Prune regularly to control growth and maintain the desired shape.
  • Remove dead or damaged growth to keep the plants healthy and attractive.
  • Fertilize and water as needed to promote vigorous growth.

3. Lighting Techniques to Highlight Fence Textures and Details

Strategic lighting can dramatically enhance the appearance of your masonry fence after dark, highlighting its textures and architectural details. Consider these lighting techniques:

Uplighting

Uplighting involves placing lights at the base of the fence and directing them upwards. This technique creates dramatic shadows and emphasizes the texture of the masonry. Tips for effective uplighting:

  • Use LED spotlights or well lights for energy efficiency and longevity.
  • Space lights evenly along the fence for consistent illumination.
  • Experiment with different angles to achieve the desired effect.

Downlighting

Downlighting involves mounting lights on top of the fence or on nearby structures and directing them downwards. This technique creates a soft, moonlit effect and can illuminate plants at the base of the fence. Consider these tips:

  • Use fixtures with adjustable heads to fine-tune the lighting direction.
  • Choose warm white light for a natural, inviting ambiance.
  • Incorporate motion sensors for energy savings and added security.

Grazing

Grazing involves placing lights close to the fence surface and aiming them at a shallow angle. This technique accentuates the texture of the masonry and creates interesting shadow patterns. Tips for effective grazing:

  • Use linear LED fixtures or individual spotlights, depending on the fence length.
  • Experiment with different distances from the fence to achieve the desired effect.
  • Consider using color-changing LED lights for special occasions or seasonal displays.

4. Creating Outdoor Living Spaces Along Your Masonry Fence

Your masonry fence can serve as an excellent backdrop for outdoor living spaces. Here are some ideas to make the most of the area along your fence:

Seating Areas

Create cozy seating areas by placing furniture against or near your masonry fence:

  • Install built-in benches along the fence for a streamlined look.
  • Place a pergola or arbor against the fence to define a seating area and provide shade.
  • Use weatherproof outdoor furniture to create a comfortable lounge space.

Outdoor Kitchens and Dining Areas

Transform the space along your fence into an outdoor kitchen or dining area:

  • Install a built-in grill or outdoor kitchen against the fence.
  • Create a bar area by mounting countertops and shelving on the fence.
  • Set up a dining table and chairs near the fence for al fresco meals.

Water Features

Incorporate water features to add a sense of tranquility to your outdoor space:

  • Install a wall fountain or waterfall feature on your masonry fence.
  • Create a small pond or water garden near the fence.
  • Use the fence as a backdrop for a decorative birdbath or bubbling rock feature.

5. Seasonal Decor Ideas for Masonry Fences

Keep your masonry fence looking fresh and inviting throughout the year with these seasonal decor ideas:

Spring

  • Hang colorful flower baskets from the fence.
  • Create a vertical herb garden using mounted planters.
  • Decorate with pastel-colored outdoor pillows and throw blankets.

Summer

  • String outdoor lights or lanterns along the fence for evening ambiance.
  • Hang sun-resistant artwork or outdoor-friendly mirrors.
  • Create a tropical oasis with potted palms and bright flowers.

Fall

  • Drape autumn garlands or wreaths along the fence.
  • Display pumpkins and gourds in varying sizes and colors.
  • Hang dried corn stalks or wheat sheaves for a rustic touch.

Winter

  • Wrap evergreen garlands and white lights around the fence.
  • Hang oversized ornaments or snowflakes for a festive look.
  • Create winter container gardens with evergreens, berries, and pinecones.

Conclusion

By implementing these landscaping and lighting ideas, you can transform your masonry fence from a simple boundary marker into a stunning feature that enhances your property’s overall aesthetic. Remember to consider your fence’s material, your climate, and your personal style when selecting plants, lighting, and decor. With thoughtful planning and creativity, your masonry fence can become a beautiful and functional element of your outdoor living space, providing privacy, security, and visual interest throughout the year.

Whether you’re looking to create a lush garden backdrop, a cozy outdoor room, or a striking nighttime display, these ideas will help you make the most of your masonry fence. Don’t be afraid to experiment with different combinations of plants, lighting techniques, and seasonal decorations to find the perfect look for your home. With proper care and maintenance, your enhanced masonry fence will continue to be a source of pride and enjoyment for years to come.

\n\n\n
error: No faq

Commercial Masonry Services: The Ultimate Guide for Ontario Businesses

Commercial masonry services play a crucial role in the construction, maintenance, and aesthetics of businesses across Ontario. Whether you’re planning a new build, restoring a historic structure, or maintaining your current property, understanding the ins and outs of commercial masonry is essential. This comprehensive guide will walk you through everything you need to know about commercial masonry services, from types of projects to choosing the right contractor, with a focus on Ontario businesses.

1. Introduction to Commercial Masonry Services

1.1 Definition and importance

Commercial masonry services encompass a wide range of construction and maintenance activities involving brick, stone, and concrete materials for business properties. These services are vital for ensuring the structural integrity, safety, and aesthetic appeal of commercial buildings. In Ontario’s diverse climate, quality masonry work is particularly important for withstanding harsh weather conditions and maintaining property value.

1.2 Types of commercial masonry projects

Commercial masonry projects can vary widely, including:

  • Office buildings and corporate headquarters
  • Retail stores and shopping centers
  • Hotels and hospitality structures
  • Educational institutions
  • Healthcare facilities
  • Industrial and manufacturing buildings
  • Historical restorations

2. Common Commercial Masonry Services

2.1 New construction

New construction projects involve building from the ground up, incorporating masonry elements into the design and structure of a commercial property. This can include foundations, walls, facades, and decorative elements.

2.2 Restoration and repair

Restoration and repair services focus on fixing damaged masonry or restoring older buildings to their former glory. This may involve repointing mortar joints, replacing damaged bricks or stones, or addressing structural issues.

2.3 Waterproofing

Waterproofing is crucial for protecting masonry structures from moisture damage. This service involves applying sealants, installing drainage systems, and implementing other measures to prevent water infiltration.

2.4 Facade maintenance

Regular facade maintenance helps preserve the appearance and integrity of a building’s exterior. This can include cleaning, sealing, and minor repairs to keep the masonry looking its best.

2.5 Custom stonework and brickwork

Custom masonry work allows businesses to create unique, eye-catching designs that enhance their brand and property value. This can include decorative elements, signage, or specialized patterns in brick or stone.

3. Benefits of Professional Commercial Masonry Services

3.1 Structural integrity and safety

Professional masonry services ensure that your building’s structure is sound and safe. Properly constructed and maintained masonry can withstand heavy loads, resist fire, and provide long-lasting durability.

3.2 Aesthetic appeal and property value

High-quality masonry work enhances the visual appeal of your property, potentially increasing its value. Well-maintained brick and stone facades create a positive impression on customers and clients.

3.3 Energy efficiency

Masonry materials like brick and stone provide excellent insulation, helping to regulate indoor temperatures and reduce energy costs. Proper installation and maintenance can further improve your building’s energy efficiency.

3.4 Long-term cost savings

Investing in professional masonry services can lead to significant long-term savings. Quality workmanship and materials require less frequent repairs and replacements, reducing maintenance costs over time.

4. Choosing the Right Commercial Masonry Contractor

4.1 Qualifications and certifications

When selecting a masonry contractor, look for relevant qualifications and certifications. In Ontario, reputable contractors should be licensed by the Ontario College of Trades and may hold additional certifications from organizations like the Canadian Masonry Contractors Association (CMCA).

4.2 Experience and portfolio

Review the contractor’s experience and portfolio of completed projects. Look for examples similar to your needs and assess the quality of their work. Don’t hesitate to ask for references from past commercial clients.

4.3 Insurance and warranties

Ensure that the contractor carries adequate insurance, including liability coverage and workers’ compensation. Ask about warranties on materials and workmanship to protect your investment.

4.4 Customer reviews and testimonials

Research online reviews and ask for testimonials from previous clients. This can provide valuable insights into the contractor’s reliability, communication, and quality of work.

5. The Commercial Masonry Process

5.1 Initial consultation and assessment

The process typically begins with a thorough site assessment and consultation to understand your needs, budget, and project scope. The contractor should provide a detailed proposal and cost estimate.

5.2 Project planning and design

Once you’ve agreed on the scope, the contractor will develop a detailed project plan, including timelines, material requirements, and any necessary permits or approvals.

5.3 Material selection

Choosing the right materials is crucial for the success of your project. Your contractor should guide you through options that balance aesthetics, durability, and cost-effectiveness.

5.4 Execution and quality control

During the construction or repair process, professional contractors will adhere to strict quality control measures to ensure the work meets or exceeds industry standards.

5.5 Final inspection and maintenance recommendations

Upon completion, a thorough inspection should be conducted to ensure all work meets specifications. The contractor should also provide maintenance recommendations to help preserve your masonry investment.

6. Commercial Masonry Materials and Techniques

6.1 Brick and stone options

Ontario businesses have a wide array of brick and stone options, including:

  • Clay bricks
  • Concrete blocks
  • Natural stone (e.g., limestone, granite, sandstone)
  • Manufactured stone veneer
  • Glass blocks

6.2 Mortar types and applications

Different mortar types are used depending on the project requirements and environmental conditions. Common options include:

  • Type N: General-purpose mortar for above-grade use
  • Type S: High-strength mortar for below-grade applications
  • Type M: Extra high-strength mortar for heavy loads
  • Type O: Low-strength mortar for interior applications

6.3 Modern masonry technologies

Advancements in masonry technology have introduced innovative solutions such as:

  • Self-cleaning bricks
  • Insulated concrete forms (ICFs)
  • Advanced anchoring systems
  • Computer-aided design and modeling for precision planning

7. Maintaining Commercial Masonry Structures

7.1 Regular inspections

Schedule annual inspections to identify and address potential issues early. Pay special attention to areas prone to water damage or stress.

7.2 Cleaning and sealing

Regular cleaning and sealing help protect masonry from environmental damage and maintain its appearance. Use appropriate cleaning methods and sealants for your specific masonry type.

7.3 Addressing common issues

Be proactive in addressing common masonry problems such as:

  • Efflorescence (white, powdery deposits)
  • Cracking or spalling
  • Mortar joint deterioration
  • Water infiltration

8. Commercial Masonry Regulations and Standards in Ontario

8.1 Building codes and permits

Ensure your masonry project complies with the Ontario Building Code and local municipal regulations. Obtain necessary permits before beginning any work.

8.2 Safety regulations

Adhere to safety standards set by the Ontario Ministry of Labour, including proper scaffolding, personal protective equipment, and work site safety protocols.

8.3 Industry associations and certifications

Look for contractors affiliated with reputable industry associations such as:

  • Canadian Masonry Contractors Association (CMCA)
  • Ontario Masonry Contractors’ Association (OMCA)
  • Masonry Institute of Ontario (MIO)

9. Conclusion: Investing in Quality Commercial Masonry Services

Investing in professional commercial masonry services is crucial for Ontario businesses looking to build, maintain, or restore their properties. By understanding the types of services available, the benefits of quality masonry work, and how to choose the right contractor, you can make informed decisions that will protect and enhance your commercial property for years to come.

Remember that regular maintenance and timely repairs are key to preserving your masonry investment. By partnering with a reputable masonry contractor and staying proactive about your property’s needs, you can ensure that your commercial building remains structurally sound, visually appealing, and energy-efficient in Ontario’s demanding climate.

Whether you’re planning a new construction project, restoring a historic building, or simply maintaining your current property, professional masonry services are an invaluable resource for Ontario businesses. Take the time to research your options, consult with experts, and invest in quality workmanship to reap the long-term benefits of exceptional commercial masonry.

\n\n\n

What are commercial masonry services?

Commercial masonry services involve construction and maintenance activities using materials like brick, stone, and concrete for business properties, ensuring structural integrity, safety, and aesthetic appeal.

What types of projects fall under commercial masonry?

Commercial masonry projects can include office buildings, retail stores, hotels, educational institutions, healthcare facilities, industrial buildings, and historical restorations.

What are the common services offered in commercial masonry?

Common services include new construction, restoration and repair, waterproofing, facade maintenance, and custom stonework or brickwork.

Why should businesses invest in professional masonry services?

Investing in professional masonry ensures structural integrity, enhances aesthetic appeal and property value, improves energy efficiency, and leads to long-term cost savings.

How do I choose the right commercial masonry contractor?

To choose the right contractor, check for qualifications and certifications, assess experience and portfolio, verify insurance, and read customer reviews and testimonials.

What materials are typically used in commercial masonry?

Common materials include clay bricks, concrete blocks, natural stone (like limestone and granite), manufactured stone veneer, and glass blocks.

What maintenance practices should be followed for masonry structures?

Regular inspections, cleaning and sealing, and addressing common issues like efflorescence and cracking are important for maintaining masonry structures.

What regulations should be considered for a masonry project in Ontario?

Masonry projects must comply with the Ontario Building Code and local regulations, including obtaining necessary permits and adhering to safety standards set by the Ontario Ministry of Labour.

What are the benefits of using quality masonry materials?

Quality masonry materials provide lasting durability, excellent insulation, energy efficiency, and can significantly increase the value and appeal of a property.

Expert DIY Guide: Masonry Cleaning And Sealing For A Professional Finish

DIY Masonry Cleaning: What You Need to Know

To get your masonry looking its best, you need to know the right way to clean it. DIY Masonry Cleaning: What You Need to Know with Important Sub-sections of Required Tools and Materials, and Step-by-Step Instructions for Cleaning Masonry, will give you the solution to get that professional finish you want.

Importance of Cleaning Masonry

Maintaining Masonry: Explanations and Tips

Cleaning masonry is key for its preservation, durability, and appeal. You must remove dirt, grime, stains, mildew, and other pollutants that can cause damage or discoloration. Regular cleaning of masonry prevents moisture penetration, mold growth, efflorescence, spalling, and other forms of deterioration.

There are a few ways to clean different types of masonry – brick, stone, concrete blocks, and stucco. Each method has pros and cons, depending on age and type of stain. Common techniques include pressure washing with a mild detergent solution or chemical/solvent-based cleaners. DIYers can also try baking soda scrubbing or ready-mix cement.

Be safe while cleaning masonry. Wear protective gear and use pole sticks for heavy objects. Climate is important too. Low humidity days are best. High moisture can impact curing time.

Mr. Robert learned this the hard way. He cleaned his patio block paving without anti-weed treatment on a damp day. Debris slipped and caused decay. He had to call professionals for costly repairs and sealing.

Cleaning masonry right increases longevity and reduces future costs. So, stock up on supplies and get to work!

Required Tools and Materials

Masonry cleaning requires know-how of the necessary tools and materials. Essentials include: a stiff brush, rubber gloves, a pressure washer or garden hose, and a cleaning solution that is suitable for the masonry type. Research is a must before starting the project. For safety, a protective mask and caution when working at heights or unsteady surfaces is recommended. When selecting a chemical, make sure it won’t damage the surface and take environmental factors into account.

Masonry cleaning has been around since ancient times, but with new methods and materials, it’s now simpler than ever to preserve these historic structures. Cleaning masonry can seem difficult, but with the right steps, you’ll have those bricks looking pristine!

Diy cleaning of masonry using pressure washer.

Step-by-Step Instructions for Cleaning Masonry

Cleaning masonry can be tricky, however with the correct tools and steps it can be completed properly and quickly. Here are a few tips:

  1. Prep: Before beginning to clean, make sure to get rid of any dirt or debris with a wire brush or scraper.
  2. Clean: Pick the right cleaning solution and mix it according to instructions. Then, spray or brush the solution across the masonry evenly.
  3. Rinse: Using a pressure washer or hose, rinse off the solution. Be careful not to get too forceful, as it could damage the masonry.

Different masonry types may require different methods and solutions. It’s best to seek a professional if you are unsure.

To protect your masonry in the future, think about applying a sealant after cleaning.

Don’t wait for staining or damage to occur – it could cause more serious issues and more expensive fixes.

My mate recently tried to clean masonry without proper prep and ended up with damaged brickwork. It’s essential to take the time to prepare and research before starting any home improvement projects.

Seal your masonry like a pro and have a fortress that even the Hound wouldn’t destroy.

DIY Masonry Sealing: How to Achieve Professional Results

To achieve professional results for DIY masonry sealing, you need to understand the need for sealing and use the right sealer for your masonry. The step-by-step guide for sealing your masonry can help you achieve a professional finish. In this section, you will explore these aspects of masonry sealing to help you elevate your DIY masonry sealing game.

Understanding the Need for Sealing Masonry

Seal It to Secure Professional Results!

Sealing masonry is key to stop water from leaking in, as well as mold growth and structural damage. It also defends against dirt, stains, and pollutants that can damage the structure. Sealing guarantees your masonry will remain in great condition for years to come.

Masonry is porous and absorbs moisture quickly, so sealing it is essential to prevent expensive repairs. Plus, it guards against any structural damage.

Humans have been sealing masonry since ancient times, and this knowledge has been passed down through the years. Now, we have advanced sealing techniques.

Select the wrong sealer and your masonry will be more waterproof than the Titanic!

Choosing the Right Sealer for Your Masonry

Make sure your masonry is sealed properly. Choose the right sealer for your needs. Sealers have different chemical compositions and features that work best on certain surfaces. Use the table below to find the recommended sealer:

Masonry SurfaceRecommended Sealer
ConcreteSilane/Siloxane
BrickAcrylic
StoneNatural Look Penetrating

Consider the porosity, moisture levels, UV radiation and temperature of the surface when selecting a sealer. To get the best results, clean the masonry before applying the sealant. Don’t use too much pressure when spraying or rolling. Let the sealer dry completely for lasting results. Sealing masonry can be easy. Follow these steps for great results!

Step-by-Step Guide for Sealing Your Masonry

Ensure your masonry is protected from moisture damage with this easy guide to sealing! Here’s what you need to do:

  1. Surface Prep:
    • Clean the surface according to its material.
    • Fill in visible cracks with the right filler.
    • Mix the sealer following the instructions.
  2. Application:
    • Use a sprayer or roller, depending on the surface.
    • Apply the sealant evenly, without interruption, and in the shade.
    • Allow time for drying before applying another coat if needed.
  3. Aftercare:
    • Scrape off excess sealer around the edges of surfaces.
    • Dispose of any remaining product and clean tools with soap and warm water.

Make sure to reseal your concrete every couple of years. Don’t let damaged masonry ruin your property’s aesthetic – seal it up with our easy guide! Get that concrete jungle looking fresh without breaking the bank or your back.

Tips for an Impeccable DIY Masonry Cleaning and Sealing

To achieve a professional finish for your masonry cleaning and sealing project, you need to consider some precautions before and during the process. Additionally, it’s important to avoid common mistakes that can ruin your hard work. In this section, you will learn about the precautions to take and mistakes to avoid during DIY masonry cleaning and sealing. We will also answer some frequently asked questions about this project.

Precautions to Consider Before and During Cleaning and Sealing

Before starting masonry cleaning and sealing, take safety and efficiency measures. These include:

  • Ventilating the area.
  • Wearing protective gear like gloves and goggles throughout.
  • Testing solutions on a small area first.
  • Avoiding acidic cleaners.
  • Cleaning tools and equipment properly and storing them safely.

Safety is key when dealing with masonry cleaning and sealing. Cleaning solutions can be hazardous and machinery can be dangerous. So, get educated before attempting this task.

Using pressure washers? Don’t aim directly at bricks. Keep kids and pets away from the area. Also, follow manufacturer instructions when using sealants.

For an awesome finish, make sure the surface is spot-free during cleaning and sealing. Use a different tool for applying sealant (if necessary).

Pro Tip: Choose an appropriate sealer for the brick or stone type – incompatible ones may cause damage over time. Errors can be prevented with the right tools – pull them out before they sprout up!

Common Mistakes and How to Avoid Them

When doing DIY masonry cleaning and sealing, it’s best to avoid mistakes. These errors can cause bad results, along with extra costs and time wasted. Here are a few to keep in mind:

  • Don’t use harsh chemicals as they can damage the surface.
  • Prep work such as debris removal and crack repair is important.
  • Don’t seal before the surface is dry, as moisture will be trapped leading to decay.

Researching essential details is key. For example, you need to know the type of stains and how to remove them. A homeowner once started a patio cleaning project but didn’t realize scraping moss would scratch the pavers.

Hire a pro or tackle it yourself? Refer to these FAQs for advice on cleaning and sealing masonry. That way, you’ll get it right – or be a lesson for others!

Frequently Asked Questions about DIY Masonry Cleaning and Sealing

DIY Masonry Cleaning and Sealing is a project that requires caution. Homeowners often want to know the right way to do it. Here are some common questions regarding this task.

– What materials do I need?

  • Soap and water
  • Masonry cleaner
  • Spray nozzle

– How do I know if I need sealing?

  • Spray water on masonry
  • If it’s absorbed, you need sealing

– Best time to clean and seal?

  • Temperature range of 50-80°F in spring or fall.

– Best way to apply sealer?

  • One coat with roller or sprayer.

– How long to wait after washing?

  • Give two days for drying.

– Need a pro for sealing?

  • Not necessary but inexperienced people may cause damage.

Remember to protect yourself while doing this task. Research tips from reliable sources like Home Depot or Better Homes and Gardens before starting.

AHC Media found that improper sealing can lead to moisture-related problems in the house.

Frequently Asked Questions

  1. Can I use regular household cleaners for masonry cleaning?
    • No, masonry requires specialized cleaners that are formulated to handle the unique properties of stone, brick, and concrete. Using regular household cleaners can damage the surface and cause discoloration.
  2. .Do I need to seal my masonry after cleaning?
    • Yes, sealing your masonry after cleaning helps to protect it from water damage and stains. It also helps to enhance the natural beauty of the surface.
  3. What kind of sealant should I use?
    • The type of sealant you choose will depend on the type of masonry you have. Some common options include water-based sealers, solvent-based sealers, and penetrating sealers. It’s best to consult with a professional to determine which option is right for your specific needs.
  4. Will sealing my masonry change the color?
    • Sealing your masonry may darken the color slightly, but a good sealer will not significantly alter the appearance of the surface. In fact, some sealers can actually enhance the natural color and texture of the masonry.
  5. Can I apply sealant myself or should I hire a professional?
    • You can apply sealant yourself, but it’s important to follow the manufacturer’s instructions carefully and use proper safety equipment. If you’re not comfortable doing the job yourself, or if you have a large area to cover, it may be a good idea to hire a professional masonry contractor.
  6. How often do I need to clean and seal my masonry?
    • The frequency of cleaning and sealing will depend on the type of masonry and the conditions it’s exposed to. In general, it’s a good idea to clean and seal your masonry every 2-3 years to keep it looking its best and protect it from damage.

How to Choose Between DIY and Professional Brick Repair Techniques

DIY Brick Repair and Replacement

To mend your brickwork, you can choose to go the DIY route instead of hiring a professional mason. We present “DIY Brick Repair and Replacement” with “Pros and Cons of DIY Brick Repair, Required Tools for DIY Brick Repair, Basic Steps for DIY Brick Repair, and Common Mistakes in DIY Brick Repair” as solutions. These sub-sections can provide crucial insights into the feasibility of fixing your brickwork independently.

Pros and Cons of DIY Brick Repair

Considering DIY brick repair? Weigh the pros and cons.

  • Pros: Cost-effective & customizable.
  • Cons: No experience could lead to improper repairs & safety hazards.
  • Pros: Sense of accomplishment & learning opps.
  • Cons: Mistakes can create further damage & need for prof. repairs.

Tools & knowledge? Necessary. Failing to address moisture issues? Bad news. Plus, safety first – gloves & eye protection needed. Secure support structures before repairs too.

Pro Tip: Label bricks according to wall location for easy rebuilding. Bob the Builder’s got nothin’ on you with these essential tools for DIY brick repair.

Required Tools for DIY Brick Repair

For DIY brick repair and replacement, you’ll need the following tools:

  • Brick chisel and hammer
  • Masonry drill bit and drill
  • Trowel
  • Gloves and safety glasses
  • Mortar mix
  • Water
Some of the tools used for DIY brick repair.

Beginners should start small and check the condition of existing mortar before starting. Work slowly and carefully, matching the style and color of existing bricks.

Fun fact: ox blood was used in medieval mortar to improve durability and strength. However, this isn’t done anymore due to technological advances and animal welfare. So, get your tools ready and start fixing!

Basic Steps for DIY Brick Repair

Brick repair and replacement can be tough, but it’s not impossible! Here are the steps to help you do it yourself.

  1. Examine Damage: Check the damage to see if repair or replacement is needed.
  2. Get Supplies: Buy brick adhesive, mortar mix, tuck-pointing tool, hammer, chisel, sandpaper, and safety gear.
  3. Clean Brick Surface: Use a wire brush to remove any loose debris from the area to fix.
  4. Do Repairs: For minor damage, use adhesive with a caulking gun or fill with mortar using a trowel. For bigger damage, replace entire bricks using a tuck-pointing technique.
  5. Touch Ups: After making repairs/replacements, smooth out rough edges/excess mortar using sandpaper.

Remember, every brick structure is unique and might require different repair/replacement methods. Plus, always wear safety gear when working with bricks to prevent injuries from debris or chemicals. Don’t be that person who uses bubble gum and duct tape – avoid those mistakes!

Common Mistakes in DIY Brick Repair

DIY brick repair can save some cash, but beware of mistakes that could cost more than the repair itself!

Using the wrong mortar mix, overlooking structural issues, skipping the cleaning stage, and neglecting moisture sources are the most common mistakes made by DIY-ers.

Make sure the mortar type matches the brick’s composition and age.

Address underlying problems before repairing, and clean the surface for successful adhesion.

Check for moisture sources to ensure long-term durability.

For optimal results, take care in planning, execution, and attention to detail.

When in doubt, get advice from experts and use proper tools and materials.

Avoid these common mistakes for a successful DIY project!

Professional Brick Repair and Replacement

To ensure the proper repair and replacement of bricks, you need a professional mason. Hiring a professional can bring many benefits, such as quick and efficient work. Different types of professional masonry services are also available, depending on the level of repair needed. Understanding the factors that affect the cost of professional brick repair is vital before starting the project.

Benefits of Hiring a Professional Mason

As a property owner, it is essential to source the right professionals for brick repairs. Hiring a professional mason can bring several benefits, such as:

  • Improved Workmanship – They can precisely analyze the damages and match existing bricks with new replacements.
  • Cost Savings – Professional masons can identify risks and suggest quality materials for long-term solutions.
  • Time-Saving – Outsourcing brick repair services to experts can avoid disruptions due to lack of knowledge.
  • Safety Compliance – Professional masons use proper safety gear and adhere to safety regulations.

Moreover, they provide updates on progress and any necessary changes. Investing in expert brick repair services is recommended for years-long solutions. Make sure to check the credentials of masonry companies before starting any work.

Did you know that the first bricks were made thousands of years ago by Mesopotamians? Despite being made long ago, their foundation helped create modern-day well-engineered bricks. From chimney repairs to patio installations, these masonry services will have your bricks and blocks looking great.

Types of Professional Masonry Services

Professional Masonry Repair and Replacement Services offer lots of enhancements to make brick structures look better, safer, and work better. These services are a must for keeping homes, commercial buildings, and public spaces in tip-top shape.

  • Brick Repair: Fix chipped, cracked, or damaged bricks so they blend in.
  • Brick Replacement: Swap out crumbling or missing bricks for stability.
  • Tuckpointing: Refresh tumbled mortar joints to match the original color.

Expert masons use modern and traditional techniques with high-quality materials. Their work stands the test of time.

Don’t let your property deteriorate – get Professional Masonry Repair and Replacement Services now! Want to save? Pray for sunny weather and no supernatural disturbances!

Factors that Affect the Cost of Professional Brick Repair

Professional Brick Repair and Replacement is a must to maintain a building’s structural integrity. Its cost varies, depending on several factors, such as damage extent, location, and repair needs.

To help understand these factors, we created a table with appropriate columns to show actual data. It shows info on pricing elements, like material costs, labor fees, location-based charges, and other associated costs.

Brick Repair Cost Breakdown:

Pricing ElementDescription
Material CostsCost of materials for repair
Labor FeesCharges for brick masons’ time
Location-Based ChargesAdditional charges based on area
Equipment Rental FeesCosts related to equipment for repair

Besides material costs and labor fees, other factors must be considered when assessing brick repair expenses. These include the need for special equipment or machinery due to challenging access or existing structures nearby.

Pro Tip: Before Choosing a Professional Brick Repair Service Provider, make sure they give you transparent pricing details, including all possible costs associated with the project. High-quality workmanship and total transparency in cost and pricing elements are important.

When it comes to professional brick repair and replacement, you gotta choose between pizza and tacos – both great, but one might just fit your needs better.

Choosing the Right Option for You

To make the right decision between DIY or professional brick repair, you need to evaluate several factors. Before deciding the right option for you, take into account factors such as your DIY skill level, the extent of brick damage, and deadline for repair. Comparing the cost and time between the two options is also essential to ensure you’re making an informed decision. In the following sub-sections, we’ll discuss each factor in detail, ultimately helping you make the final decision about whether to pursue DIY or professional brick repair.

Factors to Consider Before Deciding DIY or Professional Brick Repair

When pondering DIY vs. professional brick repair, numerous factors must be taken into account. These include the extent of damage, prior experience with masonry, equipment/materials availability, budget, timeframe, and safety risks.

Every case is different, so one factor may not work in all cases. Consider long-term viability when making a decision.

Ed, for example, opted for a DIY solution with his first home purchase due to budget constraints. Growing up, he had watched his father mend broken walls with manuals, and now, 3 years later, he has a strong grasp on masonry. His house still stands strong due to his DIY input.

When it comes to DIY brick repair, time may be money, but mistakes are priceless.

Comparing Cost and Time between DIY and Professional Brick Repair

Weigh the costs and time involved between DIY and professional services when considering brick repair. Compare expenses and duration for each option in the table below.

DIYProfessional
Cost ($)100-300500-1500
Duration (hours)8-162-8

DIY repair may save money, but it could result in extended downtime and more costs if not done right. Professional services might be pricey, but they come with experience and knowledge needed to get the job done right the first time.

Each repair job can vary in type and severity. Talk to a professional before deciding which option is best.

Forbes found that hiring pros for home repairs could increase property value by up to 10%. Investing in your property? Consider all possible outcomes before making a decision. Do-it-yourself brick repair? More like do-it-yourself disaster waiting to happen.

Final Decision: DIY or Professional Brick Repair

Choosing right for brick repair needs? Considerations are key! Here’s a few pointers:

  • Evaluate damage. Can you tackle it yourself? Or seek professional help?
  • DIY? Have the skills & tools? This could be cost-effective.
  • Professional Repair? Safer, efficient & no surrounding damages.
  • Costs? Cheaper isn’t always better. Inexpensive repairs can mean bigger problems later.
  • Maintenance & Prevention? After repairs, focus on these – and protect your investments.

When choosing DIY or Professional Brick Repair, think about expertise level, resources & more. One homeowner faced this dilemma when parts of their wall crumbled. After assessing, they realized a pro was best. The repairs were done well & at a good cost. Now they have peace of mind knowing leak repairs were expert certified. Future work is now safely secured.

Frequently Asked Questions

  1. What are the benefits of DIY brick repair and replacement?
    • There are a few benefits to doing the work yourself, including potential cost savings and the satisfaction of completing a project independently. Additionally, you may have more control over the timeline and design choices. However, it’s important to note that masonry work can be difficult and time-consuming, and mistakes can be very costly to fix.
  2. When should I consider hiring a professional mason?
    • If you’re dealing with serious damage, like significant cracks or structural issues, it’s probably best to leave the work to a professional. They’ll have the experience and expertise to evaluate the problem and come up with the best solution. Additionally, if you’re working on a larger project, it may be more efficient to let someone else handle it.
  3. How do I know if I have the necessary skills and tools to do brick repair on my own?
    • Brick repair requires a lot of specialized knowledge and tools, so it’s important to be honest with yourself about your abilities. If you don’t have experience working with masonry, it can be difficult to know where to start. Additionally, you’ll need a range of tools, including a trowel, brick hammer, and jointer. If you’re not sure whether you have what it takes, it’s better to err on the side of caution and hire a professional.
  4. What kind of preparation do I need to do before attempting brick repair or replacement?
    • Before you get started, it’s essential to evaluate the extent of the damage and come up with a plan of attack. You’ll need to gather all the necessary tools and materials, including the bricks themselves, mortar, and other supplies. It’s also important to make sure the work area is clean and free of debris.
  5. What are some common mistakes to avoid when attempting DIY brick repair?
    • One of the most common mistakes people make is failing to properly mix the mortar. This can lead to weak bonds and further damage to the structure. Additionally, it’s important to use the correct amount of mortar, as too much or too little can both cause problems. Other mistakes include using the wrong kind of brick, failing to properly prepare the surface, and not allowing enough time for the mortar to dry.
  6. When should I expect to hire a professional rather than attempt DIY brick repair or replacement?
    • If you’re dealing with a serious structural issue, like a crack in the foundation or significant damage to a load-bearing wall, you should always hire a professional. Additionally, if you don’t have experience working with brick or masonry, it’s usually best to let someone else handle the job. However, if you have some experience and are confident in your abilities, smaller repairs may be doable on your own.
This image depicts a large, ornate stone and brick house with a steeply pitched roof. The house has an arched window and a balcony with decorative iron railings on the second floor. The exterior is surrounded by well-manicured landscaping, including tall evergreen trees, neatly trimmed hedges, and a stone retaining wall. The overall style and architecture of the house suggest it is a high-end, historic or traditional-style residential property.

Expert Guide To Brick Repair: Enhancing Your Home’s Integrity And Aesthetics

Brick, a durable and aesthetically pleasing building material, has been used for centuries in constructing everything from historic landmarks to contemporary homes. Despite its resilience, brickwork requires maintenance and, occasionally, repair to preserve its structural integrity and visual appeal. Understanding brick repair is crucial for homeowners, property managers, and preservationists alike, as it ensures that buildings not only stand the test of time but also continue to look their best.

A well preserved brick home retains its beauty through time

The Importance of Brick Repair

Brick repair goes beyond mere aesthetics. It’s an essential practice that addresses the natural wear and tear buildings face over time. Environmental factors, such as weather extremes, moisture, and temperature fluctuations, can cause bricks and mortar to crack, crumble, or erode. Left unaddressed, these issues can lead to water infiltration, thermal inefficiency, and structural instability, posing risks to the building’s occupants and potentially leading to costly repairs down the line.

Common Signs That Indicate the Need for Brick Repair

Detecting early signs of brick damage can save homeowners time and money. Here are some indicators that your brickwork may need attention:

  • Cracked Bricks: Cracks can develop due to settling, thermal expansion, or impact damage. They can vary in severity from hairline cracks to complete breaks.
  • Crumbling Mortar: Mortar acts as the glue holding bricks together. Over time, it can deteriorate, leading to loose bricks and gaps in the wall.
  • Efflorescence: A white, powdery substance on bricks, efflorescence is a sign of moisture penetration and can indicate more severe issues like water damage.
  • Spalling: This occurs when the surface of the brick begins to flake off or crumble, often due to moisture penetration and freeze-thaw cycles.
  • Leaning Structures: Any sign of a wall or chimney leaning or bulging is a clear indicator of structural issues requiring immediate attention.

Initial Considerations for Brick Repair

Understanding the scope and nature of brick damage is the first step toward effective repair. Here are initial considerations to guide homeowners:

  • Assessment: Conducting a thorough assessment of the damage will help determine the extent of repairs needed. This can involve visual inspection and, if necessary, consultation with a professional.
  • Technique Selection: Various repair techniques, such as repointing, brick replacement, or stabilization, can be employed depending on the damage type.
  • Material Matching: For aesthetic and structural reasons, it’s important to match the new bricks and mortar to the existing ones in colour, texture, and strength.
  • DIY vs. Professional Repair: While some minor repairs can be handled by a DIY enthusiast, significant or structural damage should be addressed by professional masons to ensure safety and longevity.

The Path Forward

Brick repair is an investment in your property’s future, enhancing its beauty, functionality, and value. By recognizing the signs of damage early and understanding the basics of brick repair, homeowners can take proactive steps to maintain their buildings’ integrity. However, the journey from identifying damage to completing repairs encompasses a range of techniques, materials, and decisions that require a deeper dive into the world of masonry.

In the following sections of our comprehensive guide, we’ll explore each aspect of brick repair in detail. From choosing the right repair technique to understanding the intricacies of material selection and deciding when to call in the experts, we’ll equip you with the knowledge you need to ensure your brickwork remains a testament to durability and craftsmanship.

Frequently Asked Questions:

  1. What are the most common signs that my brickwork needs repairs?
    • Common indicators include cracked bricks, crumbling mortar, efflorescence (a white, powdery residue), spalling surfaces, and any signs of leaning or bulging structures.
  2. Why is it important to repair damaged bricks and mortar?
    • Repairing brickwork is crucial to prevent water infiltration, maintain thermal efficiency, and ensure structural stability. This preserves both the aesthetic appeal and the safety of the building.
  3. Can I perform brick repairs myself, or should I hire a professional?
    • While minor repairs like simple repointing can be a DIY project, significant or structural damage should always be handled by professional masons to ensure the work is done safely and effectively.
  4. How do I choose the right materials for brick repair?
    • It is important to match new bricks and mortar to the existing ones in terms of color, texture, and strength. This ensures not only visual continuity but also structural integrity.
  5. What does repointing mean, and when is it necessary?
    • Repointing is the process of renewing the pointing (the external part of mortar joints) in masonry construction. This is necessary when the mortar has deteriorated due to age or weather exposure, which can lead to water entry and structural damage.
  6. How does weather affect brick durability and repair processes?
    • Extreme weather conditions, such as freezing temperatures or excessive moisture, can accelerate the deterioration of brick and mortar. Understanding local climate conditions is crucial when planning repairs to ensure that the chosen materials and methods will withstand environmental stresses.

How To Build A Retaining Wall: Expert DIY Tips For Construction And Repairs

How To Build A Retaining Wall

To have a successful DIY retaining wall construction, planning and preparation are key. In order to achieve a professional finish, start with planning and designing the retaining wall. To take on this DIY project, gather the right tools and materials needed for the construction. You should also focus on building the footing of the retaining wall, laying the bricks or blocks properly, and filling with gravel and soil to secure the retaining wall.

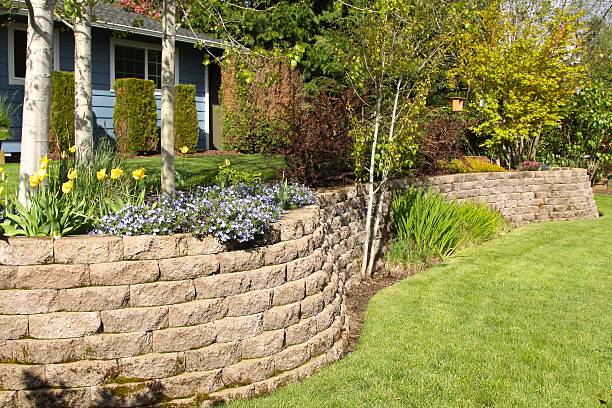
A brick retaining wall showcasing its aesthetic appeal.

Planning and Designing the Retaining Wall

Constructing a retaining wall? Meticulous planning and designing is essential! Here’s a 4-Step Guide to ensure success:

  1. Consider the Purpose. Why do you need the wall and how does it fit your outdoor space?
  2. Choose Location and Materials. Think about slope, soil type, moisture and weather.
  3. Measurements and Drainage System. Get the right height, width and thickness. Plan any drainage systems needed.
  4. Safety Considerations. Check local building codes or hire professionals.

There are other details too. Consider cost-effectiveness, local laws and permits. Maximize your outdoor space with a beautiful wall. Plan beforehand to avoid costs later! Oh, and don’t forget your shovel!

Tools and Materials Needed for the DIY Retaining Wall Construction

Gather your tools and materials for a successful DIY wall construction. Necessities include: bricks, block stones, cement, drainage pipe, gravel, shovel, spirit level, and a rubber mallet. Make sure you have everything before starting.

Align your bricks or blocks correctly. Dig deep holes and insert drainage pipes. Cover the base with gravel before adding the concrete foundation.

You’re building a BFF! Burnt clay ‘bricks’ were used in ancient Persia to build fortifications. Today, we use modern materials like cement and block stones. Take advantage of the lessons learned centuries ago. Get ready for your DIY retaining wall!

Building the Footing of the Retaining Wall

A strong retaining wall needs a solid footing. ‘Foundation Building’ sets the base for the entire structure and keeps it strong. Here’s a guide to make the footing for your wall:

  1. Mark the corners of the wall and run a string line between them.
  2. Dig along the string line with a shovel or machine, depending on the size.
  3. Add gravel, level it up.
  4. Compress the gravel with a soil compactor, making sure it’s even.
  5. Pour around 6 inches of concrete into the trench, with building stakes to keep it at the same height. Add in some reinforcing bar mesh to strengthen.
  6. Use a float trowel to smooth the concrete, letting it cure before building up.

Be sure to take accurate measurements of the corner points. Make sure the excavation is spread out evenly before pouring in the concrete. Remove dirt from the site for fast construction.

Build your wall with love and care. Ensure water is added to cement. Create a space of lasting memories. If you want your wall to last, lay those bricks just right – or face the shame of your neighborhood!

Laying the Bricks or Blocks Properly

Make sure your DIY retaining wall is strong and lasting. Here’s how to do it:

  1. Clean the area before you lay the bricks or blocks. No debris, soil, or rocks allowed.
  2. Level the ground and add gravel or sand in layers at least 4 inches thick. Compact each layer.
  3. Use mortar between the bricks or blocks. Place each brick or block level and aligned. Put a thin layer of mortar on the base.
  4. As you work up, apply more mortar between layers. Use a trowel to smooth it out and add stability.
  5. Install metal reinforcing rods into some of the rows to improve durability without losing aesthetic appeal.

Retaining walls were used for agricultural purposes 500 BC! Get your hands dirty and fill that wall with gravel and soil.

Filling with Gravel and Soil to Secure the Retaining Wall

To reinforce your retaining wall’s structural integrity, a combination of gravel and soil is essential. This technique resists pressure from the earth surrounding it. To fill the wall with gravel and soil, follow these six simple steps:

  1. Place a layer of crushed stone or pea gravel in the trench.
  2. Compact the layer using a plate compactor or hand tamper.
  3. Add another 4-inch layer of crushed stone or pea gravel.
  4. Compact this second layer.
  5. Fill in any gaps behind the wall with soil.
  6. Compact the soil against and behind the wall.

Remember to frequently check for any gaps between the backfill and retaining structure along its length. Leave 6 inches between adjacent walls and use gravel beneath for water drainage. Single-wythe does not provide enough weight resistance.

James reported success with his DIY retaining project via Youtube tutorials. He experienced minimal complications while filling his walls with gravel and soil. Retaining walls require TLC to prevent your backyard from becoming a landslide!

A homeowner filling gravel and soil behind a retaining wall

Retaining Wall Repair

To repair your retaining wall, you need to identify the problem or damage first. The right repair technique is crucial to avoid any further damage. Repair cracks on the retaining wall using proper tools. Reinforcing the retaining wall with proper drainage prevents future damages. In order to prevent any future damage, you need to follow certain techniques.

Identifying the Problem or Damage on the Retaining Wall

To keep your retaining wall strong and stable, regular inspections are a must. Check the wall’s surface for stains, bulges, or cracks. Also look at the surrounding area for soil erosion, water buildup, and shifting soil. Spot any patterns or inconsistencies that may indicate trouble.

Be alert for signs of leaning and movement, as these could mean an upcoming failure. It’s important to address damage or issues quickly, because neglecting repairs increases safety risks and can cause larger structural problems.

Remember, when it comes to fixing your retaining wall, choose the right technique that’s reliable and won’t cause future headaches.

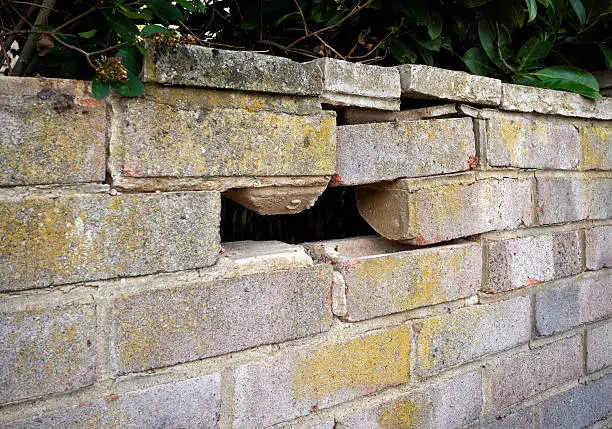
A damaged brick retaining wall.

Choosing the Right Repair Technique

Choosing the Perfect Way to Fix Retaining Walls

Retaining walls are important structures that keep soil in place and make landscapes look better. However, they can be damaged due to age, weather, and bad construction. To repair them, there are a few options. Consider the following when picking the right method:

  • Check the intensity of the damage – Figure out how serious it is. This will tell you if a minor repair or a big change is necessary.
  • Wall material – Different materials such as concrete, stone, and wood need different methods. Think of the material before deciding.
  • Budget – Decide how much you can spend on repairs. This will affect your choices.
  • Expert advice – Consult a specialist who can give the best solution based on their experience.

Do repairs quickly when damage happens. Not doing so can cause more damage and cost more.

For each situation, there are special details to think of when choosing the right technique. Knowing these details will help you choose between typical replacement or modern advancements from the newest technology.

Don’t take chances with retaining wall repairs as they are important and must work correctly all the time without any risks.

Don’t wait too long; once you spot any cracks or damages, pick the right repair method right away. Take action now to prevent situations that could have been prevented with early restoration. When it comes to fixing cracks in a retaining wall, don’t forget: it’s like putting a band-aid on a broken bone.

Repairing Cracks on the Retaining Wall

Retaining walls are amazing garden features, stopping soil erosion and providing level land for gardening. But, small cracks can be caused by poor construction, moisture, and sudden weather changes. So, repairing these small damages is essential to keep the wall looking good and structurally sound. Here’s 4 steps to repair small damages:

  1. Clean dirt and debris with a wire brush or power washer.
  2. Use a putty knife to fill the damaged area with concrete patching compound. Layer it on thin, and let each layer dry before adding the next.
  3. Mix bonding adhesive with water, as instructed by the manufacturer. Brush this onto the clean surface, let it dry, then put on the patching compound.
  4. Let the repair cure for 24 hours before painting or sealing.

For more serious problems, it may be better to get professional help or replace the wall. Ancient civilizations used retaining walls to level sloping land, create terraces, and decorate gardens. The Romans were known for their stone blocks supported by soil. Nowadays, retaining walls use steel bars, spray mixes, and poured concrete. Don’t forget the drainage! A wall without proper drainage is like a sinking ship.

Reinforcing the Retaining Wall with Proper Drainage

To strengthen retaining walls, proper drainage is key. Too much water can cause cracks and bulges. Here are five steps to reinforce with proper drainage:

  1. Dig the soil behind, adjacent to, and at the base of the wall.
  2. Put in a perforated pipe at the bottom of the excavation area.
  3. Cover it with gravel and a geotextile fabric.
  4. Put back the excavated soil, compacted in layers against the wall’s surface.
  5. Make sure water is directed away from the re-graded area.

Gravity-based, non-perforated pipes or drain tiles might also help. Professional help is recommended for these jobs.

It all began in the early 1900s when floods in cities like Los Angeles led to costly repairs. Engineers tried different techniques, like building retaining walls supported by steel beams, and drainage systems with perforated pipes and geotextile fabrics. To avoid another repair bill, remember to maintain your wall. Unlike my ex who didn’t even text me!

Preventing Future Damages on the Retaining Wall

Inspect and repair retaining walls consistently to prevent future damage. Proper drainage and vegetation control can help maintain structural stability. Utilize high-quality construction materials and soil reinforcement methods to minimize future damage. Hire a professional contractor to ensure optimal results.

Be aware that weather conditions and natural disasters may still cause damages even with the right maintenance. Address any repairs promptly after such events to avoid further damage.

Historically, inadequate maintenance and poor workmanship have caused significant damage to many retaining walls. In some cases, this has led to entire structures catastrophically failing due to their own weight and influences. Today, proper preservation techniques contribute significantly to avoiding similar scenarios in the future. Pursue a flawless finish on your retaining wall repair – do not leave any stone unturned!

Tips and Techniques for a Professional Finish

To achieve a professional finish for your DIY retaining wall construction or repair, you need some tips and techniques that can make this task a success. With this in mind, we will discuss some sub-sections that can help you in achieving the desired outcome. We’ll explore how cleaning and finishing the retaining wall can enhance its appearance, adding decorative features to make it more attractive, and proper maintenance to ensure its longevity.

Cleaning and Finishing the Retaining Wall

The Retaining Wall Care Guide: Tips and Techniques for a Professional Finish!

A tidy, well-maintained retaining wall boosts the look and strength of your property. Achieve a professional finish by performing the right cleaning and finishing processes for your retaining wall.

  1. Step 1 – Cleaning: Start by removing any debris, such as leaves, moss, or dirt. Utilize mild soaps or cleaners to take away any stains or encrustations. Next, use a pressure washer to thoroughly wash the wall with water and take away any loose material. Be careful not to apply too much pressure that could damage the surface.
  2. Step 2 – Sealing: After cleaning, give it plenty of time to dry before sealing. Applying a sealant is essential for preserving the overall appearance of your retaining wall. Sealing prevents moisture from entering into the walls, adding an extra layer of protection against deterioration due to elements like frost/heating cycles.
  3. Step 3 – Finishing: Select a finishing that blends with your property’s theme or introduces an exciting contrast. You can go for paint that coordinates with specific outdoor features like patios or decks. Furthermore, using decorative stones offers texture and visual appeal while giving weather-resistant advantages.

Keep in mind, lack of proper maintenance can lead to cracking and crumbling over time, making it necessary that you stay mindful of cleaning and upkeep. Doing minor repairs now will save you huge costs later!

Incorporate these tips into your regular retaining wall care schedule to guarantee longevity and an incredible finish over time! Why be content with a plain old retaining wall when you can add some decorative flair and give your neighbors something to talk about?

Adding Decorative Features to the Retaining Wall

To spruce up the retaining wall, get creative! Here are 6 helpful tips:

  • Put planting pockets or niches between and within the blocks.
  • Add texture and contrast with brick veneers or stone facades.
  • Light up key features at night with lighting fixtures.
  • Create a calming effect with water features like fountains.
  • Add an electrifying element with artistic engravings or mosaics.
  • Surround the wall with vibrant trellis panels and multi-coloured plants.

Pro Tip: Plan ahead, factor in placement, budget and materials for best results. Treat it with care – a well-maintained wall can last longer than a marriage!

Don’t add extra weight on the retaining wall. Choose decorative pieces with patterns, shapes and colours.

Proper Maintenance of the Retaining Wall to Ensure Longevity

Prolong your retaining wall’s life! Maintaining it properly is essential. Clean it, inspect for damage, and address any repairs. Plus, ensure proper drainage to avoid water damage and erosion.

Neglecting maintenance can lead to costly repairs or reconstruction. So take time to handle upkeep – save money and headaches!

High-quality materials and professional installation also extend the wall’s lifespan. Choose durable options from reputable vendors.

Pay attention to climate patterns in your area too. More frequent maintenance may be needed in areas with heavy rainfall or harsh winters.

I once saw a neglected wall crumble during a storm, a reminder of how vital regular maintenance is. Don’t let this happen to you – take care of your investment!

Frequently Asked Questions

  1. What materials do I need to build a DIY retaining wall?
    • To build a DIY retaining wall, you will need retaining wall blocks or stone, gravel, sand, and landscape fabric. You will also need tools like a shovel, a level, a rubber mallet, and a hand tamper.
  2. Do I need a permit to build a retaining wall?
    • In most cases, you will not need a permit if your retaining wall is less than 4 feet tall. However, it’s always best to check with your local building department to see if there are any specific requirements or regulations for your area.
  3. How do I repair a retaining wall?
    • If your retaining wall is leaning, cracked, or bulging, you may need to repair it. Start by removing any damaged blocks or stones, and then use construction adhesive to attach new ones in their place. You may also need to add drainage behind the wall to prevent future damage.
  4. How do I ensure my retaining wall is level?
    • To ensure your retaining wall is level, start by digging a level base and filling it with gravel and sand. Then, use a level to ensure that each block or stone is even with the ones next to it. A rubber mallet can help you adjust the height of each block.
  5. How do I prevent erosion behind my retaining wall?
    • To prevent erosion behind your retaining wall, place landscape fabric against the soil and behind the wall, and then cover it with a layer of gravel. This will help filter water away from the wall and prevent soil from washing away.
  6. Can I build a DIY retaining wall without professional help?
    • Yes, you can build a DIY retaining wall without professional help if you have the necessary tools and materials and follow proper instructions. However, if you have any doubts or concerns, it’s always best to consult with a professional mason or engineer.

The Ultimate Guide To DIY Masonry Restoration: Achieve Amazing Results

Introduction to DIY Masonry Repair and Restoration

Gaining an in-depth understanding of DIY Masonry Repair and Restoration is essential. Here’s a six-step guide to get you started:

  1. Identify the type of damage.
  2. Gather necessary tools and materials.
  3. Clean the damaged area.
  4. Prepare the masonry mixture.
  5. Fill gaps or cracks carefully.
  6. Cure restoration for optimal results.

It’s important to follow the steps precisely. Safety precautions are a must. Wear proper clothing and eye protection when handling equipment and materials. Opt for high-quality materials – they’ll make your repairs last longer. Now you have the knowledge to tackle minor repairs yourself. Don’t miss out on adding value to your home with regular maintenance of your masonry structures.

Preparation for Masonry Repair and Restoration

Before Proceeding with Masonry Repair and Restoration, Make Sure that You Have Completed Efficient Preparation

The key to executing successful masonry repair and restoration lies in meaningful preparation. This includes carefully examining your structure, identifying the underlying cause of the damage, and sourcing the correct materials and tools. By completing these crucial preparatory steps, you can avoid further damage to your masonry and maintain its overall integrity.

Conducting a Thorough Inspection of Your Masonry before Starting Repair and Restoration

Before beginning any work, ensure that you have assessed the extent of the damage to your masonry. Conduct a thorough inspection of your structure, identifying any cracks, gaps, or weakened areas. This will enable you to tailor your repair and restoration efforts to meet the specific needs of your masonry, delivering the most effective results.

Homeowner inspecting his masonry damage.

The Importance of Sourcing High-Quality Materials and Tools for Your Masonry Restoration Project

When sourcing materials and tools for your masonry restoration project, ensure that you choose high-quality products that are specifically designed for the job. Using inferior materials can reduce the overall effectiveness of your repair process, resulting in further damage to your structure. Additionally, using the appropriate tools for the job can significantly improve the efficiency and accuracy of your work.

Don’t Risk Further Damage – Start Your Masonry Repair and Restoration Journey Today!

By taking the time to thoroughly prepare for your masonry repair and restoration project, you can ensure the best possible outcome. Don’t wait until your masonry is beyond repair – take action now to protect and preserve your structure for years to come. With patience, diligence, and the right materials and tools, you can embark on a successful masonry repair and restoration journey today!

If you think a crack in your masonry structure is just a minor issue, it’s time to cement your understanding of proper inspection techniques.

Inspection of Masonry Structure

Before repairing or restoring masonry, assessing the condition is essential. An inspection can help spot defects, damages, and deterioration that require urgent attention. This assists in deciding the best approach and methods for repair and restoration.

Attention must be paid to walls, chimneys, archways, etc., for cracks, bulges, and signs of distress. Missing mortar joints and bowing walls are indicators of major structural damage.

The inspection includes:

  • Mortar quality
  • Presence of moisture
  • Cracks in bricks
  • Lintel and arch inspection
  • Drainage systems
  • Corrosion in steel reinforcements
  • Staining due to salt buildup

Regular inspections ensure structural stability, prolong lifespan, and prevent future costs. Small irregularities can become costly problems. Scheduled inspections every few years optimize time management for repair projects. Knowing your materials is key.

Identify the Type of Material

Understanding Material Composition:

To repair and restore masonry, it is important to know the material composition. Whether concrete, brick, or stone, the type of material influences the bond strength and durability of restorative products used.

Conducting a lab test can help determine the physical properties, like compression strength and moisture content. This plays a vital role in choosing suitable repair methods.

It is essential to identify any unique features that have been added after the initial construction. This includes cornices or carvings that may have been missed during an initial survey. Assessing these correctly helps select appropriate conservation techniques without changing historical markers.

Studying the composition of materials can reveal how architecture varies from region to region. It can also uncover innovation in architectural styles that can’t be replicated with modern methods.

Before starting masonry repair, make sure you have the right tools! Toothpicks won’t do the job.

Tools Required for Masonry Repair and Restoration

Masonry repair and restoration require key tools for successful and secure results. These include:

  • masonry trowels for mixing, spreading, and forming mortar
  • chisels to fit desired patterns and sizes
  • buckets for mixing mortars
  • mason’s hammer for stonecutting
  • masonry saws to cut and shape brick/tile/stone
  • a caulking gun for filling gaps between materials like concrete blocks.

Protective gear such as gloves, safety glasses, dust masks, and hard hats should also be worn, as this kind of repair exposes workers to falling debris.

Power drills with diamond-tipped bits are useful for drilling holes into brick walls. Investing in good quality masonry repair tools is essential for preventing costly and lengthy damage repairs.

Make sure to have the right equipment ready before starting restoration. The right tools and techniques will guarantee a long-lasting structural integrity. Cleaning up after a party is tough – imagine fixing centuries-old masonry!

Cleaning and Removal of Damage in Masonry

To achieve a professional finish in masonry repair and restoration, it is vital to understand the process of cleaning and removing damage from masonry surfaces. This involves utilizing specific techniques to eliminate any existing damage or debris on the surface.

Here is a 5-step guide to follow when cleaning and removing damage from masonry surfaces:

  1. Begin by assessing the damage to determine the extent of repair required
  2. Protect surrounding areas and cover any delicate elements with tape or plastic sheets
  3. Use a pressure washer or chemical cleaner to remove dirt, grime, and stains from the masonry surface
  4. For deeper damage, use a chisel or grinder to remove damaged sections of masonry
  5. Dispose of debris and allow the masonry surface to dry completely before proceeding with any restoration work

For more delicate or intricate masonry surfaces, it is important to use a gentler cleaning approach. Consider using a soft-bristled brush or low-pressure washer, to avoid causing any further damage. Always test any cleaning solutions on a small, inconspicuous area before applying it to the entire surface.

Recently, a historic building underwent major restoration work that included cleaning and repairing the damaged masonry. With the help of expert masons and specialized cleaning equipment, the building’s facade was restored to its former glory. The resulting transformation was stunning and highlighted the importance of proper masonry repair and restoration techniques. Don’t be fooled by the term ‘loose debris’, it’s not like it’s going to blow away on its own – it needs some serious attention.

Careful removal of damaged bricks from a masonry wall.

Removing Loose Debris and Grime

To have a clean and safe masonry surface, it is important to get rid of any debris and grime on it. This is essential for a successful restoration project. Removing these elements prepares the surface for further cleaning and repair work. Here’s a 6-Step Guide to effectively remove Loose Debris and Grime from masonry:

  1. Put on gloves and clear away big debris such as fallen bricks, mortar, or rocks.
  2. Use a soft-bristled brush or broom for small dirt particles stuck on the surface.
  3. If needed, use a pressure washer set at low pressure to clean, without damage.
  4. Mix detergent with warm water and use in a pressure washer if the brick surfaces are stained or neglected.
  5. Scrub the affected areas with a soft-bristled brush after applying the solution. Allow time for soaking then rinse with high-pressure water.
  6. Don’t use harsh chemicals when there’s vegetation around, as they can harm plants and animals.

Keep in mind that you may need extra steps, depending on how long the debris has been there. Speak to a professional about extra measures, so you don’t cause more damage to your property.

Pro Tip: Start with minimal pressure when using high-pressure washers. Increase pressure gradually until you get satisfactory results, while preventing damage to your masonry surfaces. Fixing cracks in masonry is like filling in the gaps in a relationship. Do it right, or it will keep crumbling apart.

Repairing and Sealing Cracks and Holes

Masonry damage? Time to fix up those cracks and holes! Repairing and sealing them stops further damage and keeps the structure standing. Follow these 3 simple steps:

  1. Clean the area – remove any dust, debris, or residue.
  2. Fill the gap – use a masonry repair filler.
  3. Seal the area – apply a masonry sealer over the filler.

Larger gaps might need metal reinforcement rods for stability.

Pro Tip: Use high-quality materials for long-lasting results!

Rebuilding and Replacing Damaged Masonry

To restore the structural integrity of damaged masonry, it is necessary to undertake rebuilding and replacement procedures. This involves the proper identification of the damaged areas and the use of appropriate materials and tools to repair or replace them.

Here is a 3-step guide to help you with rebuilding and replacing damaged masonry:

  1. Assessment – Inspect the entire structure to identify the nature and extent of the damage. Focus on the mortar joints, as these are the most vulnerable points. Remove any damaged areas and clean the surface properly.
  2. Preparation – Prepare the replacement material and create a bond that mimics the surrounding masonry. Mix the mortar according to the specifications provided by the manufacturer and apply it on the replacement section before carefully fitting it in place. Level and pack it properly and leave it to dry for the recommended time.
  3. Finishing – Once the replacement material has dried, clean it properly to remove any residual material. Remove any unsightly marks or stains that might appear on the surface. Finally, apply a coat of waterproofing agent to protect against weathering.

While rebuilding and replacing damaged masonry is a strenuous process, it is crucial to use proper safety equipment, follow specific instructions, and pay attention to the condition of the masonry structure. Failure to do so can compromise the structural integrity of the building.

To ensure a professional finish, consider hiring a trained masonry professional who can handle the intricate details and deliver quality workmanship.

Remember, the key to a professional and long-lasting finish is attention to detail and the use of appropriate materials and tools. By following these steps, you can repair and restore damaged masonry to its former glory.

When it comes to replacing individual bricks or stones, remember: it’s like playing a game of Jenga, but with bigger consequences.

Replacing Individual Bricks or Stones

Rebuilding a damaged masonry wall requires precision and accuracy. Here’s what to do:

  1. Take a cold chisel and hammer, and remove the mortar around the broken brick or stone.
  2. Use a flat bar to remove the old brick or stone.
  3. Clean out any debris from the cavity. Use a wire brush to clean off loose mortar from other bricks or stones.
  4. Put fresh mortar on the cavity with a pointing trowel. Make sure it fills all gaps before placing the new brick or stone.
  5. Carefully insert the new brick or stone and press down until it’s snug in the spot.
  6. Use a pointing tool to smooth and level excess mortar around the joint.

Remember to select replacement bricks or stones that match existing ones in size, color, texture, etc.
Also, wear gloves and safety glasses to protect yourself from any potential injury.
Ah, if only rebuilding life was as simple as rebuilding a wall!

Rebuilding Sections of the Wall or Structure

If a masonry wall or structure is damaged, sometimes it’s necessary to rebuild sections of it. Here’s a 5-step guide to do this efficiently:

  1. Find out how much of the wall or structure needs rebuilding and what materials are needed.
  2. Demolish the damaged section while taking care of other nearby structures.
  3. Get bricks, blocks, stones, mortar mixers, chisels, hammers, cutting blades, and utility knives.
  4. Rebuild from the base up using mortar mix between layers.
  5. Clean and seal the surfaces 24 hours after finishing.

Remember to follow safety regulations and consider an expert’s opinion before repairing work. If unsure, consider hiring a professional bricklayer with special tools and knowledge. Don’t let damages go unattended! Start rebuilding today for a secure future.

Finishing Techniques for Professional Results

Achieving a Professional Masonry Finish

To achieve the desired professional finish for masonry repair and restoration, it is essential to know the proper finishing techniques. These techniques can make a significant difference in the final outcomes of your DIY masonry projects. Following the guidelines below will deliver a pleasing and long-lasting finish that will enhance the aesthetic appeal of your home or building.

5-Step Guide for a Professional Masonry Finish

  1. Clean the surface: Use a high-pressure washer, a wire brush, or a stiff bristle brush to clean the surface. Pay attention to every crack and crevice to remove all dirt, grime, loose mortar, and other debris.
  2. Repair and Patch: Use a suitable patching compound to fill any gaps, cracks, or missing mortar. Allow it to cure as recommended by the manufacturer.
  3. Sand and Smooth: Sand the repaired surface once the patch has dried, using a sandpaper with 180-grit or higher. This will level any unevenness and create a smooth surface.
  4. Apply Finish Coats: For a natural finish, use a mortar-based mix for the final coats. For painted finishes, use a suitable paint or coating. Apply the finish coats with a hawk and trowel, following the original pattern.
  5. Cure and Seal: Allow the surface to cure completely before sealing it. Use a sealant that matches the finish to protect it from water and other elements.

Essential Tips for Professional Masonry Finishing

Applying a final coat to the repaired surface while wet will lead to bulges and bumps on your masonry surface. This can make your masonry patch look unsightly and unprofessional. Therefore, be patient and allow each coat to cure completely before moving to the next one.

A True Story of Masonry Restoration

John, a DIY enthusiast, attempted to repair his home’s masonry wall to save money. He patched the holes with mortar and painted over them. However, within a few months, the paint flaked, and the patched areas began to crumble. Disappointed with the results, he hired a professional masonry repair service who had to strip the paint, redo the patching, and apply a new finish. John learned that proper preparation, patching, and finishing were crucial for a long-lasting and professional look.

Remember, the right mortar mix can make or break your DIY masonry project, so choose wisely and mix thoroughly.

Applying the Appropriate Mortar Mix

When selecting the right mortar mix for your finishing techniques, there are several factors to keep in mind. These include types of bricks or blocks, location, weather conditions, and the required finish.

Table 1 below provides some common mortar mixes for various conditions and finishes. Each column is labeled with a factor to consider when picking the right mix.

Mix typeBrick/Block typeLocationWeather ConditionsFinish
Type N mortar mixStandard brick, BlockIndoor & outdoorModerate weatherGeneral purpose tuckpointing
Type S mortar mixStone, interlocking bricksOutdoor, below-gradeCold weatherStructural masonry
Type M mortar mixStone, concrete blocksOutdoor, above-gradeHigh wind, earthquake-prone areasHeavy loads and foundation walls

It’s important to follow manufacturer instructions for mixing and application carefully. And remember: safety first!

Mortar mix has been used since Roman times, when lime, sand, and water were the most prevalent building materials. Nowadays, cement-based mixes are more popular, as they reduce construction time and provide greater strength.

For perfect color and texture matching, use these tips!

Matching Colors and Textures to Blend Masonry

Creating a unified look with masonry takes careful attention to matching colors and textures. Consider the structures and materials surrounding your project when selecting a blend. A seasoned mason can help blend new masonry with existing structures for a smooth finish.

Picking the right materials is key when doing a project with different surfaces, for example, brick and stone. Uncover similarities between the surfaces to make it easier to match shades and textures. Use samples of existing materials to get exact color matches.

Don’t forget about elements such as sunlight, shadows, and angles when blending masonry finishes. These things affect how colors look in different settings. Analyze these factors in relation to your desired result before beginning the project.

Our Masonry Pros suggest looking into all elements of matching colors and textures for blending masonry, including surrounding structures and hidden elements that could impact your project’s end result. Keep brickwork looking neat with proper care and maintenance, because crumbled masonry is a disaster for any professional.

Maintenance and Care for Masonry

Masonry Upkeep and Maintenance: Regular masonry maintenance goes a long way in preserving the strength and longevity of your structure. Keep an eye out for signs of wear and tear, such as cracks, leaks, and loose mortar.

To maintain the health of your masonry, ensure that it is free of water damage and moisture, as this can lead to structural issues over time. Additionally, regularly clean the surface to prevent dirt and grime buildup, which can cause discoloration.

It is essential to check for any vegetation growth on the masonry, as this can cause cracking and damage to the structure. Furthermore, ensure that any repairs or restorations to the masonry are done by a professional to ensure the best results.

There have been cases where improper maintenance and care of masonry structures has led to severe damage and costly repairs. For example, neglecting to address water damage on a structure can result in crumbling bricks and weakened foundation. Don’t neglect your masonry or it might crumble faster than your sense of humor at a dad joke convention.

Importance of Regular Maintenance

Maintaining masonry is essential to keep it strong and looking good. It can save you money on repairs and replacements, and keep you safe from hazardous conditions. If neglected, it’ll only deteriorate further, making it hard to repair.

To keep your masonry in tip-top shape, do periodic inspections for cracks, erosion and weather damage. Also, get rid of vegetation near it as it can cause harm over time. Use proper cleaning methods during regular cleaning to avoid any risk.

If needed, hire a professional for better quality care or for fixing structural issues. Doing this regularly will help your property stay structurally sound and attractive.

Maintaining masonry the right way and consistently will make sure it stays in good condition for years. So don’t let it crumble like your self-esteem after a break-up!

Tips for Keeping Your Masonry in Good Condition

Safeguarding your masonry’s quality is essential for its duration and looks. Here are a few tricks to make sure your masonry stands the test of time:

  • Check your masonry regularly for any wear or damage.
  • Make sure downspouts, gutters and drainage systems are working correctly to avoid water damage.
  • Use suitable cleaning techniques and substances to get rid of dirt, stains and pollutants.
  • Fix any splits or breaks immediately to prevent further damage.
  • Contact professional services each year for a more thorough inspection and maintenance.

Apply waterproofing compounds on your masonry to guard it from the elements. This will stop moisture infiltration while still letting it breathe. Plus, be conscious of any nearby trees or plants that could cause obstruction or other kinds of destruction.

Recall that proper upkeep is the key to stretching the life of your masonry. By taking proactive measures now, you can save yourself from costly repairs in the future.

Start today by arranging a meeting with a professional mason who can give you personalized advice for maintaining and caring for your special type of masonry. Don’t wait until it’s too late!

Remember, overlooking your masonry is like overlooking your ex – it may seem like a great idea at the time, but in the end, you’ll wish you hadn’t.

Conclusion

Confidently tackle masonry repair and restoration projects after considering various tips and techniques. Have the correct tools to get a professional finish. Take note of the mortar type – it’s essential to preserve your masonry. Inspect your masonry regularly for detecting damage early.

Prior to undertaking major repairs or restorations, always ask an expert for professional advice. Safety must be a priority – wear protective gear while working.

Beware! Improper use of cleaning agents can damage your masonry. Certain acidic cleaners can corrode stone or brickwork if not used correctly. Before using on the entire surface, read manufacturer instructions carefully and test the cleaner on a small area.

Frequently Asked Questions

  1. Can I repair my own masonry without professional help?
    • Yes, with the right tools, materials, and knowledge, it is possible to repair and restore your own masonry. However, it is important to have a good understanding of the process and safety precautions to take before starting any projects.
  2. What are some common types of masonry damage and how can I fix them?
    • Common types of masonry damage include cracks, chips, and spalling. To fix cracks, you will need to use a masonry crack filler and follow the manufacturer’s instructions. For chips and spalling, you will need to mix and apply a patching compound to the damaged area.
  3. What materials and tools do I need for masonry repair?
    • You will need materials such as masonry cement, patching compound, and a waterproofer. Tools necessary may include a trowel, hammer, chisel, wire brush, and safety equipment such as goggles and gloves.
  4. Can I restore the color and texture of my masonry?
    • Yes, there are special products available for restoring the color and texture of masonry. You will need to choose a product that matches the existing color and texture of your masonry to achieve a professional finish.
  5. What safety precautions should I take when doing masonry repair?
    • Before starting any masonry repair projects, it is important to wear safety equipment such as goggles and gloves to protect your eyes and hands. You should also work in a well-ventilated area and be mindful of any potential hazards such as uneven surfaces or loose debris.
  6. How do I maintain my newly repaired masonry?
    • To maintain your newly repaired masonry, it is important to regularly clean it using a pressure washer and mild detergent. You may also want to apply a waterproofer to help protect it from future damage.