The Rich History of Masonry in Brantford, Ontario: From Joseph Brant to Modern Craftsmanship

Brantford, Ontario, a city steeped in history and architectural beauty, owes much of its character to the skilled masons who have shaped its landscape over the centuries. From the early days of Joseph Brant to the modern preservation efforts, masonry has played a pivotal role in defining Brantford’s identity. In this comprehensive exploration, we’ll journey through time to uncover the fascinating story of masonry in Brantford and its enduring impact on the community.

1. Introduction to Masonry in Brantford

Masonry, the art and craft of building structures from individual units of stone, brick, or concrete, has been an integral part of human civilization for thousands of years. In Brantford, this ancient craft has left an indelible mark on the city’s architecture and culture.

Founded in 1784 by Captain Joseph Brant, Brantford has a rich history that intertwines with the development of masonry in the region. The city’s growth from a small settlement to a thriving industrial center is reflected in its diverse array of masonry structures, each telling a story of the era in which it was built.

2. Early Masonry in Brantford (Late 18th – Early 19th Century)

2.1 Joseph Brant and the first recorded masons

Joseph Brant, also known by his Mohawk name Thayendanegea, was not only the founder of Brantford but also one of the first recorded masons in the area. His influence extended beyond leadership and diplomacy to the very foundations of the city’s built environment.

Brant’s involvement in masonry set the stage for the craft’s development in the region. As a Freemason himself, he likely encouraged the spread of masonic principles and practices, which often went hand-in-hand with the physical craft of masonry.

2.2 Influence of Indigenous craftsmanship

The early masonry in Brantford was not solely a European import. Indigenous craftsmanship, particularly that of the Six Nations, played a significant role in shaping the early built environment. Traditional techniques for working with stone and creating sturdy structures influenced the development of masonry in the region.

2.3 Early stone structures and their significance

Some of the earliest masonry structures in Brantford were simple yet sturdy buildings made from locally sourced materials. These early structures, while often modest, laid the groundwork for the more elaborate masonry that would follow. Churches, government buildings, and private residences were among the first to showcase the potential of masonry construction in the area.

3. The Rise of Freemasonry in Brantford (19th Century)

3.1 Establishment of Brant Lodge No. 45

The establishment of Brant Lodge No. 45 in 1820 marked a significant milestone in Brantford’s masonic history. As one of the oldest Masonic lodges in Ontario, it played a crucial role in fostering the growth of both Freemasonry and the masonry craft in the city.

3.2 Notable Freemasons and their contributions to the city

Many prominent Brantford citizens were members of the Masonic lodge, including businessmen, politicians, and craftsmen. These individuals often used their influence and resources to support the development of the city, including the construction of significant masonry buildings.

3.3 The Masonic Temple Building and its history

The Masonic Temple Building, constructed in 1911, stands as a testament to the influence of Freemasonry on Brantford’s architectural landscape. This impressive structure, with its intricate masonry work, served as a hub for the Masonic community until 1945 and remains an important part of Brantford’s architectural heritage.

4. Masonry in Brantford’s Architecture (19th – 20th Century)

4.1 Prominent masonry buildings and landmarks

Brantford’s cityscape is dotted with remarkable masonry structures that showcase the evolution of the craft. Some notable examples include:

  • The Brant County Courthouse (1852)
  • Victoria Park Square (1861)
  • The Carnegie Library (1904)
  • The Bell Telephone Memorial (1917)

Each of these landmarks demonstrates the versatility and durability of masonry construction, as well as the skill of Brantford’s masons throughout history.

4.2 Evolution of masonry techniques and styles

As Brantford grew and prospered, masonry techniques and styles evolved to meet changing tastes and technological advancements. From the simple stone structures of the early 19th century to the ornate Victorian-era buildings and later Art Deco influences, Brantford’s masonry reflects the broader trends in North American architecture.

4.3 The role of stone masons in shaping Brantford’s cityscape

Stone masons played a crucial role in bringing architectural visions to life. Their skill and craftsmanship can be seen in the intricate details of Brantford’s historic buildings, from decorative cornices to precisely laid brickwork. These artisans were instrumental in creating the unique character that defines Brantford’s built heritage.

5. Modern Masonry in Brantford (Late 20th Century – Present)

5.1 Preservation and restoration of historic masonry structures

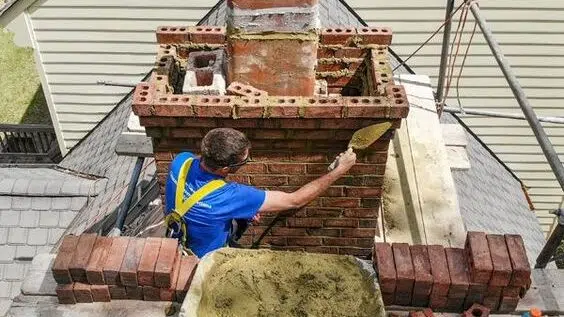
In recent decades, there has been a growing appreciation for Brantford’s masonry heritage. Preservation and restoration efforts have become a priority, with organizations and skilled professionals working to maintain the city’s historic structures. Companies like Fix My Brick play a vital role in these efforts, employing both traditional techniques and modern technologies to ensure the longevity of Brantford’s masonry buildings.

5.2 Contemporary masonry projects and innovations

While preservation is important, masonry in Brantford continues to evolve. Contemporary projects incorporate new materials and techniques while often paying homage to the city’s rich masonry tradition. Sustainable practices and energy-efficient designs are being integrated into modern masonry construction, demonstrating the adaptability of this ancient craft.

5.3 The importance of masonry in maintaining Brantford’s heritage

Masonry is more than just a construction technique in Brantford; it’s a link to the city’s past and a foundation for its future. The preservation and continued use of masonry in both old and new buildings help maintain Brantford’s unique character and sense of place.

6. The Future of Masonry in Brantford

6.1 Challenges and opportunities for the craft

As Brantford continues to grow and change, masonry faces both challenges and opportunities. The need for skilled masons to maintain historic structures is increasing, while new construction projects offer chances to innovate and adapt the craft for modern needs.

6.2 Training and apprenticeship programs

To ensure the future of masonry in Brantford, training and apprenticeship programs are crucial. Local institutions and organizations are working to pass on traditional skills while also teaching new techniques and technologies relevant to modern masonry practice.

6.3 Sustainable masonry practices

The future of masonry in Brantford is increasingly focused on sustainability. From the use of recycled materials to energy-efficient design principles, masons are finding ways to make this ancient craft environmentally friendly and relevant for the 21st century.

7. Conclusion: The Enduring Legacy of Masonry in Brantford

From the early days of Joseph Brant to the present, masonry has been an integral part of Brantford’s story. The craft has not only shaped the physical landscape of the city but has also contributed to its cultural identity and sense of community. As we look to the future, it’s clear that masonry will continue to play a vital role in preserving Brantford’s heritage while also contributing to its ongoing development.

The rich history of masonry in Brantford is a testament to the skill, creativity, and dedication of generations of craftsmen. As we walk the streets of this historic city, we are surrounded by their legacy – in the sturdy walls of century-old buildings, the intricate details of restored facades, and the innovative designs of new structures.

For those interested in learning more about Brantford’s masonry heritage or seeking expert assistance with masonry restoration and repair, companies like Fix My Brick stand ready to share their knowledge and expertise. Together, we can ensure that the art and craft of masonry continues to thrive in Brantford for generations to come.

\n\n\n

What role has masonry played in shaping Brantford’s identity?

Masonry has significantly influenced the architectural landscape and cultural identity of Brantford, marking the city’s growth from a small settlement to an industrial center through its diverse array of masonry structures.

Who was Joseph Brant and what was his contribution to masonry in Brantford?

Joseph Brant, the founder of Brantford, was one of the first recorded masons in the area and played a crucial role in establishing masonry as a key craft in the region, influenced by his Freemason background.

What significant masonry structures were built in Brantford during the 19th century?

Notable masonry landmarks from the 19th century include the Brant County Courthouse (1852), Victoria Park Square (1861), and the Carnegie Library (1904), each showcasing the craftsmanship and evolution of masonry in the city.

What is the significance of Brant Lodge No. 45?

Established in 1820, Brant Lodge No. 45 is one of Ontario’s oldest Masonic lodges and has been pivotal in supporting the development of both Freemasonry and masonry craft within Brantford.

How has modern masonry in Brantford evolved?

Modern masonry in Brantford has focused on preservation and restoration of historic structures while incorporating contemporary innovations, sustainable practices, and energy-efficient designs in new masonry projects.

What challenges does masonry face in Brantford today?

Masonry in Brantford faces challenges related to the need for skilled masons for maintenance and restoration, as well as opportunities presented by new construction projects that require adaptation of traditional techniques to modern needs.

What training programs are in place to support the future of masonry in Brantford?

Training and apprenticeship programs are being developed by local institutions to ensure that traditional masonry skills are passed down while also teaching modern techniques relevant to the current construction landscape.

What is the importance of preserving masonry heritage in Brantford?

Preserving masonry heritage is vital for maintaining Brantford’s unique character and sense of place, linking the city’s past to its future through continued use and restoration of historic masonry buildings.

How does masonry contribute to Brantford’s community?

Masonry contributes to Brantford’s community by shaping its physical environment and providing a sense of identity, reflecting the skill and creativity of generations of craftsmen.

Where can individuals seek assistance for masonry restoration in Brantford?

Individuals seeking masonry restoration assistance can contact companies like Fix My Brick, which provide expertise in maintaining Brantford’s historic masonry structures.

Revitalize Your Home With Professional Chimney Rebuilding Techniques

Chimney Rebuilding: Introduction

Chimney restoration is important for your home. As it ages, so does its masonry. A professional mason can help match new materials to the initial design. Check the adjoining walls for any damage or clean-up that needs to be done.

Also, replace or restore any damaged flashing and vents. Inspect the chimney cap and flue for any damage or wear. Invest in good materials, like copper, for greater durability and a stylish look.

Preserve the unique style of your home by paying attention to details, like the chimney. This will help add value to your property and create a beautiful look. Make sure your home stands out – don’t settle for an average-looking chimney!

Chimney undergoing rebuilding.

The Importance of Home Aesthetics

To keep your home looking stunning and to increase its value, preserve its charm with beautiful aesthetics. Focus on masonry, especially the chimney.

Choose materials that match your house’s style and age. Brick and stone for traditional homes. Concrete or stucco for modern ones.

Carry out regular maintenance and repairs. Don’t let water damage or structural problems occur. Consider a rebuild if the chimney is worn out.

Add wall cladding or painting for extra protection from the weather. And don’t forget to add decorative touches like lanterns and plants.

But remember – it’s not only about looks. It’s also about keeping Santa safe!

Chimney Rebuilding: Key Considerations

To ensure your home’s aesthetics and charm remain unchanged, you must consider chimney rebuilding with the right approach. Start with inspecting your chimney, obtaining the necessary permits, and choosing the right masonry contractor. In this section, we will guide you on these critical considerations for successful chimney rebuilding.

Chimney Inspection

Before any renovations, a thorough examination of the chimney’s structure, safety and functionality is highly recommended. This means inspecting the internal layer, evaluating the external layer, assessing the chimney cap and flue, as well as checking for blockage.

When inspecting, make sure to note the mortar joints, crown damage, flashing conditions, masonry work and other relevant factors.

It is essential to understand that improper chimney construction can lead to serious consequences. Therefore, taking time to assess all elements of the chimney’s interior and exterior layers is vital.

Historical chimneys often hold great cultural significance due to their age and architectural features. They can provide knowledge of certain cultures and building techniques from the past. Each renovation should respect this and attempt to preserve its glorious past.

Getting a permit for chimney rebuilding is not easy; otherwise, everyone would be up in smoke!

Chimney inspection

Chimney Rebuilding Permits

When planning to rebuild your chimney, it is essential to get permits from your local building department. These will guarantee your chimney is rebuilt with codes and regulations. Without these permits, fines or other penalties may occur.

To rebuild your chimney, choose a reputable contractor who specializes in masonry. Additionally, consider the materials used and make sure they’re high quality.

Depending on the extent of the rebuild, extra permits or inspections by a licensed professional may be needed. This includes inspections of the chimney foundation and any ventilation systems.

Pro Tip: Consult with a licensed professional before beginning any chimney rebuilding project. They can help you through the permit application process and make sure the project is done safely and correctly.

Choosing a Masonry Contractor

When it comes to masonry, be specific. Finding the right contractor is essential for your chimney project. Check experience, materials and safety measures.

Look for someone who puts safety first and takes precautions. Make sure they are licensed and insured.

Seek out expertise in chimney repair and clear communication throughout the project. Choose an experienced contractor who can execute your vision.

Don’t let delays or further damage threaten your home – choose a reputable masonry contractor now. Don’t try DIY – follow these steps and avoid a fiery fiasco.

Chimney Rebuilding: Step-by-Step Guide

To preserve the aesthetic appeal of your home, you may need to consider chimney rebuilding. With this step-by-step guide on chimney rebuilding, you can ensure that you achieve a successful outcome. From demolition to masonry repair and reconstruction, to chimney crown installation, this guide offers valuable insight on each sub-section.

Chimney Demolition

When reconstructing a chimney, safe removal of the existing structure is key. Planning, skilled laborers, and specialist equipment are necessary for safety and to avoid any damage.

Surveying the chimney’s condition is vital before starting. Check for risks like unstable materials and structural defects.

After a plan is drawn up, the team will begin the dismantling from the top down. Loose bricks will be carefully dislodged and taken down.

Once all of the old flue tiles have been removed, additional cleaning may be required before rebuilding.

Chimneys remain an important part of homes, even today. They manage smoke exhaust from fuel burning appliances like wood stoves. Fixing your masonry may not be glamorous, but it’s better than fixing a broken heart!

Masonry Repair and Reconstruction

When it comes to Masonry Repair and Reconstruction, it’s important to use a step-by-step guide for good results. An experienced mason needs to inspect the property before starting repairs or rebuilding.

Reconstruction includes building new brickwork, stone walls or pavements from the ground up. The mason may also suggest replacing old bricks with new ones. Repairs can include fixing cracks, chipped corners and gaps in the structure.

Every step must be carefully evaluated when doing Masonry Repair and Reconstruction. From surface preparation to mortar mixing and application, everything must follow the plan determined during inspection.

An example of this is an old building with severe brickwork damage due to bad weather. The mason-team followed the step-by-step guide carefully. This resulted in happy customers with a safe and secure chimney, able to withstand storms for years to come.

Install this chimney like a king – secure it from water damage in no time!

Chimney Crown Installation

The installation of a protective layer on the chimney is essential for its longevity. Here’s a quick guide on how to install a chimney crown:

  1. Evaluate the crown’s condition.
  2. Remove any cracked material.
  3. Cut the metal lath and attach it with adhesive.
  4. Spread a layer of mortar over the lath.
  5. Wait until the mortar dries before adding a second layer.
  6. Finish with a sealant for waterproofing.

Remember each chimney crown is different, so techniques for installation may vary depending on size and shape.

Also, remember to cover flue tiles when applying mortar to avoid clogging the vents.

Fun fact: 80% of chimney fires start from the buildup of creosote. So, if you’re going to build a chimney, make it stylish!

Finishing Touches: Chimney Aesthetics and Home Style

To preserve the look and style of your home, the Finishing Touches: Chimney Aesthetics and Home Style section provides you with solutions such as Custom Chimney Caps and Shrouds, Brick and Mortar Color Matching, and Chimney Crown Design. These sub-sections will help you enhance the beauty of your chimney and maintain the aesthetic value of your home.

Custom Chimney Caps and Shrouds

Customized Chimney Caps and Coverings provide an aesthetic boost to home design. They fit sleekly, protecting against weathering elements like rain, snow, sleet, and wind.

Plus, homeowners can choose between different styles and finishes, such as copper or stainless steel. Even a curved chimney top can be catered for – the team of experts measure every nook individually.

The final product is both functional and stylish. Finding the right color to match your bricks can be like searching for a needle in a haystack – except the needle is a specific shade of red!

Brick and Mortar Color Matching

Achieving an aesthetically pleasing finish requires matching the brick and mortar colors. This ensures a seamless blend with the house’s overall look.

Here’s a table of popular brick types and their corresponding mortar colors:

Brick TypeMortar Color
RedGray, Natural
BrownLight Tan
TanBuff
BlackGray
WhiteWhite

Contrasting colors can also make a unique design element. For example, a red brick chimney with white or black mortar creates interesting lines.

Complementary colors also offer another option that can be better than direct matching. A beige chimney with gray mortar creates a balanced yet distinct appearance.

Homeowners should pay attention to these details to ensure their chimneys add value. Taking into account the style and exterior look of your house while choosing brick and mortar color can elevate the overall aesthetics of your home. Upgrade your home with a stylish chimney crown design!

Chimney Crown Design

Chimney Crown Style is a must for your home’s aesthetic. It looks great and protects your chimney from water damage. Here are the design options:

Design OptionDescription
Slab or Flat ConcreteSimple and budget-friendly. Not good for areas with snow or lots of rain.
Sloped ConcreteThe crown slopes away from the flue, so water drains off well. Great for rainy places.
MetalStrong and weather-proof. Looks great too.

A Chimney Crown can also have a drip edge. This extra bit catches water and stops it running down the sides, which can cause erosion damage.

A Chimney Cap is a good idea too. It keeps out debris and looks great.

Choose a design carefully. Think about materials, location, weather & more. Get expert advice.

Making your home look amazing takes a lot of effort – without the reward of a paycheck at the end!

Maintenance and Upkeep: Preserving the Look and Style of Your Home

To preserve the look and style of your home, maintenance and upkeep are key. Chimney rebuilding is a crucial part of this process, and by keeping up with regular chimney inspections, chimney sweep services, and annual chimney cleaning, you can ensure that your chimney remains both functional and aesthetically pleasing.

Regular Chimney Inspections

It’s vital to remember that neglecting maintenance and inspections can result in serious issues like fires or carbon monoxide poisoning. So, schedule regular chimney inspections with licensed professionals to protect your family and home.

To keep your home in top shape, regular maintenance is key. One essential aspect of this is having your chimney inspected regularly. Professional inspections should be done at least once a year. They’ll check for cracks or damage that may cause a fire as well as any creosote buildup, which can be hazardous. Early detection of any necessary repairs can be taken care of quickly.

Maintaining your home is essential for preserving its structure, style, and aesthetic charm. Keep debris away from edges and pressure wash it every six months. Installing mesh shields over chimneys will prevent critters from entering and keep your ornate showcases intact. Plus, it’ll make inspection season go more smoothly. Keep your chimney clean and avoid any potential problems with our sweep services.

Chimney Sweep Services

Chimney sweep services are an important part of home maintenance. Cleaning chimneys regularly prevents fires caused by creosote and other flammable materials buildup.

  • Chimney Sweeps assess structural damage that could be a potential hazard.
  • They remove debris and blockages that could obstruct airflow.
  • Cleaning creosote lowers the risk of chimney fires.

Keeping chimneys clean is necessary for safety and increasing home value. Neglecting chimneys can lead to dirt, soot, and even pests. This can cause health issues and a breeding ground for harmful bacteria. So, it’s important to get help from professionals.

Chimney sweeps have been around since the 18th century when homes used wood-burning stoves or fireplaces. They make sure homes stay safe by having professionals do regular checkups. A clean chimney brings joy and your house will thank you for it!

Annual Chimney Cleaning

It’s essential to keep your chimney in top condition. Professional chimney cleaning services can help remove soot, debris and blockages that could lead to carbon monoxide poisoning or house fires.

It’s recommended to clean your chimney annually to prevent the buildup of mineral deposits, smoke and flammable soot. Also, bird nests and other items that block airflow should be removed.

Call a reliable chimney sweep service for an annual inspection. This will reduce creosote accumulation, help fix common operational problems and prevent damage from winter storms.

In case of additional repairs, qualified technicians will provide reasonable solutions for top-notch maintenance. Not having regular chimney maintenance can lead to structural damage.

A friend had a scary experience when he found soot residues all over his living room walls. Luckily, he had an annual professional chimney sweeping service scheduled the following week – avoiding costly repairs.

Regular chimney maintenance will keep your home safe and comfy. So get your home smokin’ hot by rebuilding your chimney!

Conclusion: Inspiring Home Aesthetics Through Chimney Rebuilding

Make your home look amazing with chimney rebuilding. Bring back your chimney’s glory and upgrade your home’s style. Professional masonry techniques help you keep or bring back the original design.

Chimney rebuilding can give your house an amazing look. No matter if it’s classic, traditional or modern, professional masonry makes sure your chimney fits perfectly with the rest of your house. A strong chimney increases your home’s value and is a great eye-catcher for visitors.

To make sure your chimney is safe and working, inspect it regularly and take care of repairs before they become big. Plus, use different materials like bricks, stone veneer or stucco to add a unique touch that matches the existing features.

Home aesthetics are key in increasing value and personality to your property. Invest some time in taking care of these elements today.

Frequently Asked Questions

  1. Why should I consider chimney rebuilding for my home?
    • A: Chimney rebuilding is essential for maintaining the safety and aesthetics of your home. A deteriorated chimney can pose a fire hazard and negatively impact the overall look of your property.
  2. Will my chimney look different after rebuilding?
    • A: Not necessarily. A professional masonry contractor can use materials that match the existing look and style of your chimney, ensuring that it blends seamlessly with the rest of your home.
  3. How can I preserve the look and style of my home during chimney rebuilding?
    • A: Work with a reputable and experienced masonry contractor who understands the importance of aesthetics and can select materials that match the existing look of your home. Communicate your concerns and preferences upfront to ensure the best possible outcome.
  4. How long does chimney rebuilding take?
    • A: The timeline for chimney rebuilding depends on the extent of the damage and the scope of the project. A simple repair can be completed in a few days, while a complete rebuild may take several weeks.
  5. What types of materials can be used for chimney rebuilding?
    • A: The most common materials for chimney rebuilding include brick, stone, and concrete. These options offer durability and long-lasting aesthetics that can enhance the overall look and value of your home.
  6. How can I maintain my chimney after rebuilding?
    • A: Regular inspections and maintenance are key to preserving the look and function of your chimney. Hire a professional to clean and inspect your chimney annually, and address any issues promptly to prevent further damage and preserve the beauty of your home.

How To Repair Your Chimney: Essential Tips For Homeowners

Chimney Repair Basics

To understand the chimney repair basics with chimney maintenance, masonry services can help homeowners address common chimney problems. Regular chimney maintenance ensures the proper functioning of a chimney and reduces the need for repairs. In this sub-section, we will discuss the importance of regular chimney maintenance. Additionally, we’ll share some common chimney problems that homeowners should look out for to prevent further damage to their chimney.

Importance of Regular Chimney Maintenance

Maintaining chimneys is a must for proper functioning and to avoid hazardous situations. Regularly inspect the chimney and identify any flaws. This way, creosote buildup can be prevented. It’s flammable, and can lead to chimney fires and carbon monoxide leaks. Maintaining a chimney signals safety, longevity, and functionality.

Keeping chimneys in check also boosts heating appliance efficiency, like fireplaces and wood stoves. Without maintenance, airflows can be blocked, leading to poor ventilation and malfunctioning appliances. Inspecting the chimney often is key. Professional assessment of damages is needed to prevent obstructions and improper ventilation. Homeowners should only hire trustworthy specialists who prioritize safety.

In 2011, over 22,000 chimney fires were reported in the US. These were caused by debris buildup, and spread into house fires, leading to deaths in multiple states. Thus, routine checks by experts are necessary, as risks remain high without it. Don’t let your cozy fireplace become a smoke-filled nightmare – maintain your chimney regularly!

Chimney needing repair.

Common Chimney Problems to Look Out For

If you own a house with a chimney, it’s essential to watch out for signs of potential problems. Look out for:

  • cracks, gaps
  • too much soot, flammable creosote
  • blockages from animals or debris
  • bowing or leaning of the chimney structure
  • Also, check for water damage which can speed up deterioration.

Regular cleaning and inspections by a pro can stop most chimney issues. Failing to maintain your chimney can cause dangerous scenarios like carbon monoxide poisoning, fires, or even structural collapse. Get in touch with a chimney repair professional today – don’t risk your safety and home security! Chimney repair may seem dull, but with all these issues, it’s practically a Netflix series.

Types of Chimney Repair

To easily repair your chimney, you need to know the right type of repair that it needs. This is where understanding the different types of chimney repair comes in handy. In order to help you with this, we will discuss the three most common types of chimney repair: masonry chimney repair, chimney liner repair, and chimney cap repair.

Masonry Chimney Repair

Restoring and maintaining a masonry chimney requires professional expertise. This may include replacing bricks, mortar, or even the entire chimney. Doing so ensures the chimney is structurally sound and can withstand weather extremes. Waterproofing services can also be done to prevent water damage.

The flue is critical for proper ventilation and keeping out dangerous gases and soot. Issues like cracks or blockages must be addressed quickly.

It is important to choose an experienced, licensed company for repair and maintenance. According to Chimney Sweep News, 22,800 fires occur each year due to lack of chimney maintenance. Regular inspections by professionals are necessary to identify problems before they become more serious.

Show your love with a freshly repointed brick chimney!

Repointing Bricks

When repairing a chimney, repointing bricks is a common fix. This means replacing any deteriorated mortar between bricks. Here’s how to do it:

  1. Inspect the chimney to determine how much mortar needs to be replaced. If more than 1/4 inch is missing, it’s time for repointing.
  2. Clean the bricks with a wire brush, getting rid of all debris and dirt.
  3. Mix mortar using Portland cement and sand in the correct ratio. Gradually add water until it’s spreadable.
  4. Using a pointing trowel, fill each joint with the mortar. Make sure there are no gaps.
  5. Smooth out excess mortar with a jointing tool or finger to create a uniform surface.
  6. Keep the newly applied mortar moist for at least three days by spraying water on it periodically.

Cracks or missing bricks require different methods of repair, not just repointing. Cement-based mortars can cause damage in historic buildings due to poor structural performance.

Don’t wait until your roof collapses – call professionals if your chimney needs maintenance. Repointing your chimney is like hitting the reset button for your home’s warming system.

Rebuilding Chimneys

Chimney Rebuilding is key for chimney repair. This includes making new chimney crowns, caps, flue liners, fireboxes and smoke chambers. Severe weather can cause damage that needs rebuilding.

  1. Inspection. Assess the damage to know if you need to rebuild or repair. Thoroughly look for extent and nature of damage.
  2. Demolition. Take the chimney apart to its foundations. Be mindful of dust and debris during this.
  3. Materials Selection. Choose new bricks and materials for the rebuild. Skilled masons needed to lay them perfectly.
  4. Reconstructing. Precision work must be done by professionals. Carefully scrutinize each brick.
  5. Finishing Touches. Add quality dampers, fresh chimney caps and fitted crown for protection.

Never neglect chimney repair. It can be expensive. Cutting corners is bad. It can cost more in the long run. Get a licensed expert for the job. Fixing mortar joints? Get a brick-and-mortar-man!

Tuckpointing Mortar Joints

Tuckpointing for Mortar Joints:

Tuckpointing is a must for improving the structural integrity of your chimney. It involves removing and replacing deteriorated mortar joints with new ones. This will make the bricks and masonry look better and more aligned.

How to Tuckpoint:

  1. Chisel and hammer out old mortar between bricks.
  2. Apply fresh mortar to the joints with a pointed trowel.
  3. Smooth the new joint with a rounded trowel. Let it dry.
  4. Make sure the new mortar matches the original in color and composition.

My Experience:

I hired a tuckpointer, but they used the wrong mortar. It made my chimney look worse. I had to ask them to come back and use the right materials.

Fixing a chimney liner is like giving it a new jacket. But let’s hope it doesn’t cost too much!

Chimney Liner Repair

The innermost layer of a chimney must be kept in good condition. To do this, Chimney Flue Restoration may be needed. This process involves fixing or changing the part that stops smoke and gas entering your living area.

During Chimney Flue Restoration, any cracks, gaps or damage to the flue lining is fixed. This stops hazardous gases from getting into your home. The restoration ensures chimneys work at their best.

Porcelain liners have a key benefit. They hide existing cracks without needing extra repairs. Ceramic liners also cope with extreme temperatures for longer.

Pro Tip: Inspections should be done regularly. This helps find internal problems before they become expensive to fix.

When it comes to chimney liners, it’s time to ‘tear out the old and stuff in the new!’

Installing a new chimney liner.

Replace or Install New Liner

When it comes to fixing your chimney, one key element is replacing or installing a new liner. This keeps your chimney working properly and prevents any damage to the structure. Here’s a simple manual to help you out:

  1. Measure the flue’s size.
  2. Pick an appropriate liner material (stainless steel, cast-in-place, clay tile, etc.)
  3. Clean the chimney and get rid of all the leftovers.
  4. Secure the liner in place with anchor plates or other applicable fasteners.
  5. Attach the top of the liner to a cap or seal at the top of your chimney.
  6. Check that everything is sealed tight and test the chimney.

You should know that different types of chimneys need different liners. Ask an expert for advice before taking action.

In addition, keep inspecting and caring for your chimney to keep it from getting damaged again.

My pal had an issue with their fireplace and called in specialists for repair. After the inspection, they saw their liner was severely damaged due to long-term negligence. They quickly replaced it, which made the fireplace work much better and prevented further damage. Now, you can find your ideal liner on the Tinder of chimney liners!

Types of Chimney Liners

Different types of chimney liners are available for homeowners. Want to know more? Check out the table below!

Chimney Liner TypeMaterial UsedPrice Range
Clay TilesClay$600 – $1,200
Stainless SteelStainless Steel$2,500 – $5,000
AluminumAluminum$1,500 – $3,000

Clay tiles are cheaper, but they may not have enough insulation. Stainless steel is better insulated, but it’s pricier. Aluminum is a good middle option.

In addition, there are cast-in-place liners and hybrid systems that have their own advantages. Sarah used stainless steel, as it was durable, even though it was expensive at first. In the end, she was relieved that her fireplace was safe and well-insulated.

It’s important to choose the right liner, and also to install it properly. Otherwise, you’re playing Russian roulette with your house!

Importance of Proper Chimney Liner Installation

Chimney liner installation is essential for safety and proper functioning. Without it, combustion gases might enter your living space, or create dangerous air pressure imbalances. Insulation also protects your chimney from corrosion and moisture damage.

Select the right size, shape, and material to optimize performance. Depending on the fuel used, a specific style of liner may be needed. Also, alignment and attachment are key for safety.

Good installation offers financial benefits too. It increases home value, and reduces energy costs.

In the past, lack of insulation caused thousands of fires and property damage. The NFPA now requires liners in all new construction homes with heating appliances. A faulty chimney cap is like leaving the front door open – but it’s on your roof!

Chimney Cap Repair

Maintaining the top of your chimney is key to avoid damage to your house and environment. Here’s a quick guide on how to repair Chimney Caps:

  1. Step 1: Clear any debris blocking the Cap.
  2. Step 2: Look for gaps in cement between the Cap and flue tiles, and repair them.
  3. Step 3: Check for rust or bending on steel Chimney Caps, and replace if necessary.
  4. Step 4: Check for mortar that needs repair or replacing on the Chimney Cap.
  5. Step 5: Ensure metal flashing is sealed tightly; patch any leaks.
  6. Step 6: Clean the chimney regularly to prevent severe deterioration.

It’s important to spot loose brickwork early, as it can be fixed quickly with each layer dried properly before continuing.

Don’t wait too long – a damaged Chimney Cap can cause water damage in your home. Get help with any major issues.

Remember: a proper Chimney Cap can make all the difference between warm fires and a soot-filled house!

Importance of Chimney Caps

Chimney caps are essential for keeping your chimney healthy. They keep water, debris, and critters out, and they also stop sparks from flying out and causing fires. Get the right size cap, made of stainless steel or copper, with features like spark arrestors or animal guards. In wet areas, a top-mounted damper cap can help with airflow and keep precipitation out.

It’s important to get annual inspections from professionals. If you see any cracks in your cap, address them quickly—otherwise, repairs can get expensive! Prevention is key for long-term chimney health! But why bother with a cap when you can let the squirrels move in and turn it into a wildlife sanctuary?

A chimney cap.

Reasons for Chimney Cap Damage

Chimney Cap Damage can be caused by lots of factors that are often overlooked. Here are some of the sources that can weaken the cap and need repair:

  • Heavy rains and snow can put extra weight on the cap, leading to cracks and weakening.
  • Branches or other items falling onto the chimney can damage the cap, as can blockages in the chimney.
  • Wild animals like raccoons and birds can shake the cap off due to their movements.
  • Rust on metal fixtures corrodes and weakens them.
  • Frequent chemical cleaning products damage metal components like caps.

Uncapped chimneys also face problems – like moisture buildup or water intrusion. Damage varies in severity, but Chimney Cap Damage is more common if it’s not fixed.

Around 1884, construction workers started using tin caps as a design solution for rooftop concerns like storms or hail damage. Don’t let a faulty chimney cap ruin your day – get it fixed or replaced before your living room floods!

Chimney Cap Replacement or Repair

A chimney cap is important for your chimney system. It stops debris and animals from entering, keeps rain out, and reduces how much wind gets in. If you need to fix or replace it, it’s best to hire a pro. Here are four points to know:

  • Chimney caps come in different sizes, shapes, and materials.
  • Damage or missing caps can cause problems like water damage, blockages, and decreased efficiency.
  • Installation needs an exact fit and attaching the cap using screws or adhesive.
  • Cleaning off debris and checking for damages can make your cap last longer.

DIYers may try to repair their caps themselves. But, getting a pro is better for proper installation, efficient performance, and long life. Get a custom copper cap to fit any size and brand of chimney! Don’t wait for chimney chaos – call for repair today.

Signs Indicating the Need for Chimney Repair

To identify the need for chimney repair with smoke and draft issues, creosote build-up, and water damage as solution. Understanding the signs of chimney repair can help you prevent bigger problems and ensure the safety of your home. We will cover three sub-sections in this section: smoke and draft issues, creosote build-up, and water damage.

Smoke and Draft Issues

Draft and Smoke Levels in Chimneys: Be Careful!

Ensure stable smoke and draft levels in your home. Blocked chimneys can cause harmful gases and fire hazards. Smoke can mean something is blocking the flue or vents, reducing airflow.

It could be birds nesting, debris, or wear and tear. Weather like high winds or rain can also cause issues. If you sense changes in odor/smoke color or it’s harder to light a fire, get professional inspection. Inspections are important even when nothing is wrong.

Don’t get short-term solutions, take steps to repair the chimney before things get worse. Don’t let creosote build-up ruin your home’s style!

Creosote Build-Up

The Chimney Substance Build-Up.

Soot and creosote can build up inside chimneys when left uncleaned. Creosote is a thick, sticky substance that forms from incomplete combustion of gas or wood. It can be ignited by sparks from fires, leading to destructive house fires.

Timely cleaning is needed to prevent creosote build-up. Warning signs include: strong smells, excess smoke, and black smoke from the chimney stack.

Dampness and masonry damage can also affect chimneys. Bad smells come from water seeping in through cracks or missing brickwork or failed seals.

One homeowner ignored a musty odor. But it turned into mold and mildew growth. Water penetration had caused the toxic spores to form!

Looks like your chimney swam too close to the waterworks – time for repairs before it becomes a pool.

Water Damage

Water intrusion can be an indicator of a disrepair chimney. Causes include missing caps, cracked crowns, and damaged flashing material. This can lead to stained walls, rusted accessories, and ceilings. It’s important to take care of this issue quickly to avoid more damage.

Water buildup invites mold, mildew, and weakens the flue lining. Plus, smoke emissions containing dangerous gases like carbon monoxide. If left unattended, the fireplace can be ruined and put your health at risk.

Animals can cause further destruction by hollowing out wood materials and clogging up chimneys. This is nothing new, as cavemen lit fires against rocks and used openings for ventilation. Then homeowners created customized chimney solutions.

If you don’t maintain your chimney, you’ll pay the price. So make sure to schedule regular check-ups and cleanings.

Chimney Repair Cost and Maintenance Tips

To help you reduce the cost and extend the lifespan of your chimney, this section provides maintenance tips and different types of chimney repair with a focus on masonry services. The following sub-sections will guide you in understanding the cost of common chimney repairs, the significance of addressing small chimney problems, and preventive maintenance tips for keeping your chimney in good shape.

Cost of Common Chimney Repairs

When it comes to fixing a chimney, the costs can vary. It depends on the type of repair and how much damage there is. Check out the table for common chimney repair costs:

Common Chimney RepairAverage Cost
Chimney Cleaning$100-$300
Chimney Cap$200-$700
Liner Replacement$2,500-$7,000
Masonry Repairs$350-$1,800

Regular inspections and maintenance are essential for avoiding costly repairs. Cleaning and watching out for signs can help spot issues before they get worse. Waterproofing the chimney is also an option to prevent damage from rain or snow.

One person learnt that ignoring regular maintenance can be costly. He had to pay for major masonry and liner repairs. Ignoring small chimney problems is like skipping the dentist- it will cost you in the end.

Importance of Addressing Small Chimney Issues

Small chimney problems may seem minor, but can lead to huge damage if not addressed in time. Early attention and preventive care are essential to avoid further expenses. Ignoring small issues can even cause severe fire hazards and expensive repairs.

Neglecting issues such as inadequate insulation, creosote buildup, or damaged mortar can reduce the unit’s structural integrity gradually. This can create snowballing costs. Regular maintenance and checking the firebox, flue tiles, damper, and other components can stop perilous scenarios.

Keeping good airflow by removing dirt from grates and having open dampers when not in use prevents creosote buildup and blockages due to debris. Homeowners must pay attention to these areas of their fireplace units before small issues develop into major repair issues.

Don’t wait to seek professional intervention! Homeowners must take active steps to repair problems before it’s too late. Don’t let your chimney become a threat; book an appointment with a certified technician to ensure your safety.

Extend your chimney’s life by following these tips. No one wants a premature chimney collapse!

Preventative Maintenance Tips for Extending Chimney Life Span

Keeping your chimney in proper maintenance is key for extending its lifetime. Preventative measures can save you money and keep you secure. Here are 6 must-dos for prolonging your chimney’s life:

  1. Clean it regularly.
  2. Put on a cap.
  3. Inspect & repair professionally.
  4. Avoid burning green wood or trash.
  5. Keep the area around your chimney tidy.
  6. Be sure proper ventilation is in place.

Using correct fuel helps clean your chimney, reducing creosote. Good airflow is also important to stop negative air pressure in your home. For complex issues, hire certified experts for inspections, cleaning, and repairs.

Chimneys were once put in the centre of homes to keep them warm but now, due to insulation and new heating methods, they are placed on the outer wall.

Frequently Asked Questions

  1. What are the different types of chimney repairs?
    • There are several types of chimney repairs, including masonry repair, chimney crown repair, flashing repair, and chimney liner repair.
  2. When should I call for chimney repair?
    • You should call for chimney repair services if you notice any signs of damage, such as cracked mortar or bricks, loose flashing, rusted flue lining, or water damage.
  3. What is masonry repair?
    • Masonry repair refers to the restoration of damaged bricks, stones, or mortar in your chimney. This is typically done using special materials and techniques to restore the structure back to its original condition.
  4. What is chimney crown repair?
    • A chimney crown is the topmost masonry layer that covers the chimney. It is designed to prevent water from entering the chimney. Chimney crown repair involves fixing any cracks, leaks, or damage in this layer.
  5. What is flashing repair?
    • Flashing is metal strips or sheets that create a waterproof barrier between the roof and the chimney. Flashing repair involves fixing any damaged or missing flashing to prevent water from entering the chimney and causing damage to the roof.
  6. What is chimney liner repair?
    • A chimney liner is a protective layer that lines the inside of the chimney flue. It helps to prevent heat and gases from damaging the chimney structure. Chimney liner repair involves fixing any cracks or damage to the liner to maintain the safety and functionality of the chimney.