Historic brick homes are a testament to timeless beauty and craftsmanship. These architectural gems require special care to maintain their charm and structural integrity. Whether you’re a proud owner of a historic brick home or a professional in the restoration field, understanding the proper techniques for cleaning historic brick is crucial. In this comprehensive guide, we’ll explore the do’s and don’ts of cleaning historic brick, ensuring you preserve your home’s character for generations to come.
Gentle Cleaning Methods for Historic Brick
When it comes to cleaning historic brick, the golden rule is to always start with the gentlest method possible. Harsh cleaning techniques can cause irreversible damage to the delicate surface of old bricks. Here are some safe and effective methods to consider:
1. Dry Brushing
For light dirt and debris, start with a simple dry brushing technique:
- Use a soft-bristled brush or broom
- Work in small sections, using gentle circular motions
- Brush from top to bottom to prevent streaking
2. Water and Mild Detergent
For more stubborn dirt, a mixture of water and mild detergent can be effective:
- Mix a small amount of pH-neutral detergent with warm water
- Apply the solution with a soft-bristled brush or sponge
- Rinse thoroughly with clean water to remove all soap residue
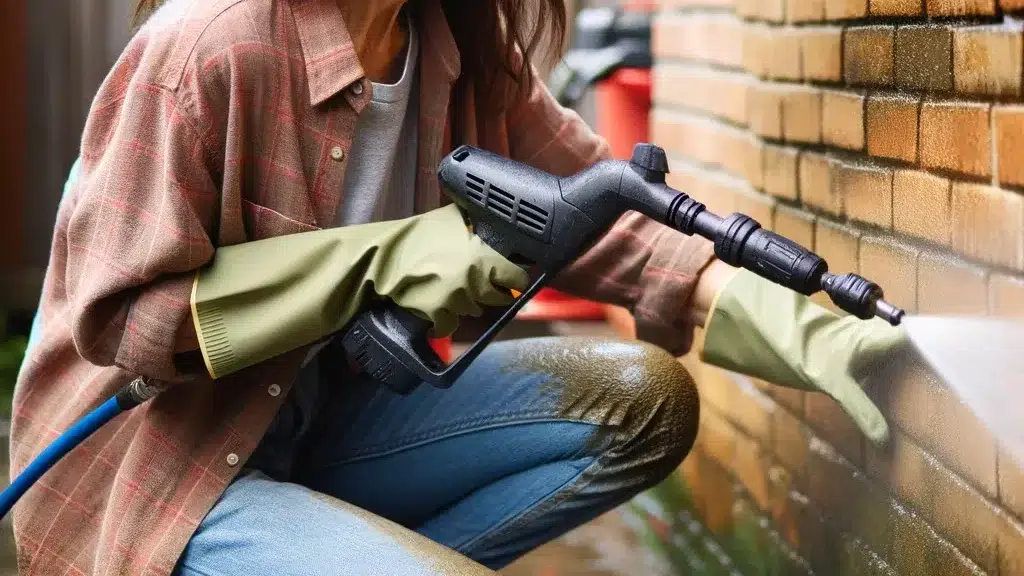
3. Low-Pressure Water Washing
For larger areas or more challenging dirt, low-pressure water washing can be used:
- Use a garden hose with a spray nozzle or a low-pressure washer (under 300 psi)
- Keep the nozzle at least 12 inches away from the brick surface
- Work in small sections, moving from top to bottom
Remember, the key is to be patient and gentle. It’s better to repeat a mild cleaning process than to risk damaging the brick with aggressive methods.
Harmful Cleaning Practices to Avoid
While it may be tempting to use stronger cleaning methods for quicker results, certain practices can severely damage historic brick. Here are some approaches to avoid at all costs:
1. High-Pressure Water Washing
High-pressure washing can cause several problems:
- Erosion of the brick’s surface
- Damage to the mortar joints
- Forcing water deep into the brick, leading to internal damage
2. Sandblasting
Sandblasting is extremely destructive to historic brick:
- Removes the protective outer layer of the brick
- Increases porosity, making the brick more susceptible to water damage
- Can change the appearance and texture of the brick irreversibly
3. Acidic Cleaners
Harsh chemicals, especially acidic cleaners, can cause significant damage:
- Etching of the brick surface
- Discoloration or staining
- Weakening of the brick structure
4. Wire Brushes or Metal Tools
Using abrasive tools can lead to:
- Scratching or gouging of the brick surface
- Removal of the protective patina
- Introduction of metal particles that can cause rust stains
Choosing Appropriate Cleaning Products
Selecting the right cleaning products is crucial for preserving historic brick. Here’s what you need to know:
1. pH-Neutral Cleaners
Always opt for pH-neutral cleaners specifically formulated for masonry:
- Look for products with a pH between 6 and 8
- Avoid cleaners with harsh chemicals or abrasives
- Test the product on a small, inconspicuous area first
2. Natural Cleaning Solutions
Some natural alternatives can be effective for mild cleaning:
- White vinegar diluted with water (1:10 ratio)
- Baking soda paste for spot cleaning
- Hydrogen peroxide for organic stains (test first)
3. Specialized Masonry Cleaners
For tougher stains or large-scale cleaning, consider specialized masonry cleaners:
- Look for products specifically designed for historic brick
- Follow manufacturer instructions carefully
- Always perform a test patch before full application
When to Seek Professional Cleaning Services
While many cleaning tasks can be handled by homeowners, there are situations where professional help is necessary:
1. Extensive Dirt or Staining
If your historic brick has years of built-up grime or stubborn stains, a professional can:
- Assess the type and extent of the dirt or staining
- Use specialized equipment and techniques safely
- Apply appropriate cleaning solutions without risking damage
2. Delicate or Deteriorating Brick
For brick that shows signs of deterioration, professional expertise is crucial:
- Identify areas of concern and potential underlying issues
- Use gentle cleaning methods appropriate for fragile surfaces
- Recommend and perform necessary repairs alongside cleaning
3. Large-Scale Projects
For cleaning entire facades or large structures, professionals can:
- Ensure consistent results across the entire surface
- Use efficient methods to clean hard-to-reach areas safely
- Complete the project in a timely manner with minimal disruption
4. Historic Preservation Requirements
If your building is listed or in a historic district, professionals can:
- Navigate local preservation guidelines and regulations
- Obtain necessary permits and approvals
- Document the cleaning process for historical records
Maintaining Clean Brickwork Long-Term
Once your historic brick is clean, maintaining its appearance is key to reducing the need for future intensive cleaning:
1. Regular Inspections
Perform routine checks of your brickwork:
- Look for signs of dirt buildup, staining, or damage
- Address small issues before they become major problems
- Schedule professional inspections every few years
2. Gentle Routine Cleaning
Implement a regular cleaning schedule:
- Use soft brushes to remove loose dirt and cobwebs
- Rinse with low-pressure water periodically
- Clean gutters and downspouts to prevent water staining
3. Protective Measures
Consider preventative treatments to protect your brick:
- Apply breathable sealants to reduce water absorption (consult a professional)
- Install proper drainage systems to direct water away from the brick
- Trim vegetation to prevent moisture retention against the brick surface
4. Prompt Repairs
Address any damage or deterioration immediately:
- Repair cracked or missing mortar to prevent water infiltration
- Replace damaged bricks to maintain structural integrity
- Consult with a masonry expert for proper repair techniques
Conclusion
Cleaning historic brick is a delicate process that requires patience, care, and the right approach. By following these do’s and don’ts, you can maintain the beauty and integrity of your historic brick home without causing harm. Remember, when in doubt, it’s always best to consult with a professional who specializes in historic masonry. With proper care and maintenance, your historic brick will continue to tell its story for generations to come.
At Fix My Brick, we understand the unique challenges of preserving historic brickwork. Whether you need advice on cleaning methods or professional restoration services, our team of experts is here to help. Contact us today to learn more about how we can assist in maintaining the character and charm of your historic brick home.
\n\n\nWhat are the best methods for cleaning historic brick?
The best methods include dry brushing, using a mixture of water and mild detergent, and low-pressure water washing (under 300 psi). Always start with the gentlest approach to avoid damaging the bricks.
What cleaning practices should be avoided when cleaning historic brick?
Avoid high-pressure water washing, sandblasting, abrasive cleaners, and metal tools as these can damage the brick surface, weaken structure, and lead to staining.
What types of cleaning products are safe for historic brick?
Use pH-neutral cleaners specifically formulated for masonry, natural solutions like diluted vinegar, and specialized masonry cleaners designed for historic brick. Always conduct a test on a small area first.
When should I seek professional cleaning services for historic brick?
Consider hiring professionals for extensive dirt or staining, delicate or deteriorating brick, large-scale projects, or if your building is under historic preservation requirements.
What steps can be taken to maintain clean brickwork long-term?
Maintain clean brickwork by performing regular inspections, implementing routine gentle cleaning, applying protective measures, and making prompt repairs to any damage.
Why is it important to use gentle cleaning methods on historic brick?
Gentle cleaning methods are crucial to preserve the delicate surface and structural integrity of historic brick, preventing irreversible damage that can occur with harsh techniques.
How can I prevent future damage to my historic brick home?
To prevent future damage, regularly check for issues, keep bricks clean with soft brushes, use breathable sealants, and address any repairs promptly.
What are the signs that I should call a professional for my historic brick?
Signs to call a professional include years of grime buildup, deterioration signs, extensive projects, or compliance with historic preservation guidelines.
What should I do if I notice damage to my historic brick?
If you notice damage, immediately consult with a masonry expert for proper repair techniques to prevent further issues and maintain structural integrity.